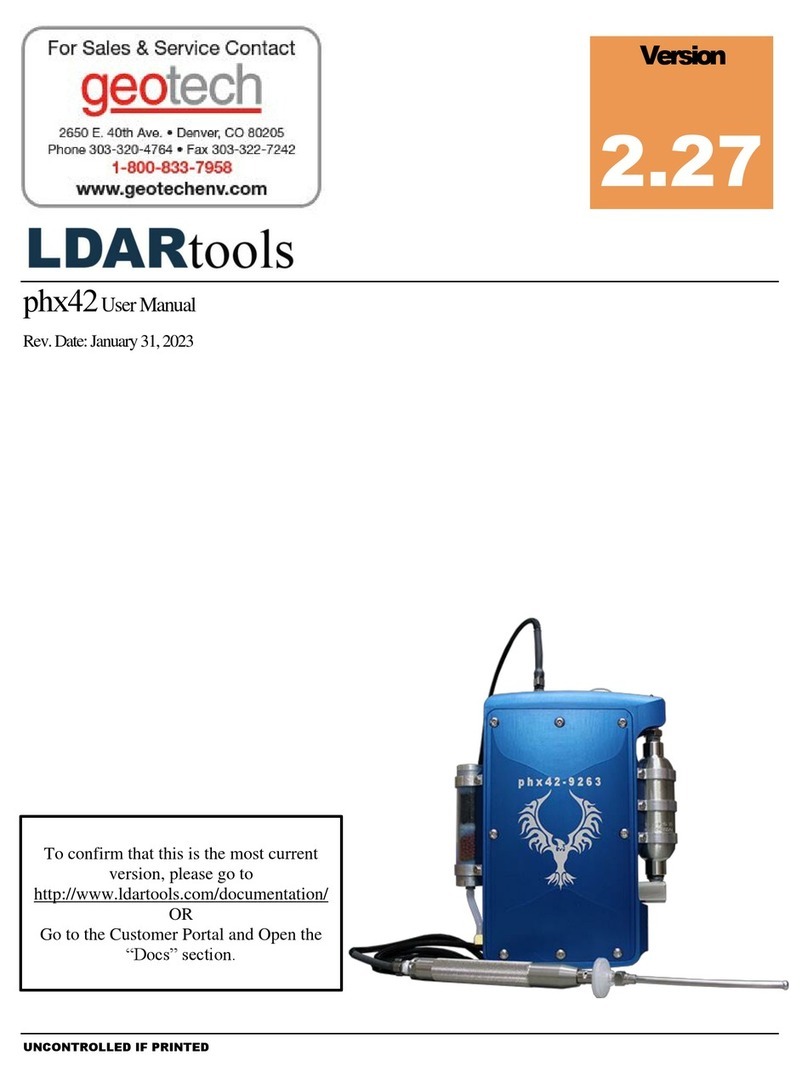
LDARtools phx42 User manual

phx42™ Manual
Rev. Date: October 15, 2019
Version
2.02
To confirm that this is the most current
version, please go to
http://www.ldartools.com/#resources
OR
Go to the Customer Support Portal and
Open the “Docs” section.
For Sales & Service Contact
2650 E. 40th Ave. • Denver, CO 80205
Phone 303-320-4764 • Fax 303-322-7242
1-800-833-7958
www.geotechenv.com

Table of Contents
Welcome to the LDARtools Family ........................................... 1!
The Big Picture .......................................................................... 3!
Start-up Guide ........................................................................... 4!
Intended Use ................................................................................... 4!
Comprehensive List of phx42 Skills ................................................. 5!
External Parts .................................................................................. 6!
Connecting the Probe ...................................................................... 7!
Disconnecting the Probe .................................................................. 8!
Power Button ................................................................................... 8!
Power Button Indicators ................................................................... 9!
Filling the phx42 with Hydrogen ..................................................... 10!
Receiving After Shipping ............................................................... 11!
Charging the phx42 ....................................................................... 13!
Replacing the Probe Tip Filter ....................................................... 13!
FAQs while Monitoring ................................................................... 14!
phx42 App ............................................................................... 15!
phx42 Application .......................................................................... 15!
Starting the phx42 Application ....................................................... 15!
What’s in the phx42 Application ..................................................... 15!
Menu Options on phx42 Application .............................................. 16!
Firmware Updates ......................................................................... 16!
Setting a PPM Alarm ..................................................................... 18!
Igniting the phx42 .......................................................................... 18!
More about the 42App ................................................................... 18!
Manual Calibration ......................................................................... 20!
Creating Daily Calibration Reports ................................................ 21!
Daily Filter Detection ...................................................................... 21!
Application Error Codes ................................................................. 23!
Level 1 Repair Procedures ...................................................... 24!
Before You Begin ........................................................................... 24!
Requirements of Level One Certification ....................................... 24!
phx42 Level One Repair Tech Pledge ........................................... 25!
How to Take the Level One Certification Test ............................... 26!
Required Spare Parts .................................................................... 27!
Tool Kit Inventory ........................................................................... 27!
Weekly Probe Integrity Inspection ................................................. 28!
Probe Hose Construction ............................................................... 28!
Probe Repair Procedure ................................................................ 29!

Removing a Broken Probe Tip Filter .............................................. 37!
Identify phx42 Parts ....................................................................... 38!
Removing the phx42 Lid ................................................................ 38!
Reinstalling the phx42 Lid .............................................................. 38!
Replacing the Scrubber Media ...................................................... 39!
Glow disk Repair Procedure .......................................................... 41!
Opening & Closing the Flame Arrestor Assembly ......................... 43!
Replacing the Battery .................................................................... 43!
Replacing the Pumps ..................................................................... 43!
LDARtools Technical Support ................................................. 45!
User Login Information .................................................................. 46!
Add to Firewall Whitelist ................................................................ 47!
Technical Specifications .......................................................... 48!
phx42 Operating Parameters ......................................................... 49!
Certifications and Markings ........................................................... 50!
General Specifications ................................................................... 51!
Electrical Parameters ..................................................................... 51!
Battery and Charging ..................................................................... 51!
Design Characteristics ................................................................... 51!
Ease of Use and Safety Features .................................................. 51!
Electrostatic Requirements ............................................................ 52!
Special Conditions of Use .............................................................. 53!
Applicable Standards and Directives ............................................. 54!
Environmental Conditions Affecting Use ....................................... 56!
Chemical Exposure ........................................................................ 56!

1
Welcome to the
LDARtools Family
We are excited that you have chosen the phx42 as your VOC
analyzer. The phx42 is designed to work for you.
If you are not getting the results you want, we WANT TO HEAR
ABOUT IT—immediately.

2
LDARtools Technical
Support
At LDARtools, we want to ensure that you get the maximum performance from
all of the software and equipment that we offer. We have made every effort to
provide you with a comprehensive manual to assist you with using our products.
If you are having issues with any of our products, please contact us for assistance
right away.
For general questions, you can consult a member of LDARtools Technical
Support Team by emailing [email protected].
For equipment or software issues and before beginning any repair contact
LDARtools Technical Support Team by following these directions:
1. Do either:
a. Self-Check and Submit using the phx42 app.
b. Report an issue at LDARtools.com. Click Support,
login, then Report Hardware Issue.
Only use this method if the Self-Check option is not
possible.
2. If a confirmation email is not received within 30 minutes, please
email support ([email protected]).
3. Stand by for instructions from the LDARtools Technical
Support Team.
REMINDER: Equipment being shipped to LDARtools for repair must have a
Return Merchandise Authorization (RMA) printed and in the box. Failure to do so
will result in extra processing and diagnostic expense and time. The only
exception would be written instructions from LDARtools Technical Support
Team.

3
The Big Picture

4
Start-up Guide
Intended Use
The phx42 analyzer can be used to safely collect data in Class 1, Division 1
hazardous locations. This includes:
• Refineries & Chemical plants
• Gas or oil pipelines
• Compressor and pump stations
• Oil field production facilities
• Anywhere VOCs are present
• Indoor and outdoor environments
The phx42 must be installed in a backpack while in hazardous locations.
• The phx42 should be upright in the pack with the north end (with probe port)
facing up.
• The phx42 must not share a pocket with any other items or tools.
• Backpack should fit snugly so the phx42 does not tilt away from the tech or tip
over. This can cause probe kinks.
Overnight equipment storage and calibration should be done indoors at or near room
ambient conditions (15-25 °C or 59-77 °F) with a maximum humidity of 85%.
Section
1

5
Comprehensive List of phx42 Skills
Normal Operations
1. Clean it
2. Power it ON/OFF
3. Know the end-of-day sleep mode procedure
4. Change Filter
5. Ignite it
6. Connect and Disconnect to the 42App or your Monitoring Software
7. Fill Hydrogen
8. Confirm that the Hydrogen Cap is in place
9. Attach unit to Charger
10. Confirm that the Charging Port Cover and Tether are in place
11. Take a PPM Reading
12. Initiate a self-check using Cal5.0 OR the 42App
13. Block the Probe tip during the self-check process
14. Calibrate using Cal5.0 OR Manually Calibrate
15. Report issues to LDARtools using the Customer Portal (if there is no Level 1
Technician on-site)
16. Perform the Probe Integrity Inspection (weekly)
Level 1 Certified Operations
1. Verify that you have most current version of phx42 Manual
2. Receive it after shipping
3. Initiate the Prepare-to-Ship Wizard
4. Update the 42App firmware
5. Set a PPM Alarm
6. Set a Response Factor other than 1
7. Troubleshoot issue with LDARtools Customer Support
8. Repair a Probe
9. Remove broken probe tip filter
10. Replace Scrubber filter medium*
11. Replace the Glow Disk*
12. Replace the Battery*
13. Replace a Pump*
14. Collect Inspection records with the Basic Survey Mode
*Only after reporting an issue on the customer support portal.

6
External Parts
l The connection end (north end) contains the following:
A. Hydrogen fill port/H2
Quick Fill
B. Charging
port/Charging port
cover and tether*
C. Bluetooth® antenna
D. Probe port
l Side panels contains the following:
E. Scrubber (west end)
F. Power button (west end)
G. The FID exhaust
(flame arrestor end cap assembly) is located on the side of the enclosure (east end).
l The phx42 enclosure
o Enclosure is a two-part (lid and base) aluminum housing with a serial number on top. It also
has important manufacturer information and certification labeling at the bottom.
TECH TIP: If the H2 Quick Fill Cover or the Charging Port Cover are EVER missing, you should not
take the phx42 into a hazardous location.
*Pictures of the charging port with the cover removed are available in the charging section.
F
A
C
E
G
B
B
D

7
Connecting the Probe
1. Align the quick disconnect (A), which is attached to probe hose (B),
with the probe port (C).
2. Snap the quick disconnect into the probe port.
REMINDER: The probe and a probe tip filter should be connected to the phx42 before
igniting the device (unless performing filter detection calibration).
Never operate the phx42 pumps without a filter in place. Do not remove the filter on a
running phx42.
FAQ
Can I use an extension/other probe on the phx42?
Any device certified for use in hazardous environments using modern standards is done so
with accessories defined or attached. The phx42 was certified with the basic probe. You
should consult your safety department for a hazard assessment before using a different
probe.
Any extension should not exceed 20ft of tubing with minimum ID of 1/8”. The tubing in the
standard probe is 1/16” and cannot be used as a base for an extension probe. The extension
probe should utilize the same filters as the standard probe.
Why is the probe handle so heavy?
The probe handle was made from stainless steel to comply with the applicable safety
standards.
TECH TIP: When using the probe, a few basic points should be kept in mind while using it daily:
1. When moving from place to place and not actively using the probe for inspections, the probe
handle should be attached to the backpack so that it isn’t accidentally dropped.
2. When using the probe, pay attention to the probe hose and avoid snagging or pulling on it.
This can place undue stress on the connections and potentially cause a leak.
3. Be mindful of the probe filter and tip. Dropping the probe onto the filter or prying with the
probe tip can potentially break the filter and either lodge plastic in the fitting at the end of the
probe or cause leaks at the filter interface.
4. Never mar or scratch the center of the Leur lock fitting where the sealing is occurring. Doing
so will lead to leaks and repairs of the probe.
5. Make sure the phx42 is oriented in the backpack so that the probe connection is not pinched,
or kinked while being used.
A
C

8
Disconnecting the Probe
1. Pull the collar on the quick disconnect to release probe.
2. Pull probe off gently.
Power Button
"#$%!$&!
'#(!)*+!
,-.#!
/00!
!"#$$!1#(!%&'(!2*3!4!&.5*#(&!
"#$%!6$77!%+3#!/89!
/8!
,3$:7.!)*+!
"#$%!6$77!$;#$%.9!
/8!
<+1(3+:7.!)*+!=>?@!
SLEEP%MODE%
"#$%!&-+%&!*22!&*7.#*$(A!&%*::$#;!27*6!*2!-B(3*;.#9!
071C.!6$77!;*!*+%9!
Pump!6$77!3+#!2*3!1#!1(($%$*#17!DE!&.5*#(&!=%*!.F15+1%.!
C*$&%!1$3!2*3!%-.!0GH@9!
Bluetooth!6$77!&%1B!15%$F.9!
,IGJ!$&!%-.!%B:$517!.#(K*2K(1B!:3*5.&&9!!
/8!
!"#$$!1#(!%&'(!2*3!LKM!
&.5*#(&!
POWER%DOWN%
"#$%!6$77!:*6.3!(*6#9!
,-$&!$&!1!-13(!:*6.3!*229!
,-$&!:3*5.&&!&-*+7(!N.!1F*$(.(!+#7.&&!&-$::$#;!*3!-1F$#;!
5*##.5%$*#!$&&+.&9%

9
Power Button Indicators
Device is powered on.
Device is powered off.
The light pattern provides an indication of the machine’s state so that you can give commands using
the power button.
*Once the battery is fully charged, but connected to a charger then it will cycle between OFF/ON/OFF/ON
and Breathing. This is because once the battery is fully charged it stops charging (even though it is still
plugged in) and the light goes OFF/ON/OFF/ON until the battery is depleted a minimal amount and the
charging process re-begins and the light starts to Breath.
%
Ignited%
Bluetooth%Status%
Charging%
/00O4!P+7&.&O/00O4!P+7&.&!
).&!
H$&5*F.31N7.!
8*!
/00O/8O/00O/8Q!
8*!
H$&5*F.31N7.!
8*!
J%.1(B!/#!
).&!
R*##.5%.(!
8*!
/8O4!P+7&.&O/8O4!P+7&.&!
8*!
R*##.5%.(!
8*!
S3.1%-$#;Q!!
8*!
S*%-!
).&!
!
8*!T$;-%!
"#$%!$&!/229!!
U1:$(!01&%!N7$#V!%-.#!/00!
"#$%!-1&!(.%.5%.(!1!N1%%.3B!1%!WXEY!*2!5-13;.!1#(!1+%*C1%$5177B!
:*6.3.(!(*6#9!G#!*3(.3!%*!3.&%13%A!B*+!6$77!-1F.!%*!1%%15-!%-.!5-13;.3!
2*3!1%!7.1&%!ZE!C$#+%.&!N.2*3.!:*6.3$#;!N15V!*#9!!

10
Filling the phx42 with Hydrogen
Gases are typically stored under pressure in metal cylinders. Cylinders are designed to withstand high
pressures. Improper handling and use of compressed gases can result in devastating consequences. Be
sure to follow all safety guidelines outlined by your facility.
1. Remove the H2 quick-fill cover (LDAR#42908).
2. Make sure of the following:
(a) The hydrogen cylinder being used to fill the phx42 has a regulator in place.
(b) Turn the regulator to counter-clockwise if pressure has been bled.
(c) Verify that there is no dust or debris in the Hydrogen (H2) fill port.
(d) Verify that there is no dust or debris in the Hydrogen (H2) fill adapter.
(e) Verify the arrow on red handle is pointing to the
breather side of the fill valve.
(f) Gauge nearest the cylinder is reading ~1800 psi. If
not, adjust regulator.
(g) If pressure has bled off the fill adapter, turn the red
handle 180 degrees for 2 seconds to bleed any air
from the system before connecting to the phx42.
3. Power on the phx42. Sleep mode, connected, disconnected, or ignited are all ok. In some
cases, a flameout will occur. This is normal.
4. Connect the H2 fill adapter to the H2 fill port, then verify the connection by slightly
pulling on the 3-way valve.
5. Confirm that the H2 fill adapter is firmly seated on the H2 fill port.
6. Turn the red handle 180° to open valve. Arrow should point to the fill hose.
7. Wait for 10 seconds after the needle on the gauge stops moving.
8. Turn the handle back 180° to close valve.
There will be a slight hiss from the release of pressure.
9. Pull on the collar of the H2 fill adapter to release it.
10. Twist the H2 quick-fill cover onto the H2 fill port.
11. Close bottle. There is no need to bleed pressure off the H2 fill Adapter.

11
REMINDER: The phx42 MUST have the H2 quick-fill cover in place at all times unless filling.
A very small amount of O-ring grease should be applied to the phx42 side of the quick connect
weekly. Apply as little as possible.
Your phx42 is now filled with hydrogen, and while it has been designed to minimize
possible leaks, you should handle and store it with caution.
TECH TIPS:
1. Maintain a constant pressure range of 400 – 1800 psi. If the hydrogen is allowed to drop
below 400 psi, you may have to follow the “Receiving After Shipping” procedure below.
2. Fill your cylinder at end-of-day, this accomplishes several things:
a. Analyzer will have enough hydrogen for end of day drift.
b. Being full overnight allows the calibrating tech to see if the pressure is stable or
dropping (leak test).
c. Motor needle valve has time to stabilize with a full cylinder.
3. Many successful users have adopted a 2-fill practice: Mid-day and End of day.
4. If the H2 Quick Fill Cover pops off, it’s likely that there’s a hydrogen leak. Report an issue to
LDARtools Technical Support and send the Log files.
Receiving After Shipping
The battery and the hydrogen cylinder are drained for shipping. Special charging and fill procedures are
required.
Charge the battery:
1. PULL Charging Port Cover (LDAR# 42013) to access the charging port. Twisting/turning the
Cover to remove will damage the Tether. It does “click” into the Charging Port so some effort
will be required to remove the Charging Port Cover.
2. Align the red lines on the phx42 charger and the charger jack. Push gently and you will feel a
click.
3. Turn on phx42, if not already on. The power button should have a light on*.
4. If the pumps are still running, tap the power button four times to put the machine in Sleep
Mode.
If battery power is sufficient, power light on the phx42 will begin to breathe/pulse.
*REMINDER: If charging a phx42 with a fully depleted battery, the power button may blink rapidly or
not respond at all. Leave the phx42 powered off for a minimum of 90 minutes while connected to charger.
Then repeat steps 3 and 4.

12
Filling Empty cylinder with Hydrogen
The motor needle valve for the hydrogen cylinder will need some time to adjust from an empty to a
full cylinder. Follow the standard “Filling the phx42 with Hydrogen” procedure, with the following
exceptions:
• After step 6 (in the fill procedure above) instead of counting to 10, watch the gauge near the
hydrogen fill cylinder and stop the flow when the gauge is reading between 900 – 1000 psi.
Turn the handle back 180° to close valve.
• Pull on the collar of the H2 fill adapter to release it.
• Wait 4 minutes for the motor needle valve to adjust.
• Confirm that the H2 fill adapter is firmly seated on the H2 fill port.
• Turn the red handle 180° to open valve. Arrow should point to the fill hose.
• Wait for 10 seconds after the needle on the gauge stops moving (at 1800 psi).
• Turn the handle back 180° to close valve.
o There will be a slight hiss from the release of pressure.
• Pull on the collar of the H2 fill adapter to release it.
• Twist the H2 quick-fill cover onto the H2 fill port.
• Close bottle. There is no need to bleed pressure off the H2 fill Adapter.
TECH TIP: 2-3 ignition attempts may be required. Pressure Stabilization messages are normal. Wait 4
minutes between each ignition attempt. If Ignition Failure continues, perform a self-check, and submit a
failure with comments to LDARtools Support Team.

13
Charging the phx42
1. PULL Charging Port Cover (LDAR# 42013) to access the charging port. Twisting/turning the
Cover to remove will damage the tether. It does “click” into the charging port so some effort will be
required to remove the Cover.
TECH TIP: It is important to grasp the cable between the Cover and the crimp when
removing the charging port cover. This accomplishes two things:
• Protects the cable crimp.
• Ensures that you're pulling the Cover out straight instead of at an angle.
2. Align the red lines on the phx42 charger and the charger jack. Push gently and you will feel a click.
3. Turn on phx42, if not already on. The power button should have a light on*. If the pumps are still
running, tap the power button four times to put the machine in Sleep Mode.
*If battery power is sufficient, power light on the phx42 will begin to breathe/pulse.
TECH TIP: It is best to leave the charger connected during calibrations (daily, PreCal, or drift) for best
battery performance.
REMINDERS:
1. The Charging Port Cover MUST be in place while using the phx42 in a hazardous area.
2. If charging a phx42 with a fully depleted battery, the power button may blink rapidly or not respond
at all. Leave the phx42 powered off for a minimum of 90 minutes while connected to charger. Then
repeat step 3.
Replacing the Probe Tip Filter
REMINDERS:
1. A probe tip filter should be in place at ALL times while the phx42 pump(s) are running.
When prompted to change the filter by the handheld or before unit start up:
1. Remove the dirty filter, and then attach the probe tip to a clean filter. Probe Filter-Double
Thread (LDAR# 25).
2. Re-ignite.

14
FAQs while Monitoring
FAQ
How%long%should%it%take%to%recover%from%a%high%PPM%to%background?!
,-./$./0+&$$/1'#.-&.2/3#.*.$+#4/5/4.*6$7#".7/-8&9-.:6&7/62.78*-.-;+#.&5.48#0/4*'.*6(.5&".78*-.
'#62-8.&5.-/0#.-8#.+8<=>.7*$.#<+&$#(?.,5.;&9.*"#.4&64#"6#(.*1&9-.-8#."#4&3#";.-/0#@.4&0+'#-#.
*.A#'5B48#4:.*6(.C*$.D8#4:.9$/62.-8#.=>.*++.*6(.$910/-.*6./$$9#?.D&00#6-E.FA'&7.G#4&3#";.
)/0#H?
How%can%I%Ignite%the%phx42%without%removing%it%from%my%backpack?!!
,5.96*1'#.-&.I/26/-#I.-8#.+8<=>.5"&0.;&9".0&6/-&"/62.software,.;&9.4*6.9$#.-8#.I-"/+'#.-*+I.
0#-8&(.7/-8&9-."#0&3/62.-8#.96/-.5"&0.;&9".1*4:+*4:?.J&9.7/''.:6&7.-8#.96/-./$./26/-#(.78#6.
;&9.$##.*.!!K."#*(/62.&6.-8#.0&6/-&"/62.$4"##6?
What%should%I%do%with%my%phx42%when%I%come%in%for%lunch?%
1. Fill H2
2. Leave running
3. Plug it in

15
phx42 App
phx42 App
1. The 42App can be downloaded from Google Play or obtained from your site IT department.
Starting the phx42 App
1. Install the phx42 application on an Android device with web access.
2. Open the phx42 application on your device.
3. Tap the phx42 device you want to connect to, then tap Connect to phx42.
You will be directed to the phx42 screen once connection is complete.
What’s in the phx42 App
The home screen provides information on the phx42 device:
• The PPM reading
• The LPH2 (Low Pressure Hydrogen)
• H2 (Hydrogen Tank Pressure)
• The battery status
• The battery charge percentage
• The Ignite button
Section
2

16
Menu Options on phx42 App
1. Tap Menu.
2. Tap any of the following:
• Calibrate: Calibrate manually.
• Self-check: Do a self-check on your phx42.
(You must have a Support Login to submit an issue)
• Device Details: Provides more details about your device. Code of the day or login required.
Request the code of the day by emailing support@ldartools.com.
• Update Firmware: Update the phx42’s firmware.
• Prepare to Ship: Drains battery and Hydrogen supply.
• Survey Components:
• Settings:
• Report App Issue:
• Disconnect: Disconnect from the phx42.
• About:
Firmware Updates
1. Launch the phx42 app on the Android handheld.
2. Select the phx42 from the list.
3. Tap Connect.
REMINDER: Tap Pair if necessary.
4. From the menu, tap Update Firmware.
5. Select the version of the update.
6. Tap Update.
Once complete, the 42App will automatically disconnect from phx42.
7. Power cycle the phx42.
8. Refresh the 42 App by closing and opening it.
9. Select the phx42 from the list
10. Tap Connect.
11. From the menu, tap About.
12. Confirm the firmware version is correct.
13. Tap Done.

17
FAQ%
How will I know when a new version of Firmware is available?
L#7.3#"$/&6$.&5.-8#.5/"07*"#.7/''.1#.*3*/'*1'#.&6.-8#.FM/"07*"#H.-*1.&5.-8#.=>N++?.,-./$.6&-.
6#4#$$*";.-&.9+(*-#.;&9".5/"07*"#.96'#$$./6$-"94-#(.-&.(&.$&.1;.OPNG-&&'$.$9++&"-?.Q+(*-/62.
5/"07*"#.7/''.4'#*".4*'/1"*-/&6."#4&"($.5&".-8*-.(*;?!!
Do I need to calibrate my phx42 after I update the firmware?
Yes. Loading new firmware will clear your calibration records. Avoid updating the
firmware unless you have already pulled your monitoring data and performed drifts for the
day.
Prepare to Ship
1. Launch the phx42 app on the Android handheld.
2. Select the phx42 from the list.
3. Tap Connect.
REMINDER: Tap Pair if necessary.
4. From the menu, tap Prepare to Ship.
5. Select Domestic or International.
6. Tap Start.
TECH TIP: Most units will take from 30 minutes to 2 hours. Some units could take up to 5 hours.
Monitor the status bars to confirm status. Report any problems by running a self-check.
Other manuals for phx42
1
This manual suits for next models
1
Table of contents
Other LDARtools Measuring Instrument manuals
