Troubleshooting
14
13
Product Installation
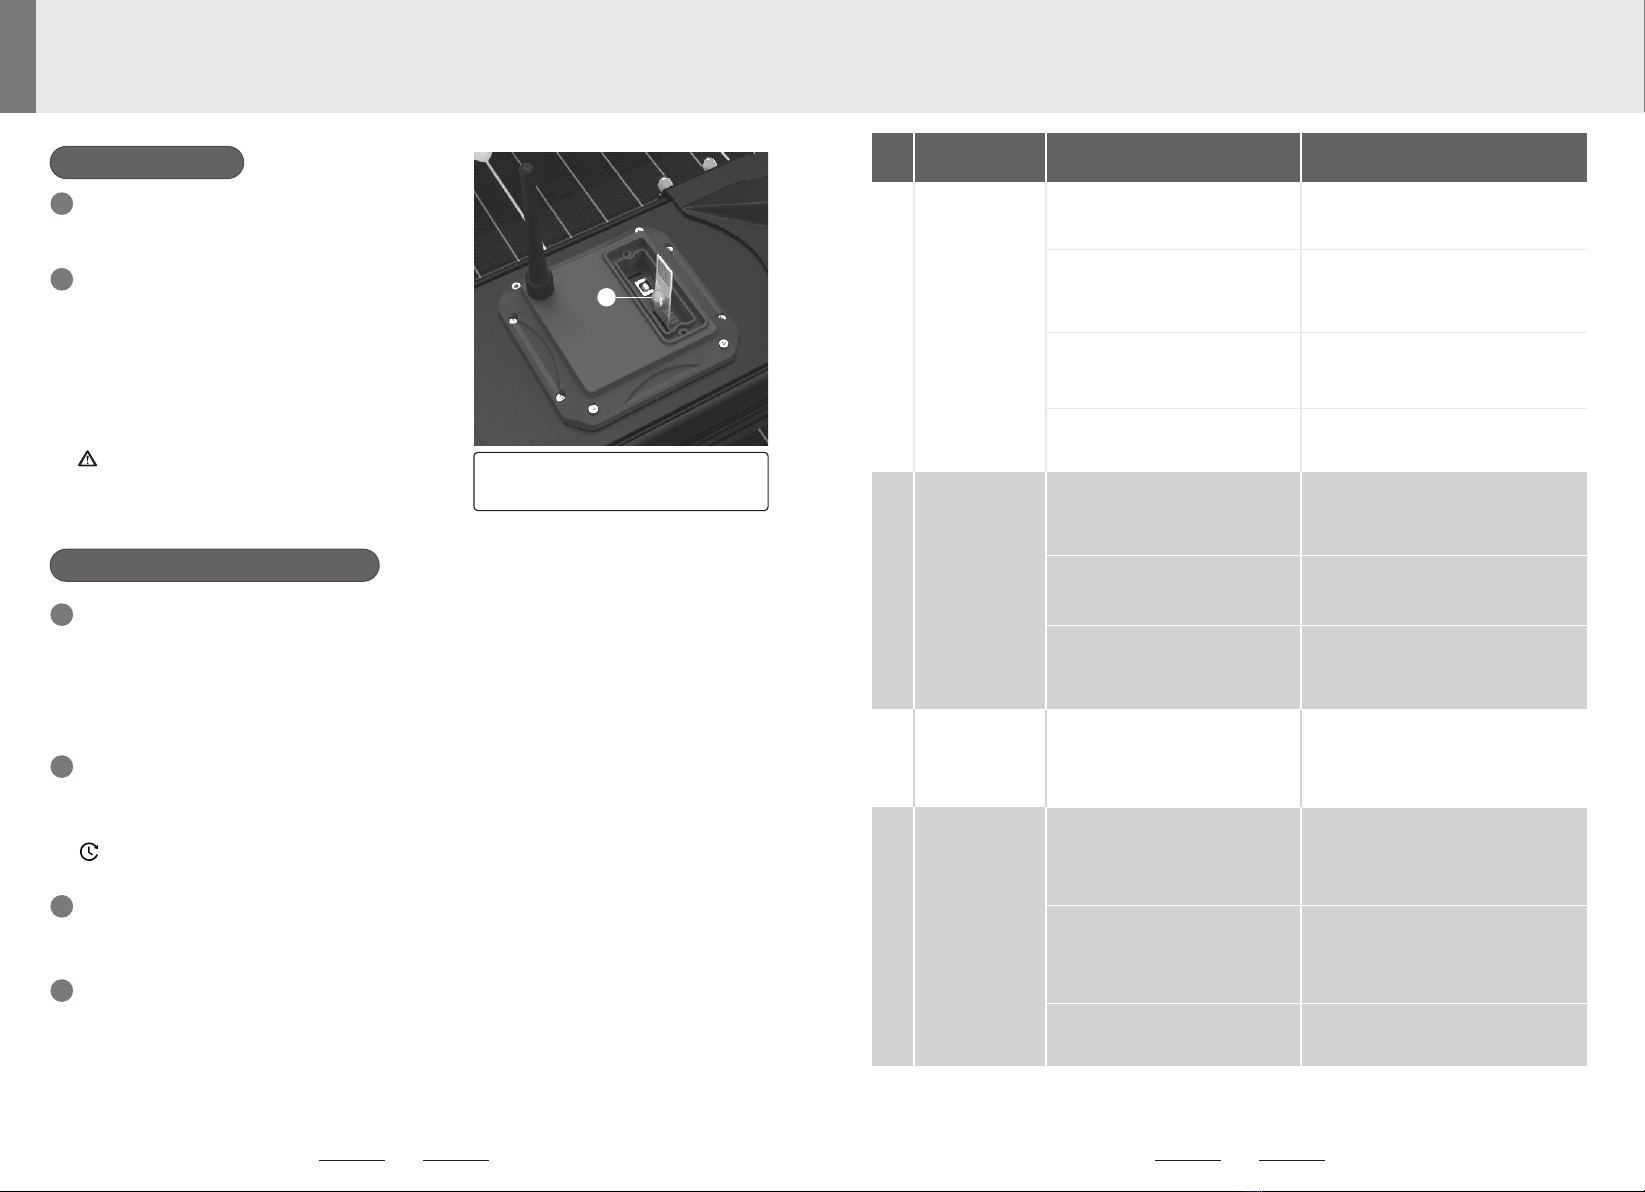
With the gateway switched off, i.e., its red indicator lamp is
off, insert the 2G/4G SIM card into the slot according to the
picture.
Please use LEDSUN EDGE APP to remotely control and configure the street light, visit
www.leadsunglobal.com and follow the steps to Download the LEADSUN EDGE.
A. For APPLE users please go to the APP STORE and install the APP 'LEADSUN EDGE' .
B. Android cellphone please visit www.leadsunglobal.com or go to the software platforms like Google
Play to download and install 'LEADSUN EDGE'.
C. PC App please visit http://47.52.88.104:8083/Home/Login
1
Open APP 'LEADSUN EDGE'→Project 'Add Project' →Gateway 'Add Gateway'
→Gateway column 'Add Equipment' →Gateway column 'Reboot'
2Gateway Communication
Push the switch button of the solar engine controller for 5
seconds to active it (This step is not needed if the solar
engine has been activated), then push the switch button of
the Gateway for 5 seconds to see its red indicator lamp
turns on.
Wait until the Gateway's communication is connected
successfully, i.e., its yellow indicator lamp turns on.
Add Gateways/Lights on App
Wait for 2~5 minutes and then refresh the page in APP, the lights are online and displayed under
the Gateway column.
Test Network Communication
Click the light column → Click 'Remote Control' to turn on/off the lights remotely via the App, for
testing the network communication is successful, before you proceed to install the solar light.
Mark Pole Numbers
After the solar light is installed, mark a serial number on its pole as the pole number. And on the App,
change the Equipment Name of the solar light to the same as its pole number for future maintenance
convenience. Open and keep the GPS access of your mobile phone, open LEADSUN EDGE App
within 1m of the light pole, and update/get the Longitude and Latitude coordinates of the solar light on
the page of “Edit Equipment”. This is very important for analyzing the light’s network signal status.
2
3
4
Software Operation Instruction
1
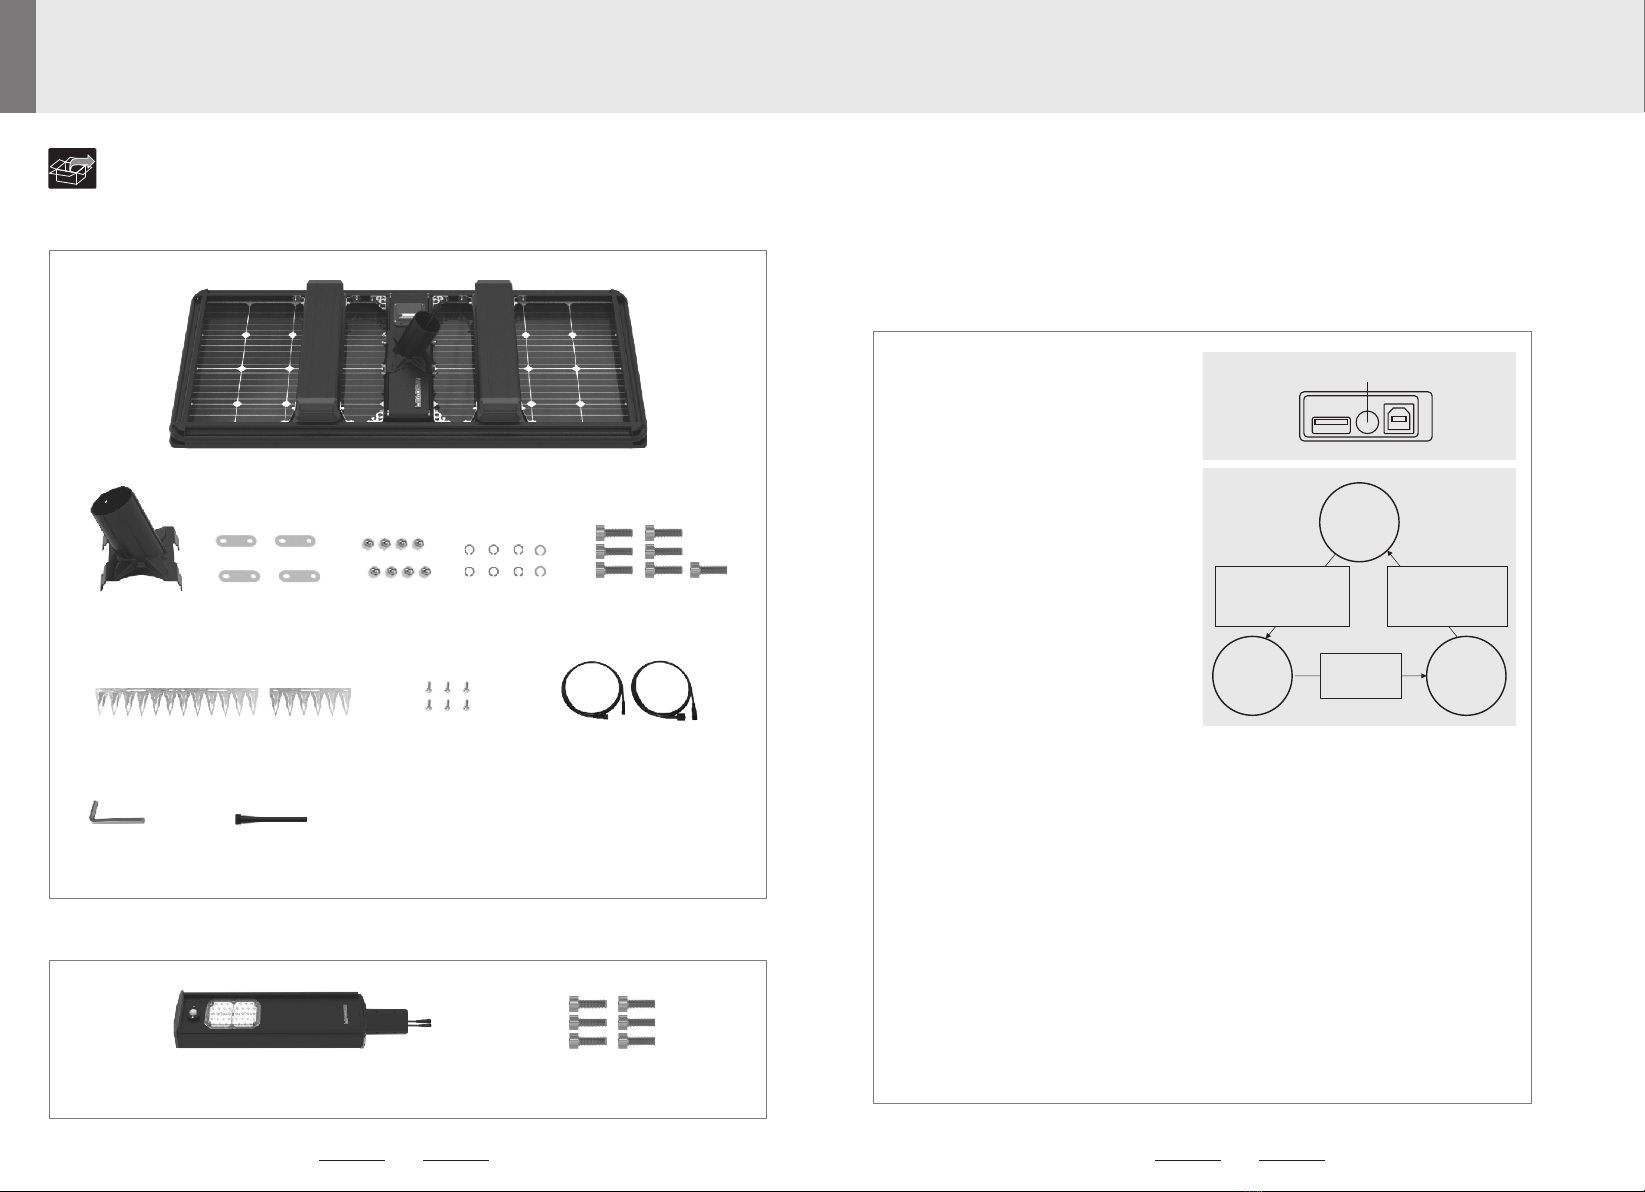
Insert SIM Card
#12 is the switch button of the Gateway.
Ensure the SIM card cutting edge is face down and
the magnetic stripe is away from the indicator light.
Cautions:
Check that the lamp can be manually
activated.
Refer to “Activation and Installation” section
on this user guide and run activation tests.
Check if the solar panel is blocked
from the sunlight by houses, trees and
other obstacles.
Clear obstructions or change installation
location.
Check if there is any artificial light
source(s) shining on the solar panel
during the night.
Remove the artificial light source(s) of
interference or change the installation
location.
Examine status of each component
based on the repair guide.
Replace the damaged component(s).
A serious shortage
of working time
Check if the solar panel is blocked
from the sunlight by houses, trees and
other obstacles.
Clear obstructions or change installation
location.
Check if the surface of the solar panel
is dusty or covered.
Clean the surface of solar panels as
detailed above.
Examine if the battery pack is
damaged as per the repair guide
instructions.
Lighting does not
follow the normal
operating mode of
turning on and off
Lights fail to turn
on properly when
humans approach
Check if the air temperature close to
human body temperature.
When the air temperature is close to human
temperature, motion detection may slow
down. It will return to normal after the air
temperature changes.
Check if the installation height is too
high.
It is out of motion detection range when
installation height exceeds 8m. It is
recommended to reduce the height or use
other operating modes.
Replace damaged motion sensor or
controllers.
12