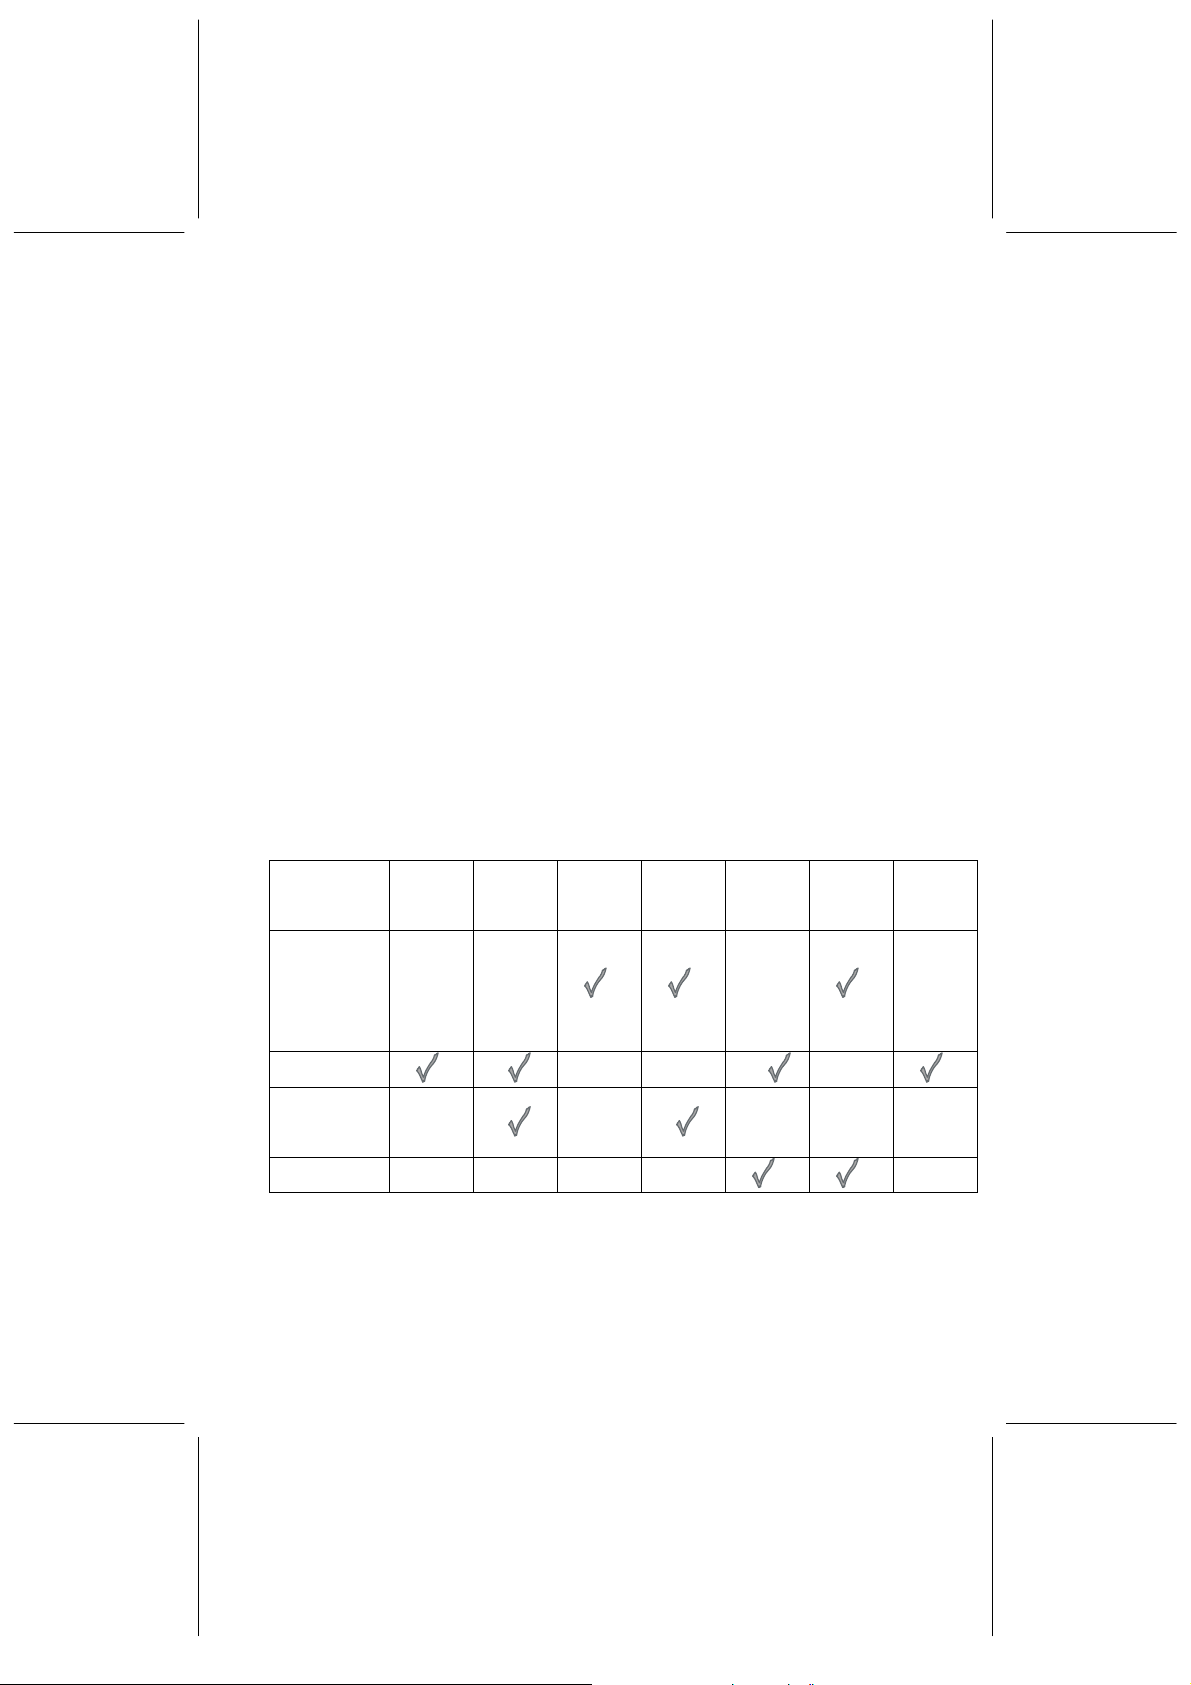
2
Accessories:
yUltra ATA 66/100/133 IDE cable x
1; FDD cable x 1; this user’s
manual; USB module and cable
(optional); and TV-out add-on
card (optional)
Motherboard & SCSI Software Pack CD:
yChipset driver; display driver; USB 2.0
driver; AWARD flash utility; user’s
manual; and technical support request
form
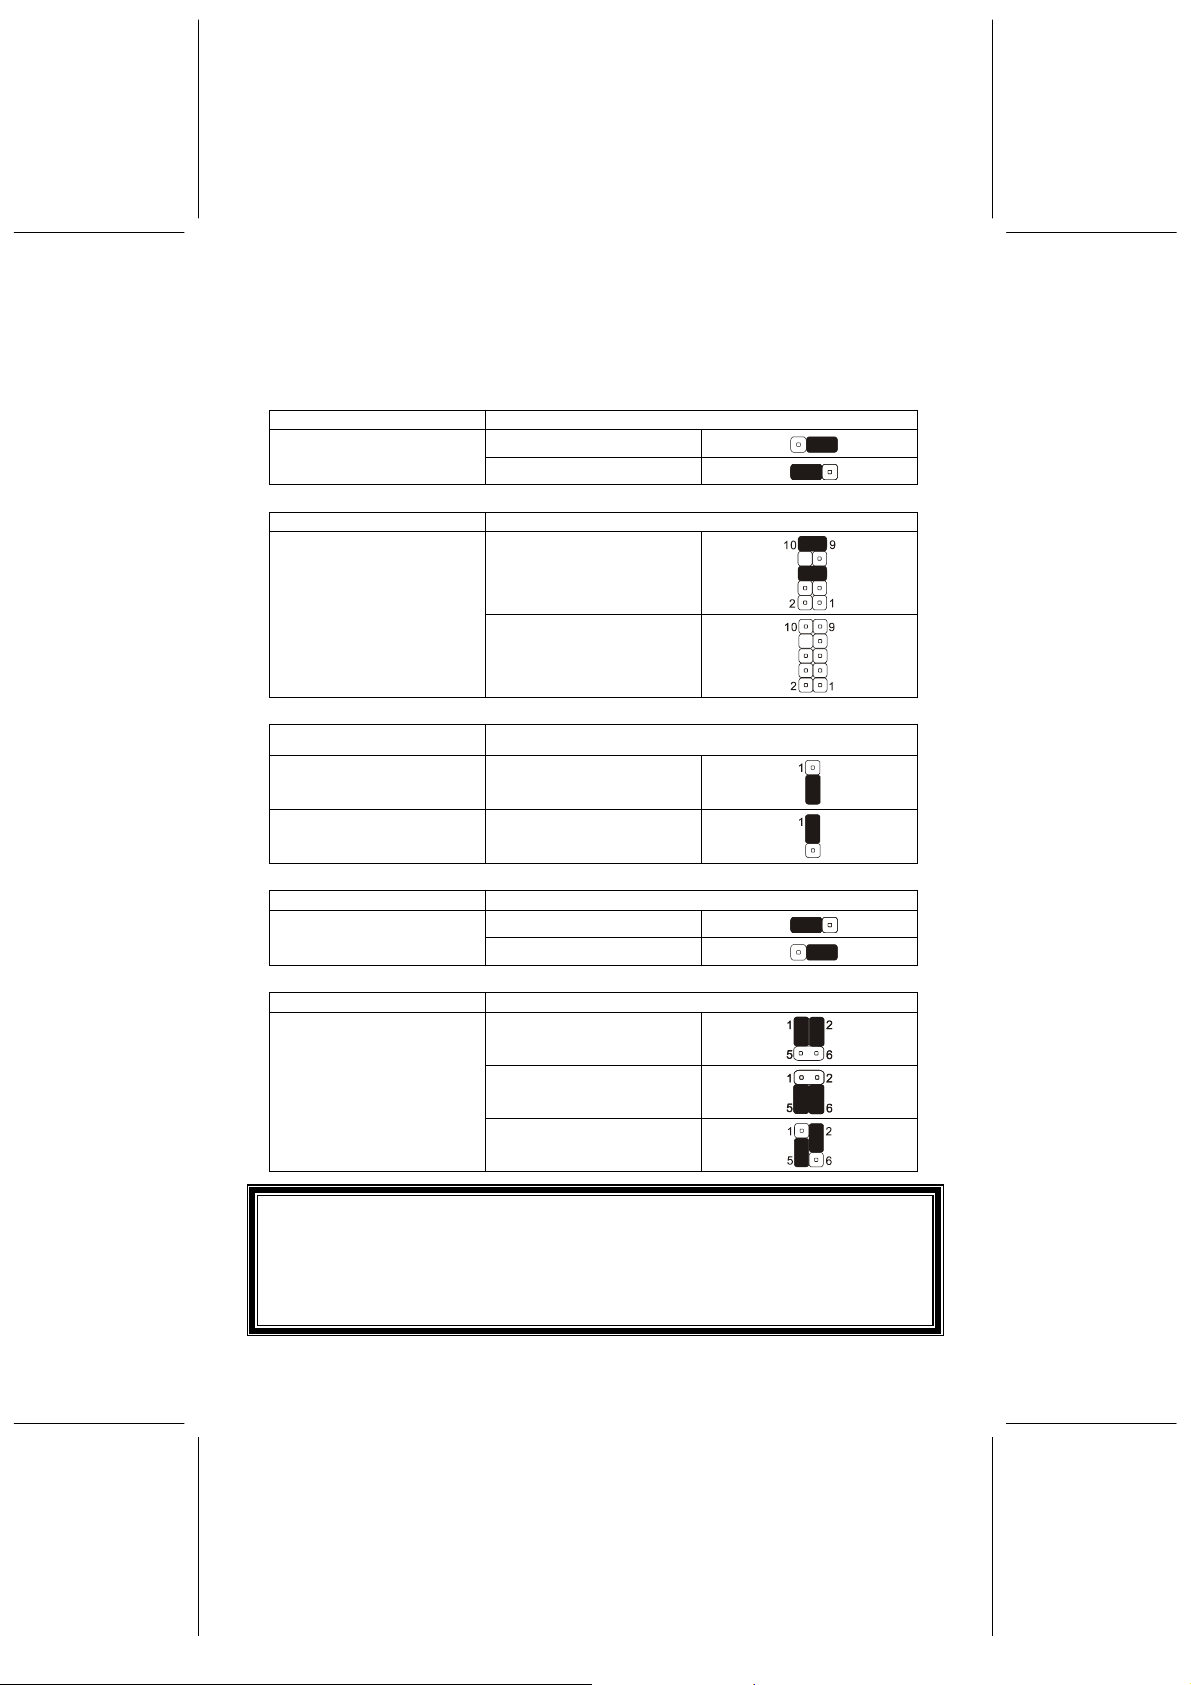
1.2. Specifications
CPU Support
♦AMD Athlon/Athlon XP/Duron
processors at 3200+ MHz with Socket
A support
Platform Processories
♦NVIDIA nForce2 Ultra 400/nForce2
400+ nForce2 MCP(-T) (only
K7NCR18D series)
NVIDIA nForce2 IGP+ nForce2
MCP(-T) (only K7NCR18G series) –
support Geforce 4 MX equivalent GPU
♦Dual channel memory architecture
with 128-bit DDR memory controller
(64-bit DDR memory controller-
K7NCR18DL); high-speed buses to
MCP (800 MB/sec maximum); two
ATA; 133 controllers; USB 2.0 (EHCI) ;
1.1 (OHCI) support ; and supports
6-channel AC97 codec
Board Size
♦ATX form Factor/12" x 9.6" (304.8 mm
x 243.8 mm)
FSB (Front Side Bus)
♦200/266/333 MHz FSB support
♦400 MHz FSB support only for
K7NCR18D series
Memory
♦Supports three 184-pin DDR DIMMs ;
up to 3 GB;
On Board IDE
♦The IDE controller on nForce2 MCP;
MCP-T chipset supports IDE;
CD-ROM under Ultra DMA 133;
twin headers for 4 IDE, including
IDE HDDs and CD-ROMs
Expansion Slot
♦Four 32-bit PCI bus slots support
3.3 V/5 V PCI Bus Master
♦One Accelerated Graphics Port
(AGP)
- In compliant with AGP standards
- AGP 4x/8x support
♦One ACR slot
Video
♦256-bit 2D/3D graphics accelerator
♦Second generation T&L engine
support with NVIDIA shading
rasterizer
♦DVI-out add-on card support
(WinFast K7NCR18G series)
On Board LAN (Optional)
♦10/100 MB Base-T Ethernet/Fast
Ethernet
On Board IO
♦1 FDD connector supporting two
360 K/720 K/1.2 M/1.44 M/2.88
MB FDDs; 1 COM/serial port; 1
parallel port supporting
SPP/EPP/ECP modes; 1 VGA port
(WinFast K7NCR18G series); A
second COM port (WinFast
K7NCR18D series); 2 SATA
devices, support all UDMA and
PIO mode (UDMA is up to 150
MB/sec and support SATA Raid 0
and SATA Raid 1)( WinFast
K7NCR18D-Pro 2/18G-Pro 2
only);6 USB ports (4 built-in and 2
with Front Pin Header); 1 IrDA
connector; 1 CIR connector; and
1394 module (K7NCR18D/G Pro
series )