Ledgerware 6U Server Rack Mount Case User manual

LEDGERWARE
6U Server Rack Mount Case
Assembly Instructions

LEDGERWARE
Assembly Instructions
6U Server Rack Mount Case
2
Components Included in Kit
6 x Riser Kits
o1 x Riser PCB
o1 x USB 3.0 Cable
o1 x SATA or Molex Power Cable
o1 x PCI to USB Adapter
1 x Accessories Kit
o2 x Rackmount Ears
o6-32 Screws
o6-32 Standoffs
oRack Mounting Screws
oPower Supply Screws
1 x GPU Safety Bar
1 x GPU Support Bar
1 x Flange Mount Bar
1 x Chassis Body
1 x Chassis Top
1 x Power Cord
1 x Front Panel PCB
1 x Power Supply Mounting Bracket
1 x Hard Drive Mounting Bracket
6 x Case Fans
Components NOT Included
These components are referenced in the instructions but are not included with
the mining kit.
ATX Power Supply
2.5” Hard Drive (optional if booting from an external source)
ATX Mother Board
ATX Mother Board Pass-Through Plate
Graphics Cards
LEDGERWARE
Assembly Instructions
6U Server Rack Mount Case
3
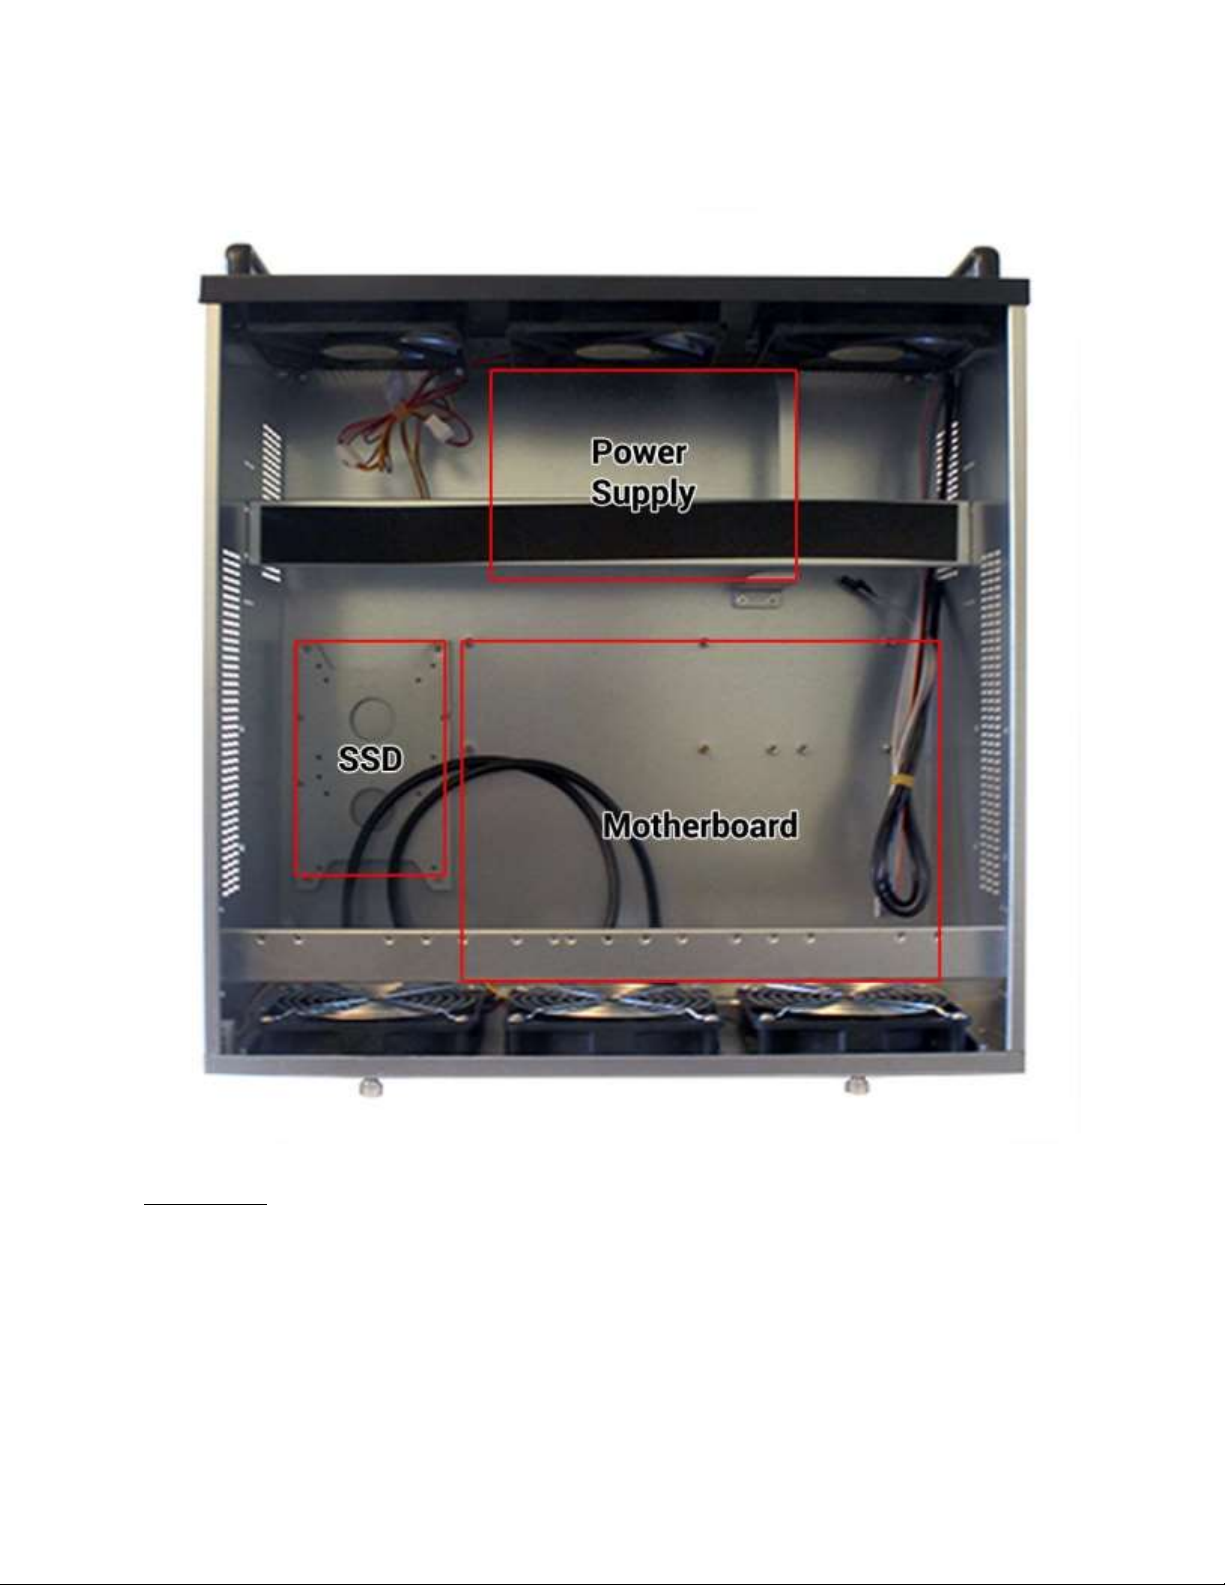
General Case Layout
SAFETY
DO NOT ASSEMBLY THE CASE OR ANY CASE
COMPONENTS THAT ARE POWERED. GROUND YOURSELF
BEFORE HANDLING ELETRONIC COMPONENTS TO
MINIMIZE THE POTETIAL FOR STATIC DISCHARGE DURING
ASSEMBLY.

LEDGERWARE
Assembly Instructions
6U Server Rack Mount Case
4
Step 1: Unboxing
Open the box and remove the case from the shipping foam and
plastic cover.
Remove the accessories kit (bag or box) from the box.
Remove the risers and riser components from the box.
Remove the GPU Safety Bar from the box.
Step 2: Open the Case
Remove the two screws from the back of the case that keep chassis
top from sliding backwards with a Phillips head screwdriver.
(Note: these screws are not the thumbscrews that open the fan door
on the back of the case.
Slide the chassis top backwards and set the chassis top aside.
LEDGERWARE
Assembly Instructions
6U Server Rack Mount Case
5
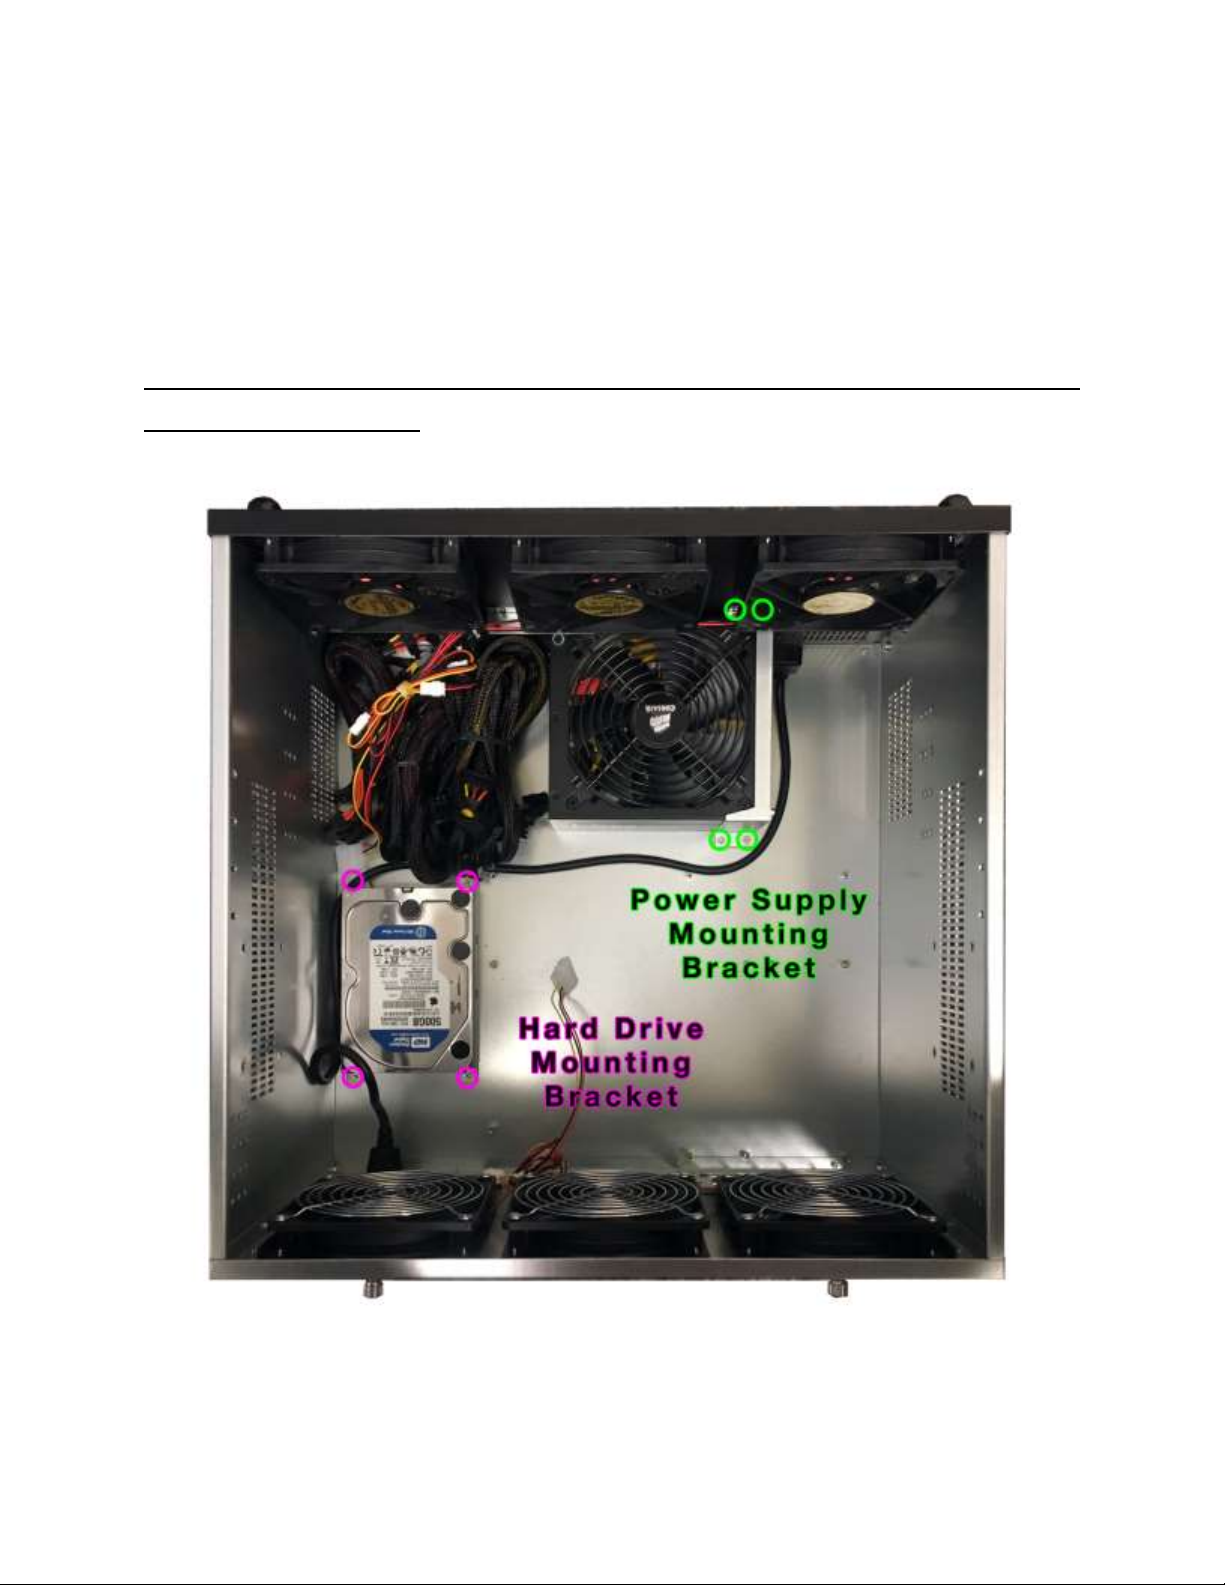
Step 3: Add ATX Power Supply
Remove the Place an ATX power supply into the power supply
mounting bracket by removing the four screws highlighted with green
circles.
Note: Two of the screws are black screws that are attached through
the front of the case.
LEDGERWARE
Assembly Instructions
6U Server Rack Mount Case
6
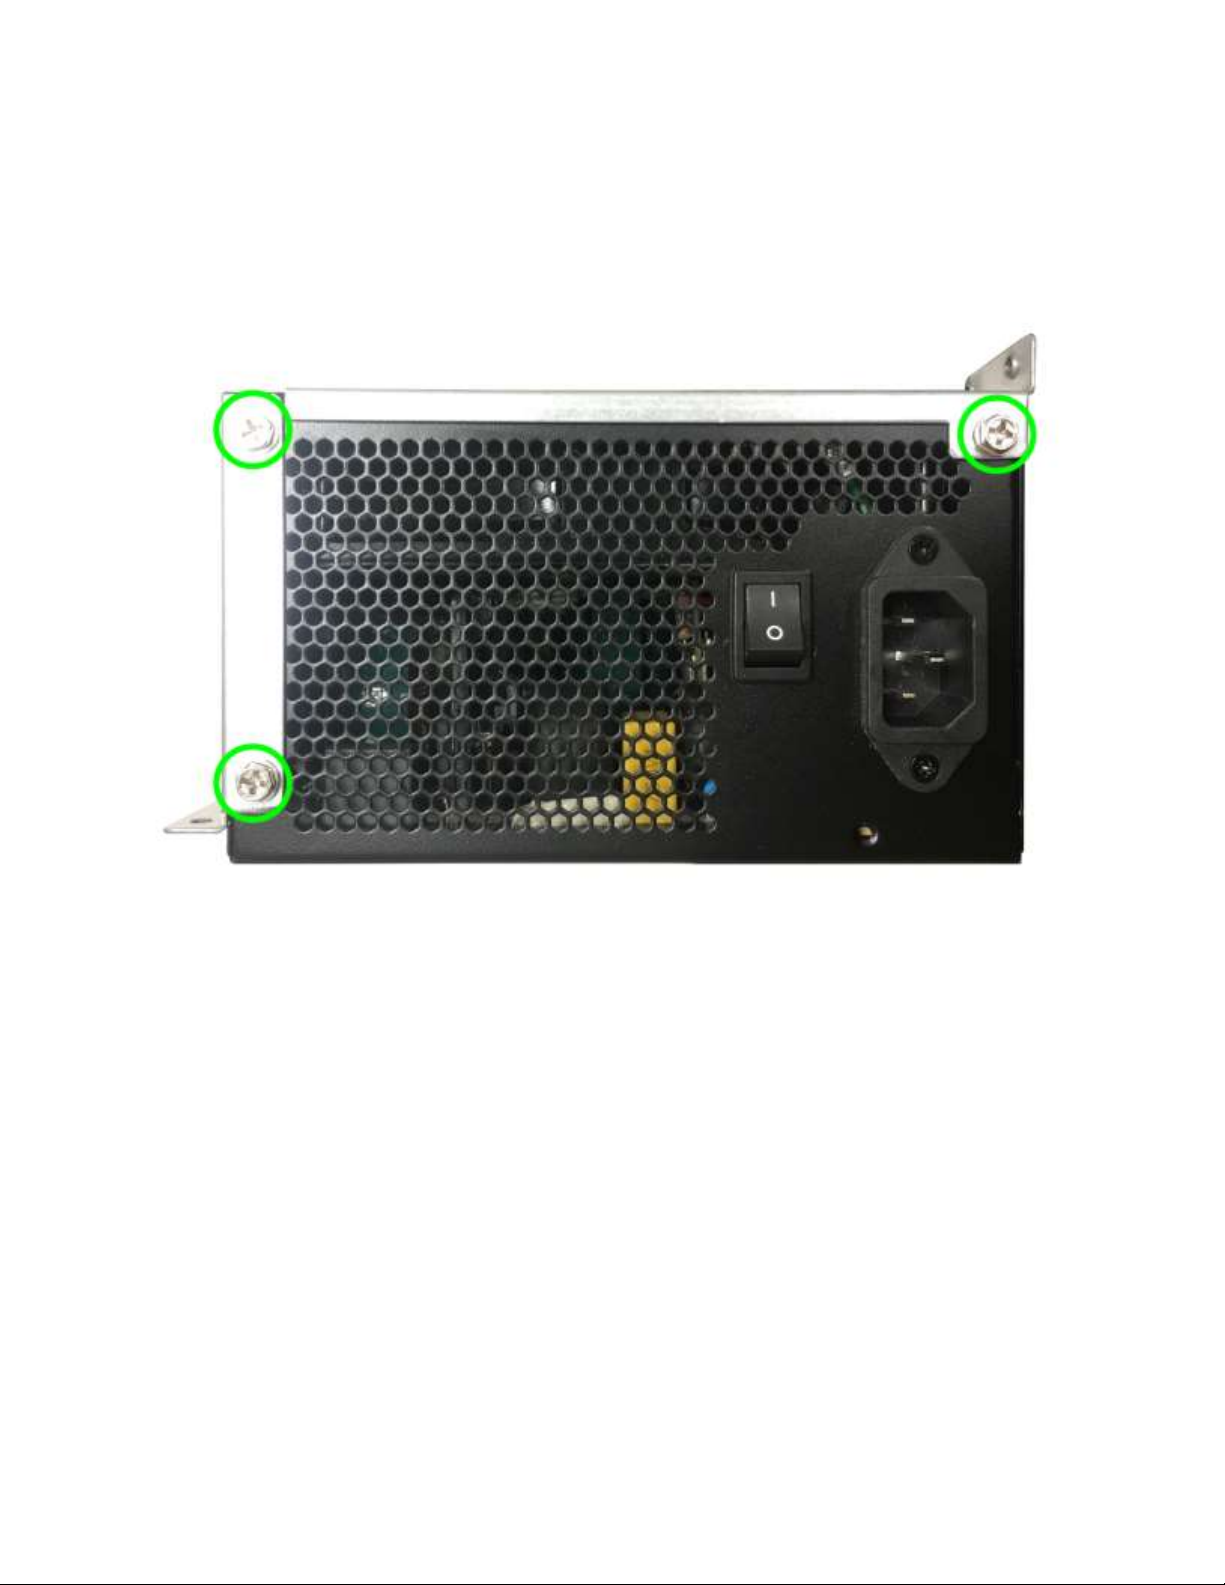
Attach power supply using the power supply attachment screws (the
three locations highlighted in green circles below).
Attach the cable power supply cable from the back of the case.
Step 4: Attach Fans to Power Supply
Daisy-chain the three molex fans connectors together and then attach
one of the molex fan cables to the power supply.
Repeat this step for the three fans in the back of the case.
LEDGERWARE
Assembly Instructions
6U Server Rack Mount Case
7
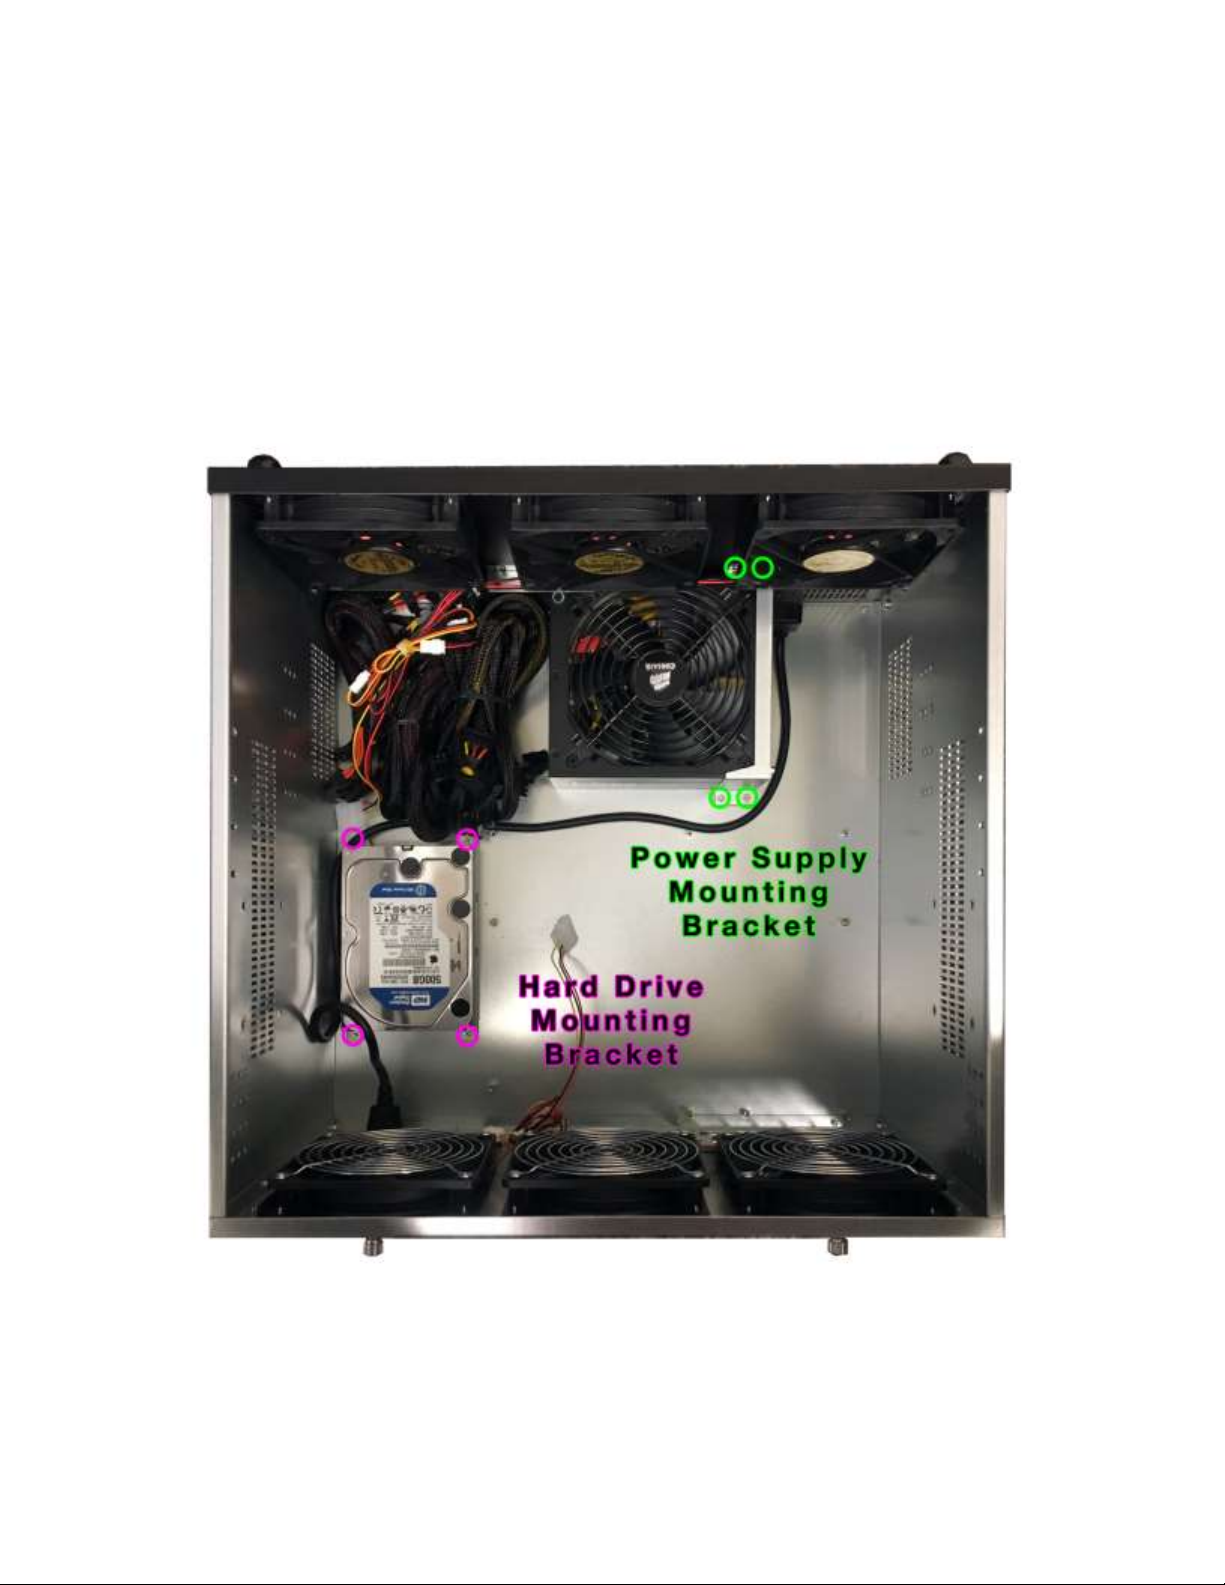
Step 5: Add Hard Drive
Remove the hard drive mounting bracket by removing the 4 screws
holding it in place (with a Phillips head screwdriver).
The four screws that need to be removed are highlighted by the pink
circles below.

LEDGERWARE
Assembly Instructions
6U Server Rack Mount Case
8
Attach your hard drive to the mounting bracket by screwing the base
of the hard drive to the bracket.

LEDGERWARE
Assembly Instructions
6U Server Rack Mount Case
9
Step 6: Add ATX Mother Board
Add the ATX mother board pass-through plate (usually included with
your ATX mother board).
Reference the hole-pattern on your ATX mother board and add the
brass 6-32 standoffs that are included in the accessories kit.
Place your ATX mother board on the standoffs that were just
added to the case.
Attach the ATX mother board to the standoffs using the 6-32
screws included in the accessories kit.
Attach the Power/Reset Buttons & Power/Status LEDs to the
ATX main board. Consult your ATX mother board instructions for
the attachment locations.

LEDGERWARE
Assembly Instructions
6U Server Rack Mount Case
10
Step 7: Add GPU Support Bar & GPU Flange Mount Bar
Attach a riser PCB to a GPU
Other Ledgerware Computer Accessories manuals


