manuals.online logo
Brands
  1. Home
  2. •
  3. Brands
  4. •
  5. Legacy
  6. •
  7. Speakers System
  8. •
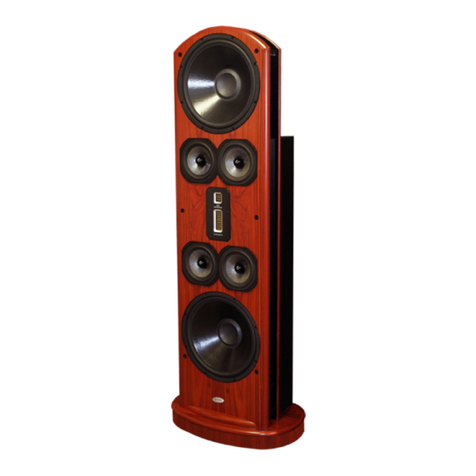
  9. Legacy Helix User manual

Legacy Helix User manual

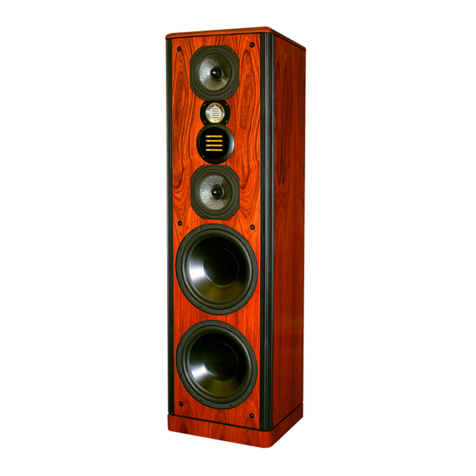
Owners Manual For The
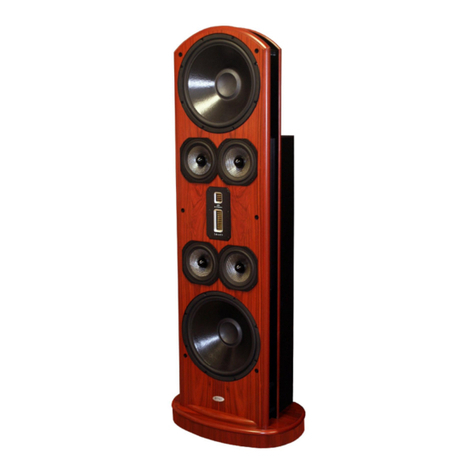
Helix
Loudspeaker System
2
Registration
Owners Record 3
The Cabinetry Our Commitment 4
Warranty 5
Setup
Unpacking Your Speakers 6
Speaker Placement 7-8
Speaker Connections 9-12
Wave Launch Processor 13-21
Technology
Designer’s Notes 22
Specifications 23
Table of Contents
Page
3
The serial number is located on the rear of the unit. Record this
number in the space provided below. Refer to this when calling your
dealer regarding this product.
Model: Helix
Serial No: _________________________
Date of purchase: ___________________
Thank you for selecting a Legacy Loudspeaker System. These hand-
crafted instruments will provide you with many years of listening en-
joyment.
Owners Record
4
Handcrafted
Beneath the surface of Helix’s elegant exterior lies rigid MDF
construction. Interlocking joinery maximizes the strength of the
cabinet parts. Polyester fiberfill is selected for internal damping.
A sharp rap on the enclosure will leave you with little more than
bruised knuckles. Each cabinet is impeccably finished on all ex-
posed surfaces with select veneers. The exquisite finish is hand-
rubbed several times to assure a patina at home with the most
elegant decor.
Our Commitment
A great deal of forethought, love and satisfaction is instilled in
each piece of Legacy workmanship. We take pride in getting to
know many of our customers on a first name basis. The re-
nowned “Legacy Satisfaction Guarantee” backs your purchase of
this product.
The Cabinetry / Our Commitment
5
Legacy Audio supports its customers and products with pride. We cheerfully warrant our loud-
speaker products we manufacture from defects in materials and workmanship for a period of seven
(7) years. Electronic components such as internal amplifiers and digital processors are covered for
three (3)years. Please register your product with Legacy Audio. Should you require service Legacy
will require a proof of purchase in order to honor the warranty - so please keep your receipt.
• The warranty applies to the original owner and is not transferable.
• The warranty applies to products purchased from an “Authorized Legacy Dealer”.
• The warranty on active components such as digital processors or internal amplifiers is limited to three
(3) years of coverage.
• The warranty on dealer stock will extend for a maximum of two years from invoice.
The warranty does not cover transportation costs of product to or from the customer, distributor or
dealer, or related shipping damage.
Exclusions from Warranty
The following situations or conditions are not covered by the Legacy Audio warranty:
• Accidental damage, electrical abuse or associated equipment failure.
• Use inconsistent with recommended operating instructions and specifications
• Damage caused by modification or unauthorized service
• Costs associated with the removal and reinstallation of defective products. Consequential damage to
other products.
• Normal wear such as fading of finishes due to sunlight.
Warranty
6
Helix is a large loudspeaker requiring assistance of a dolley, a cord-
less Philips screw driver and two or more physically capable individu-
als to uncrate and locate.
Here are some uncrating tips:
1. Carefully remove screws securing the lid of the crate, and lift
panel away. Locate subwoofer power cord and set aside.
2. Next remove front panel of crate and set aside.
3. Remove side panel of crate as shown.
4. Remove foam from top lid and use as ramp as shown in bot-
tom photo.
5. Helix is setting on four heavy duty casters, allowing is to be
maneuvered on level ground.
6. Take care to avoid damaging floors when locating.
7. Helix is a field serviceable loudspeaker, so it is unlikely that an
entire cabinet would ever need to be returned to the factory.
However, when moving or storing, the crates are extremely
useful for protecting the cabinets.
Unpackin Your Speakers
7
1. A speaker setup (left) that works well with HELIX follows
these ratios:
Distance, d1, between the speakers (center to center) =
Distance, d2, from plane of speaker front to listener.
2. Toe the speakers into the listening area. In most circum
stances crossing speaker axes just slightly behind of the lis
tener’s head works best. This will broaden your sweet spot
horizontally. If dispersing into an L-shaped seating arrange
ment you might find the best results by aiming the left
speaker at the right most seating position, and the right
speaker at the left most seating position.
Speaker Placement
8
Room reflections and resonance typically contribute 85% of the
total energy arriving at the listener’s ears. Often, a loudspeaker
designed to measure well under laboratory conditions, will be-
come blurred, dissonant and placement dependent in the actual
listening room.
The HELIX speaker has a carefully shaped polar pattern. This as-
sures that the wave-launch generated will sum coherently at the
listening position. To the left is an illustration of how our new He-
lix speaker performs.
Conventional speakers (top) beam treble and scatter midrange
about the imaging room, while loading up the corners with boom-
ing, lingering bass.
Legacy’s directivity controlled designs focus the radiation pattern
toward the listeners (bottom). The result is a broader sweet spot
for imaging, markedly greater clarity and a slamming bass line
that is quick and tight
Speaker Placement
9
The Terminal Plate
The four-way HELIX requires the user to
provide three channels of amplification per
speaker. This may be accomplished via three
stereo amplifiers, a combination of mono
blocks and stereo amplifiers, or a single six-
channel amplifier.
HELIX includes an internal 750-watt ampli-
fier to power the subwoofer section. A bal-
anced XLR input feeds the subwoofer, while
three pairs of premium WBT Platinum five-
way binding posts are provided for the mid
bass, midrange and treble inputs.
Your Legacy dealer can assist you with your
specific cabling needs.
Speaker Connections
10
It is advantageous, when practical, to position the amplifiers midway between the HELIX speakers. This
will keep the speaker cable lengths to a minimum.
Speaker Connections
11
HELIX Internal Wirin
(For use by qualified technicians only)
Speaker Connections
12
Xilica XD Cable Connections
From To
Left channel of preamp output Processor Input 1
Right channel of preamp output Processor Input 2
Processor Output 1 Left Subwoofer
Processor Output 2 Left Midbass
Processor Output 3 Left Midrange
Processor Output 4 Left Treble
Processor Output 5 Right Subwoofer
Processor Output 6 Right Midbass
Processor Output 7 Right Midrange
Processor Output 8 Right Treble
Speaker Connections
13
The high definition Digital Wavelaunch Processor hosts a LEGACY custom algorithm which automatically loads when the proc-
essor is powered on. Factory settings are ‘plug and play’, and do not require a computer to utilize. Connections between the
preamp, power amplifier, and speakers should be as shown on previous page.
Selectin the Pro ram
1. Press the MENU left arrow
2. Scroll through the programs using the job wheel
3. Press enter to select the program of choice
4. Press enter again to confirm selection. The program will now load.
Users are welcome to load the included software and learn to make individual adjustments as desired. However it is recom-
mended that any changes be saved as Program 6 or higher to avoid overwriting the factory settings.
Wave Launch Processor
14
Downloadin and Installin the XConsole software
Downloadin
From Included CD
Your Wave Launch Processor will come with a CD or USB drive containing the XConsole
software. Insert the CD and find the install file. Move Save the install file to your
computer.
From Xilica Website
- Go to www.xilica.com
- Click on the “Downloads” tab at the top of the screen
- Click “XConsole” on the Left and then Click “Software”
- Click “XConsole software” to start the download
- Save and Extract the installation file on your computer
Installin
- Double click on the install file and follow the on– screen instructions to install the software.
Wave Launch Processor
15
The XD processor will allow you to make adjustments to your system from a laptop computer
from your listener position.
Connectin Your Computer with the Xilica Processor
- Connecting will require a long USB Device cable. These can be found at most electronic or big box stores. It is the
same cable that a USB printer would use. This 16 ft cable is available at Radio Shack.
http://www.radioshack.com/product/index.jsp?productId=3584358&filterName=Len th&filterValue=16-20+ft.
- Once the cable is connected, start the XConsole software. It will ask “Do you want to connect to the device?”, answer
“No” for now.
- You now must access the Windows Device Manager. This processes can vary depending on the version of Windows in
use, but typically it is found in the Control Panel. Then click on “System.” On the tabs across the top, click “Hardware”
and then “Device Manager” This will bring up a list, find “Ports (COM & LPT)” and click the plus (+) next to it. You
should then find a device called “Silicon Labs CP210x USB to UART Bridge” with a COM number listed next to it. This
number will change on all computers, but take note of this number.
CONTINUED ON NEXT PAGE
Wave Launch Processor
16
- Go back to the XConsole software. At the top of the screen click “Setup” then “Port Connections” This bring up a new
dialog box. Select the COM port number you obtained from the device manger and click “OK.” The software will warn
you that you must restart the software for your changes to take effect.
- Restart the XConsole software. This time, when it asked “Do you want to connect to the device?”, answer “Yes”.
- You should now be connected to the device and ready to use.
Room Equalization
Before making adjustments with your processor, a basic understanding of parametric and graphic equalization is needed.
Parametric filters allow you to control the three primary parameters of a useful band-pass filter. These parameters
are amplitude (boost or cut), center frequency (pitch) and bandwidth (tonal range). Bandwidth is typically labeled "Q" on the
unit, which stands for Q factor. The amplitude of each band can be controlled, and the center frequency can be shifted, and
widened or narrowed.
Simpler graphic filters are fixed in frequency and bandwidth, so the music spectrum is divided into uniform third-octave spac-
ings.
Wave Launch Processor
17
Makin Adjustments with Wavelaunch Processor
After installing the included software, connect the processor to the computer via a USB cable.
Launch the XConsole software.
When asked if you want to connect to the device, click yes.
In the Device List, click on the device that is connected. This will launch the program that is currently on the processor.
Wave Launch Processor
18
In the Device List, click on the device that is connected. This will launch the program that is currently on the processor.
Adjustments to the processor can be made to “Input 1: Left” and “Input 2: Right”.
Clicking on “In 1: Left” opens the controls for the Left speaker.
In this window, you are presented with 31 channels of graphic EQ and 8 channels of parametric EQ.
Wave Launch Processor
19
Makin a boost with the parametric EQ
In this example, we have selected Parametric EQ 2 (PEQ2) by clicking in its box, which will turn red to indicate your selection.
Once highlighted, locate the blue boxes with up and down arrows, at the bottom of the interface. These arrows are used to in-
crease or decrease the gain, frequency and Q of the selected parametric EQ. This column shows a 4.00 dB boost at 41 Hz with a
Q of 6.551. A larger Q affects a narrow range of frequencies, while a smaller Q affects a broader range of frequencies. We can
adjust gain, frequency and Q by clicking in the corresponding box. Once highlighted, locate the blue boxes with up and down ar-
rows, at the bottom of the interface. These arrows are used to increase or decrease the gain, frequency and Q settings.
Wave Launch Processor
20
Makin a cut with the raphic EQ
In this example, we have selected Graphic EQ 8 by clicking in its box which will turn red to indicate your selection. Once high-
lighted, locate the blue boxes with up and down arrows, at the bottom of the interface. These arrows are used to increase or de-
crease the gain of the selected graphic EQ. This column shows a 4.00 dB cut at 100 Hz. Only gain is adjustable in the graphic
EQ section because graphic equalizers have a fixed frequency and Q.
After adjusting the left speaker, you may close the window, and click “Input 2: Right” to make adjustments to the right speaker.
Wave Launch Processor

Other manuals for Helix

2

Other Legacy Speakers System manuals

Legacy FOCUS SE User manual

Legacy

Legacy FOCUS SE User manual

Legacy FOCUS SE User manual

Legacy

Legacy FOCUS SE User manual

Legacy Focus User manual

Legacy

Legacy Focus User manual

Legacy Studio HD User manual

Legacy

Legacy Studio HD User manual

Legacy Expression User manual

Legacy

Legacy Expression User manual

Legacy Whisper XDS User manual

Legacy

Legacy Whisper XDS User manual

Legacy Skyline User manual

Legacy

Legacy Skyline User manual

Legacy V System Operation manual

Legacy

Legacy V System Operation manual

Legacy Studio HD User manual

Legacy

Legacy Studio HD User manual

Legacy Deco User manual

Legacy

Legacy Deco User manual

Legacy Whisper XD User manual

Legacy

Legacy Whisper XD User manual

Legacy Harmony Center User manual

Legacy

Legacy Harmony Center User manual
Legacy VALOR User manual

Legacy

Legacy VALOR User manual

Legacy AERIS User manual

Legacy

Legacy AERIS User manual

Legacy Focus HD User manual

Legacy

Legacy Focus HD User manual

Legacy CALIBRE User manual

Legacy

Legacy CALIBRE User manual

Legacy Xtreme XD User manual

Legacy

Legacy Xtreme XD User manual

Legacy Signature SE User manual

Legacy

Legacy Signature SE User manual

Legacy Focus HD User manual

Legacy

Legacy Focus HD User manual

Legacy Whisper XD User manual

Legacy

Legacy Whisper XD User manual
Legacy Studio HD User manual

Legacy

Legacy Studio HD User manual
Legacy FOCUS SE User manual

Legacy

Legacy FOCUS SE User manual
Legacy FOCUS XD User manual

Legacy

Legacy FOCUS XD User manual

Legacy Silhouette User manual

Legacy

Legacy Silhouette User manual

Popular Speakers System manuals by other brands

Logitech Z553 Setup guide

Logitech

Logitech Z553 Setup guide

Samsung HW-T450 Full manual

Samsung

Samsung HW-T450 Full manual

LG GX owner's manual

LG

LG GX owner's manual

Nxg PRO 6020 user guide

Nxg

Nxg PRO 6020 user guide

Fbt PROMAXX114 user manual

Fbt

Fbt PROMAXX114 user manual

Toa BS-678 Specifications

Toa

Toa BS-678 Specifications

JVC HX-GX7 Service manual

JVC

JVC HX-GX7 Service manual

JBL EVOi.sys user guide

JBL

JBL EVOi.sys user guide

Adcom GFS-300 owner's manual

Adcom

Adcom GFS-300 owner's manual

Creative INSPIRE T6300 quick start guide

Creative

Creative INSPIRE T6300 quick start guide

Sony SRS-GU10iP Marketing operating instructions

Sony

Sony SRS-GU10iP Marketing operating instructions

Extron electronics CS 26T user guide

Extron electronics

Extron electronics CS 26T user guide

Samsung HW-Q950A Full manual

Samsung

Samsung HW-Q950A Full manual

Beyerdynamic Opus 100 operating instructions

Beyerdynamic

Beyerdynamic Opus 100 operating instructions

Savant HST-STUDIO46-2CH Deployment guide

Savant

Savant HST-STUDIO46-2CH Deployment guide

THOMSON SB402BT User instructions

THOMSON

THOMSON SB402BT User instructions

MartinLogan FRESCO user manual

MartinLogan

MartinLogan FRESCO user manual

Goldmund LOGOS TOWER user manual

Goldmund

Goldmund LOGOS TOWER user manual

manuals.online logo
manuals.online logoBrands
  • About & Mission
  • Contact us
  • Privacy Policy
  • Terms and Conditions

Copyright 2025 Manuals.Online. All Rights Reserved.