300 N. Opdyke Rd.
Auburn Hills, MI 48326
www.legendvalve.com
800-752-2082
Legend Valve & Fitting, Inc. Item # 508-280 Auburn Hills, MI
www.legendvalve.com
Legend Crimp Tool Installation Guide
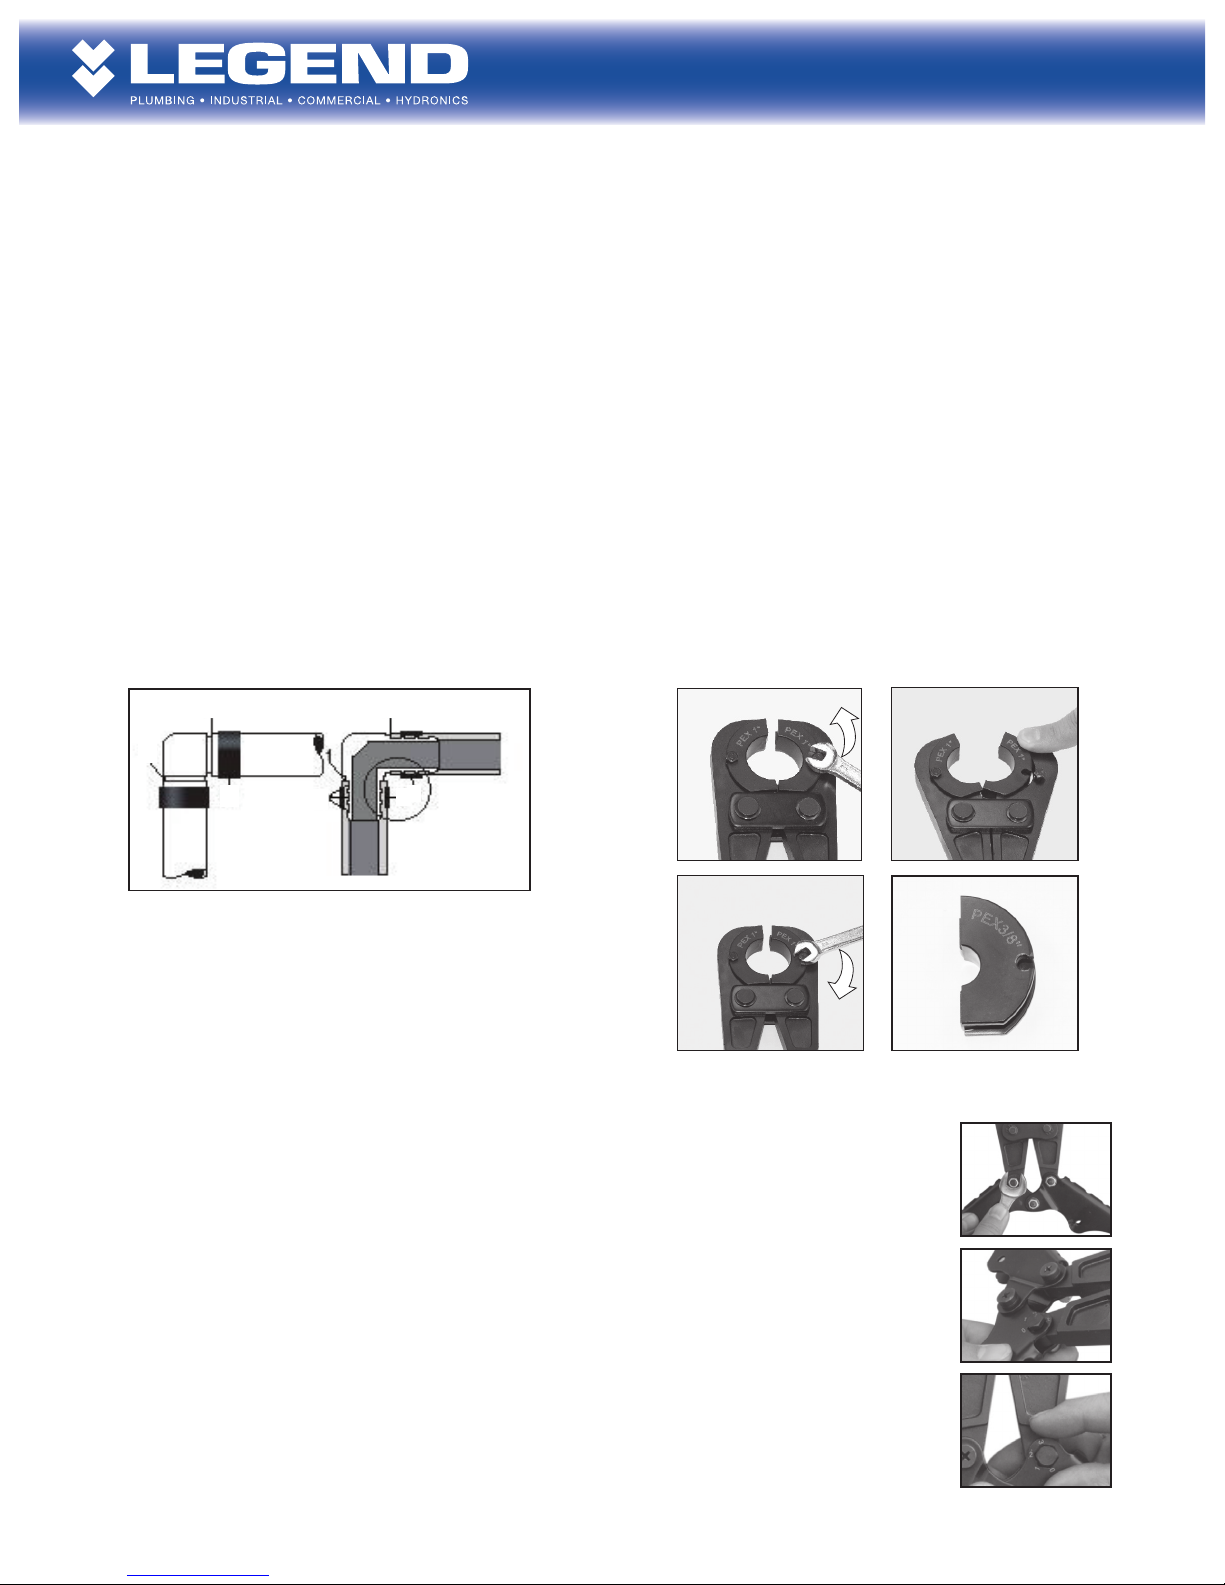
Illustration Of A Good Connection
1. Fitting shoulder location.
2. Tube is cut square and stops at the tting shoulder.
3. Crimp ring is positioned 1/8”-1/4” from end of tube,
directly over ribs of tting.
4. Crimp ring is evenly compressed over tube and
show no evidence of uneven distortion.
5. The tube material is uniformly compressed between
the brass ribs, resulting in a leak-free, quality joint.
Tool Calibration
After repeated usage components on the tool may wear and not allow proper closing force, which in turn
may cause an improper crimp connection. Always check each connection with the Go/No-Go gauge per
enclosed directions. If more than one or two improper connections are found where the crimp ring was not
compressed enough, perform the following adjustments on the tool:
1. Open the handle and loosen the nut as shown, counter-clockwise.
2. Push the bolt through (2) far enough so the head opposite side can be rotated clockwise to the
higher number on the scale as shown. (3)
3. Push the bolt back in place and tighten the nut on the opposite side.
4. Check the next crimp connection with the Go/ No-Go gauge for proper compression and re-adjust
as necessary. If compression is too small, repeat steps 1-3; except rotate the bolt head counter-
clockwise to the next lower number. If adjustment is required higher then 3, or lower than 0, then
replace the tool.
Change the jaws to crimp different size fittings
1. Loosen jaw bolt by turning counter-clockwise 2-4 turns with
wrench provided.
2. Remove jaw by sliding inwards.
3. Put new jaw into tool, tighten jaw screw by turning clockwise.
Repeat steps 1-3 to change both jaws in the set. Be sure both
jaws installed match each other, the desired tting size and tube
to be crimped.
2
3
1
1
2
3 5
2
43
1
2
3


