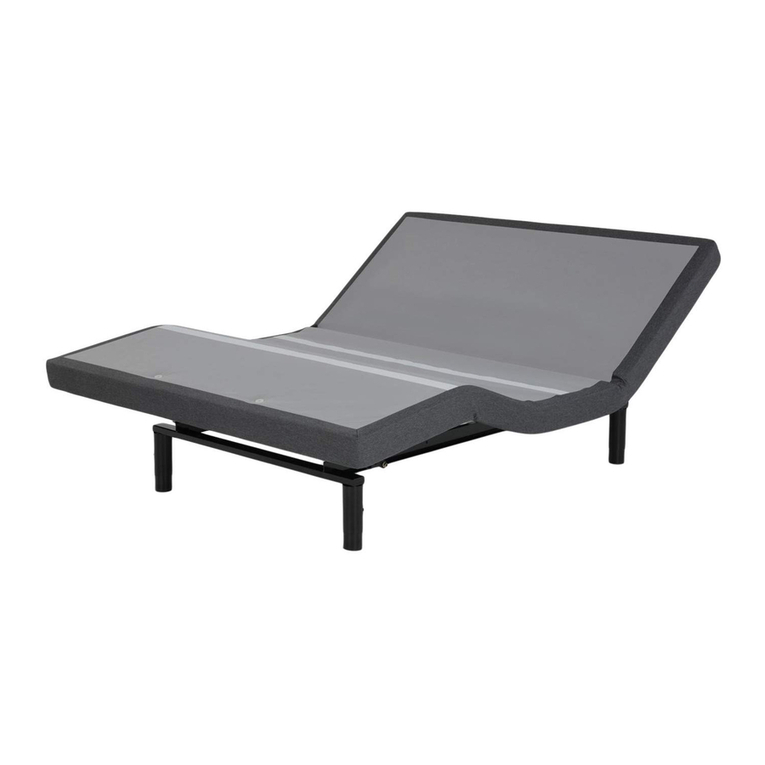
Leggett & Platt LP 50 II User manual

owners manual
K-110 Q/K
ENGLISH SPANISH FRENCH
LP 50 II

CONTENTS
READ ALL INSTRUCTIONS BEFORE USING
If adjustable base does not operate or if parts are missing, call:
1-800-888-3078
For customer service in French, call: 1-877-452-2665
Do not contact retail store or dealer.
Spanish translation begins on page 12.
La traducción en español inicia en la página 12.
French Canadian translation begins on page 22.
La traduction en Français débute à la page 22.
Advisory...................................................................................................................... 3
Assembly .................................................................................................................... 4
Remote Control Function.............................................................................................. 9
Tandem Syncing (One remote control operating both bases in tandem) ........................... 10
Troubleshooting ......................................................................................................... 11

3
ADVISORY
FOR OPTIMUM ADJUSTABLE BASE
OPERATION, USE A GROUNDED, ELECTRICAL
SURGE PROTECTION DEVICE (NOT
INCLUDED). FAILURE TO USE A SURGE
PROTECTION DEVICE COULD COMPROMISE
SAFETY OR CAUSE PRODUCT MALFUNCTION.
WARNING
!
READ THE FOLLOWING INFORMATION CAREFULLY BEFORE USING THIS PRODUCT
IMPORTANT INFORMATION
ELECTRICAL RATING
Input rating: 100-130V, 50/60Hz, 2.5A max. Output rating:
29VDC, 1.8A.
ELECTRICAL GROUNDING
This product is equipped with a polarized or grounded
electrical power cord. The power cord will only fit into a
grounded, electrical surge protection device (not included)
or a grounded electrical outlet.
WARRANTY WARNING
Do not open any control boxes, motors or remote control
devices (with the exception of the remote control and
power down box battery compartments). The product
warranty will be void if these components are tampered
with. Do not attempt to alter component wiring or adjust
or modify the structure of the product in any way or the
warranty will be void. Any repair or replacement of base
parts must be performed by authorized personnel.
LUBRICATION
This product is designed to be maintenance free. The
lift motors are permanently lubricated and sealed—no
additional lubrication is required. Do not apply lubricant
to lift motor lead screws or any nylon nuts or the base may
inadvertently creep downward from the elevated position.
HOSPITAL USE DISCLAIMER
This base is designed for in-home use only. It is not
approved for hospital use and does not comply with
hospital standards. Do not use this base with tent type
oxygen therapy equipment, or use near explosive gases.
Manufacturer makes no representation or warranty that
the adjustable base constitutes a medical device or is
suitable for medical or therapeutic use.
LOCATION ENVIRONMENT
The level of sound experienced during operation is directly
related to the location environment.
PRODUCT RATINGS
The base lift motors are not designed for continuous use.
Reliable operation and full life expectancy will be realized
as long as the lift motor operation does not exceed five (5)
minutes over a fifty (50) minute period, or approximately
10% duty cycle. Any attempt to circumvent or exceed
product ratings will shorten the life expectancy of the
product and may void the warranty.
The recommended maximum weight (including mattress)
is 700 lb (317 kg) distributed evenly across the base.
This product is not designed to support or lift this amount
in the head or foot sections alone. Note: Exceeding the
recommended weight restrictions could damage the base
and void the warranty.
For best performance, consumers should enter and exit
the adjustable base with the base in the flat (horizontal)
position. Avoid placing entire weight on head or foot
section of the base, including when in the raised position.
DO NOT STAND ON BASE AT ANY TIME.
UL (Underwriters Laboratories) recognized components.
CFR 1633 approved for use with most mattresses.
SMALL CHILDREN / PETS WARNING
After the base is unboxed, immediately dispose of
packaging material as it can smother small children
and pets. To avoid injury, children or pets should not be
allowed to play under or on the base. Children should not
operate this base without adult supervision.
SERVICE REQUIREMENTS
Service technicians are not responsible for moving
furniture, removing headboards and footboards or any
items required to perform maintenance on the base. In
the event the technician is unable to perform service due
to lack of accessibility, the service call will be billed to
the purchaser and the service will have to be rescheduled.
LIFTING/LOWERING MECHANISMS
The lift/lower feature will emit a minimal humming sound
during operation. This is normal.
During operation, the lift arm wheels make contact with
the platform support of the base. This applies slight
tension on the moving components and resonance
is reduced to a minimum level. If excessive noise or
vibration is experienced, reverse the movement action
(up or down) of the base with the remote control. This
should realign the base’s activating mechanisms to the
proper operational position.

4
To assemble adjustable base, complete the following procedure:
ASSEMBLY
STEP 1
Place adjustable base shipping container on solid,
level surface. Remove top section of shipping
container. Remove packing material. Carefully, lift
adjustable base out of bottom section of shipping
container and place on clean surface. Allow for
enough space to unfold base in setup area.
STEP 2
Raise the top section of the adjustable base and
remove hardware / leg boxes.
DUE TO RISK OF INJURY, TWO ADULTS
ARE REQUIRED TO HANDLE AND MOVE
ADJUSTABLE BASE.
WARNING
!
PINCH POINT!
KEEP HANDS AND FINGERS CLEAR OF
HINGES DURING UNFOLDING OF BASE.
WARNING
!
IMAGES SHOWN MAY DIFFER FROM ACTUAL
PRODUCT.
NOTE
STEP 2
Raise the top section of the adjustable base and
remove hardware / leg boxes.
STEP 3
Remove cotter pin and clevis pin from hinge (one on
each side) and fold adjustable base out flat (FIGURE 1).
STEP 4
When base is flat, reinsert clevis pin and cotter pin (one on each side)
(FIGURE 2).
REMOVE
COTTER PIN
REMOVE
CLEVIS PIN
FIGURE 1
REINSERT
CLEVIS PIN
BASE IN FLAT
POSITION
FIGURE 2
REINSERT
COTTER PIN
clevis pin
clevis pin

5
ASSEMBLY
STEP 5
Open the hardware box and verify the following items are
included:
• (6 or 8) Bed legs (depending on base type)
• (1) Remote Control
• (1) Mattress Retainer (zip-tied to base frame)
• (1) Sync Cable (split sizes only)
• (1) Owners Manual
LEG
(6 or 8 pieces,
depending on base
type)
OWNERS MANUAL
MATTRESS
RETAINER
REMOTE CONTROL SYNC CABLE
(split sizes only)

6
ASSEMBLY
STEP 6
Remove remaining packaging. Cut the zip-tie and remove the mattress
retainer. CAUTION: EXERCISE CAUTION WHEN USING SHARP INSTRUMENTS.
If setting up two twin bases to operate as one king base (tandem setup), refer
to Tandem Syncing section of manual before proceeding.
STEP 7
Plug remote control cord into base motor cable (FIGURE 3). Pivot cable
latch downward and snap cable latch in closed position (FIGURE 4). Note:
Align pins before inserting plugs (FIGURE 4). Do not weave cords through
base structure.
REMOTE
CONTROL
CORD
MOTOR
CABLE
LINE UP PINS
ON REMOTE
CONTROL CORD
AND MOTOR
CABLE
FIGURE 3
FIGURE 4 CABLE
LATCH
STEP 8
Plug electrical power cord into a working, grounded
electrical outlet.
Note: An electrical surge protection device is
recommended (not included).
POWER CORDS MUST NOT INTERFERE WITH
ANY ADJUSTABLE BASE MECHANISMS.
DO NOT WEAVE CORDS THROUGH BASE
STRUCTURE.
WARNING
!

7
ASSEMBLY
STEP 9
Screw legs into the leg plates on the base frame (FIGURES 5 and 6). Tighten
securely.
FIGURE 5
FIGURE 6
QUEEN BASES
HAVE 6 LEGS
KING BASES
HAVE 8 LEGS

8
ASSEMBLY
MATTRESS
RETAINER
MATTRESS RETAINER
INSERTS (FOOT END
OF BASE)
FIGURE 7
STEP 10
Rotate base over onto its legs.
STEP 11
Operate remote control to verify base functions properly.
If base does not operate, see the Troubleshooting
section.
STEP 12
Lower base to flat position.
DUE TO RISK OF INJURY, TWO ADULTS
ARE REQUIRED TO HANDLE AND MOVE
ADJUSTABLE BASE.
WARNING
!
STEP 13
Install the mattress retainer. Place one end of the mattress retainer into
the outside hole of the left insert and place the other end into the outside
hole of right insert (FIGURE 7).
STEP 14
Place mattress on base to complete assembly.

9
HEAD DOWN BUTTON
Press and hold to lower
the head section.
HEAD UP BUTTON
Press and hold to
raise the head section.
REMOTE CONTROL FUNCTION

10
TANDEM SYNCING
To tandem sync two bases to operate as one base, perform the followning procedure:
MALE END
(CONNECTS
TO BASE 1)
FEMALE END
(CONNECTS
TO REMOTE
CONTROL)
MALE END
(CONNECTS
TO BASE 2)
FIGURE 8
SYNC CABLE
STEP 1
Locate the sync cable (FIGURE 8).
STEP 2
Unplug both remote control cords from respective
base motor cables.
STEP 3
Plug one male end of sync cable into motor cable of
base 1; place the other male end of sync cable into
motor cable of base 2.
STEP 4
Plug (1) remote control cord into female end of sync
cable. Second remote is not needed. Retain for future
use.
One remote control will now operate both bases.
POWER CORDS MUST NOT INTERFERE WITH
ANY ADJUSTABLE BASE MECHANISMS.
DO NOT WEAVE CORDS THROUGH BASE
STRUCTURE.
WARNING
!

11
TROUBLESHOOTING
If the adjustable base fails to operate, investigate the symptoms and possible solutions
provided in the chart below:
SYMPTOM SOLUTION
• Verify power cord is plugged into a working, grounded
electrical outlet. A grounded, electrical surge protection
device is recommended. Test outlet by plugging in
another working appliance.
• Verify remote control is plugged into the motor.
• Unplug power cord, wait 30 seconds and plug in to
reset electronic components.
• Electrical circuit breaker may be tripped. Check
electrical service breaker box to verify.
• Defective surge protection device or electrical outlet.
Test outlet by plugging in another working appliance.
• Base mechanism may be obstructed. Elevate base and
check for obstruction. Remove obstruction.
• Head section may be too close to the wall.
Remote control will not activate base.
Head section will elevate, but will not return to
the horizontal (flat) position.

CONTENIDO
LEA TODAS LAS INSTRUCCIONES ANTES DE USAR
Si la base ajustable no funciona o si hay partes faltantes,
llame al: 800-888-3078
Por favor no contacte a la tienda minorista o al distribuidor.
Recomendaciones...................................................................................................... 13
Ensamblaje............................................................................................................... 14
Funcionamiento del Control Remoto ............................................................................ 19
Sincronización en Tándem (un control remoto operando ambas bases en tándem)............ 20
Resolución de Problemas ........................................................................................... 21

13
RECOMENDACIONES
PARA UN FUNCIONAMIENTO ÓPTIMO
DE LA BASE AJUSTABLE, UTILICE UN
DISPOSITIVO DE PROTECCIÓN CONTRA
SOBRETENSIÓN ELÉCTRICA CONECTADO A
TIERRA (NO INCLUIDO). NO UTILIZAR TAL
DISPOSITIVO PODRÍA PONER EN RIESGO LA
SEGURIDAD U OCASIONAR EL MAL
FUNCIONAMIENTO DEL PRODUCTO.
ADVERTENCIA
!
LEA DETENIDAMENTE LA SIGUIENTE INFORMACIÓN ANTES DE USAR ESTE PRODUCTO
INFORMACIÓN IMPORTANTE
CARACTERÍSTICAS ELÉCTRICAS
Entrada: 100-130 V, 50/60 Hz, 2.5 A. Máx. Salida: 29 VCC, 1.8 A.
CONEXIÓN A TIERRA
Este producto está equipado con un cable eléctrico conectado a
tierra o polarizado. El cable de alimentación encaja sólo en un
dispositivo de protección contra sobretensión eléctrica puesto a
tierra (no incluido), o en un tomacorriente puesto a tierra.
ADVERTENCIA DE LA GARANTÍA
No abra ninguna caja de control, motor ni dispositivo del
control manual (con la excepción de la caja de desconexión
eléctrica). La garantía del producto perderá validez si se alteran
estos componentes. La garantía del producto perderá validez
si se alteran estos componentes, si se altera el cableado de los
componentes, o si se ajusta o modifica de manera alguna la
estructura del producto. Cualquier reparación o reemplazo de las
partes de la base debe ser realizado por personal autorizado.
LUBRICACIÓN
Este producto está diseñado para no necesitar mantenimiento.
Los motores de elevación están permanentemente lubricados
y sellados, no se necesita lubricación adicional. No aplique
lubricante a los tornillos de avance del motor de elevación ni a
las tuercas de nilón, de lo contrario la cama puede deslizarse
accidentalmente hacia abajo desde la posición elevada.
LIMITACIÓN DE RESPONSABILIDAD EN USOS HOSPITALARIOS
Esta base está diseñada para uso en el hogar únicamente. No
está aprobada para el uso en hospitales y no cumple con las
normas hospitalarias. No use esta base con equipo de terapia de
oxígeno tipo tienda de campaña ni use cerca de gases explosivos.
El fabricante no hace ninguna representación o garantía de que
la base ajustable constituye un dispositivo médico o es adecuado
para uso médico o terapéutico.
ESPECIFICACIONES DEL PRODUCTO
Los motores de elevación de la base no están diseñados para
uso continuo. Logrará un funcionamiento confiable y una
expectativa de vida útil completa siempre que los motores de
elevación no funcionen durante más de cinco (5) minutos en un
período de cincuenta (50) minutos o aproximadamente un 10%
del ciclo de trabajo. Cualquier intento de evadir o exceder las
especificaciones del producto acortará la vida útil del mismo y
puede invalidar la garantía.
El peso restringido recomendado para las bases ajustables es
de 317 kg (700 lb) en todos los tamaños. Este producto no está
diseñado para soportar o elevar esta cantidad sólo en la sección
de la cabeza o de los pies. Nota: Exceder las restricciones
recomendadas en cuanto a peso podría dañar la cama y anular la
garantía.
Para un mejor desempeño, los consumidores deben entrar y salir
de la base ajustable con la base en la posición plana (horizontal).
Evite colocar todo el peso en las secciones de la cabeza o los
pies de la base, incluso cuando esté en la posición elevada. NO
SE PARE EN LA BASE EN NINGÚN MOMENTO.
Componentes fabricados conforme a UL (Underwriters
Laboratories).
CFR 1633 aprobado para el uso con la mayoría de los colchones.
ADVERTENCIA SOBRE NIÑOS PEQUEÑOS Y MASCOTAS
Después de sacar la base de la caja, deseche de inmediato el
material de empacado pues puede asfixiar a niños pequeños
o mascotas. Para evitar lesiones, no debe permitir que niños y
mascotas jueguen abajo o encima de la base. Los niños no deben
operar esta base sin la supervisión de un adulto.
REQUISITOS DE SERVICIO
Los técnicos de servicio no son responsables de mover muebles,
quitar cabeceras y pieceras o cualquier otro artículo requerido
para realizar el mantenimiento a la base. En el caso de que
el técnico no pueda realizar el servicio debido a falta de
accesibilidad, la llamada de servicio se le cobrará al comprador y
el servicio se tendrá que programar para otra fecha.
MECANISMOS DE ELEVACIÓN/DESCENSO
La función de elevación/descenso emitirá un zumbido mínimo
durante la operación. Este sonido es normal.
Durante la operación, las ruedas del brazo de elevación tienen
contacto con el soporte de la plataforma de la base. Esto
aplica un poco de tensión a los componentes móviles y la
resonancia se reduce a un nivel mínimo. Si se experimenta
ruido o vibraciones en exceso, invierta la acción de
movimiento (arriba o abajo) de la base con el control manual.
Esto debe realinear los mecanismos de activación de la base a
la posición de operación apropiada.
ENTORNO DONDE SE ENCUENTRA UBICADO EL EQUIPO
El nivel de sonido experimentado durante el funcionamiento de
la cama se relaciona directamente con el entorno en el que se
encuentra ubicada.

14
DEBIDO AL RIESGO DE LESIONES, SE
REQUIERE DE DOS ADULTOS PARA
MANIPULAR Y MOVER LA BASE AJUSTABLE.
ADVERTENCIA
!
¡ PUNTOS DE COMPRESIÓN !
MANTENGA LAS MANOS Y LOS DEDOS
ALEJADOS DE LAS BISAGRAS MIENTRAS SE
DESPLIEGA LA BASE.
ADVERTENCIA
!
Para montar la base ajustable, realice el siguiente procedimiento:
ENSAMBLAJE
PASO 1
Coloque el contenedor de envío de la base ajustable en una
superficie sólida y nivelada. Retire la sección superior del
contenedor de envío. Retire el material de empaque. Con
cuidado, levante la base ajustable de la sección inferior del
contenedor de envío y colóquela en una superficie limpia.
Deje espacio suficiente para desplegar la base en el área de
configuración.
PASO 2
Levante la sección superior de la base ajustable y retire
las cajas de piezas/patas.
LAS IMÁGENES QUE SE MUESTRAN PUEDEN
DIFERIR DEL PRODUCTO REAL.
NOTA
PASO 3
Retire de la bisagra la chaveta y el pasador de horquilla
(hágalo en ambos lados) y despliegue la base ajustable
hasta que quede plana (FIGURA 1).
PASO 4
Cuando la base esté plana, reinserte el pasador de horquilla y la chaveta (hágalo en
ambos lados) (FIGURA 2).
RETIRE LA
CHAVETA
RETIRE EL PASADOR
DE LA HORQUILLA
FIGURA 1
REINSERTE EL
PASADOR DE
HORQUILLA
BASE EN
POSICIÓN PLANA
FIGURA 2
REINSERTE LA
CHAVETA
pasador de horquilla

15
ENSAMBLAJE
PASO 5
Abra la caja de envió de la base y verifique que se incluyan
los siguientes elementos:
• (6 o 8) Patas de cama (dependiendo del tamaño
de la base)
• (1) Control remoto
• (1) Retenedor de colchón (precintado al bastidor
de la base)
• (1) Cable de sincronización (solo tamaños de dos
piezas)
• (1) Manual del propietario
PATA
(6 o 8 piezas,
dependiendo del
tamaño de la base)
MANUAL DEL PROPIETARIO
RETENEDOR
DE COLCHÓN
CONTROL REMOTO CABLE DE SINCRONIZACIÓN
(solo tamaños de dos piezas

16
ENSAMBLAJE
PASO 6
Retire el embalaje restante. Corte la abrazadera de plástico y quite el retenedor de
colchón. PRECAUCIÓN: TENGA CUIDADO AL UTILIZAR INSTRUMENTOS AFILADOS.
Si configura dos bases gemelas para que funcionen como una base king
(configuración en tándem), consulte la sección Sincronización en Tándem del manual
antes de continuar.
PASO 7
Enchufe el cordón del control remoto en el cable del motor de la base (FIGURA 3).
Gire hacia abajo el gancho pestillo del cable y ajuste el gancho pestillo del cable a la
posición cerrada (FIGURA 4). Nota: Alinee los pines antes de insertar los enchufes
(FIGURA 4). No pase los cables a través de la estructura de la base.
CABLE DE
CONTROL
REMOTO
CABLE DEL
MOTOR
ALINEE LOS PERNOS
EN EL CORDÓN DEL
CONTROL REMOTO Y
EL CABLE DEL MOTOR
FIGURA 3
FIGURA 4 GANCHO PESTILLO
DEL CABLE
LOS CABLES DE ALIMENTACIÓN NO DEBEN
INTERFERIR CON NINGÚN MECANISMO DE
LA BASE AJUSTABLE.
NO PASE LOS CABLES A TRAVÉS DE LA
ESTRUCTURA DE LA BASE.
ADVERTENCIA
!
PASO 8
Enchufe el cable de alimentación eléctrica a un
tomacorriente que funcione y esté conectado a tierra.
Nota: Se recomienda utilizar un dispositivo de protección
contra sobrevoltaje (no incluido).

17
ENSAMBLAJE
PASO 9
Atornille las patas en las placas para patas del bastidor de la base (FIGURAS 5 y 6).
Apriete firmemente.
FIGURA 5
FIGURA 6
LAS BASES QUEEN
TIENEN 6 PATAS
LAS BASES KING
TIENEN 8 PATAS

18
ENSAMBLAJE
PASO 14
Coloque el colchón sobre la base para completar el montaje.
PASO 10
Gire la base sobre sus patas.
PASO 11
Haga funcionar el control remoto para verificar que la base
funcione correctamente. Si la base no funciona, consulte la
sección de resolución de problemas.
PASO 12
Baje la base hasta que quede en posición plana.
PASO 13
Instale el retenedor de colchón. Coloque un extremo del retenedor del colchón en
el orificio exterior del inserto izquierdo y coloque el otro extremo del retenedor del
colchón en el orificio exterior del inserto derecho (FIGURA 7).
DEBIDO AL RIESGO DE LESIONES, SE
REQUIERE DE DOS ADULTOS PARA
MANIPULAR Y MOVER LA BASE AJUSTABLE.
ADVERTENCIA
!
RETENEDOR DE
COLCHÓN
INSERTOS DE RETENCIÓN
DEL COLCHÓN (PIE DE
LA BASE)
FIGURA 7

19
BOTÓN PARA BAJAR LA CABEZA
Oprima y sostenga para bajar la
sección de la cabecera.
BOTÓN PARA SUBIR LA CABEZA
Oprima y sostenga para subir la
sección de la cabecera.
FUNCIÓN DEL CONTROL REMOTO

20
SINCRONIZACIÓN EN TÁNDEM
Si va a sincronizar en tándem dos bases para que operen como una sola, realice el siguiente procedimiento:
PASO 1
Ubique el cable de sincronización (FIGURA 8).
PASO 2
Desconecte ambos cables de los controles remotos de los
respectivos cables de los motores de las bases.
PASO 3
Conecte un extremo del enchufe macho del cable de
sincronización en el cable del motor de la base 1;
coloque el otro extremo del enchufe macho del cable de
sincronización en el cable del motor de la base 2.
PASO 4
Conecte (1) el cable del control remoto dentro del extremo
del enchufe hembra del cable de sincronización. El
segundo control remoto no se necesita. Conservar para uso
futuro.
Ahora, un control remoto operará ambas bases.
LOS CABLES DE ALIMENTACIÓN NO DEBEN
INTERFERIR CON NINGÚN MECANISMO DE
LA BASE AJUSTABLE.
NO PASE LOS CABLES A TRAVÉS DE LA
ESTRUCTURA DE LA BASE.
ADVERTENCIA
!
EXTREMO DEL
ENCHUFE MACHO
(CONECTA A LA
BASE 1)
EXTREMO DEL
ENCHUFE HEMBRA
(CONECTA AL
CONTROL REMOTO)
FIGURA 8
CABLE DE SINCRONIZACIÓN
EXTREMO DEL
ENCHUFE MACHO
(CONECTA A LA
BASE 2)
Table of contents
Languages:
Other Leggett & Platt Lifting System manuals