7
EL CONTROL REMOTO REQUIERE (3) BATERÍAS AAA. PARA ALARGAR LA VIDA DE LAS PILAS,
EL TRANSMISOR APAGA TODAS LAS FUNCIONES AL PRESIONAR CUALQUIER BOTÓN POR MÁS
DE 50 SEGUNDOS.
NOTA
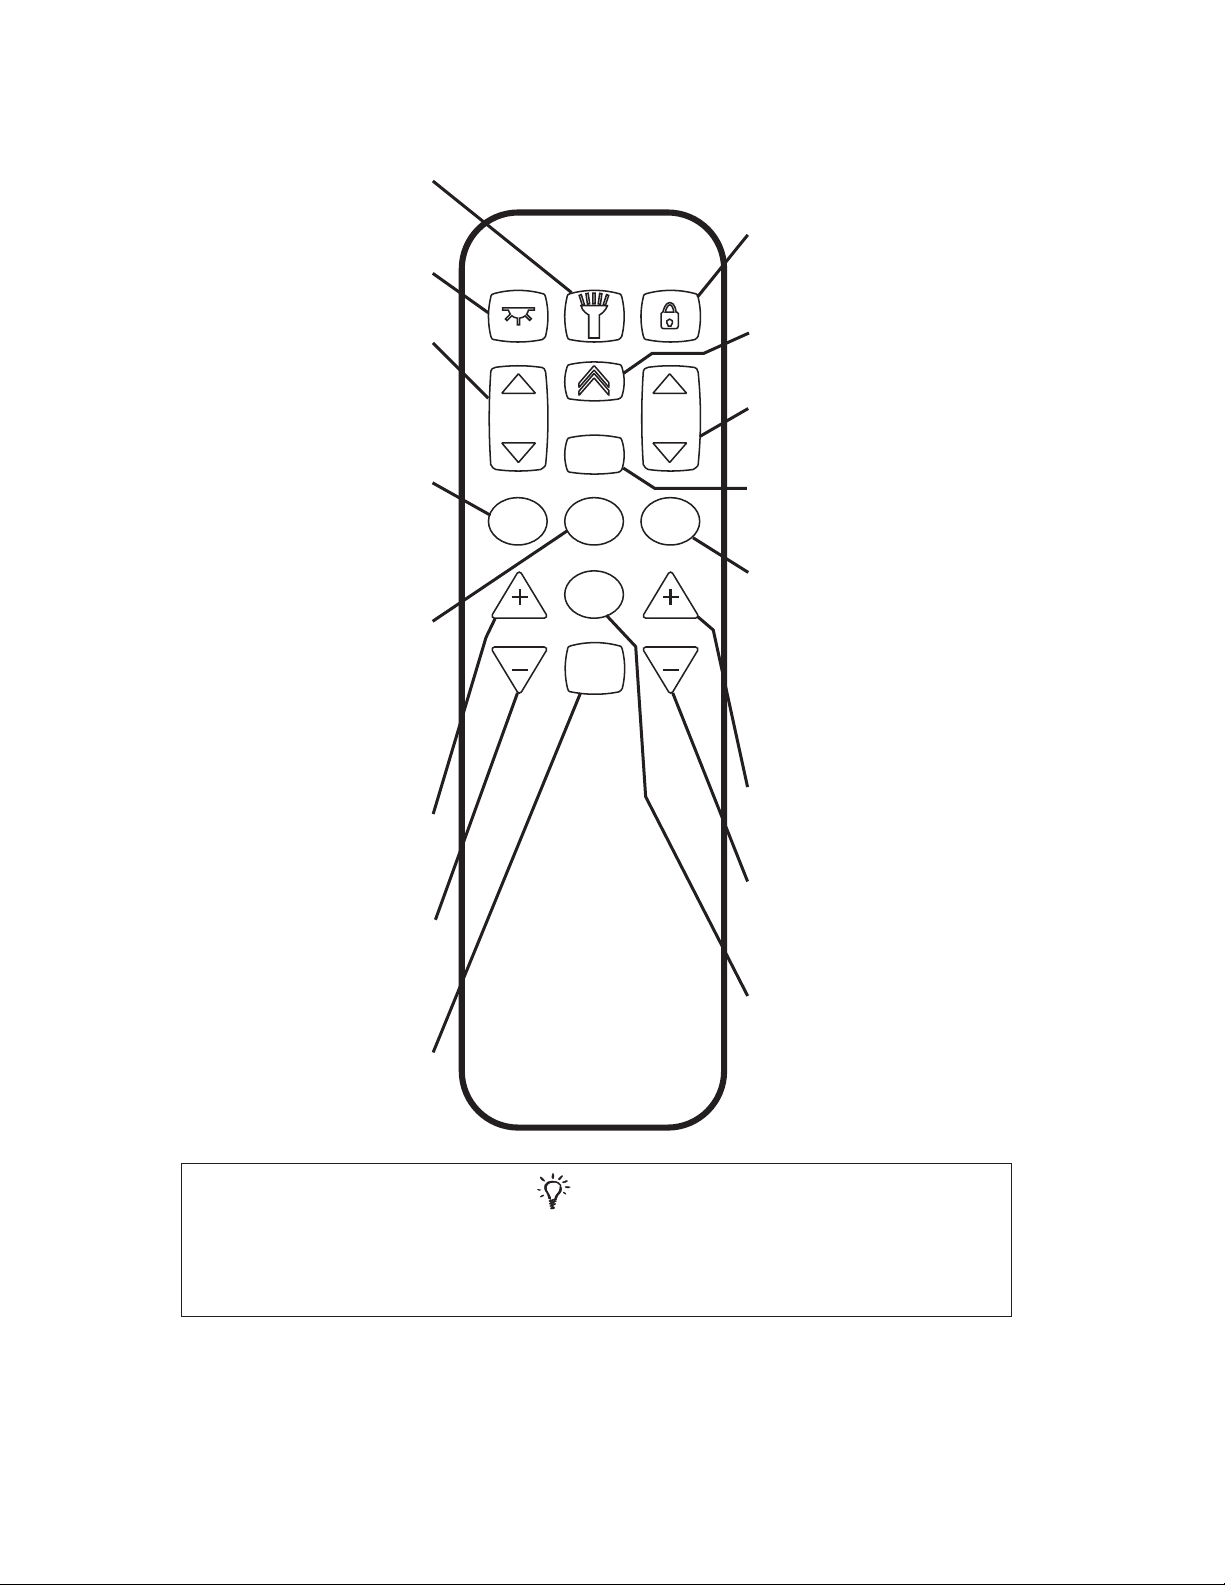
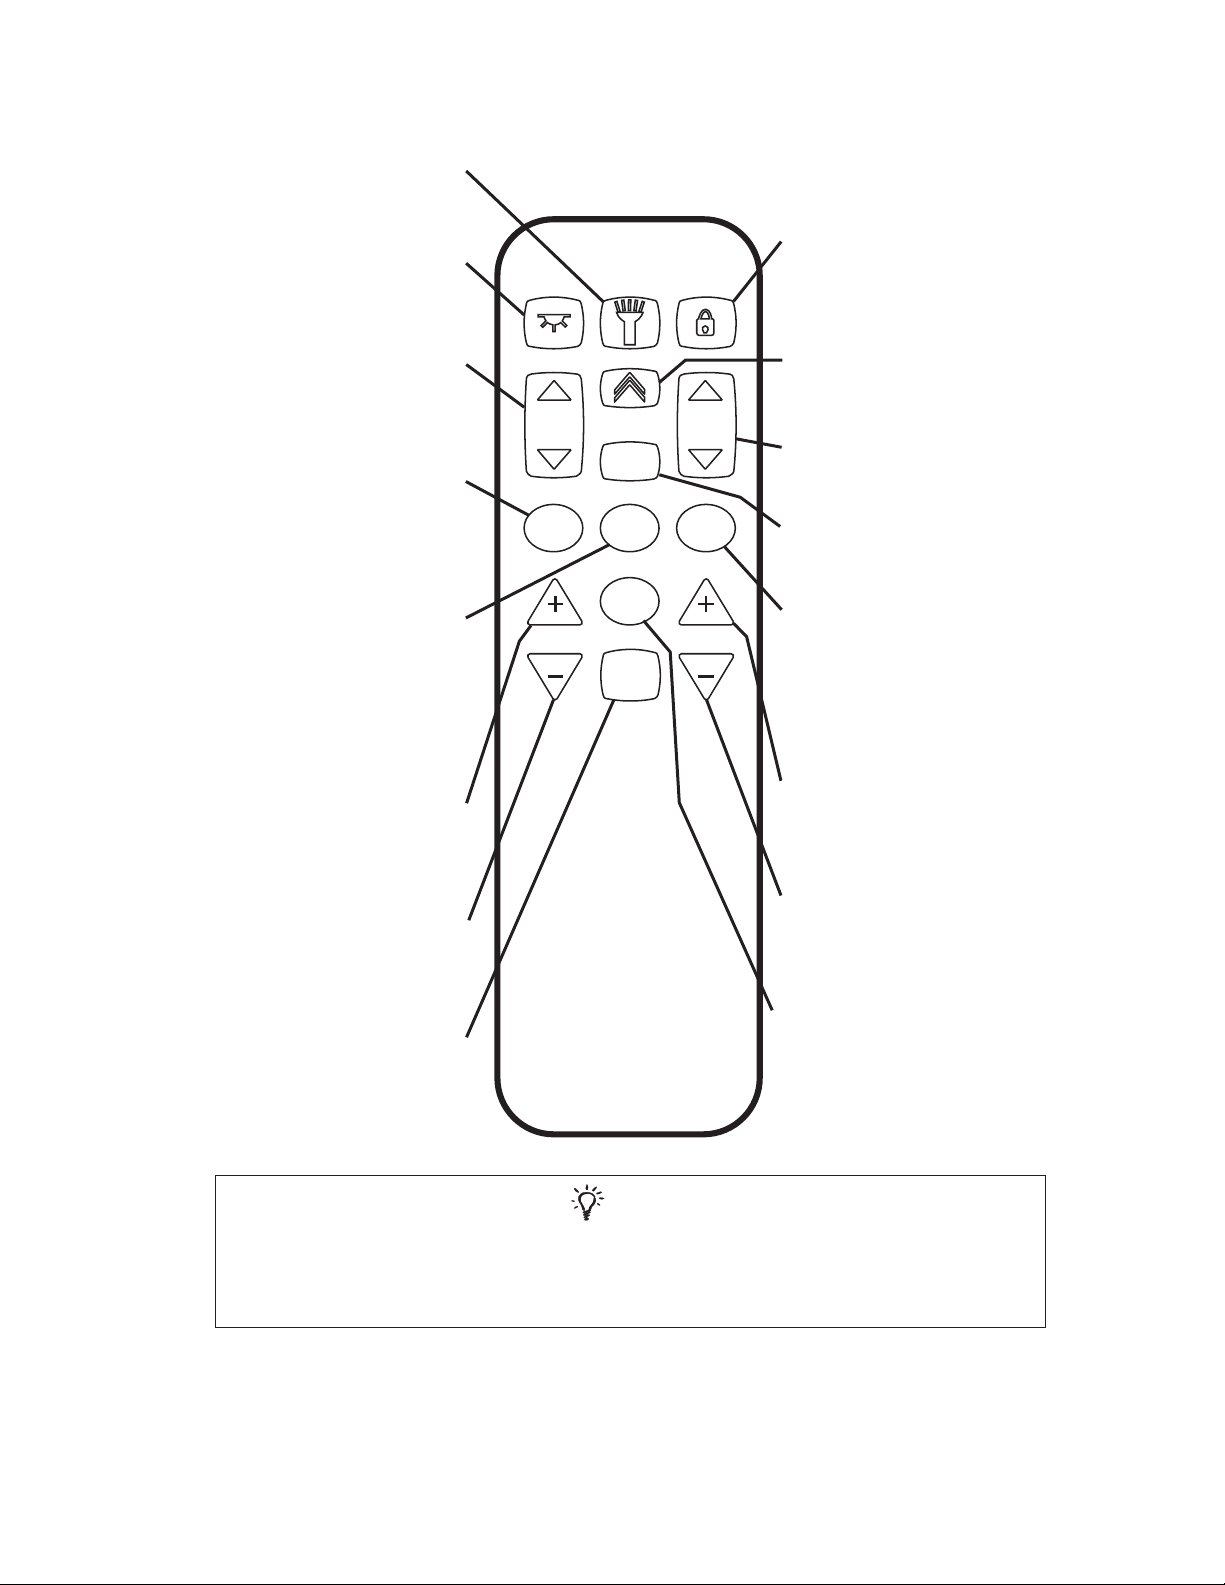
BOTÓN DE MEMORIA
Presione para ajustar la base en la posición
de memoria predeterminada de fábrica. Para
reprogramar, ajuste la base, el masaje y la
iluminación debajo de la cama en la posición
deseada, luego presione simultáneamente
y mantenga presionados los botones de
conguración y memoria hasta escuchar un
sonido audible y luego suelte ambos botones.
BOTÓN ZG (GRAVEDAD CERO)
Presione para ajustar la base en la posición
de gravedad cero predeterminada de fábrica.
Para reprogramar, ajuste la base, el masaje y
la iluminación debajo de la cama en la posición
deseada, luego presione simultáneamente
y mantenga presionados los botones de
conguración y gravedad cero hasta escuchar un
sonido audible y luego suelte ambos botones.
BOTÓN SNORE (RONQUIDOS)
Presione para ajustar la base en la posición
ronquidos predeterminados de fábrica. Para
reprogramar, ajuste la base, el masaje y la
iluminación debajo de la cama en la posición
deseada, luego presione simultáneamente
y mantenga presionados los botones de
conguración y ronquidos hasta escuchar un
sonido audible y luego suelte ambos botones.
BOTÓN PARA INCREMENTAR MASAJE DE CABEZA
Presione para activar el masaje de cabeza.
Presiónelo nuevamente para incrementar la
intensidad del masaje. El masaje se desactiva
automáticamente después de 15 minutos.
BOTÓN PARA DISMINUIR MASAJE DE CABEZA
Una vez ACTIVADO el masaje de cabeza, presione
para disminuir la intensidad del masaje. Cuando el
masaje esté en su intensidad más baja, presiónelo
nuevamente para DESACTIVAR el masaje.
BOTÓN PARA INCREMENTAR MASAJE DE PIES
Presione para activar el masaje de pies. Presiónelo
nuevamente para incrementar la intensidad del
masaje. El masaje se desactiva automáticamente
después de 15 minutos.
BOTÓN PARA DISMINUIR MASAJE DE PIES
Una vez ACTIVADO el masaje de pies, presione
para disminuir la intensidad del masaje. Cuando el
masaje esté en su intensidad más baja, presiónelo
nuevamente para DESACTIVAR el masaje.
BOTÓN DE VIBRACIÓN ONDULATORIA
Presione para activar el masaje en modo de
vibración ondulatoria. Presiónelo nuevamente
para recorrer el ciclo de velocidades de vibración
ondulatoria.
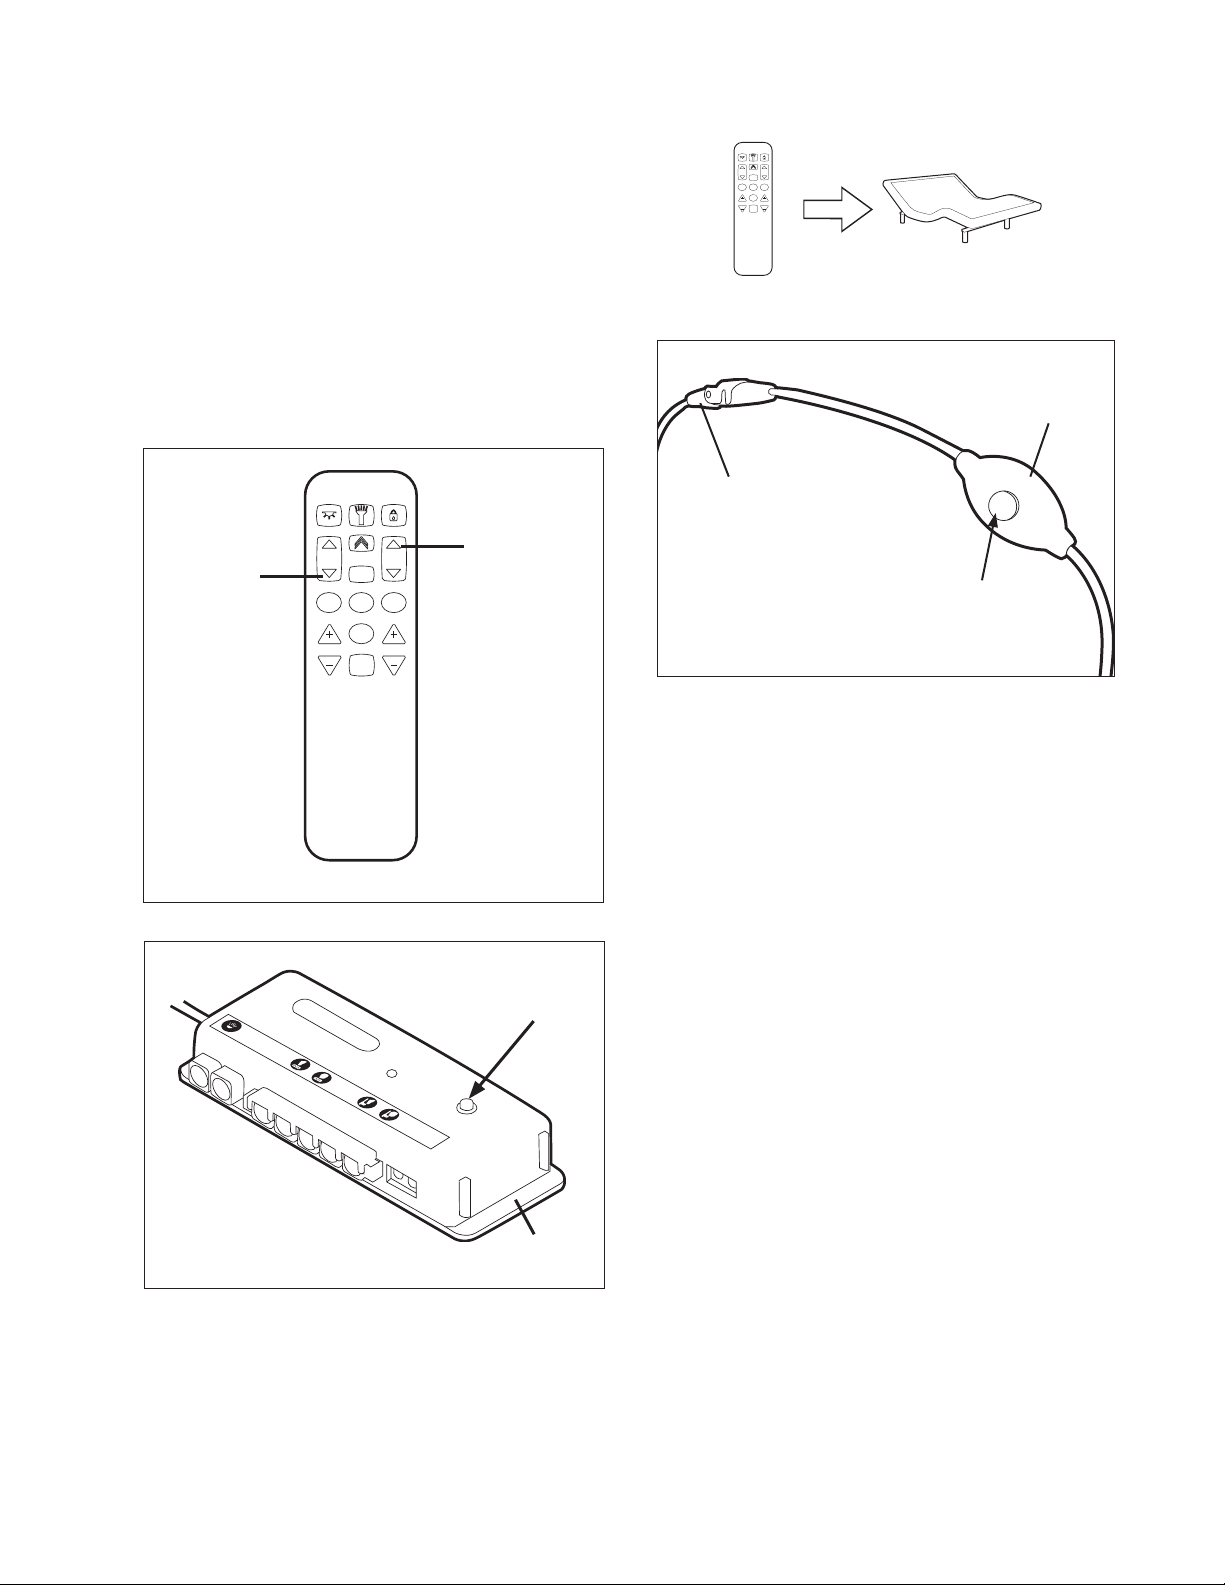
BOTÓN DE CABECERA ARRIBA/ABAJO
Oprima y sostenga para elevar o bajar la sección
de la cabecera.
BOTÓN DE ELEVACIÓN DOBLE (DUAL UP)
Oprima y mantenga presionado para elevar
simultáneamente las secciones de la cabecera y
de los pies.
BOTÓN DE CONFIGURACIÓN
Use para programar los valores preestablecidos
de gravedad cero, ronquido y memoria.
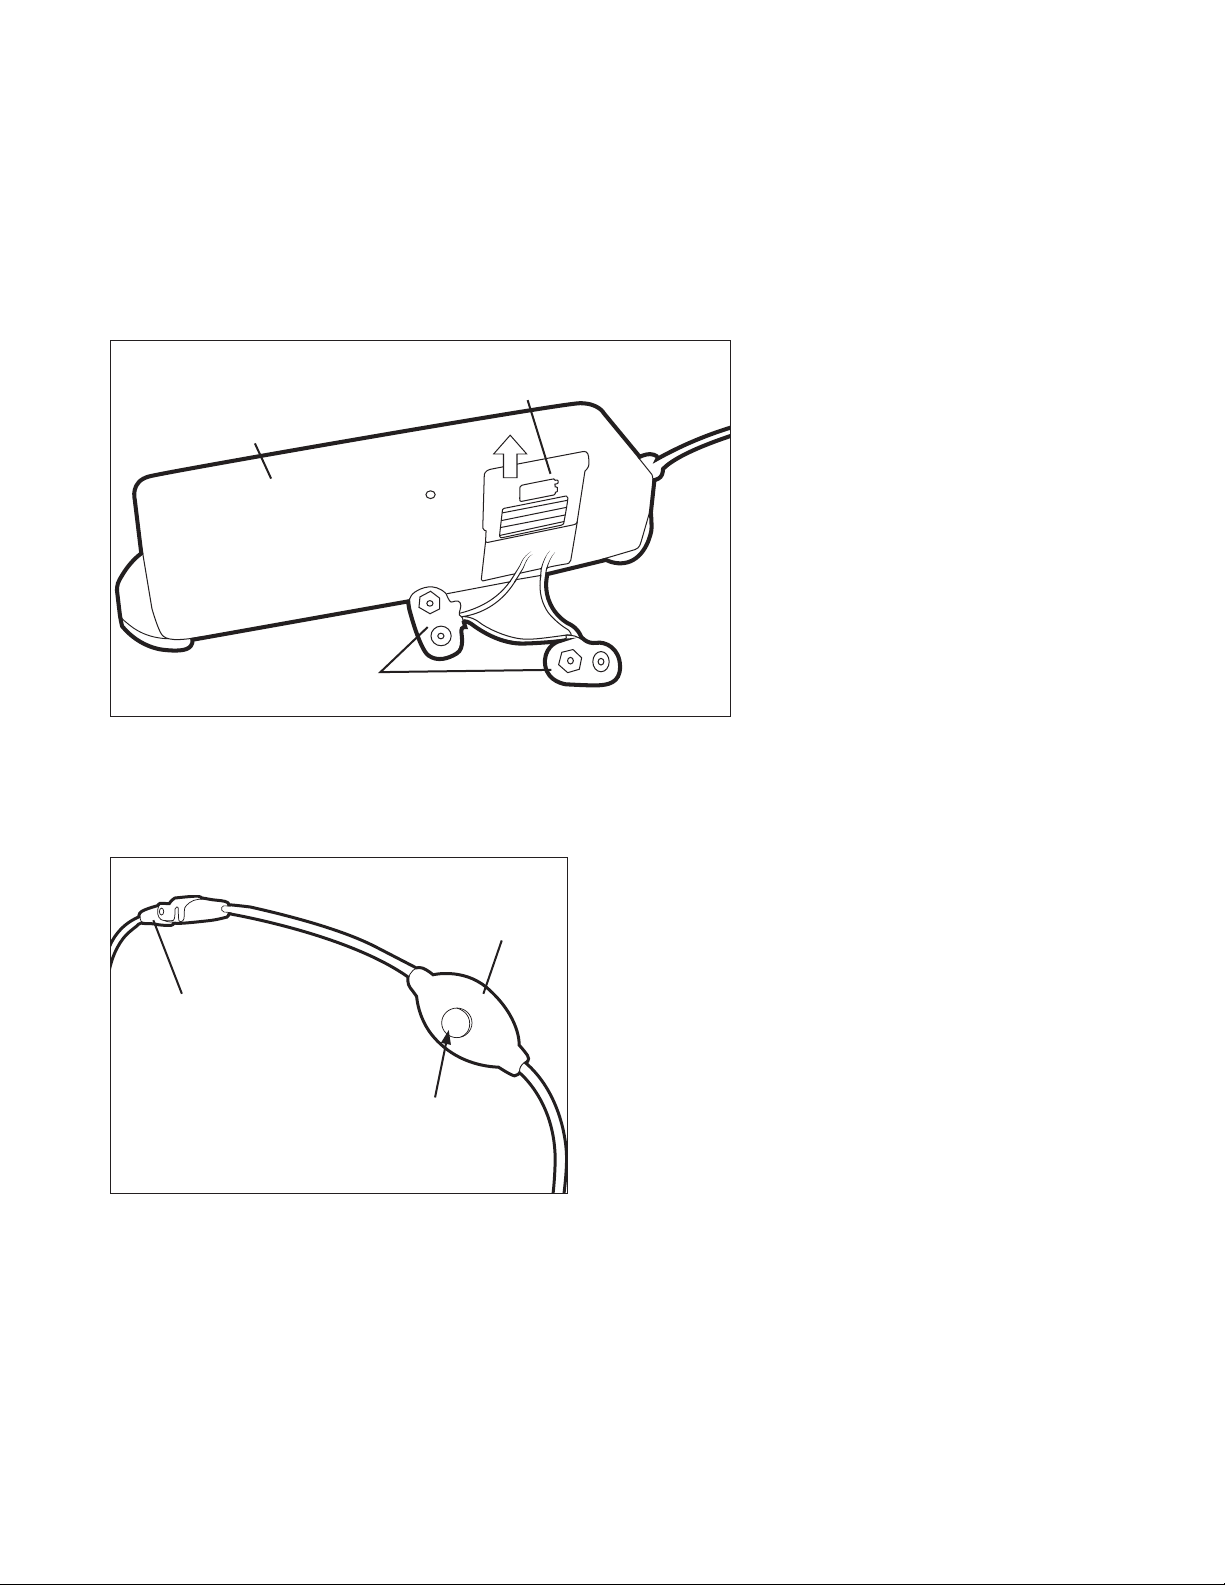
BOTÓN DE LUZ DE DESTELLO
Presione y sostenga para que la luz de destello
se ENCIENDA. Suelte el botón para que la luz de
destello se APAGUE.
BOTÓN PARA LA ILUMINACIÓN DEBAJO DE LA
CAMA
Presione para encender o apagar la iluminación
debajo de la cama.
BOTÓN DE POSICIÓN PLANA (FLAT)
Oprima para bajar la base a la posición nivelada.
Este botón también apaga los masajes.
BOTÓN PARA ELEVAR/BAJAR LOS PIES
Oprima y sostenga para elevar o bajar la sección
de los pies.
BOTÓN LOCK (BLOQUEO)
Para bloquear/desbloquear los botones del control
remoto, presione y mantenga presionado el botón
de bloqueo durante 5 segundos. La retroiluminación
parpadeará 3 veces.
Botones de gravedad cero, ronquidos y memoria:
Para borrar las conguraciones programadas y volver a la conguración de fábrica, presione simultáneamente y mantenga presionados
los botones para BAJAR LA CABECERA y de posición PLANA (FLAT) hasta escuchar un sonido audible y luego suelte los botones.
FUNCIONAMIENTO DEL CONTROL REMOTO
ZG MEMSNORE
FLAT
FOOT
HEAD
SET
MASSAGE
FH
WAVE