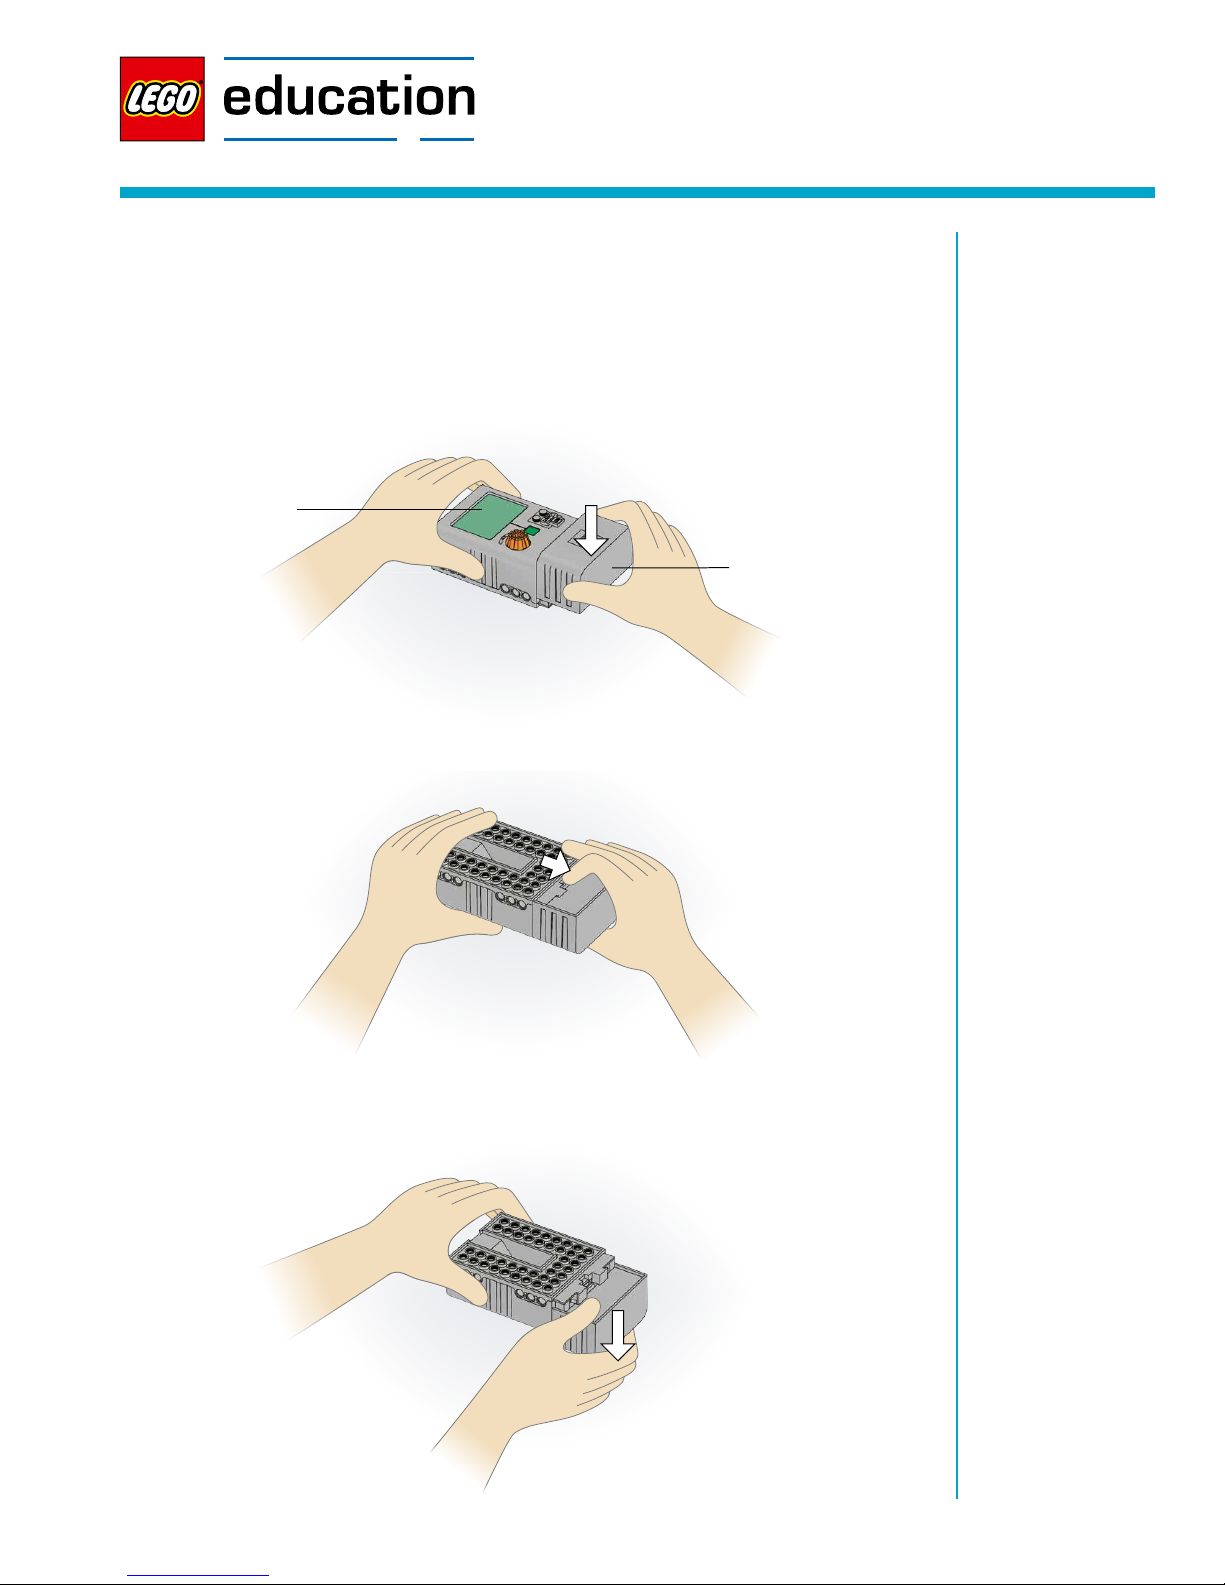
LEGO Energy Meter User manual

LEGO and the LEGO logo are trademarks of the/sont des marques de commerce du/son marcas registradas de LEGO Group.
©2016 The LEGO Group. All rights reserved.
LEGO®Energy Meter
How to Get Started
The Energy Meter consists of two parts: the LEGO®Energy Display and LEGO Energy Storage.
The Energy Storage fits onto the bottom of the Energy Display.
To install the Energy Storage, simply slide it down onto the Energy Display.
To remove the Energy Storage, press the plastic tab on the back and...
press the Energy Storage down to slide it off.
Energy Storage
Energy Display

Energy Meter Element Guide
LEGO and the LEGO logo are trademarks of the/sont des marques de commerce du/son marcas registradas de LEGO Group.
©2016 The LEGO Group. All rights reserved.
How to Get Started
To install the Energy Storage, simply slide it down onto the Energy Display. To remove the Energy
Storage, press the plastic tab located on the rear of the unit and gently press down to slide it off.
• Disconnect after use, to optimize the lifetime of the Energy Storage
• Store at room temperature in a clean, dry place away from heat and frost.
To charge the Energy Meter:
• Connect the Energy Meter either to the LEGO®Power Functions Battery Box supplied with six
new batteries, or the LEGO Power Functions Rechargeable Battery Box in order to charge the
Energy Storage
• Turn on the Energy Meter by pressing the green On/Off button, check that the display is on
• Let the LEGO Power Functions Battery Box, or the LEGO Power Functions Rechargeable Battery
Box charge the Energy Meter by leaving them connected for three hours or until the display
turns off
To discharge the Energy Meter:
• Disconnect all wires and other devices from the Energy Meter
• Press the green On/Off button for 10 seconds until a triangle with an exclamation mark appears
blinking with one second intervals on the display
• Let the Energy Meter remain like this for approximately 1½ hours or until the display turns off
If you wish to cancel the discharge, simply press the On/Off button to turn off the Energy Meter.
To return to normal mode, turn on the Energy Meter again.
For more information see www.LEGOeducation.com

Energy Meter Element Guide
LEGO and the LEGO logo are trademarks of the/sont des marques de commerce du/son marcas registradas de LEGO Group.
©2016 The LEGO Group. All rights reserved.
How It Works
The Energy Meter can measure, store and release generated energy.
Functionality
Energy Display
MINDSTORMS Output Port
For more on how to use the Energy Meter together with LEGO MINDSTORMS, see
www.MINDSTORMSeducation.com
Directional Control Switch
Use the directional control switch to operate the output function. By turning the switch in either
direction with power on you can control the output function. In the middle position, the output
function is off.
On/Off Button
Press the On/Off button down once to turn the Energy Meter on and once more to turn it off.
Pressing down and holding the On/Off button down for two seconds will reset joules
measurement to 0 J.
Output Plug
Connect the E-Motor to the output plug and read the Energy Meter’s power output. A minimum of
1 J must be stored before an output can be drawn from the Energy Meter.
Input Plug
Connect the Solar Panel or E-Motor, used as a generator to the input plug and read the Energy
Meter measurements.
Energy Display
Input plug
Display
Directional control switch
On/Off button
Output plug
Energy Storage
LEGO®MINDSTORMS®
Output port

Energy Meter Element Guide
LEGO and the LEGO logo are trademarks of the/sont des marques de commerce du/son marcas registradas de LEGO Group.
©2016 The LEGO Group. All rights reserved.
Display Measurements
Input voltage Input current Input wattage
Accumulated joules
Output voltage Output current Output wattage
Accumulated Joules
The maximum amount of accumulated joules that can be stored is 100 J. The reading of 100 J
will start blinking on the display with one second intervals when this maximum is reached. Input
voltage will remain measured in the display, but input current and input wattage will go to zero.
The output measurements will depend on the load applied. Pressing down and holding the On/
Off button for two seconds will reset the joules measurement to 0 J. Please note that this is not
an indication of the charged status of the Energy Storage.
Blinking Lightning Symbol
A lightning symbol appears blinking with one second intervals on the display, when one of two
possible situations have occurred:
• If the number of joules remains the same, then you should be able to continue your activity, but
the Energy Storage power level is low and you should soon charge the Energy Meter.
The Energy Storage should be charged before each lesson.
• If the number of joules resets to 0 J and output voltage goes to zero, then the Energy Meter has
been overloaded and must be recharged.
Do not overload the Energy Meter.
Constant Lightning Symbol
A constant lightning symbol appears on the Energy Meter display when the Energy Storage
needs to be charged.
Error
A triangle with an exclamation mark appears on the display when there is an error on the Energy
Storage. Measurements are not valid. Remove the Energy Storage, check the connecting parts
and see if they need cleaning. Reconnect the Energy Storage to the Energy Display and charge
the Energy Meter. If the error triangle reappears, replace with a new Energy Storage.

Energy Meter Element Guide
LEGO and the LEGO logo are trademarks of the/sont des marques de commerce du/son marcas registradas de LEGO Group.
©2016 The LEGO Group. All rights reserved.
Energy Storage
The Energy Storage stores the energy you have generated. Measurements on the Energy Display
are not valid when disconnected from the Energy Storage. The lifespan of the Energy Storage
depends heavily on the way it is used, maintained and stored. Store the Energy Storage at room
temperature in a clean, dry place away from heat. Heat, frost and long discharge periods can
significantly shorten the expected lifespan of the Energy Storage. Disconnect the Energy Storage
after use. It is necessary to recharge the Energy Storage after a long storage period.
Technical Specifications
The Energy Meter will display measurements in the range of:
• 0.0 V to 9.9 V, input voltage
• 0.000 A to 0.200 A, input current
• P = V x I, P = input wattage
• 0 J to 100 J, accumulated joules
• 0.0 V to 9.9 V, output voltage
• 0.000 A to 0.450 A, output current
• P = V x I, P = output wattage
Refresh Rate and Averaging Measurements
Display measurements are refreshed every 0.5 seconds; they are calculated by averaging the
measurements at equal intervals of 100 per 0.5 seconds. Depending on the input, this should give
fairly constant and easily identifiable measurements.
Take Good Care of Your Energy Meter
• Do not bend or push hard on it or elements connected to it
• Do not step on or otherwise place heavy weights on it
• Do not drop it
• Do not short circuit it
• Do not exceed the maximum 10 V supply voltage
• Do not overload the Energy Meter as this will cause it to discharge
• It is not waterproof
• Store at room temperature in a clean, dry place away from heat and frost
• The Energy Storage should be charged before each lesson
Table of contents
Popular Measuring Instrument manuals by other brands

palintest
palintest Pooltest 25 manual

Brigade
Brigade MDR 600 Series Installation and operation guide

Brigade
Brigade MDR-504 Series Installation and operation guide

Draminski
Draminski Twist Grain pro instruction manual

Keithley
Keithley 595 instruction manual

Nidec-Shimpo
Nidec-Shimpo FG-3000 Operation manual