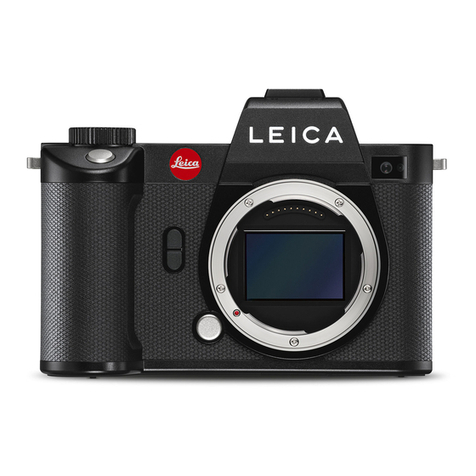
Leica SL2-S User manual

LEICA SL2-S
Firmware update 2.0

EN
2
FIRMWARE 2.0
PHOTO & VIDEO
_NEW: Exposure metering method Highlight-WeightedHighlight-Weighted
_NEW: iDRiDR (Intelligent Dynamic Range) for the optimization of darker areas
_NEW: Anytime manual access to Pixel Mapping
_EXTENDED: Additional settings for image properties (HighlightHighlight and ShadowShadow)
_IMPROVED: Autofocus with improved algorithm
PHOTO
_NEW: Enhanced Live ViewEnhanced Live View as auxiliary function for image composition in the dark
_NEW: Image Overlay
Download the full scope instruction manual here:
https://en.leica-camera.com/Service-Support/Support/Downloads
Please register via the following link if you would like to receive a printed copy of the full scope instruction manual:
www.order-instructions.leica-camera.com

EN
3
VIDEO
_NEW: Follow Focus
_NEW: HEVC video formats (H.265)
_NEW: Segmented Video as protection against data loss
_NEW: Waveform Monitor
_NEW: Configurable reference values (Color Bar and Test Sound)
_NEW: REC Frame for a more detailed display of a running recording
_EXTENDED: Optional import of custom LUT profiles

EN
4
TABLE OF CONTENT
TABLE OF CONTENT...........................................................................4
FIRMWARE UPDATES.........................................................................5
EXPOSURE METERING METHOD “HIGHLIGHT-WEIGHTED” .........8
AUTOMATIC OPTIMIZATION OF DARKER AREAS ........................ 10
PIXEL MAPPING................................................................................12
ADVANCED PARAMETERS FOR IMAGE PROPERTIES.................. 13
LIVE VIEW SETTINGS...................................................................... 16
ENHANCED LIVE VIEW................................................................... 16
PICTURE OVERLAY.......................................................................... 18
TRANSPARENCY ...........................................................................................18
IMAGE SELECTION ....................................................................................... 18
ACTIVATING THE FUNCTION....................................................................... 19
FOLLOW FOCUS.............................................................................. 20
FUNCTION BEHAVIOR..................................................................................20
FOLLOW FOCUS MENU ............................................................................... 21
PREPARATION............................................................................................... 22
CONFIGURING A FOCUS POSITION.................................................................. 22
CHANGING THE FOCUS POSITION ...................................................................23
APPLICATION ................................................................................................23
ACCESS AS NEEDED...........................................................................................24
AUTOMATIC SEQUENCE.....................................................................................24
OTHER SETTINGS .........................................................................................25
SPEED ..................................................................................................................25
SUBSEQUENT FOCUS MODE............................................................................. 25
NEW VIDEO FORMATS.................................................................... 26
SEGMENTED RECORDING.............................................................. 27
WAVEFORM MONITOR (WFM)....................................................... 28
ADJUSTING VISUALIZATION .............................................................................. 29
REFERENCE VALUES ...................................................................... 30
COLOR BAR ...................................................................................................30
TEST SOUND ................................................................................................. 31
APPLICATION ................................................................................................ 31
REC FRAME ...................................................................................... 32
IMPORTING CUSTOM LUT PROFILES ........................................... 34
VIDEO GAMMA..............................................................................................34
HLG SETTINGS ....................................................................................................34
L-LOG SETTINGS.................................................................................................34
SETUP/MANAGEMENT OF LUT PROFILES................................................................ 35
USING LUT PROFILES................................................................................................ 37
EN
5
FIRMWARE UPDATES
Leica is continuously working on the further improvement and
optimization of your camera. Since many camera functions are
entirely controlled by software, some of these improvements and
additions to the functional scope can be installed in retrospect.
Leica offers firmware updates at irregular intervals, which you can
download from our website.
Leica will notify you of any new updates, once you have registered
your camera.
Find out which firmware version is currently installed
▸ Select Camera InformationCamera Information in the main menu
• The current firmware versions are displayed.
More information about registering, firmware updates and how to
download them to your camera, as well as any amendments and
additions to this manual can be found in the customer area of our
website at:
club.leica-camera.com
EXECUTING A FIRMWARE UPDATE
Any interruption of a running firmware update may cause
serious and irreparable damage to your equipment!
You will therefore have to take particular note of the following,
when carrying out a firmware update:
• Do not switch off the camera!
• Do not remove the memory card!
• Do not remove the lens!
Notes
• A warning message will appear if the battery is insufficiently
charged. Recharge the battery and then repeat the process
described above.
• You will find additional device and country-specific registration
marks and numbers in the Camera InformationCamera Information submenu.

EN
6
PREPARATION
▸ Fully charge and insert the rechargeable battery
▸ The second SD memory card (where applicable) must be
removed from the camera
▸ Remove any stored firmware files from the memory card
• We recommend saving any recordings on the memory card
and reformatting it before the update.
(Caution: Loss of data! All data stored on the memory card
will be lost during formatting.)
▸ Download the latest firmware version
▸ Save the download to the memory card
• Store the firmware file in the main directory of the memory
card (not in a sub-directory).
▸ Insert the memory card into the camera
▸ Switch the camera on
UPDATING THE CAMERA FIRMWARE
▸ Carry out preparations
▸ Select Camera InformationCamera Information in the main menu
▸ Select Camera Firmware VersionCamera Firmware Version
▸ Select Start UpdateStart Update
• A prompt with information about the update is displayed.
▸ Check the version information
▸ Select YesYes
• The prompt Save profiles on SD Card?Save profiles on SD Card? appears.
▸ Select YesYes/NoNo
• The update will start automatically.
• The lower status LED will flash during this process.
• Once the process has completed successfully, a relevant
on-screen message and prompt to restart the device will
appear on screen.
▸ Switch the camera off and on again
Note
• Date & time, as well as the preferred language will have to be
set up again after the restart. Relevant prompts will appear on
screen.

EN
7
UPDATING THE LENS FIRMWARE
Where available, you can optionally carry out firmware updates for
lenses. The instructions provided for camera firmware updates
apply.
▸ Carry out preparations
▸ Select Camera InformationCamera Information in the main menu
▸ Select Lens Firmware VersionLens Firmware Version
▸ Select Start UpdateStart Update
• A prompt with information about the camera is displayed.
▸ Check the version information
▸ Select YesYes
• The update will start automatically.
• The lower status LED will flash during this process.
• Once the process has completed successfully, a relevant
on-screen message and prompt to restart the device will
appear on screen.
▸ Switch the camera off and on again
UPDATING THE ADAPTER FIRMWARE
Where available, you can optionally carry out firmware updates for
adapters. The instructions provided for camera firmware updates
apply.
▸ Carry out preparations
▸ Select Camera InformationCamera Information in the main menu
▸ Select Lens Firmware VersionLens Firmware Version
▸ Select Start UpdateStart Update
• A prompt with information about the camera is displayed.
▸ Check the version information
▸ Select YesYes
• The update will start automatically.
• The lower status LED will flash during this process.
• Once the process has completed successfully, a relevant
on-screen message and prompt to restart the device will
appear on screen.
▸ Switch the camera off and on again
Note
• The relevant menu item will only be visible if an adapter is
mounted and active.

EN
8
EXPOSURE METERING METHOD
“HIGHLIGHT-WEIGHTED”
EXPOSURE METERING METHODS
The following exposure metering methods are selectable.
Factory setting: Multi-FieldMulti-Field
Spot
Center-weighted
Highlight-weighted
Multi-field
SPOT
This metering method is concentrated exclusively on a small area
in the center of the image. The metering fields are joined together
when the exposure metering method SpotSpot is combined with the AF
metering methods SpotSpot, FieldField and ZoneZone. Exposure metering will then
occur at the point specified by the AF metering field, even if it is
moved.
CENTER-WEIGHTED
This method considers the entire image field. The subject
elements captured in the center will, however, impact on the
calculation of the exposure value more so than areas around the
edges.
MULTI-FIELD
This metering method is based on the detection of multiple values.
These values are used in an algorithm to calculate an exposure
value appropriate for a good rendering of the assumed main
subject.
HIGHLIGHT-WEIGHTED
This method considers the entire image field. The exposure value
will, however, be adjusted to very bright subject elements. That
prevents the overexposure of central subject elements without
having to measure them individually. This metering method is
particularly useful for subjects that are significantly more brightly
lit than the background (e.g. people in a spotlight) or that reflect
the light significantly (e.g. white clothing).
Multi-Field Highlight-Weighted

EN
9
▸ Select Exposure MeteringExposure Metering in the main menu
▸ Select the desired metering method
(SpotSpot, Center-WeightedCenter-Weighted, Highlight-WeightedHighlight-Weighted, Multi-FieldMulti-Field)
• The selected metering method is displayed in the header line
of the screen image.
Spot metering allows a shifting of the metering field:
▸ Press the joystick in the relevant direction
Notes
• The exposure information (ISO value, aperture, shutter speed
and light balance with exposure compensation scale) will help
to determine the settings required for correct exposure.
• The most important displays (ISO value, aperture and shutter
speed) will also appear in the top display.

EN
10
AUTOMATIC OPTIMIZATION OF DARKER
AREAS
DYNAMIC RANGE
The contrast range of an object comprises all levels of brightness
from the brightest to the darkest point in the image. All levels of
brightness can be captured by the sensor, provided the contrast
range of the object is lower than the dynamic range of the camera.
In case of significant differences of brightness in the object (e.g.
recordings of interior spaces with bright windows in the back-
ground, recordings with subject elements in shadow or directly lit
by the sun, landscapes with dark areas and a very bright sky), the
camera with its limited dynamic range will not be able to map the
entire contrast range of the object. Information in ‘edge areas’ will
be lost (under and overexposure).
Contrast range of a
low-contrast object
Contrast range of a high-contrast object
Dynamic range of the camera
Underexposure Overexposure
This effect is particularly severe in JPG recordings, as they have a
reduced dynamic range and their creation results in a part of the
image data contained in raw data (DNG) to be permanently lost.
Information specifically in the darker areas will usually be severely
reduced, while the contrast in brighter areas will be better
preserved in comparison. Unlike DNG files, which contain all
image information captured by the sensor, a reworking of JPG files
will not have much effect.

EN
11
iDR FUNCTION
The iDRiDR (Intelligent Dynamic Range) function allows an optimization
of the darker areas. Object details become much clearer.
Without iDR With iDR
You can specify beforehand if and to what extent you want to
optimize darker areas (HighHigh, StandardStandard, LowLow, OffOff). In the AutoAuto setting,
the camera will automatically select the right setting depending on
the contrast range of the object.
In addition to that setting, the effect also depends on the exposure
settings. The function will have the strongest effect in combination
with low ISO values and fast shutter speeds. The effect is less
pronounced with higher ISO values and/or slower shutter speeds.
Factory setting: AutoAuto
▸ Select JPG SettingsJPG Settings in the main menu
▸ Select iDRiDR
▸ Select the desired setting
(AutoAuto, HighHigh, StandardStandard, LowLow, OffOff)
Note
• The optimization of darker areas will slightly reduce differentia-
tion in very bright areas.

EN
12
PIXEL MAPPING
Defective pixels may appear on the image sensor of digital
cameras over time. The camera compensates for these defective
pixels automatically by calculating the data captured by other
pixels surrounding defective ones. This feature requires a process
known as “pixel mapping” to recognize and register defective
pixels. The camera does this automatically every two weeks. The
function can also be accessed manually if needed.
▸ Select Camera SettingsCamera Settings in the main menu
▸ Select Pixel MappingPixel Mapping
▸ Select YesYes
• Pixel mapping is executed. The process may take a few
seconds.
• The message Please Restart the CameraPlease Restart the Camera appears.
▸ Switch the camera off and on again

EN
13
ADVANCED PARAMETERS FOR IMAGE
PROPERTIES
The image properties of JPG pictures and video recordings can be
changed easily using several parameters. These are summarized in
pre-configured Film StyleFilm Style profiles. Previously, only setting options
for ContrastContrast, SharpnessSharpness and SaturationSaturation were provided. These
options have now been complemented with the parameters
HighlightHighlight and ShadowShadow. These parameters can be adjusted for all
available profiles (SaturationSaturation only for color profiles).
HIGHLIGHT/SHADOW
Depending on the exposure selected and the dynamic scope of
the object, some details in brighter or darker areas may no longer
be clearly visible. The parameters HighlightHighlight and ShadowShadow allow
differentiated control over very brightly or less brightly lit areas.
Where, for example, part of the object is in shadow, a higher
setting for ShadowShadow can help brighten these areas to make details
more visible. Conversely, existing shadows or particularly bright
areas might be additionally emphasized for reasons of image
composition. Positive values will brighten the targeted areas, while
negative values will darken them.
Note
• The Video StyleVideo Style function is unavailable if any other setting but OffOff
is selected for Video GammaVideo Gamma.
Selecting a profile
▸ Select JPG SettingsJPG Settings in the main menu
▸ Select Film StyleFilm Style
▸ Select a profile
Adjusting a profile
▸ Select JPG SettingsJPG Settings in the main menu
▸ Select Film StyleFilm Style
▸ Select Film Style SettingsFilm Style Settings
▸ Select a profile
▸ Select ContrastContrast/SharpnessSharpness/SaturationSaturation/HighlightHighlight/ShadowShadow
▸ Select the desired level
(-2-2, -1-1, 00, +1+1, +2+2)
▸ Confirm

EN
14
SELECTING SETTINGS
A B C D
A“Back” button
(Exit without saving)
B“Parameter” button
C“Setting” button
D“Confirm” button
(Save and exit)
The operation is slightly different, depending on whether the
settings are done via key control or touch control.

EN
15
Using button control
Navigating between buttons
▸ Press the joystick left/right
• An active button is indicated by a red frame.
Applying setting
▸ Press the joystick up/down
• The button toggles directly between each of the options.
or
▸ Press the joystick
• All selectable options are displayed.
• The “Parameter” button displays the currently set value for
each of the parameter options.
▸ Press the joystick up/down
• An active button is indicated by a red frame.
▸ Press the joystick
• The options are no longer displayed.
Using touch control
▸ Tap the desired button
• All available options are displayed for the buttons
“Parameter” and “Setting”.
• The “Parameter” button displays the currently set value for
each of the parameter options.
▸ Tap the desired alternative
SAVE
▸ Select the “Confirm” button
CANCEL
▸ Select the “Back” button

EN
16
LIVE VIEW SETTINGS
The function Exposure PreviewExposure Preview will now be part of the menu item
Live View SettingsLive View Settings. The Leica SL2-S furthermore receives a Live
View mode which is optimized specifically for very dark recording
situations.
ENHANCED LIVE VIEW
Image composition is often difficult in very dark environments (e.g.
at night), as the objects are barely visible. The function
Enhanced Live ViewEnhanced Live View will assist the image composition in such
situations. The image is enhanced in Live View based on a
significant increase in the ISO value and a reduced refresh rate.
Picture quality will not be impacted. Due to technical issues, there
will, however, be image noise and severe tracer effects in Live View
mode. This function will only be active in very low ambient light.
▸ Select Live View SettingsLive View Settings in the main menu
▸ Select Enhanced Live ViewEnhanced Live View
▸ Select OnOn/OffOff
Notes
• The function will be inactive even if Enhanced Live ViewEnhanced Live View is set to OnOn
if there is sufficient ambient light.
• In AF mode, the function Enhanced Live ViewEnhanced Live View will be intermittently
inactive during range metering.
• Focus PeakingFocus Peaking will be unavailable when Enhanced Live ViewEnhanced Live View is set
to OnOn.
• Depending on the selected exposure mode and other settings,
Live View will display an exposure preview when the shutter
button is tapped and held (see section “Exposure Control” in
the long-form manual).

EN
17

EN
18
PICTURE OVERLAY
Leica SL2-S allows a transparent overlay of previous pictures as
an image composition tool. That way, objects can be recorded
from the exact same position at different times, or various objects
can be aligned exactly against the same background in multiple
shooting sessions. The transparent overlay image will not be
visible in the resulting picture.
One usage scenario would be the creation of an image series in
front of a tree across an entire year. The precise alignment of the
images would also allow the creation of a time lapse recording
from those images.
Overlay image View with transparent
image overlay
TRANSPARENCY
The transparency of the overlay image can be adjusted in line with
e.g. lighting conditions.
▸ Select Image OverlayImage Overlay in the main menu
▸ Select TransparencyTransparency
▸ Select HighHigh/LowLow
IMAGE SELECTION
Any image from the memory card can be selected for the image
overlay.
▸ Select Image OverlayImage Overlay in the main menu
▸ Select Choose Overlay ImageChoose Overlay Image
• The Image Selection display appears.
• In Image Selection view, all recorded images appear in full
screen mode. An overview of all images in thumbnail size is
not available.

EN
19
Browsing through the images
▸ Press the joystick left/right
or
▸ Turn the thumbwheel
or
▸ Swipe to the left or right
Selecting a recorded image
▸ Press the thumbwheel / the joystick
or
▸ Directly select the control element “Confirm”
Resetting the function when switching off the camera
The function settings can optionally be reset when switching off
the camera.
▸ Select Image OverlayImage Overlay in the main menu
▸ Select Reset on Turn OffReset on Turn Off
▸ Select OnOn/OffOff
• The image selection and the setting for Use Overlay ImageUse Overlay Image will
remain intact after the camera is switched off if OffOff is
selected.
ACTIVATING THE FUNCTION
▸ Select Image OverlayImage Overlay in the main menu
▸ Select Use Overlay ImageUse Overlay Image
▸ Select OnOn/OffOff

EN
20
FOLLOW FOCUS
This function facilitates automatic transitions to specified focus
settings (focus positions). Up to three such focus positions can be
pre-configured and optionally be set up with a delay time. When a
focus position is accessed, the camera will automatically focus on
the set distance. The transition will then be achieved smoothly and
with a configurable speed. That way, soft, almost unnoticeable
transitions are created. Prerequisite is that the relevant distances
are known beforehand.
The specified focus positions can be accessed individually or in an
automated sequence.
▸ Select FocusingFocusing in the main menu
▸ Select Focus ModeFocus Mode
▸ Select Follow FocusFollow Focus
▸ Select Focus PositionFocus Position
• “Follow Focus” is activated. The Follow Focus menu appears.
• The Follow Focus menu remains visible until the function is
exited.
FUNCTION BEHAVIOR
The function continues to run regardless of whether the camera is
currently recording. All operating procedures described in the
following can therefore also occur while actively recording. It is
also possible to start and stop a recording during an active focus
sequence, or to exit the Follow Focus menu while recording.
Notes
• The following limitations apply while the function is active:
– Focus ring and autofocus are deactivated.
– The FN buttons are locked.
– EVF is unavailable.
• Follow FocusFollow Focus is not available under the following conditions:
– Recordings in slow motion
– When using a lens adapter
– When using MF lenses
– When using lenses with AF/MF switch if the MF setting is
selected
Other manuals for SL2-S
4
Table of contents
Other Leica Digital Camera manuals

Leica
Leica M 10 User manual

Leica
Leica Digital-Modul R User manual

Leica
Leica X2 User manual

Leica
Leica SL2 User manual

Leica
Leica M Monochrom User manual

Leica
Leica X Vario User manual

Leica
Leica CM User manual

Leica
Leica S User manual

Leica
Leica 6376 User manual

Leica
Leica M10- P ASC 100 Edition User manual