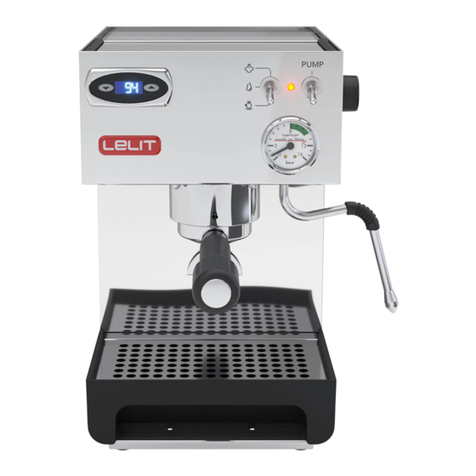
Lelit PL162T-EU Service manual

Extended guide
EXTRA
content
*PL162T-EU PL162T-AUS PL162T-120 PL162T-100
230 V
50 Hz
240 V
50 Hz
120 V
60 Hz
100 V
50/60 Hz
Type E+F Type I Type B Type B

2
LELIT Bianca - PL162T
THANK YOU FOR CHOOSING
A LELIT PRODUCT
Visit our “LELIT” YouTube channel for insights,
tutorials, tips and tricks.
Save the box and all
the packaging material!
LELIT has studied the external and internal pack-
aging of your coffee machine to help you re-use it
in case of maintenance or repair need.

3
Extended guide
Index
1. Main specications 4
2. Product overview 6
3. Factory settings 8
4. Equipment box 8
5. Packing 10
6. First start-up 10
7. Connection to the water mains 11
8. How to install the water softener lter 12
9. Espresso and coffee 12
10. Steam and hot water 14
11. Energy saving modes 14
12. Functioning modes 15
13. Technical menu 20
14. The art of espresso coffee 22
15. Limescale prevention 26
16. Daily cleaning 26
17. Weekly cleaning 27
18. Annual cleaning 28
19. Most common problems 29
20. Warranty terms 31

4
LELIT Bianca - PL162T
1. Main specifications
Paddle
Allows to change, in real time, the ow of the water during
extraction to regulate pressure manually for the best possible
result in the cup with every type of coffee blend.
Pre-infusion with programmable
parameters
To moisten the coffee for a few seconds before the start of the
actual brewing stage. This compacts the coffee powder and
improves the ow of coffee.
Flow programmable parameters
Through the LCC, the water ow can be set and automatically
replicated every at extraction.
LCC
To adjust the boiler temperature, control the perfect settings for
coffee and steam.
Stainless steel
For maximum hygiene in the kitchen and easy cleaning of the ap-
pliance. A simple wipe with a microber cloth and your machine
will shine again.
Coffee slide
An innovative dispensing spout that can be used for both one or
two cups and that allows the user to see the coffee cream on its
way towards the cup.

5
Extended guide
Dual boiler
Two separate boilers, one for steam and hot water and one for
brewing. This system allows for more temperature stability and
enables dispensing steam and coffee simultaneously.
Energy saving
Multiple modes can be activated to optimise the energy
consumption of the machine to match your routine. By default,
after 30 minutes of inactivity, the machine goes in standy-by mode.
ATTENTION:
Read the safety notes carefully before using this
product.

6
LELIT Bianca - PL162T
2. Product overview
1. Water tank cover
2. Water tank
3. Hot surface with grate for cups
4. Steam dispensing knob
5. Multi-directional, anti-burn
steam wand
6. ON/OFF main switch (with
lighted frame)
7. LCC (LELIT Control Center)
8. Brewing group
9. Paddle
10. Hot water dispensing knob
11. Brewing group manometer
12. Multi-directional, anti-burn hot
water wand
13. Brewing group lever
14. Manometer for steam and pump
pressure
15. Grate for drip tray
16. Drip tray

7
Extended guide
PIC. 2
Paddle
LELIT paddle enables the experience of preparing high quality coffees,
reaching unique extraction results. The water ow can be changed in every
moment of the coffee delivery, until the maximum pressure is reached.
1
2
3
4
5
6
7
8
9
10
11
12
13
14
15
16
9

8
LELIT Bianca - PL162T
4. Equipment box
A. 1 dose (9-11g) coffee lter
B. 2 doses (14-18g) coffee lter
C. 2 doses (18-21g) coffee lter
D. Blind lter for backushing
E. 4-holes steam wand tip
F. Filterholder for 1 cup and 2 cups
lters and bottomless lterholder
G. Accessories for water mains
connection
H. Raiser for espresso cups
I. First cleaning kit (with 3 deter-
gent powder single-dose bags
and 1 single-dose bottle)
J. Tamper in stainless steel with
aluminium handle (PLA481A)
K. Plastic spoon for coffee powder
L. Power cord
M. LELIT 70 l water softener lter
N. Brush for group head cleaning
O. LELIT microber cloth
3. Factory settings
Coffee boiler temperature
95°C
Steam boiler temperature
125°C
Steam boiler
ON
Default temperature scale
Celsius
Programmable
pre-infusion times
OFF
Programmable low ow
times
OFF
Brew temperature off-set
0°C
Sleepy mode
OFF
Stand-by
ON

9
Extended guide
Discover all the barista tools and the necessary
accessories to become a true barista.
Visit our website LELIT.COM
A
HK
L
J
M
N
O
B
C
D
E
I
F
G

10
LELIT Bianca - PL162T
5. Packing
The packaging of your LELIT coffee machine has been studied and produced
to be re-used. Use the original box and all the packaging elements in case you
need to send the machine back to your reseller or to an authorized service cen-
tre, for ordinary or extraordinary maintenance. On our YouTube channel you will
nd a video on how to pack the machine properly, using the original box and
packaging material. Please also consult your LELIT reseller before shipping the
machine away and follow his eventual specic instructions.
6. First start-up
6.36.1 6.2
FRONT
Attention. Remove the machine from its packaging and follow the instruc-
tions printed on the box.
Attention. The unit weighs 26.5 kg
Place the machine on a solid, at, and dry surface and make sure the appliance
is stable; if needed, screw/unscrew the feet to adjust the position of the machine.
Fill the water tank (2) with room temperature water up to the indicated maximum
level and insert it in its seating (Pic 6.1).
Note. The machine has been designed to be also connected directly to the
water mains (see accessories in the equipment box). For this type of connection,
we recommend contacting an authorized technician.
Attention. Make sure that the paddle (9) is positioned completely to the
right to allow the passage of the water. The group lever (13) has 2 functional
positions: completely up for open and completely down for closed. Make sure
that the group lever is completely down.

11
Extended guide
Use the power cord (L) to connect the machine to the electrical mains and turn
ON the machine by pressing the ON/OFF switch (6) (Pic 6.2). Once the display
shows the LELIT logo, follow the instructions that appear on the LCC (7): lift the
group lever (13), wait for the countdown (30 seconds) to nish and return the
group lever (13) in its original position. Wait until the bar is fully loaded and “OK”
appears on the display (less than 24 minutes).
The hydraulic circuit will need maximum 4 minutes from the 1st turn on to get
lled with water.
Now the hydraulic circuit is lled up. The machine will start heating the water to
reach the pre-set values. This operation requires maximum 24 minutes.
Note. It may happen that the LCC (7) shows to rell the water tank. Follow
the instruction to ll the hydraulic circuit correctly.
Once the water temperature has reached the pre-set values and the hydraulic
circuit is lled up, the LCC (7) will show the temperature inside the coffee boiler
and a coffee cup icon (Pic 6.3).
Attention. During the heating phase, a small quantity of water and steam will
drain in the tray (16). This is normal and conrms the machine correct functioning.
7. Connection to the water mains
The LELIT Bianca can also be connected to the water mains. The equipment
box contains the necessary components, but we suggest you contact a special-
ized technician for this operation and follow the instructions supplied with the
machine, our technical sheet #7900190 (inserted in the equipment box with the
pieces for the connection).
The water prole used with the coffee machine is a very important factor, and it
inuences the result in the cup and the machine performance in time. Below you
can see the prole that we suggest for a good and stable extraction:
Parameter Range
Chlorine (ppm Cl2) 0
pH 6,5 - 7,5
Total Hardness (ppm CaCO3) 0 - 110
Carbonate Hardness (ppm CaCO3) 40 - 75
Chloride (ppm Cl-) < 30
Sulphate (ppm SO4) < 50

12
LELIT Bianca - PL162T
8. How to install the water softener
filter
8.1
min
3
8.2 8.3
1
2
Attention. Before installing the water softener lter (M), follow the instruc-
tion for the rst start-up of the machine. The hydraulic circuit must be lled up.
Before installing the water softener lter in the water tank, immerse the lter (M)
in a jug full of water for about 3 minutes to eliminate the air inside the lter that
may cause a machine disfunction (Pic 8.1).
Take out the water tank (2) and remove the black plastic support placed on the
bottom of the tank. Insert the lter (M) in the bigger hole of the support, remove the
charge tube from the small plastic lter and x it on the nozzle of the lter (Pic 8.2).
Re-place the support in its seating on the bottom of the tank (2), rinse the tank
carefully, ll it with water and insert the tank in its seating (Pic 8.3).
9. Espresso and coffee
9.1 9.2
1
29.3
Note. Even though the machine is immediately ready to dispense espresso
coffee, it might take a few tries before getting the perfect cup of coffee.

13
Extended guide
Choose the coffee lter (a,b,c), insert it into the lterholder (F) and ll it with ad-
equate quantity of ground coffee. Use the tamper (J) to press the coffee powder
in the lterholder. Fix the lterholder into the brewing group (8) and make sure
the handle is aligned with the padlock symbol present on the group (Pic 9.1).
Place the cup/s under the lerholder (F) and lift the group lever (13) to start
brewing (Pic 9.2).
Attention. Make sure that the paddle (9) is positioned completely to the
right to allow the passage of the water.
9.4
OK
By turning the paddle (9), you can change the water
ow, hence the pressure, on the coffee to obtain the
desired extraction prole. The pressure value will
be shown on the manometer (11) (Pic 9.3).
Return the group lever (13) to its initial position to
stop the extraction (Pic 9.4).
Take out the lterholder (F) and empty the lter after
every coffee extraction.
Note. We suggest you leave the lterholder inserted into the brewing group
to help harmonize the temperature between the group and the lterholder com-
plete of the lter.
Attention. Do not remove or loosen the lterholder from the brewing group
during the coffee extraction to avoid burn risks caused by hot water leaks.
Note. If you want to track any thermal uctuations, press twice the but-
ton while the lever is lifted to show the temperature of the coffee boiler during
extractions.

14
LELIT Bianca - PL162T
10. Steam and hot water
10.1 Steam. Open the steam knob (4) by turning it anti-
clockwise (Pic 10.1), with the steam wand (5) point-
ed on the drip tray (16), to drain the small quantity of
water.
When the steam comes out close the knob (4).
Place the milk jug, lled up to the beginning of the
spout, under the steam wand (5) and open again
the steam knob (4).
Once you have obtained the desired result, turn the
knob (4) clockwise to stop the function.
Attention. Clean the steam wand (5) after every use by pointing the steam
wand to the drip tray (16) and dispensing some steam. Thoroughly clean the
wand (5) with a sponge or clean cloth.
10.2 Hot water. Place a jug under the hot water wand
(12) and open the hot water knob (10) by turning it
anticlockwise (Pic 10.2).
Once you have obtained the desired result, turn the
knob (10) clockwise to stop the function.
Attention. Never place hands or other body parts under the steam (5) or hot
water (12) wand. Burn/Scald risks.
11. Energy saving modes
LELIT Bianca has multiple states that can be activated and deactivated to match
your routine with the minimum energy consumption possible.
All in all, what LELIT Technical Department and Lab suggest is to follow what is
more coherent with your routines. Additionally, if you leave the machine unused
for 3+ days, we suggest you rinse the system before starting brewing again and
turn off the machine so that all the components last longer, creating less waste.

15
Extended guide
Screen saver. Once sleepy mode and stand-by are deactivated, but you still
want to prevent the wear of the LED display, the screen saver is automatically
activated.
On the LCC, a square starts moving around. Everything works correctly accord-
ing to set parameters and temperatures, but on the display the coffee boiler
temperature is replaced by the square moving around.
Sleepy mode. The sleepy mode is a machine state where the steam boiler is
turned off and the coffee boiler goes down to 70°C. You can choose when sleepy
mode is activated by setting the time on the LCC (from 30 to 540 minutes).
Stand-by. After 30 minutes of inactivity, the machine automatically goes into
stand-by mode. The LCC display and the heating elements are disabled, and the
ON/OFF button starts ashing.
Note. LELIT Technical team and lab suggest you turn ON and OFF the
machine according to your needs to optimise the energy consumption of your
machine.
12. Functioning modes
The LCC is the brain of the LELIT machines. In LELIT Bianca – PL162T, you
can nd all the functions that can be managed through setting the parameters
in the LCC.
How to adjust the LCC settings:
1. Press the button to enter the menu and scroll through the menu
2. Press the button to change the setting, it will start ashing
3. Change its value and/or state by using the and buttons
4. 3 seconds after the last press of any button, LCC stores the data and
exits from the menu
Note. If you wish to reset the LCC, with the machine OFF, keep the right
key/button pressed, turn the machine ON and wait until the display shows
PRS then turn the machine OFF again.

16
LELIT Bianca - PL162T
List of the parameters present in the LCC:
Parameter Variable value Parameter Variable value
Pre-infusion
time ON From 1 sec to 20 sec Pre-infusion
time OFF From 1 sec to 20 sec
Low ow start From 1 sec to 20 sec Low ow nal From 1 sec to 20 sec
Brew
temperature
off-set
± 20°C Coffee boiler
temperature From 80°C to 115°C
Steam boiler
temperature From 115°C to 135°C Steam boiler ON/OFF
Sleepy mode From 30 minutes to
540 minutes
Temperature
unit °C/°F
Partial/Total doses: You can check the number of the total doses that you
brewed with LELIT Bianca. The software counts as one dose any extraction
longer than 10 seconds.
Please keep in mind that this number can’t be reset, and it plays a fundamental
role in maintenance as it suggests and justies the wear of some parts.
What LELIT Technical Department and Lab suggest is to use the partial number
of doses as a reminder of when to change some parts, such as the grouphead
gasket, the anti-vacuum valve and the safety valve.
Pre-infusion
LELIT Bianca can perform pre-infusion. It is the initial phase of the extraction,
and it moistens the coffee puck for a few seconds before the start of the actual
brewing phase. This compacts the coffee powder and makes the ow of the
coffee uniform.
Pre-infusion time ON: This value refers to the starting second of this functioning
mode.
Pre-infusion time OFF: This value refers to the length of this functioning mode.
Once the pre-infusion times (both “time ON” and “time OFF”) have been pro-
grammed, you can start brewing: once the lever is lifted, the pump will be acti-
vated for the previously programmed “time ON” in order to wet the coffee puck.
Afterwards, the pump will stop working for the previously programmed “time
OFF”. Once the “time OFF” elapsed, the pump starts working normally again.

17
Extended guide
Low flow
The design of the paddle is a LELIT invention implemented in the semi-profes-
sional machines for domestic use.
It is a handle placed on the brewing group that can rotate 200°. While rotating,
it gradually increases or decreases the water ow inside the brewing group,
enabling the highest, manual personalization of every single phase of the coffee
extraction. The water ow, hence, the pressure, can be changed in every mo-
ment of the coffee delivery, until the lever is lowered.
This gives the possibility to get the best out of every coffee blend, managing the
main palate sensations of body, acidity, bitterness, and astringency according
to the different tastes and to your personality. The LELIT user is thus able to
make the most of the characteristics of each coffee type, even the most prized
mono-origin blends, that will express themselves at the best in their fullness.
In the LCC, you can nd two parameters that manage the water ow, hence the
pressure, during coffee brewing:
Low ow start: This value refers to the time slot from the beginning of the brew-
ing process up until the set value.
Low ow nal: This value refers to the time slot from the set value up until the
end of the brewing process.
Low ow and Pre-infusion can be combined to follow the most complex brew-
ing prole. Below, you can see how the water ow changes according to the set
parameters and the extraction time.
Attention.
The graphs below show examples of extraction with NO paddle
action.
Note. These graphs are for educational purposes only.

18
LELIT Bianca - PL162T
There are 4 main situations:
1. Full ow extraction:
Water Flow
Extraction Time
The graph shows a standard extraction with neither low ow nor pre-infusion
activated. There is no action of the paddle.
2. Full ow extraction with pre-infusion:
Water Flow
Extraction Time
This graph shows an extraction where at the beginning there is a blooming/
pre-infusion phase. In these seconds (pre-infusion OFF) there is no water ow
passing through the lterholder and the coffee puck.

19
Extended guide
3. Low ow extraction:
Water Flow
Extraction Time
The graph shows an extraction where the ow is reduced both at the beginning
(low ow START) and at the end (low ow FINAL) of the coffee extraction.
4. Low ow extraction with pre-infusion:
Water Flow
Extraction Time
This graph shows the most complex situation that you can perform by setting the
parameters on the LCC. In the initial phase, both low ow and pre-infusion are
active; at the end, low ow is reactivated to complete the extraction.
Brew temperature off set
This value either increases or decreases the coffee boiler temperature during cof-
fee brewing, changing the temperature of the water coming out of the grouphead.
LELIT Technical Department and Lab suggest to try different values in positive
and negative (rst try +5°C and then -5°C).
If you set a positive parameter, the result is a cup of coffee with more acidity.
If you set a negative parameter, the result is a cup of coffee with more bitterness.

20
LELIT Bianca - PL162T
13. Technical menu
The technical menu offers extra customization settings for the more expert us-
ers. Please remember that these settings require time before seeing results in
the cup of coffee, however if you think that you changed your machine values
too much, all the settings can be restored with the following procedure:
5. With the machine turned OFF, hold pressed the button
6. Switch the machine ON
7. Wait until the LCC shows KPc value
Note. Keep pressed and until KPc value is shown on the display to be
sure that you have entered the technical menu and not resetting your machine.
Note. If you do not press the button, you have a factory reset of the LCC and
you will have to re-enter and/or check all parameters.
PID
PID stands for Proportional-Integral-Derivative.
Temperature is extremely important when brewing coffee. While different brew
methods and roasts demand different temperature, stability is the key.
All in all, a machine with PID control monitors itself to ensure temperature
stability and control.
A traditional thermostat tends to hit a desired temperature, then turn off the heat-
ing element as the temperature rises above its target. Then it will kick back on as
the temperature falls below the set value. These results in uneven temperatures
can lead to inconsistent shot quality in a coffee machine, like LELIT Bianca.
PID controllers use the PID algorithm to keep your machine at the proper brew
temperature. This also means that you can directly control the temperature of
the machine. The temperature detected inside the boilers is the one visible on
the display and it is subjected to all the variations happening inside the boilers.
Note. PID is an algorithm that regulates the boiler temperature according to
the temperature detected by the probe (NTC) located inside the boiler. PL162T
having two boilers has therefore two working PID: the letter c at the end of the
parameter (e.g., KPc) refers to coffee boiler; the letter s at the end of the param-
eter (e.g., KPs) refers to steam boiler.
This manual suits for next models
5
Table of contents
Other Lelit Coffee Maker manuals

Lelit
Lelit PL41E User manual

Lelit
Lelit PL41LEM User manual
Lelit
Lelit Pro Line MARA X PL62X Service manual

Lelit
Lelit Grace PL81T User manual

Lelit
Lelit PL042E User manual

Lelit
Lelit PL042TEMD User manual

Lelit
Lelit PL92T User manual

Lelit
Lelit Elizabeth User manual

Lelit
Lelit PL41LEM User manual

Lelit
Lelit PL60PLUST User manual
Lelit
Lelit PL56 User manual

Lelit
Lelit Giulietta PL1SVH User manual

Lelit
Lelit PL042TEMD User manual

Lelit
Lelit PL41TEM User manual

Lelit
Lelit PL41LEM User manual

Lelit
Lelit Pro Line MaraX User manual

Lelit
Lelit PL60T User manual
Lelit
Lelit PL042TEMD User manual

Lelit
Lelit PL042EM User manual

Lelit
Lelit PL042TEMD User manual