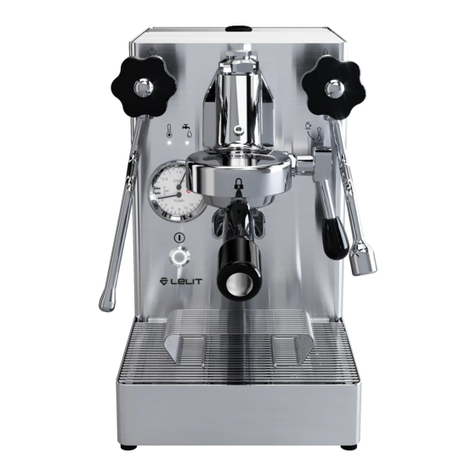
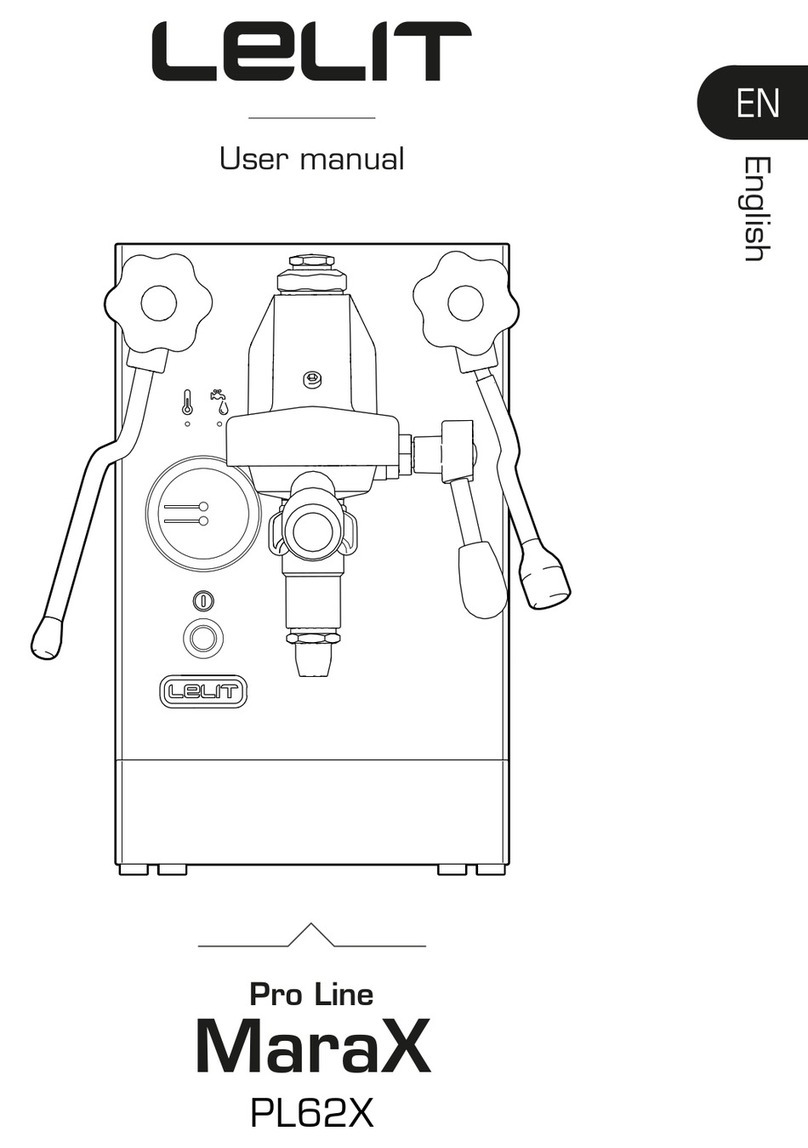
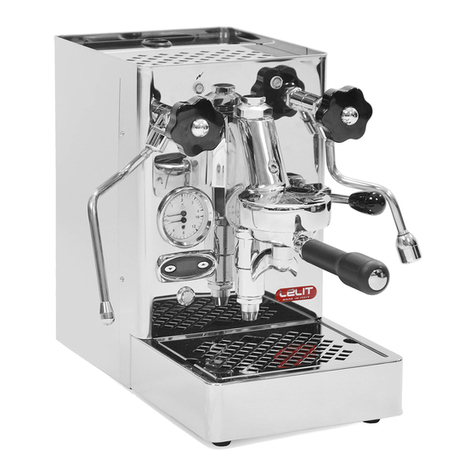
Lelit Pro Line MARA X PL62X Service manual

Extended guide
PL62X
MaraX
Pro Line
EXTRA
content
MARA X

PRO Line - MaraX - PL62X
2
THANK YOU FOR CHOOSING
A LELIT PRO LINE PRODUCT
To get the most of your coffee machine PL62X
visit our Lelit Espresso YouTube channel for
insights, tutorials, tips and tricks.
Save the box and all
the packaging material!
LELIT has studied the external and internal pack-
aging of your coffee machine to help you re-use it
in case of maintenance or repair need.

3
Index
1. Main specications 4
2. Product overview 6
3. Factory settings 6
4. Equipment box 7
5. Packing 8
6. First start-up 8
7. How to install the water resin lter 9
8. Espresso and coffee 10
9. Steam and hot water 11
10. Stand-by mode 12
11. Functioning modes 13
12. The art of espresso coffee 15
13. Limestone prevention 18
14. Daily cleaning 19
15. Weekly cleaning 19
16. Annual cleaning 21
17. Pilot lights and states 21
18. Most common problems 22
19. Warranty terms 25

PRO Line - MaraX - PL62X
4
1. Main specications
User Friendly
This machine allows anyone
to make an espresso as good
as it tastes at a café by using
an E61 group.
Stainless steel
For maximum hygiene in the
kitchen and easy cleaning of
the appliance. A simple wipe
with a sponge and your ma-
chine will shine again.
Stainless steel boiler
The new stainless-steel boiler
AISI316L is a detail aimed at
improving the nal result: an
espresso that keeps its taste
and aroma intact through
each single bean from the
start to the very end.
Coffee Slide
A dispensing spout that can
be used for both one or two
cups and that allows the user
to see the coffee cream on
its way towards the cup.
Energy saving
When the machine is not
used for a long time, it au-
tomatically enters the power
saving mode. This saves
money for you and valuable
resources for the planet.
ATTENTION:
Read the safety notes carefully before using this
product.

5
1 11 17
in the equipment
box
Pic 2
1
12
10
15
2
6
8
9
3
4
5
14
13
16
7
17
11

PRO Line - MaraX - PL62X
6
2. Product overview
3. Factory settings
1. Mobile water tank cover
2. Heated surface for cup grate
3. Steam dispensing knob
4. Pilot light machine ready
5. Pilot light water tank full of water
6. Manometer for steam and pump
pressure during extraction
7. Multi-directional, anti-burn steam
wand
8. ON/OFF main switch (with lighted
frame)
9. Temperature mode switch
10. Water tank (2,6L)
11. Grate for heated surface
12. Hot water dispensing knob
13. Brewing group
14. Coffee group lever
15. Multi-directional, anti-burn hot
water wand
16. Use mode switch
17. Removable water drainage tray,
complete with grate
Use mode (16)
Coffee Mode (pre-set value)
Temperature mode (9)
Warm (pre-set value)
Stand by:
ON
Resin lter:
Not inserted
MaraX has 2 functioning modes: Coffee Mode that gives priority to Coffee and
Steam Mode that gives priority to Steam. You can choose the right use mode
for your habits and always get the best possible performance: press the switch
(16) to change the functioning mode.
Both modes can run on specic temperature or pressure range: press the switch
(9) to change the range.
Read more about other functioning proles on Chapter 11.

7
4. Equipment box
A. 1 dose (9-11g) coffee lter
B. 2 doses PLUS (18-21g) coffee lter
C. Blind lter for backushing
D. Tamper in stainless steel with red
wood handle (PLA481R)
E. Raiser for espresso cups
F. First cleaning kit (with 3 detergent
powder single-dose bags and 1 sin-
gle-dose bottle)
G. Filterholder complete with 2 doses
(14-18g) coffee lter
H. LELIT 35L water resin lter
I. Brush for group head cleaning
J. Plastic spoon for coffee powder
K. Power cord
h
i
k
a
b
cf
ej
g
d

PRO Line - MaraX - PL62X
8
5. Packing
The packaging of your coffee machine has been studied and produced to be re-
used. Save the box and all the packaging material for the entire warranty period
and, if possible, even after.
Use the original box and all the packaging elements in case you need to send
the machine back to your reseller or to an authorized service centre, for ordinary
or extraordinary maintenance.
On our Lelit Espresso YouTube channel you will nd a video on how to pack the
machine properly, using the original box and packaging material.
Please also consult your LELIT reseller before shipping the machine away and
follow his eventual specic instructions.
6. First start-up
6.1 6.2 6.3
FRONT
30
sec
Attention. Remove the machine from its packing and follow the instructions printed
on the box.
Place the machine on a solid, at and dry surface and make sure the appliance is
stable; if needed, screw/unscrew the feet to adjust the position of the machine.
From the equipment box, take out the water drainage tray (17), the grate (11),
the mobile cover (1) and position them as indicated in Pic. 2.
Attention. Do not install the water lter, please run the rst start-up and proceed
with the water lter installation only aerwards.
Fill the water tank (10) with room temperature water up to the indicated maxi-
mum level and insert it in its seating (Pic 6.1).

9
Use the power cord (K) to connect the machine to the electrical mains and turn
ON the machine by pressing the ON/OFF (8) switch. If the water tank (10) is full
of water and properly inserted in its seating, the pilot light (5) goes ON (Pic 6.2).
The hydraulic circuit will need maximum 4 minutes from the 1st turn on to get
lled with water. Once the waiting time is over, the pilot light (4) will start ash-
ing. Lift the group lever (14) completely. The brewing group (13) will start dis-
pensing water (within 30 seconds). Let the water come out for about 30 seconds
and then return the group lever to its initial position (Pic 6.3).
Now the hydraulic circuit is lled up. The machine will start heating the water to
reach the pre-set values. This operation requires maximum 24 minutes: the pilot
light (5) remains rmly on, while the pilot light (4) ashes.
The machine is ready for use when the 2 pilot lights (4, 5) and the lighted frame
of the ON/OFF (8) switch are rmly on.
Attention. During the heating phase, a small quantity of water will drain in the
tray (17). is is normal and conrms the machine correct functioning (functions check).
Attention. MaraX has all the drains into the drip tray, including the one coming
from the overpressure valve. Check the drip tray, empty, and rinse it periodically!
7. How to install the water resin lter
7.1 7.2 7.3
1
2
min
3
Before installing the resin lter (H) in the water tank (10), immerse the resin lter
in a jug full of water for about 3 minutes, to eliminate the air inside the lter that
may cause a machine malfunction (Pic 7.1).

PRO Line - MaraX - PL62X
10
Take out the water tank (10) and remove the black rubber support placed on
the bottom of the tank. Insert the resin lter (H) in the bigger hole of the rubber
support, remove the charge tube from the small plastic lter and x it on the
nozzle of the resin lter (H) (Pic 7.2).
Re-place the support in its seating on the bottom of the tank (Pic 7.3), ll the
tank (10) with water and insert the tank (10) in its seating.
Note. e Lelit water lters are composed of sodium-based cationic resins. ese
lters placed inside the tank lter the water and capture the calcium and magnesium salts
which would normally precipitate and form scale deposits in the espresso machine circuit.
Once captured, these salts liberate sodium salts: a water rich in sodium is good for the
health and enhances the avour of the coee blend chosen for the coee brewing.
The Lelit water lters have a tested autonomy for 35 lt (PLA930S) and 70 lt
(PLA930M): once reached this quantity of water and anyway within 4 months
from the installation, the lter must be changed, because the cationic resin
inside is worn out.
8. Espresso and coffee
8.1 8.2 8.3
1OK
2
Choose your coffee lter, insert it into the portalter (G) and ll it with the ade-
quate quantity of ground coffee. Use the tamper (D) to press the coffee powder
in the portalter (G). Fix the portalter (G) into the brewing group (13) and make
sure the handle is aligned with padlock symbol present on the group (Pic 8.1).
Place the cup/s under the portalter and lift the group lever (14) to start the
coffee extraction (Pic 8.2).

11
During the extraction phase, the lighted frame of the ON/OFF switch (8) ashes
to indicate that the pump works. Return the group lever (14) to its initial position
to stop the extraction (Pic 8.3).
Take out the portalter (G) and empty the lter after every coffee extraction.
Note. During the normal functioning the pilot lights of the machine may ash or go
o to indicate various states of the machine. See the chapter 14 “Pilot lights and states of
the machine” for more details.
Note. We suggest you leave the portalter (G) inserted into the brewing group (13)
to help harmonize the temperature between the group and the portalter complete of the
lter.
Attention. Do not remove or loosen the portalter (G) from the brewing group
(13) during the coee extraction to avoid burn risks caused by hot water leaks.
9. Steam and hot water
To obtain an optimal performance of the machine, lift the group lever (14) com-
pletely and return it to its initial position about 30 seconds before using the
steam wand or the hot water wand (7 or 15).
9.1 Turn the knobs (3 or 12) anticlockwise to dispense
steam or hot water (Pic 9.1).
Vary the rotation of the knob to adjust the steam or
hot water quantity/intensity.
Turn the knobs (3 or 12) clockwise to stop the func-
tion.

PRO Line - MaraX - PL62X
12
10. Stand-by mode
10.1 10.2 10.3
30
min
After 30 minutes of inactivity, the machine will go automatically in stand-by
mode (Pic 10.1).
The lighted frame of the ON/OFF switch (8) ashes while the pilot lights (4 and
5) remain rmly off (Pic 10.2).
To re-start the machine, you must lift the group lever (14) completely and return
it to its initial position (Pic 10.3).
Wait until all the pilot lights are rmly on before using the machine.
Disable or enable Standby function
The Standby is normed by an EU directive for this type of coffee machine,
but if you want, you can disable this function, below the procedure:
1. Turn off the machine (main switch 8).
2. Lift the coffee group lever (14).
3. Turn on the machine (main switch 8).
4. If the standby function is on, after 5 seconds the frame of the on/
off switch (8) starts ashing (1on - 1off) and the status changes to
“standby OFF”
5. If the standby function is off, after 5 seconds, all lights ash to
conrm the switch to active standby.
6. Then switch off and on the machine to save the settings.

13
11. Functioning modes
MaraX has 2 functioning modes: Coffee Mode that gives priority to Coffee and
Steam Mode that gives priority to Steam.
Use mode switch (16)
You can choose the right use mode for you and always get
the best possible performance: press the 2-position switch
(16) to change the functioning mode.
Temperature mode switch (9)
Both modes can run on specic temperature range: press
the 3-position switch (9) behind the drip tray to change the
temperature range: I Hot, 0 Warm, II Extra Hot.
On Coffee Mode (factory setting) MaraX is always ready to brew
coffee, with no need to ush the group as you would do with a
standard E61 group: just brew your coffee or coffees and when
you have nished, just clean the group.
On Steam Mode MaraX gives priority to steam and works like a
standard HX (heat exchanger) coffee machine with PID device.
The temperatures and pressures in MaraX are electronically controlled and
every switch selection has a different impact on the result and on the overall
performance of the machine.

PRO Line - MaraX - PL62X
14 COFFEE MODE
control coffee temperature
24 min
STEAM MODE
control steam pressure
45 min
Coffee temperature
WARM
Steam pressure
0,9 - 1,2 bar
Coffee temperature
HOT
Steam pressure
1,1 - 1,4 bar
Coffee temperature
EXTRA HOT
Steam pressure
1,3 - 1,6 bar
WARM UP TEMPERATURE KEEPING COFFEE EXTRACTION
0
0.5
11.5 2
2.5
3
0 - 3.2
bar
0
0.5
11.5 2
2.5
3
0.4 - 2
bar
0
0.5
11.5 2
2.5
3
1 - 2.5
bar
Below you will nd a table indicating the 6 different functioning proles that you
can achieve with MaraX:
Attention. On Coee Mode (factory setting) MaraX uses the temperature in the
HX as reference point, therefore the steam pressure gauge may oscillate. Below a table that
indicates the pressure range based on usage:

15
12. The art of espresso coffee
Contrary to what you might think, making a perfect Espresso is not that easy.
It takes experience, ability, passion and a little bit of curiosity. In this paragraph
we would like to share with you some of the basic rules for making a perfect
cup of Espresso.
Suggested doses:
Ristretto (Strong) about 20 ml – Espresso about 30 ml – Lungo (Long) about 60 ml.
The “5 M’s”
If you want to make perfect Espressos,
you should start by ensuring the ve es-
sential factors which turn a simple cup
of coffee into an Espresso for connois-
seurs! These are the “5 M’s”; in Italian:
miscela (blend), macinatura (grinding),
macchina (machine), manualità (skill) and
manutenzione (maintenance).
1 - Miscela (Blend)
Good Espressos are always made
with a good freshly roasted and
ground coffee. The freshness and the
way the coffee is stored will have a
dramatic affect on the taste of the
coffee. There are blends and single
origins all offering levels of acidity &
taste experiences Try out different
combinations
until you find the blend you like best!
2 - Macinatura (Grinding)
The grinder is a must for making good
Espresso. Coffee should always
be ground just before it is used. To
get the best from your Mara X you will
need a good quality grinder with
at least 50mm burrs and stepless
adjustment
3 - Macchina espresso
(Espresso machine)
Lelit machines are designed and built
so that the water temperature can be
adjusted to suit your needs. In addi-
tion, setting this variable correctly will
allow you to extract from the ground
coffee, not only the soluble sub-
stances that give it taste, but also the
non-soluble ones that give body and
avour to your coffee.
4 - Manualità (Skill)
Half of the result depends on how you
use the machine. A passionate expert
is an essential part of the Espresso
production chain and can enhance
the result to bring additional value to
the nal product. Passion and practice
are, therefore, the secrets to learning
how to use the machine. You can ex-
periment with different blends of cof-
fee, grinding, pressing, water temper-
ature and pressure, not just to make
an Espresso, but to make the one that
is just right for you.
5 - Manutenzione (Maintenance)
Daily maintenance, scheduled mainte-
nance and care of the machine will en-
sure the quality of the beverage and
the durability of the product you have
purchased. A clean machine says a lot
about your passion for coffee making.

PRO Line - MaraX - PL62X
16
Coffee varieties
The choice of the blend is an
essential factor for making the ideal
coffee for your taste. There are a lot
of different varieties of coffee blends
on the market to choose from. The
differences in flavour, aroma and
texture depend on the quantities of
the varieties of coffee that make
the blend.
Single Origins
These as the title suggests come from
one origin and can very from country
to country offering different flavours
levels of acidity Have fun
experimenting with different origins
Robusta
It is grown between 200/600 m
Spicy aroma.
Caffeine between 1.8 ~ 4%
Arabica
It is grown between 900/2000 m
Rich aroma.
Caffeine between 0.9 ~ 1.7%
No variety of coffee can make an ideal
Espresso on its own. The perfect Es-
presso has a top layer of cream 2-3 mm
thick, a nut brown to dark brown colour,
with reddish tinges and light streaks, a
harmonious avour, a strong, balanced
aroma and a sweet, long-lasting after-
taste. It has a strong aroma with notes
of owers, fruits, toast and chocolate.
These sensations can last just a mo-
ment or can persist for a few minutes in
your mouth. The taste is round and well
structured. The acid and bitter percep-
tions are well balanced whereas there is
little or no astringency.
The ideal parameters to obtain this type
of coffee are:
9 ± 0,5 g. of ground coee.
25 seconds to brew 30 ml.
88 / 92°C when brewing and 80°C in the cup.
8 /10 bar pressure during extraction.
Even Arabica blends often contain a
small amount of Robusta, which is ne-
cessary to enhance the cream and add
aroma and body to the espresso.
Blends made for coffee bars usually
contain 20% Robusta but in south-
ern Italy, where they prefer a stronger
taste, the percentage can reach 40-
50%. At the end of the day, it’s just a
matter of taste…Experiment until you
nd the blend you like best!
Cappuccinos
There’s nothing better than a cappucci-
no to start your day. Although they are
made and served everywhere, few peo-
ple know how to make one properly.
Making the coffee is only part of this
complex procedure. The froth often
creates major problems, but thanks to
the steam wand on our machine, with
a few suggestions and a little practice
you’ll soon be making cappuccinos
just like in the coffee bars!
We recommend www.TheRoastery.co.uk
freshly roasted organic coffee delivered
to your door.

17
Milk and jug
You need 100 ml of milk to make a
cappuccino.
MILK
100ml
5°C
Fresh whole milk provides a smoother,
creamier and tastier froth. Milk will not
froth at over 65°C, so cold milk from
the fridge should be used to allow
more time for it to froth. The best jugs
to use are made of stainless steel and
have a spout, like the Lelit jug (code
PLA301S – PLA301M – PLA301L - not
included). The jug should never be
more than half lled with milk.
Frothing the milk
Before using the steam wand, some
steam should be released for about
two seconds, as it always contains
some water due to condensation.
2 SEC
2 SEC
Insert the wand so that the end of the
nozzle is near the side of the jug (pre-
tend you have split the top section
into four parts and insert the nozzle
into one of them) and about one cen-
timetre below the surface of the milk.
Since the milk will start to expand in
volume, you will have to gradual-
ly lower the jug so that the nozzle is
always kept immersed at the same
depth. This process is complete when
the milk reaches a temperature of
about 37°C, or when you can feel the
warmth with your hand. You can use
the thermometer too (code PLA3800
- not included).
Processing the milk
This phase is very important to make
the cream thick, with a ne texture
and a shiny surface.
65°C
65°C
Insert the wand all the way down and
tilt the jug to create a vortex. Heat the
milk to the desired temperature, with-
out exceeding 65°C. Close the steam.
Prepare the milk by rst tapping the
jug on the countertop to remove any
air bubbles and then rotating it to
keep the milk and froth well amalga-
mated. The nal result should be a
smooth, creamy surface without any
bubbles.

PRO Line - MaraX - PL62X
18
Pouring the milk
You should leave the milk to settle for
a least half a minute, so we suggest
you always prepare it before making
the coffee.
The doses for a cappuccino should be
one part Espresso and two equal parts
of milk and froth. Clean the steam
wand with a damp cloth.
coffee
milk
But, if you want to process the milk be-
fore making the coffee, remember to
lift the group lever for 3 seconds and
then bring it back in its initial position.
Wait at least 30 seconds for the ma-
chine to be stable on a pressure more
suitable for steam (Coffee Mode). Do
this operation before using the steam
wand to froth the milk!
To see the tutorial,
please scan the QR-Code.
To read the QR code, download the
proper app from your store.
13. Limestone prevention
13.1 To prevent limestone deposits and grant a better
result in the cup, use the water resin lter (H). The
lter found in the equipment box has an autonomy
tested for 35 litres of water.
Use the slides put on the handles of the water tank
(10) to remember the complete llings of the tank
and replace the resin lter once exhausted (Pic
13.1).
Note. e resin lter must be replaced every 14 complete llings, or aer 4 months
of use. If the machine remains unused for 1 month, the resin lter must be replaced with a
new one.
Note. Sea chapter 6 “How to install the water resin lter” to replace the lter cor-
rectly.

19
14. Daily cleaning
14.1 14.2 14.3
Note. For an optimal result we suggest you use our kit PLA9101 (not included) that
contains a microber cloth with embroidered LELIT logo, a paintbrush with bristles in
natural bres and a brush with nylon bristles.
General cleaning. Use a soft cloth, preferably in microber, and moisten it with
tap water to clean the stainless-steel appliance body of the machine (Pic 14.1).
Group cleaning. After each extraction empty the coffee lter, wash the portal-
ter (G) and the relative lter with tap water and use the brush (I) to eliminate the
coffee residues from the group gasket (Pic 14.2).
Steam wand cleaning. After frothing the milk, clean the nozzle of the steam
wand (7) using a soft cloth and dispense a small quantity of steam to eliminate
every possible milk rest in the holes (Pic 14.3).
15. Weekly cleaning
Note. In the equipment box you’ll nd the detergents (F) for the rst cleaning cycle
of the machine. Aerwards, we suggest you use our accessories PLA9201 and PLA9203
(not included).
Filters and portalter cleaning. It’s necessary to clean the portalter to elim-
inate the coffee oils that affect the taste of your drinks negatively. Place a jug
under the hot water wand (15), turn the knob (12) anti-clockwise and take out
about 1 l of water.

PRO Line - MaraX - PL62X
20
15.1 15.2 15.3
10x10”
min
15
Insert the portalter (G) and the used lters into the jug but pay attention not to
immerse the portalter handle (Pic. 15.1). Add 2 bags of detergent powder (F
or PLA9201). After 15 minutes, empty the jug and rinse the portalter (G) and
the lters with plenty of tap water.
Backushing. Insert the blind lter (C) into the portalter and pour 1 bag of
detergent powder (F or PLA9201) into the lter. Insert the portalter (G) in the
group (13) and lift the lever (14) for 10 seconds. Stop the function and wait for
10 seconds. Repeat the procedure 10 times (Pic 15.2).
Remove the portalter (G) from the group and rinse it with hot water from the
brewing group (Pic 15.3).
Re-insert the portalter (G) in the group and repeat the previous operation 5
times for 10 seconds each time, without detergent powder.
Remove the portalter (G) and take out the blind lter (C). Empty the drainage
tray (17) and rinse the portalter (G), the lters and the tray (17) with plenty of
tap water.
15.4
10x5”
Steam wand cleaning. Fill a jug with 500 ml of
cold water, add the content of 1 bottle of detergent
liquid (F or PLA9203) and immerse the steam wand
(7) in this solution.
Open the knob (3) and dispense steam for 5 sec-
onds. Stop the function and wait for 5 seconds. Re-
peat the operation 10 times (Pic 15.4).
Repeat the entire procedure using 1 l of fresh water
to rinse the steam wand (7) properly.
Table of contents
Other Lelit Coffee Maker manuals

Lelit
Lelit PL41QE User manual

Lelit
Lelit PL042TEMD User manual

Lelit
Lelit PL042E User manual

Lelit
Lelit PL41E User manual

Lelit
Lelit PL61 User manual

Lelit
Lelit PL41TEM/110 User manual

Lelit
Lelit PRO Line MaraX PL62X User manual

Lelit
Lelit PL042TEMD User manual

Lelit
Lelit PL042E User manual

Lelit
Lelit PL41PLUST User manual

Lelit
Lelit PL 046 User manual

Lelit
Lelit Kate PL82T User manual

Lelit
Lelit PL60PLUST User manual

Lelit
Lelit PL56 User manual

Lelit
Lelit PL41PLUST User manual

Lelit
Lelit pl041 Installation guide

Lelit
Lelit PL042TEMD User manual

Lelit
Lelit PL41LEM User manual
Lelit
Lelit PL042TEMD User manual
Lelit
Lelit PL41TEM User manual