Lencarta ElitePro 2 300 User manual

www.lencarta.com
0845 618 2889
300 & 600
Instructions for use
tough • lightweight • clever

www.lencarta.com
Congratulations!
Welcome to our
lightweight super
tough elitepro2.
The instructions in this manual apply
to both our 300Ws and 600Ws models,
the controls are identical.
Enjoy!

1
222
3
4
5
6
78
9
10
The rear panel controls are simple
and intuitive.
1. The modelling lamp can be set
to any power, and is independent
of the flash power setting.
2. The modelling lamp, ready beep
and slave cell can all be
switched on or off.
3. The optional radio receiver/
remote control plugs into a USB
port, which powers the receiver.
4. The sync socket can be used
with a non-dedicated radio
trigger or with a sync lead.
5. The
mains socket has a 5Amp
fuse (300Ws) or an 8Amp (600Ws)
situated immediately above it.
6. The stand locking screw secures
the flash head to the stand.
7. The LCD digital display shows
the power, which can be set in
1/10th stop increments.
8. The power adjustment is digital.
9. The test button can also be used
for open (non-synchronised) flash.
The on/off switch controls all
electrical functions.
www.lencarta.com
1
2
3
4
5
6
7
8
9
10
getting
started

The slave sensor, is switched on or off from the rear
control panel. It responds to another flash and so
allows any non-synchronised flash heads to operate
as a slave when switched on. There is a choice of S1
and S2 slave modes. S1 causes the Elitepro2 to
fire in response to another flash, whereas S2 ignores
the first flash, and responds to the second flash.
S2 mode is ideal when needing to respond to an
iTTL or eTTL speedlight being used as a trigger.
To change from S1 mode to S2 mode, or vice versa,
simply press the slave button until it displays the
required mode. A blue light above the slave button
shows that it is in S1 mode. A red indicator light
above the shows that it is in S2 mode.If the light is
not showing at all, slave mode is disabled.
www.lencarta.com
The Elitepro2 flash heads accept
the full range of Lencarta/Bowens
S-fit accessories and light shapers.
Simply press and hold the orange
catch whilst removing the accessory.
Elitepro2 flash heads are fitted with a 150watt
modelling lamp. The safety cover, shown on the left,
provides additional protection in the unlikely event
of bulb breakage, and must always be used.
To adjust the tilt, simply loosen the tilt
handle and tighten it again to lock the
position. Pull out and twist the handle
to adjust its position.
getting
started

www.lencarta.com
about the
Elitepro2
Be in Control
The ElitePro2 offers you easy to use, complete digital control.
Five stops of power adjustment from 9Ws to 300Ws can be made with precision.
Control the modelling lamp from full brightness to off, or anywhere in between,
simply by turning one dial. Or control these functions using our Wavesync
Commander, at any distance up to 100m.
Full Metal Body
The new ElitePro 2 has a tough but lightweight aluminium case that protects it
from knocks and bumps. In addition to the tough exterior, the Elitepro2’s clever
software takes care of the interior components as well as the user replaceable
flash tube and powerful 250 watt Halostar modelling lamp. The Elitepro2 will
automatically switche off the modelling lamp after a period of inactivity to extend
the life of the lamp.
And because the new ElitePro 2 uses the same Wavesync Commander system
that's used on our SuperFast, Atom and SmartFlash 2 flash heads, it can be
used alongside them, to give you more options and creativity.
Modifiers
Fitted with the standard reflector (available separately) the Elitepro2 produces a
guide number of 160 (equivalent to f/16 @ 10’ at 100 ISO or f/6.3 when fitted
with a 150cm softbox) which is ideal for portrait, glamour or fashion photography.
It’s 5 stops of power adjustment allows for a wide choice of aperture settings,
and has extremely accurate power and colour temperature consistency.
Full power recycling of only 1 second with the minimum power adjustment of 0.2
seconds allowing it to keep up with most cameras even in continuous shooting
mode. The flash tube is extremely unlikely to fail, but it's good to know that all
Lencarta flashtubes are available at very reasonable prices and are user
changeable.

1. Do not dissemble the flash unit. The Lencarta Elitepro2 is a precision
instrument. It contains high voltage components. Unauthorised
tampering with the unit is dangerous and will void its warranty.
2. Do not leave the unit unattended when switched on.
3. To avoid risk of overheating, switch the unit off once the current studio
session is complete.
4. Do not use non-approved modelling lamps. Always use modelling lamps
of the correct wattage to prevent damage.
5. Do not leave modelling lamps switched on when using restrictive
lighting tools such as honeycombs or spotlights. It will overheat and may
be damaged.
6. Always switch the unit off when fitting or removing modelling lamp or cables.
7. Always remove the protective head cap before operating the unit.
8. For indoor use only. The Elitepro2 should be used in a dry, well
ventilated environment.
9. Keep the flash tube and modelling lamp clean. Gently remove any dirt
with alcohol.
10. Do not touch the flash tube with bare hands.
11. Fire the flash at least once every two months to prolong its life span.
12. Do not expose the unit to rain, vapour or excessive dust. Keep it away
from sources of fire and heat, including strong direct sunlight. Do not
leave the unit in a car in hot weather.
13. When working under high humidity, turn on the modelling lamp to
dissipate any condensation that may have gathered on the flash tube
before using the flash.
The flash unit arrives with a protective cap fitted. This cap is designed to
protect the delicate flash tube during transit and we strongly recommend that
you keep this cap on whenever the flash unit is not in use. You must remove
the protective cap when you are using the Elitepro2.
www.lencarta.com
using your
elitepro2
setting up
your Elitepro2

www.lencarta.com
remote • control
Wavesync
Commander System
Instructions for use

www.lencarta.com
getting
started
Welcome to your new Lencarta Wavesync Commander
System for use in conjunction with the with Lencarta
Elitepro2 flash head.
Features:
1. Combined radio trigger and remote control.
2. ‘Zero delay’ electronic circuitry allows the maximum sync
speed of the camera to be used if required.
3. Transmitter uses 2 x standard AA batteries.
4. Receiver draws its power from the USB socket fitted.
5. 50 metre range, subject to environmental conditions.
6. 16 separate channels.
The transmitter slides into the camera hotshoe, with the controls facing the rear of the camera.
It will work with any type of hotshoe except for the proprietary Sony/Minolta hotshoes, for
which an adapter is needed. Once fitted, the knurled locking wheel should be gently tightened.
Please note that over-tightening can damage the unit, and can also prevent reliable operation.
The radio receiver is powered by the USB port on the control panel of the SuperFast flash head,
so no batteries are required. The USB connection folds neatly away when not in use.
The channel settings, near the top of the receiver, need to be set to correspond with the
channel settings on the receiver.
The only other adjustment fitted to the receiver is the Selector Dial. This receives the settings
from the transmitter unit.
If just one flash head is in use, the selector can be set to any setting from 0-9 or A-F.
For the unit to act as a remote control, both of the selector dials must have the same setting.

The flash will still be triggered even if the two Selector Dials are not on the same setting,
but the remote control functions will not operate unless they are set the same.
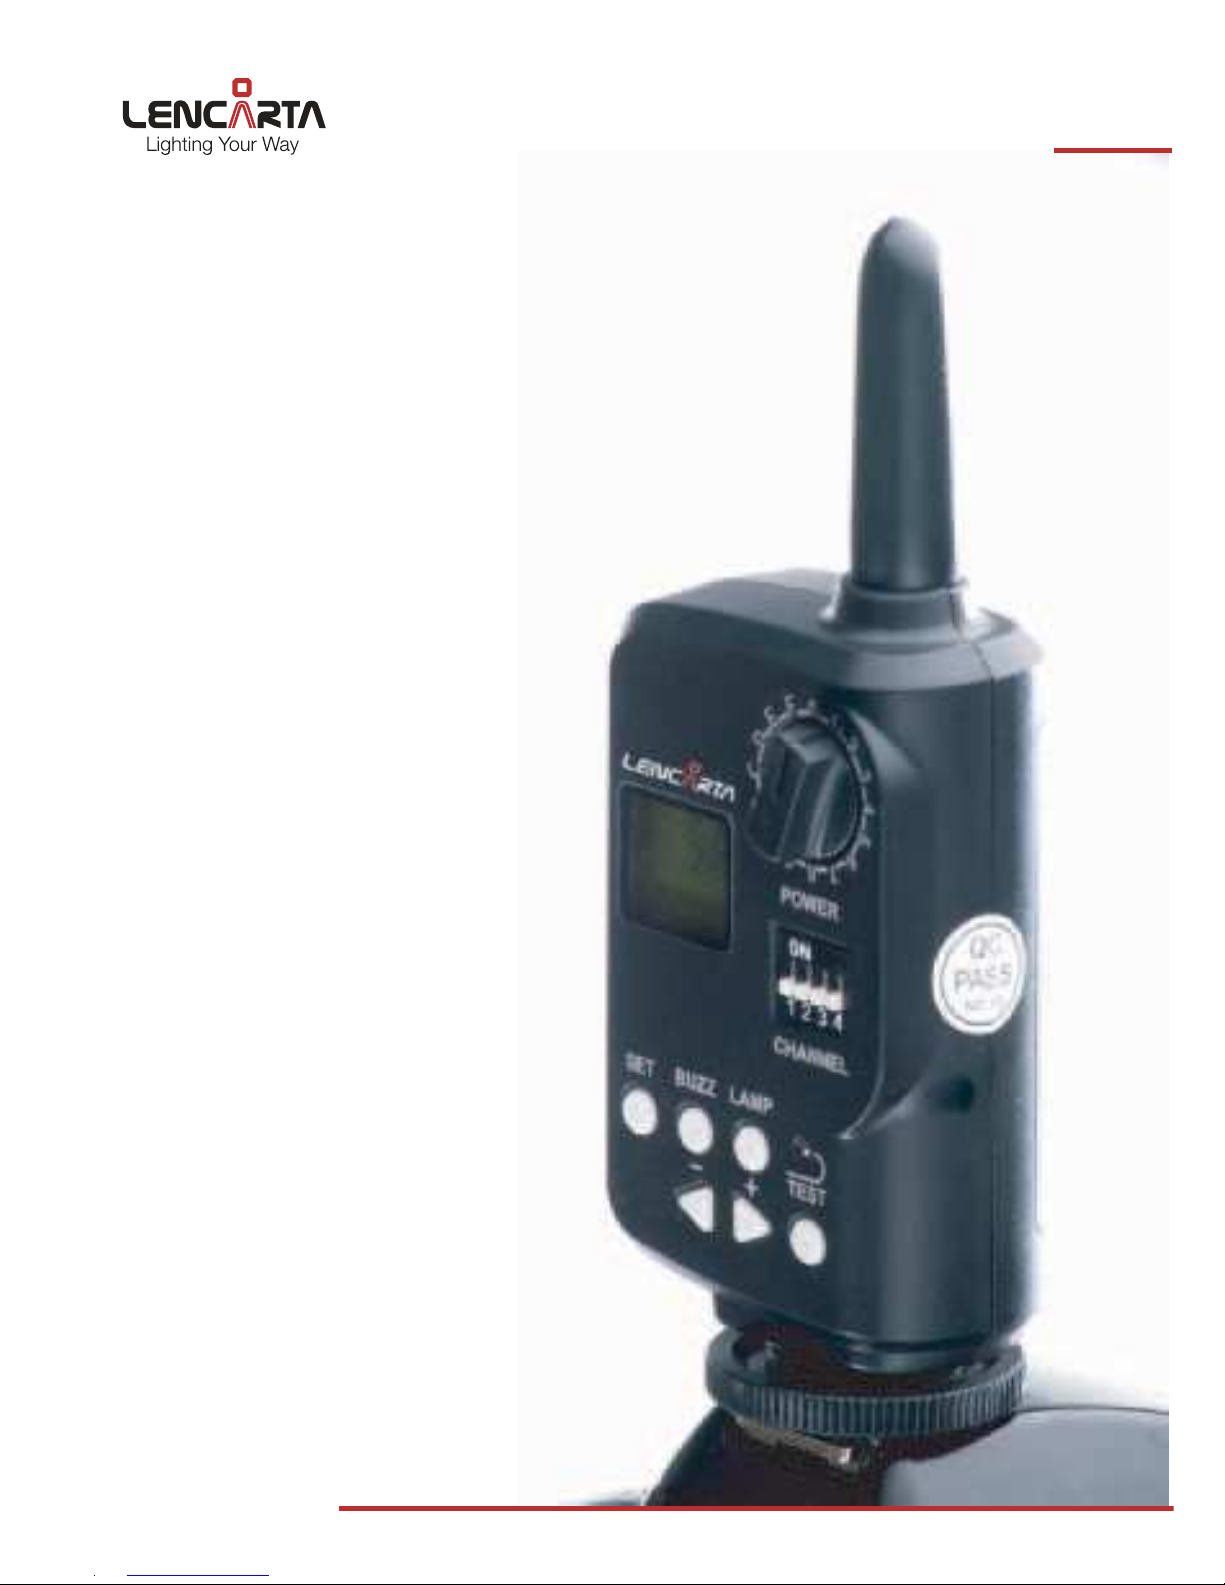
Insert 2 type AA batteries into the transmitter. Both alkaline
and rechargeable batteries can be used. Fit the transmitter
to your camera hotshoe, as shown.
Switch the transmitter on, using the on/off switch mounted
to the left hand facing side of the transmitter unit.
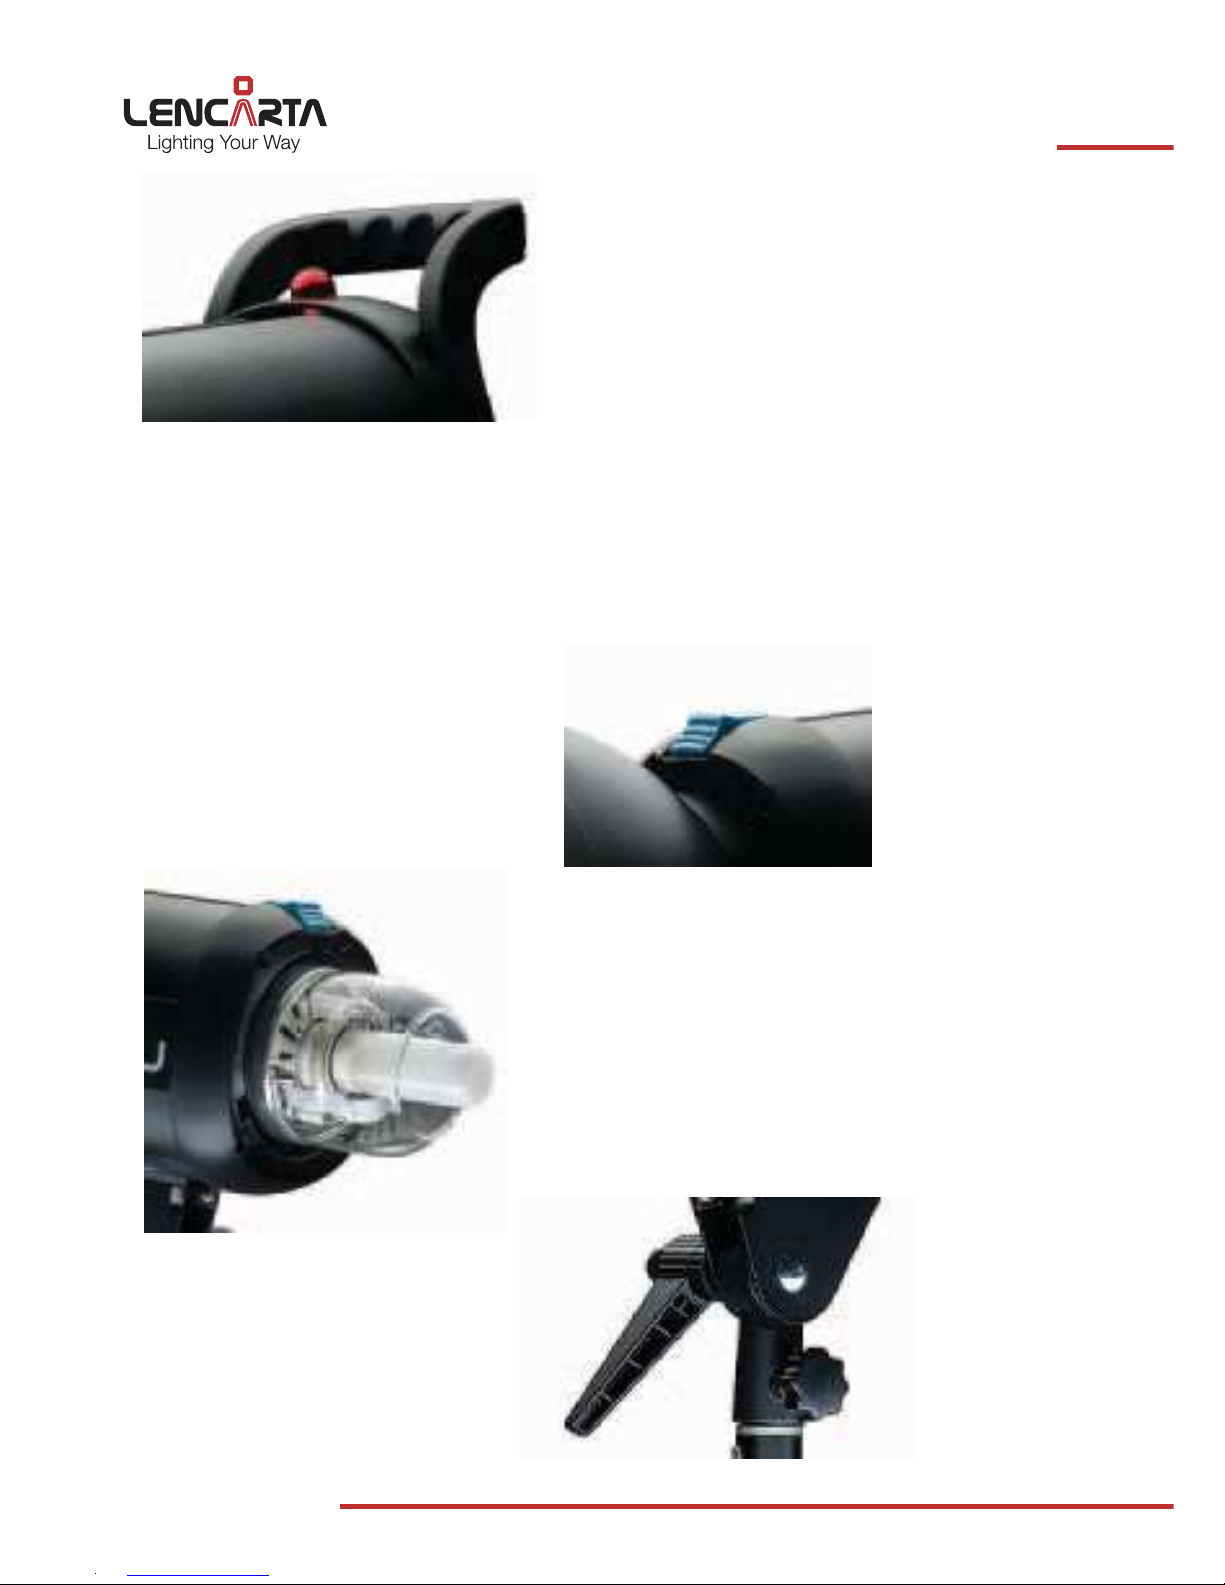
With the flash head switched on, and the power set to any
setting from 5 – 10, the flash should operate if you either
release the camera shutter or press the ‘test’ button. A red LED, above the test button,
should flash momentarily, together with a red LED on the receiver unit.
Remote control buttons
1. There are 4 dip switches, fitted to both the Transmitter and the receiver, they are used,
if necessary, to change the channel if your flashes are being affected by other flashes
within range of your receiver(s). These need to be on the same setting on each unit.
2. The SET button is not used with the SuperFast flash heads provided that the display is
showing a setting between 5 and 10. However, if the display is showing a setting
between 1/128 and 1/1, hold the SET button down for two seconds. This will change
the display.
3. The BEEP button, when pressed, switches the recycling beep either on or off
4. The LAMP button, when pressed, switches the modelling lamp either on or off
5. The TEST button, when pressed, fires the flash
6. The –button reduces the power setting of the flash head. Each press of the button
reduces the power by 1/10th, and finally to off. The setting is displayed on the LCD
screen. If the button is held down it will continue to adjust the flash power, and the
power setting will be displayed on the LCD display as soon as the button is released.
7. The +button increases the power setting of the flash head, and operates exactly
as above.
www.lencarta.com
wavesync
commander

The Transmitter Selector Dial can be used to control the
various settings on any number of flash heads.
1. To control one flash head, set the Selector Dial to the
same number or letter on both the Transmitter and
the Receiver.
2. To control more than one flash head, and to operate
each of them with identical settings, set the Selector
Dial to the same number or letter on both the
Transmitter and each Receiver.
3. To control more than one flash head, and to operate
each of them with different settings, set a different
number or letter on each receiver.
Select the required flash head by setting
the appropriate number or letter on the
Transmitter Selector Dial, adjust the
settings for that flash head as required
and then adjust the settings of any
other flash heads.
Shutter sync speed
As with all studio flash equipment, the
maximum synchronisation speed that
can be set on the camera is determined
by the shutter fitted to the camera, it is
not in any way dependent on the flash
head.
Therefore, please refer to your camera
instruction manual if you are unsure
about the fastest usable shutter speed
on your camera.
www.lencarta.com
using your
wavesync
commander

Our warranty is 36 months and covers all components (except bulbs) and
includes labour. Physical damage and damage caused by failure to remove
batteries is not covered by our warranty.
All Lencarta products are fully compliant with both ROHS and EU standards
and have been issued with the necessary certificates. We are also fully
compliant with WEE Regulations and are happy to accept any Lencarta
electrical products for recycling, once they have reached the end of their
useful life.
Should you have any problems with your Elitepro2 you can contact us using
the details below.
Tel: 0845 618 2889
Email: [email protected]
View videos and demos :www.lencarta.com
www.lencarta.com
Warranty

www.lencarta.com
0845 618 2889
This manual suits for next models
2
Popular Camera Accessories manuals by other brands

Panasonic
Panasonic VARICAM AU-VCVF2G operating instructions

Moog Videolarm
Moog Videolarm PRM50G Installation and operation instructions

Vicon
Vicon AurorA2000 instruction manual

KERN
KERN PCB-A01 Battery Installation

Pixapro
Pixapro ST-IV F instruction manual

Ikelite
Ikelite 6242.20 Supplemental instructions