General Care |87 |General Use www.ReallyRightStuff.com 1-385-248-0777 or TOLL FREE 1-888-777-5557
2 3 4
GENERAL TRIPOD USE GENERAL CARE
|Leg Set Up |Maintenance Tips
|Cleaning
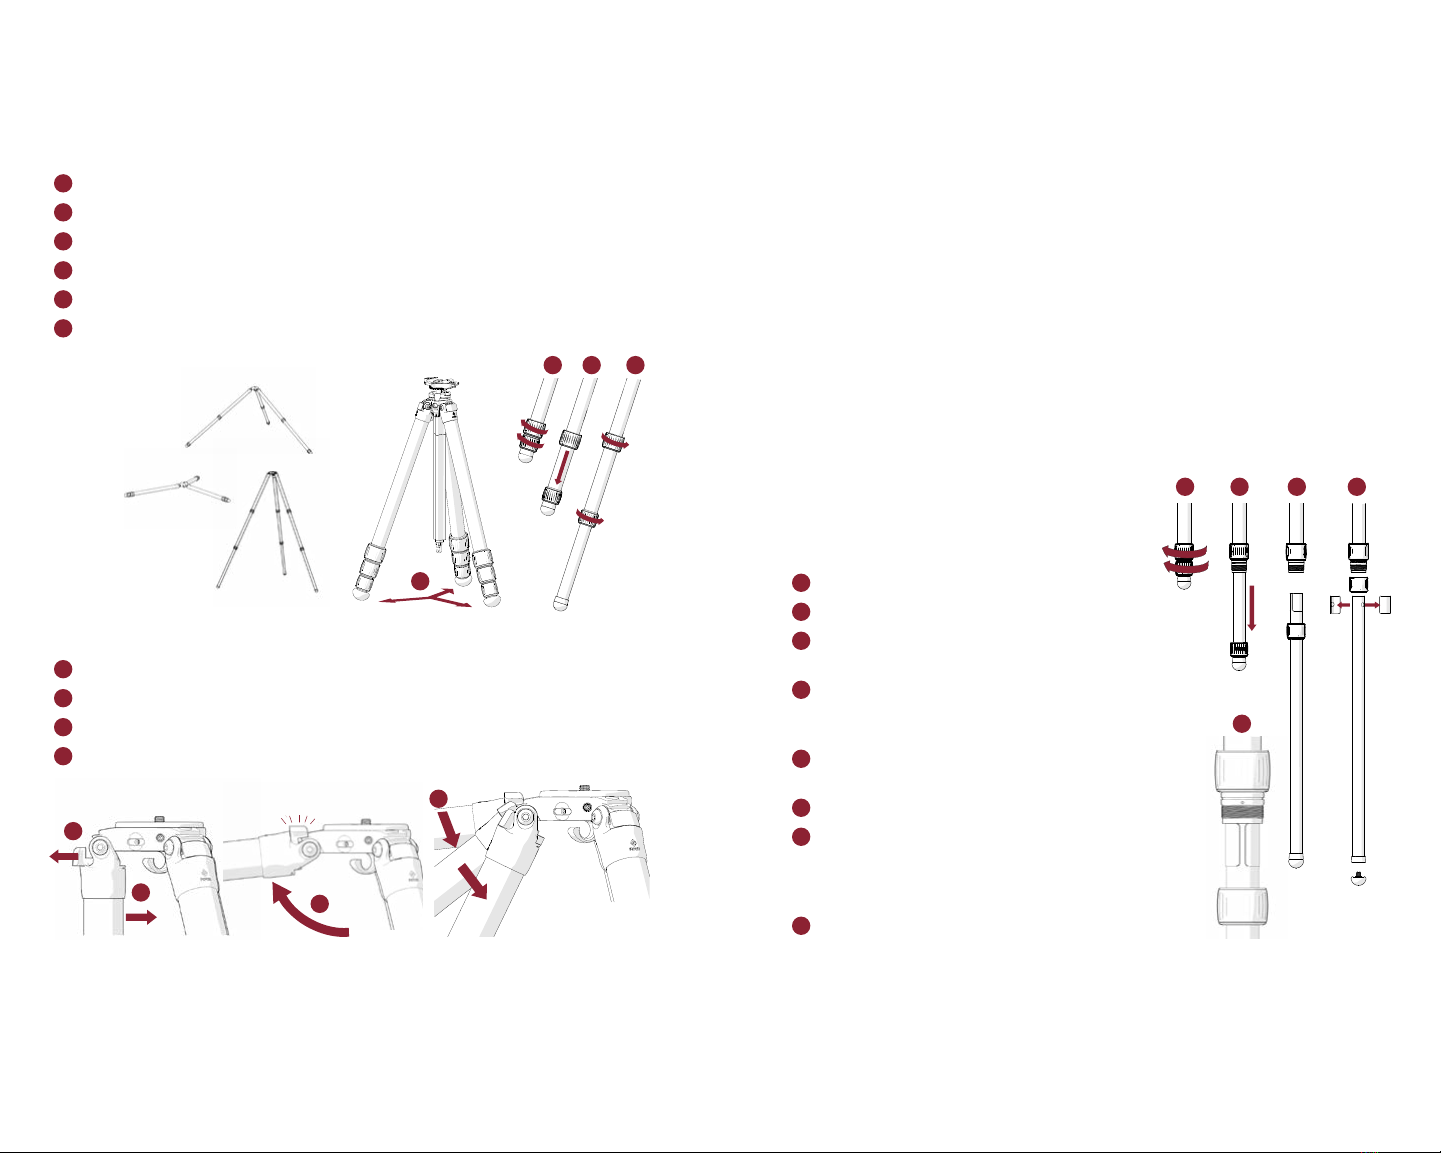
|Set Leg Positions
1Swing out all three legs.
2Grab twist locks with one hand, rotate one quarter turn to loosen.
3Pull leg until fully extended.
4Tighten Twist Locks.
5Repeat on all legs.
6To collapse, loosen twist locks and collapse leg. Grab all Twist Locks
with one hand and tighten.
1Swing leg slightly inward.
2Pull out tab completely (push closed at any time to cancel).
3Swing leg to horizontal position. Angle stop will engage.
4Move to desired position. Angle stop will ratchet automatically.
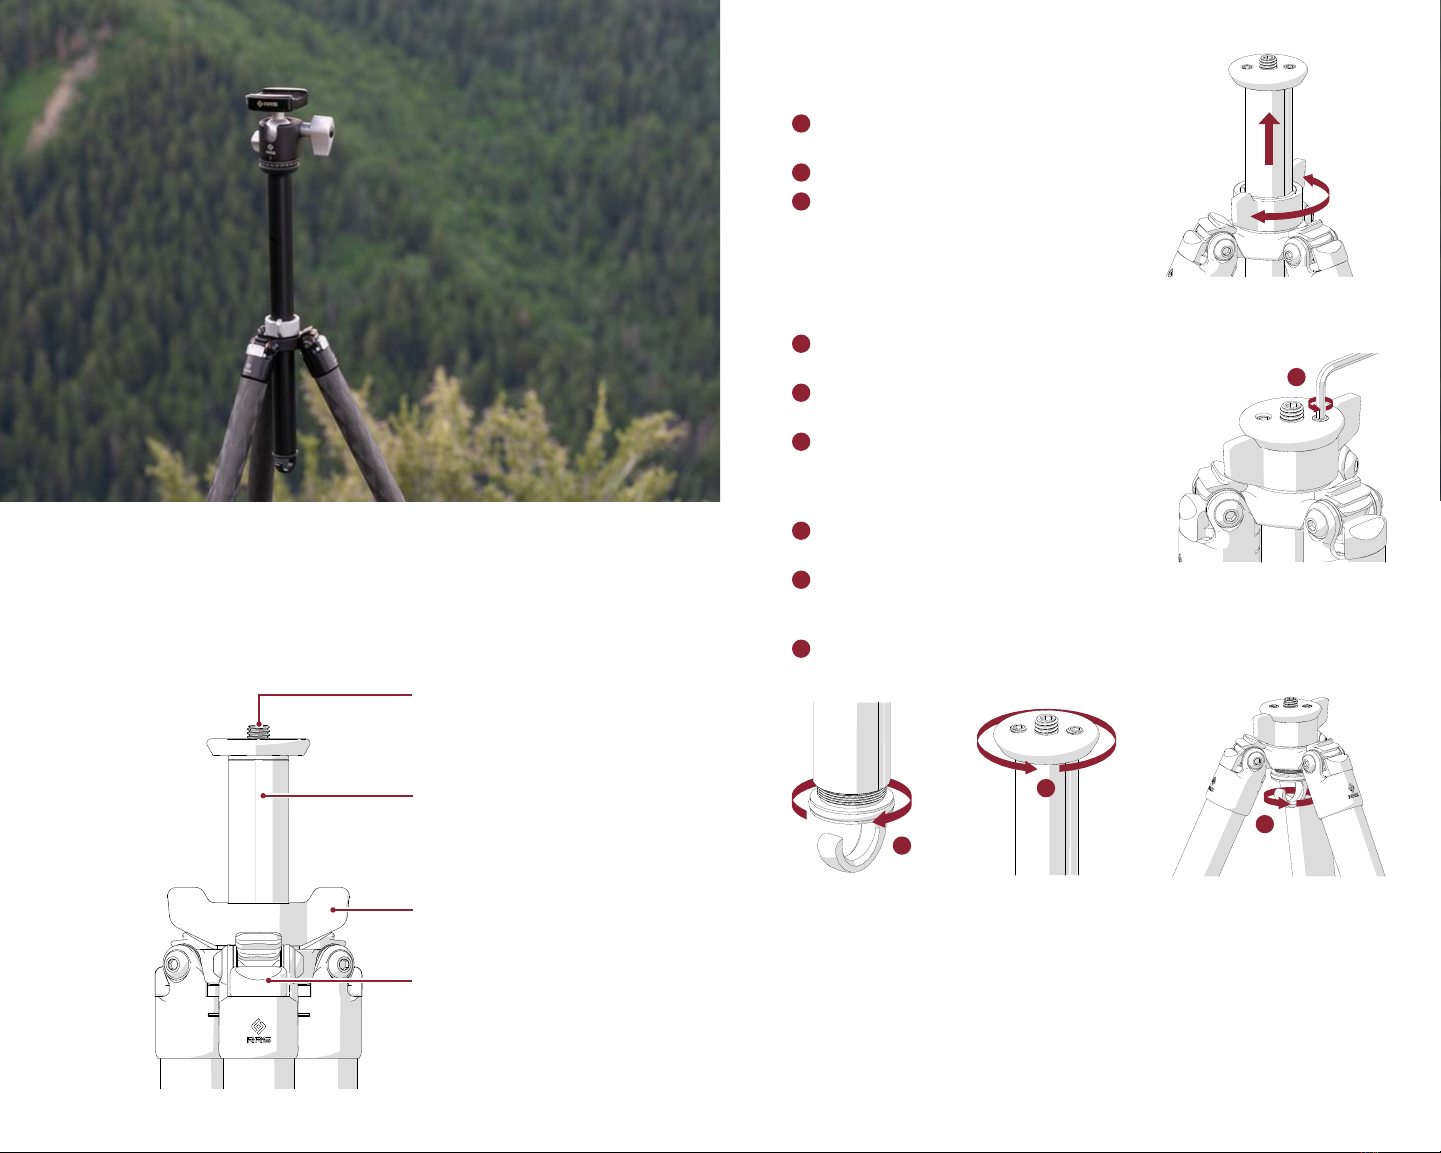
1Rinse exterior with fresh water and towel dry.
2Unscrew twist lock and fully remove leg section.
3Remove twist lock, foot, and anti-twist
sleeves.
4Wipe down leg, foot, and exposed threads
with damp cloth, removing any dirt or
debris. Allow to dry.
5Apply small amount of multi-purpose
grease to exposed leg threads.
6Replace anti-twist sleeves and twist lock.
7Holding anti-twist sleeves in place, insert
leg into tripod where the arrow meets with
gap between the anti-twist sleeves. Slide
leg in completely.
8Screw Twist Lock and foot back into
position. Rotate Twist Lock back and forth
to spread grease.
1
2
3
4
1
• When exposing your tripod to mud, sand, or saltwater, use a damp
towel to wipe down and dry the legs completely before collapsing.
Then, disassemble and clean tripod per instructions on the next page.
• Leg bolts should be tight enough to prevent legs from collapsing, but
loose enough to open with ease. Use hex key to make adjustments
as necessary.
• Periodically apply multi-purpose lubricant to the threads of each leg
section twist lock. However, never lubricate the carbon fiber legs.
• Check for metal corrosion. Contact Really Right Stuff for any
necessary replacement parts.
• Always keep your tripod in a protective bag when transporting or storing.
• Always fully extend the lower leg section during use in sand or mud
to prevent contaminating leg joints.
2a 2b 2c 3
7
«Tripod Leg Set Up & Positions VIDEOS
CLICK HERE
Cleaning & Disassembly VIDEO »CLICK HERE