manuals.online logo
Brands
  1. Home
  2. •
  3. Brands
  4. •
  5. LENCO
  6. •
  7. CD Player
  8. •
  9. LENCO CR-3800CD User manual

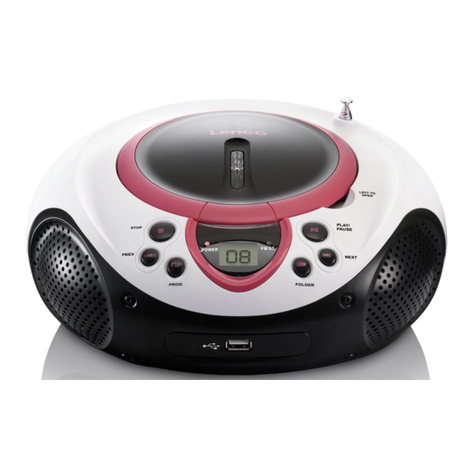
LENCO CR-3800CD User manual

MODEL NO: CR-3800CD
Portable, Folding CD player
With AM/FM Radio
Calendar Alarm Clock & Temperature
Instruction Manual
1
LOCATION OF FUNCTIONS
1. Alarm Set Button
2. Time Set Button
3. Date Set Button
4. Speaker
5. LCD Multifunction Display
6. Snooze/Light Button
7. Alarm/Snooze Switch
8. Temperature Button
9. Hour/Month Button
10.12/24 Hour Button
11.Minute/Date Button
12.TUN UPButton
13.TUN DOWNButton
14.Band Switch Button: AM/FM
15.M-UP Button
16.M-DOWN Button
17.Memory Button
18.RADIO ON/OFFButton
19.CD: Door Open Button
20.CD: PROGRAMButton
21.CD: MODEButton
22.CD: Play/Pause Button
23.CD: Stop Button
24.CD: SKIP/SEARCHDOWN Button
25.CD: SKIP/SEARCHUPButton
26.Open Knob
27.Bass Boost Switch
28.FUNCTIONSWITCH
29.Volume Knob
30.Headphone Jack
31.DC Jack
32.FM Telescope-Antenna
POWER SUPPLY
DC operation
Open the battery compartment cover then insert the batteries according to diagram
1. Audio: insert 4xAA/UM3/R-6 type batteries for CD and Radio.(Not included). Alkaline batteries
recommended. DO NOT MIX USED AND NEW BATTERIES. DO NOT MIX ALAKALINE AND STANDARD
(CARBON-ZINC) OR RECHARGEABLE (NICKEL CADIUM) BATTERIES.
2. Clock: Insert 2xLR44/AG 13 type button cell batteries for clock.
AC operation
1. Insert the DC plug at the end of the AC adaptor cord into the DC input jack.
Input: 110V/60Hz Output: DC9V/700mA
2. Plug the AC adaptor into an appropriate wall outlet.
Note: AC operation only for CD and radio mode.
3
IMPORTANT
BEFORE OPERATING YOUR APPLIANCE, PLEASE READ ALL OPERATING AND SAFETY
INSTRUCTIONS TO RECEIVE MAXIMUM ENJOYMENT. ALL INSTRUCTIONS SHOULD
BE PROPERLY FOLLOWED.
LASER SAFETY: THIS UNIT USES A LASER. ONLY A QUALIFIED
SERVICE TECHNICIAN SHOULD REMOVE THE COVER OR ATTEMPT
SERVICE AS THIS DEVICE CAN CAUSE POSSIBLE EYE INJURY.
CAUTION: INVISIBLE LASER RADIATION WHEN OPEN AND
INTERLOCKS DEFEATED. AVOID EXPOSURE TO THE BEAM.
THIS DEVICE COMPLIES WITH PART 15 OF THE FCC RULES. OPERATION IS SUBJECT TO THE
FOLLOWINGTWO CONDITIONS:(1) THISDEVICE MAYNOT CAUSEHARMFUL INTERFERENCE,AND(2)
THiS DEVICE ACCEPTS ANY INTERFERENCE RECEIVED, INCLUDING INTERFERENCE THAT MAY
CAUSE UNDESIRED OPERATION.
MODEL NO: CR-38OOCD
CONTROL FUNCTIONS
LCD MULTI-FUNCTION DISPLAY
1. Clock: AM/PMIndicator
2. Time/Year lndicator
3. Time Indicator
4. Alarm Set lndicator
5. Alarm Function lndicator
6. Snooze Function Indicator
7. Month Indicator
8. Date Indicator
9. Day Indicator
10.Temperature Indicator
11.AM/FM Band Indicator
12.FM Stereo Indicator
2
13.Radio Frequence lndicator
14.KHz,MHz lndicator
15.Memory lndicator
16.Preset Channel No.lndicator
17.CD: Intro Indicator
18.CD: Play/pause lndicator
19.CD: Low Battery lndicator
20.CD: Track No. lndicator
21.CD: TimeIndicator
22.CD: Repeat Indicator
23.CD: RandomIndicator
24.CD: ProgamIndicator
CLOCK AND CALENDAR SETTING
Settingthe Time
1. Press and hold Time Set button and press Hour/M & Min/D to adjust hour and minute.
2. Release Time Set button to store your setting in memory.
3. Press the 12/24 button to select 12 or 24 hour clock display.
Setting the Calendar
1. Press and hold Date Set button and press 12/24 to adjust year.
2. Press and hold Date Set button and press Hour/M & Min/D to adjust month and date. The Day of week
will automatically set in accordance with the date.
3. Release Time Set button to store your setting in memory.
TEMPERATURE FEATURE
This unit has an indoor thermometer that has the range of-19.5°C to 60°C. Press Temperature button
°C/°F to select Celsius ( °C ) or Fahrenheit (°F).
Note: If the measured temperature range is over, the display will show “LO” or “HI”.
PLAYING A CD
1. Slide the FUNCTION switch to the CD position. (FIG.1 below)
2. Press the OPEN button and load your disc then close the CD door.
3. Press the PLAY/PAUSE button once to turn the unit ON.
4. After TOC reading, the number of tracks of your CD and the total playing time will be displayed about 1
second in the LCD display, and then start playing automatically.
5. Adjust the level of sound by using the VOLUME knob. If using BASS BOOST,it may be necessary
to adjust the volume for clarity. The display will show the current playing track number and time. To
stop playback, press the STOP button once.
6. To power off the CD function, press STOP button again, the unit will turn off automatically.( auto power
off at 30 sec passed from last operation at stop condition)
PAUSEAND SKIP FEATURES
1. Start playing your CD as described previously.
Press PLAY/PAUSE button to pause the current track. Press PLAY to continue playing.
2. Press forward CD skip button to advance one track. Hold it down to advance quickly through the
tracks.
3. If you wish to go back to the beginning of the track when it is playing press back CD skip button once.
If you wish to return to the previous track press CD skip button twice.
PROGRAMMED PLAY
This function allows you to preset the order in which a series of tracks will be played.
1. Insert a CD as described above. Press the PGM button. “PGM 00 01” will appear in the display.
2. Press the CD skip or buttons briefly to locate the particular track. Then press the PGM button again
to store the selected track in the memory. Up to 2O tracks can be registered by repeating step 2.
3. To review the tracks that you have programmed, press the PGM button repeatedly.
4. After programming is complete press PLAY button and tracks will be played in stored order.
5. To clear all programmed tracks, Register 00 on the first program track or open the door or power off.
REPEAT CD PLAY
If you wish to listen to a track over and over again, the repeat function will allow you to do so.
1. Start playing a CD.
2. Press MODE button once to repeat play the current track, the indication “ 1” will be displayed in
the LCD display.
3. Press the MODE button again to repeat play all tracks, the indication “ ” will be displayed in the
LCDdisplay.
4. To cancel the repeat feature, press the MODE button repeatly until the indication disappear.
INTRO CD PLAY
You can set the unit to scan forward and play the 10 seconds of each track on the CD, so you can find
the track you want to listen to.
1. Press the MODE button 3 times, the indication “ INTRO ” will be displayed in the LCD display.
2. Press PLAY/PAUSE button to start the intro play.
3. If you want to continuous play, press the PLAY/PAUSE button again.
RANDOM CD PLAY
You can listen to the track by random sequence.
1. Press the MODE button 4 times, the indication “ RANDOM ” will be displayed in the LCD display.
2. Pess PLAY/PAUSE button to start the random play.
3. After all tracks playing are finished, it will stop automatically.
4. To cancel the random play mode, press the MODE button again until the indication disappear.
RADIOOPERATION
1. Slide the FUNCTION switch to the RADIO position. (FIG.1, page 4)
2. Press the radio ON/OFF button once to switch on the unit.
3. Press Band button to select AM/FM band.
4. Press and hold the TUN UP or TUN DOWN button for more than 1 seconds and this will start the auto
search feature and your appliance will tune automatically and stop at the next radio station in your
area of sufficient signals strength. To continue auto search press ABOVE buttons again.
5. If auto search is not required press the TUN UP or TUN DOWN buttons until the desired station frequency
is shown in the LCD display.
6. To off the radio, press Radio ON/OFF button once or slide the switch to CD position, the LCD display
will turn off.
NOTE: For FM reception there is a FM Antenna on the rear of the unit. Extend the antenna and rotate
to obtain the best reception.
For AM reception the signals are picked up through the built-in antenna. You may have to
rotate the unit to obtain the best reception at horizontality.
FMSTEREO RECEPTION
If an FM stereo signal is received, STEREO indicator is automatically turned on.
STORING RADIO STATION
This unit is featured with 10 station memory for AM and FM band.
1. Tune A desired station as described in above radio operation.
2. Press the MEMORY button once, the indication “MEMO” will flashing appear in the display.
3. Press M-UP or M-DOWN button to select channel 1~10.(EXAMPLE: CH1)
4. Press the MEMORY button again to enter this station into memory CH1.
5. Repeat step 1~4 until memory is full (AM: 10 stations, FM: 10 stations).
4 5
RADIO CD BUZZ
FIG.1
PLAYING SELECTED RADIO STATIONS
1. Power on the radio.
2. Press the BAND button for select AM, FM.
3. Press M-UP or M-DOWN button to select the station stored in memory.
4. Adjust volume to the desired sound level, if BASS BOOST is on, it may be necessary to adjust volume
for clarity.
SETTING THE ALARM
1. Press and hold Alarm Set button and press Hour/M & Min/D to adjust hour and minute.
2. Release Alarm Set button to store your setting in memory.
3. To review the alarm time press Alarm Set button.
WAKE TO RADIO
1. Power on the RADIO, select your desired radio station.
2. Adjust the volume to desired level.
3. Follow procedures 1 to 3 in setting the alarm, the pre-set wake-up time will continue to be registered
in the timer memory.
4. Slide the ALARM/SNOOZE switch to the “ON” position.
5. Press the RADIO ON/OFF button to off the radio.
6. When the preset alarm time comes, the radio will turn on automatically.
7. To switch the sound off, press the RADIO ON/OFF button once to turn off the unit and slide the alarm
switch to off position.
WAKE TO CD
1. Follow procedures 1 to 2, in playing a CD.
2. Adjust the volume to desired level.
3. Follow procedures 1 to 3 in setting the alarm, the pre-set wake-up time will continue to be registered
in the timer memory.
4. Slide the ALARM/SNOOZE switch to the “ON” position.
5. Turn OFF the CD. ( if CD is ON )
6. When the preset alarm time comes, the CD will turn on and play automatically.
7. To switch the sound off, press the STOP button twice to turn off the unit and slide the alarm switch
to off position.
WAKE TO BUZZER
1. Slide the function switch to buzz position. (FIG.1, page 4)
2. Follow the procedures in SETTING THE ALARM.
3. Slide the ALARM/SNOOZE switch to the “ON” position, The pre-set wake-up time will continue to be
registered in the timer memory.
4. When the preset alarm time comes, the buzz sounds.
5. To switch the sound OFF, slide the ALARM Switch to OFF position.
* The buzz sound can not be adjusted by volume.
SNOOZE CONTROL ( BUZZER ONLY )
The Snooze Button allows the user an extra sleep time of about 5 minutes after the buzzer is switched
on to the pre-set wake-up time.
1. Follow the procedures in SETTING THE ALARM.
2. Slide the FUNCTION switch to the “ BUZZ ” position.
3. Slide the ALARM/SNOOZE switch to the “ SNOOZE ” position.
4. When the alarm is announcing, press the SNOOZE/LIGHT button to pause the alarm. After 5 minutes,
the alarm will activate again.
5. To switch the sound OFF, slide the ALARM switch to OFF position.
6

Other LENCO CD Player manuals

LENCO SCD-580SI User manual

LENCO

LENCO SCD-580SI User manual

LENCO CD-010 User manual

LENCO

LENCO CD-010 User manual

LENCO CD-215 MP3 User manual

LENCO

LENCO CD-215 MP3 User manual

LENCO CD-011 User manual

LENCO

LENCO CD-011 User manual

LENCO SCD-38 USB User manual

LENCO

LENCO SCD-38 USB User manual

LENCO SCR-96 User manual

LENCO

LENCO SCR-96 User manual

LENCO SCD-37 USB User manual

LENCO

LENCO SCD-37 USB User manual

LENCO SCD-24 User manual

LENCO

LENCO SCD-24 User manual

LENCO CD-201 User manual

LENCO

LENCO CD-201 User manual

LENCO SCD-37 User manual

LENCO

LENCO SCD-37 User manual

LENCO SCD-42 User manual

LENCO

LENCO SCD-42 User manual

LENCO SCD-26 User manual

LENCO

LENCO SCD-26 User manual

LENCO CD-214 User manual

LENCO

LENCO CD-214 User manual

LENCO BOOST-8 User manual

LENCO

LENCO BOOST-8 User manual

LENCO CD-400GY User manual

LENCO

LENCO CD-400GY User manual

LENCO SCD-37 USB User manual

LENCO

LENCO SCD-37 USB User manual

LENCO SCD-650BU User manual

LENCO

LENCO SCD-650BU User manual

LENCO CD-012 User manual

LENCO

LENCO CD-012 User manual

LENCO SCD-37 User manual

LENCO

LENCO SCD-37 User manual

LENCO SCD-36 User manual

LENCO

LENCO SCD-36 User manual

LENCO CD-500 User manual

LENCO

LENCO CD-500 User manual

LENCO MCi-215 User manual

LENCO

LENCO MCi-215 User manual

LENCO DAR-061BK User manual

LENCO

LENCO DAR-061BK User manual

LENCO SCDI-01 User manual

LENCO

LENCO SCDI-01 User manual

Popular CD Player manuals by other brands

Sony XDCAM PDW-HD1500 Operation manual

Sony

Sony XDCAM PDW-HD1500 Operation manual

Sony WALKMAN D-EJ760 user manual

Sony

Sony WALKMAN D-EJ760 user manual

Audiovox Rampage ACC-52 Owner's manual and installation guide

Audiovox

Audiovox Rampage ACC-52 Owner's manual and installation guide

Magnavox AZ1100 - Single Deck Istruzioni per l'uso

Magnavox

Magnavox AZ1100 - Single Deck Istruzioni per l'uso

Sony WX-GT80UI operating instructions

Sony

Sony WX-GT80UI operating instructions

Sony CDX-838 - Compact Disc Changer System operating instructions

Sony

Sony CDX-838 - Compact Disc Changer System operating instructions

Sony D-V500 operating instructions

Sony

Sony D-V500 operating instructions

Hott CD511 Q&A

Hott

Hott CD511 Q&A

JVC POWERED WOOFER CD RV-B99 BK/BU instructions

JVC

JVC POWERED WOOFER CD RV-B99 BK/BU instructions

Tangent Fjord user manual

Tangent

Tangent Fjord user manual

Pioneer CDJ-1000MKII operating instructions

Pioneer

Pioneer CDJ-1000MKII operating instructions

Ibiza sound CDS-200 manual

Ibiza sound

Ibiza sound CDS-200 manual

Philips AZ7261 - Cd Personal Instructions for use

Philips

Philips AZ7261 - Cd Personal Instructions for use

Optimus CD-3680 (42-5075) owner's manual

Optimus

Optimus CD-3680 (42-5075) owner's manual

Panasonic SL-CT780 operating instructions

Panasonic

Panasonic SL-CT780 operating instructions

Philips AZ 1560/00 Specifications

Philips

Philips AZ 1560/00 Specifications

Philips AZ1137 user manual

Philips

Philips AZ1137 user manual

Plinius CD-101 instruction manual

Plinius

Plinius CD-101 instruction manual

manuals.online logo
manuals.online logoBrands
  • About & Mission
  • Contact us
  • Privacy Policy
  • Terms and Conditions

Copyright 2025 Manuals.Online. All Rights Reserved.