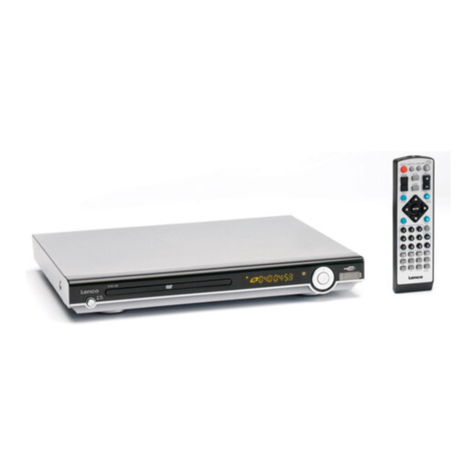
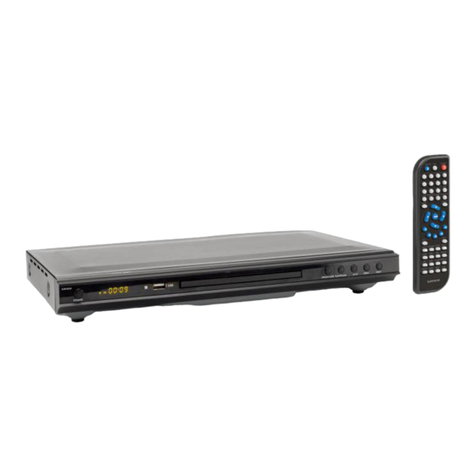
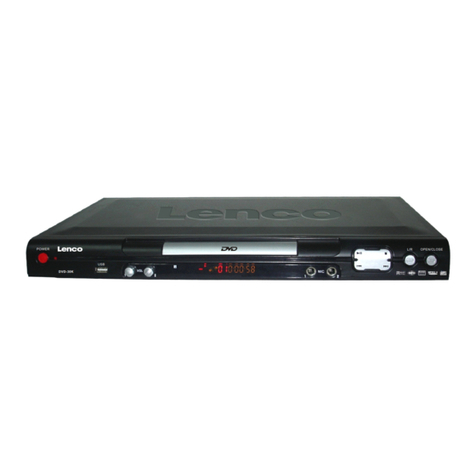
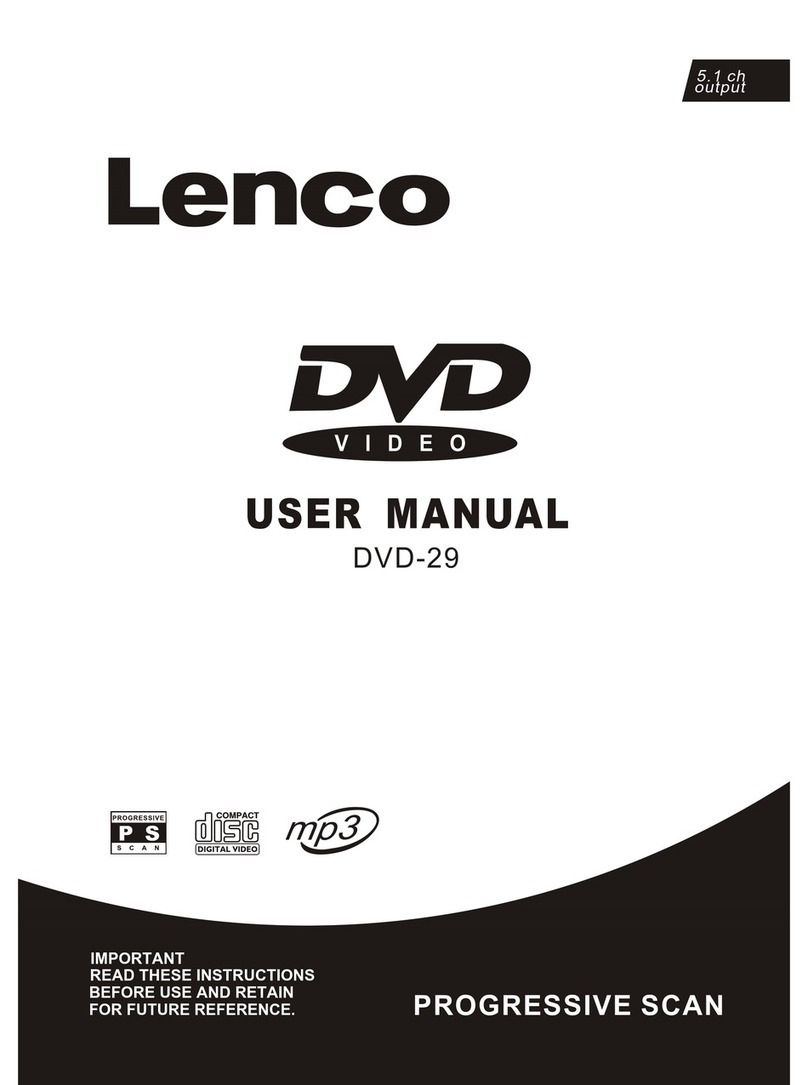
LENCO DVD-517 H User manual

Instruction Manual
DVD-517H

AVIS RISQUE CHOC ELECTRIQUE NE
PAS OUVRIR

3

4

TABLE OF CONTENTS
General StepsIn TheSetup Menu 21
1 System Setup 22
1.1 SystemSetup 22
1.1.1 Source 22
1.1.2 Tv System 22
1.1.3 Video 22
1.1.4 Tv Type 22
1.1.5 Password 22
1.1.6 Rating 22
1.1.7 Default 23
1.2 LanguageSetup 23
1.2.1 Osd Language 23
1.2.2 Audio Lang 23
1.2.3 Subtitle Lang 23
1.2.4 Menu Language 23
1.3 AudioSetup 24
1.3.1 Audio Out 24
1.3.2 Lpcm Output 24
1.3.3 Prologic 24
1.4 VideoSetup 24
1.4.1 Screen saver 24
1.4.2 Brightness 24
1.4.3 Contrast 24
1.4.4 Hue 24
1.4.5 Saturation 25
1.5 SpeakerSetup 25
1.5.1 Downmix 25
1.5.2 Center Delay 25
1.5.3 Rear Delay 25
1.6 DigitalSetup 25
1.6.1 Dynamic Range 25
1.6.2 Dual Mono(left + Right) 25
Mp3 &Mpeg Function 27
Jpeg Files 28
Usb Inputand cardreader 29
Troubleshooting 30
Specifications 31
Precaution 3
Safety Information 4
Table ofContents 5
About Your DVDPlayer 6
Best Location 6
To Obtain aClear Picture 6
Playable Discs 6
Digital Audio Output 6
Laser-Head Over-CurrentProtection System 6
Use ofDisc 7
Handling 7
Cleaning 7
Storing 7
Front andBack panels 8
Back Panel 8
Front Panel 8
Remote Control 9
Operating theremote control 10
Connecting Devices 11
Speakers 12
Arrangement ofspeakers 12
Connecting speakers 13
Connecting antenna 14
Connecting powersupply 15
Playing theradio 16
Basic DVDoperation 17
Functions 18
5

The followingwill helpyou getthe mostenjoyment fromyour DVDreceiver system.
BEST LOCATION
The unit should be placed on a firm, flat surface, away fromVCRs, stereos,radios, orlarge
speakers, asthe magneticflux fromthese devices may cause distortion in the sound and a poor
picture. Ifplaced ina cabinet,be surethere isat least1 of free space completely around the unit
for properventilation.
TO OBTAINACLEAR PICTURE
ADVD receiveris aprecision device. If theoptical pick-uplens anddisc drive parts becomedirty
or worndown, picturequality willbecome poor. To obtaina clearpicture, regular inspection and
maintenance arerecommended every 1,000 hoursof use,depending onthe operating environment.
Contact dealerfor details.
PLAYABLE DISCS
This DVDreceiver systemwill playthe followingtypes of discs: DVD, MP3, CD, CD-R,
and CD-RWwith super-errorcorrection ability. Itis alsocapable ofdisplaying pictureCDs anddigital
photo albums.It supportseight languages,up to32 subtitles, and multi-angle viewing. It features
easy setupand operationwith on-screenmenus. Ithas fullfunction CPUup gradeable capability.
DIGITALAUDIO OUTPUT
The unit'scoaxial outputcapability enablesyou toconnect an external six-channel AV amplifier
and processorwith built-inDolby Digitalcode andMPEG modulatingcapacity with just one
cord. Thisenables youto convenientlyenjoy differentDVD, CD,and Mp3discs.
ANALOG AUDIOOUTPUT
Speaker system plug-and-play convenience through the built-in six-channel power amplifier
eliminates theuse ofan externalpower amplifier.
LASER-HEAD OVER-CURRENT
PROTECTION SYSTEM
To extend the service life of the laserhead, theunit includesa uniquelaser-head over-current
protection system,ensuring aconstant lasercurrent.
"
ABOUT YOUR
DVD PLAYER
6

USE OFDISCS
This page contains valuableinformation regardingthe handling, cleaning, andstorage ofdiscs
played inthis unit.
Handling
Do nottouch theplayback sideof thedisc.
Do notattach paperor tapeto discs.
Do notstick orwrite anythingon thesurface. Protectagainst fingerprints.
Alwayshold adisc bythe centerand edgeportions.
Cleaning
Fingerprints anddirt onthe discmay causepicture and/orsound deterioration.Wipe the disc from
the centeroutward witha softcloth. Always keepthe discclean.
If youcannot wipethe dirtoff, lightlyuse aslightly moistenedsoft clothand finishwith adry cloth.
Do notuse anytype ofsolvent suchas: Paintthinner,benzene, commerciallyavailable cleanersor
anti-static sprayfor vinylLPs.
Storing
Do notstore discsin placessubject todirect sunlightor nearheat sources.
Do notstore discsin placessubject tomoisture anddust.
Store discsvertically ina case.Stacking orplacing objectson discsoutside oftheir casemay
cause warping.
7

FRONT AND
BACK PANELS
Front Panel Functions
Back PanelFunctions
5. NEXT
While in the DVD status, you may press this
button for next track. .
8. VOLUME
Use this button to control the unit's volume. It
controls all six channels simultaneously.
2. OPEN/CLOSE
Use thisbutton toopen andclose thedisc tray
while inDVD mode.
4. PREV
While in the DVD status, you may press this
button for previous track.
outlet, checkto makesure allof theconnections
have beenproperly completed.When theyhave
to powerthe unit.
of electricitymay causeinterference withother
1. POWER
Before plugging the powercord intotheAC
been, carefullyplug powercord intooutlet.
Press the POWER buttonon thefront panel
When theunit isinitially powered,a briefsurge
electronic equipmenton thesame circuit.If this
occurs, connectthe unitto anoutlet ona
different circuit.
3. PLAY/
Use thisbutton tobegin playfunction whilein
DVD mode.
Use this button to pause play function while in
DVD mode.
PAUSE
6. INPUT SIGNAL SOURCE
Use this button to select the proper input signal
source. (Note: The selected input will correspond to
the selected input terminal on the rear panel.)
7. USB CONNECT
Readonly USBinput.
9. CARDREADER
AUDIO
AUX IN LINE OUT
SW
COAXIAL
AUX
VIDEO IN VIDEO OUTPUT
Pr/Cr
VIDEO
S-VIDEO
Y
Pb/Cb SCART TV IN/OUT
AM ANTENNA FM
100-240V
50~60Hz
SPEAKER OUTPUT
SW
SW
CEN
CEN
FL
FR
SL
SR
SR
4 4 4 4 4 8
2.ANTENNA
Use to connect the provided indoor FM and
AM loop antennas.
3. REAR
Use to connect the four terminals of the left
and right surround sound speakers.
4. FRONT/MAIN
Use to connect the four terminals of the left
and right front or main speakers.
5. CENTER/SUBWOOFER
Use to connect the four terminals of the center
and subwoofer speakers.
1. 100-240V~ 50/60HZ
This unit comes withan AC power cord. Be
sure its prongs are dry before plugging it into an
electrical outlet. Take caution not to overextend
the cord or walk on it. 6.AUX AUDIO INPUT
7 LINE OUTPUT
8. SUBWOOFER LINE OUT
9. COAXIAL OUTPUT
10.AUX VIDEO IN
11. COMPONENT VIDEO OUTPUT
12. VIDEO OUTPUT
13. S-VIDEO OUTPUT
14.SCART TV IN/OUT
21
34 5 14
678
9
12
1310 11
8

REMOTE
CONTROLLER
0
123
456
789
TUNER SCART AUX
SETUP
FM MODE PRE/TUN
MEMO
ENTER
AUTO
STOP
+10
PAUSE/STEP PLAY
+CH
ZOOM PROG SLOW
REPEAT
GOTO TITLE MENU DISPLAY
N/P
SUBTITLE AUDIO ANGLE
RESUME
A-B
CH.SET
MUTE
RETURN
+
R/L
DVD
VOL
23
2
4
5
6
22
7
13
19
14
15
12
10
11
9
21
20
8
1
17
18
16
3
38
37
36
24
27
25
26
28
29
32
31
30
33
35
34
39
42
40
41
43
1. Open/Close
2. Tuner
3. DVD
4. Scroll Up
5. FM Mode
6. Scroll Left
7. Scroll Down
8. Memo
9. Play
10. Pause/Step
11. Volume Up and Down
12. Next
13. Previous
14. Zoom
15. Program
16. Title
17. Goto
18. N/P
19. Subtitle
20. Resume
21. Return
22. Repeat
23. Mute
24. Scart input
25. AUX
26. 0-10+ Digits
27. Setup
28. Preset/Tuning
29. Scroll Right
30. Enter
31. Auto tuning
32. Stop
33. Channel Up and Down
34. Fast Reverse
35. Fast Forward
36. A - B Repeat
37. Slow
38. Menu
39. Diplay
40. AUDIO
41. Angle
42. CH.SET
43. R/L
9

Notes:
Do not direct the remote sensortoward
any lightsource, suchas directsunlight or
a strongfluorescent light,as itmay cause
the unitto notoperate correctly.
When other remote controls are used
nearby or when the remote isused near
equipment usinginfrared rays,interference
may occur.
Placing an object on the remotecontrol
may cause it to inadvertently depressa
button, changinga functionand shortening
battery life.
Do notglaze thefront ofthe DVDreceiver
with colored glass, as it may cause
interference withnormal operation of the
controller.
Make surethere isno barrierbetween the
remote controland remote sensor, as it
could preventthe unitfrom receiving the
signal.
Do notspill wateror putwet items on the
remote control.
Never disassemblethe remotecontrol.
BATTERIES
INCORRECT USE OF BATTERIES MAY
CAUSE THEMTO LEAK,CORRODE OR EX-
PLODE.
Battery Installation
1. Pushdown andout on the battery Compart-
ment coverto removeit.
2. Insertthe two AAA batteries intothe battery
compartment ofthe remote control, making
sure the+ and- signs on the batteries and
inside thebattery compartmentmatch up.
3. Replacethe batterycompartment cover.
Notes:
Do not mix batteriesfrom differentmanu-
facturers, norold oneswith new.
If theremote controlwill notbe usedfor an
extended period of time, remove the
batteries to prevent damage-causing
corrosion.
Remove dead batteries immediately to
prevent damage-causingcorrosion.
If batteryleakage occurs,wipe thebattery
liquid fromthe batterycompartment, then
replace bothbatteries.
Alwaysreplace bothbatteries atthe same
time, usingnew,fully chargedbatteries.
Life expectancy of batteries may vary
depending onamount ofuse.
Using theRemote Control
Point theremote controlat theremote sensor
on the DVD receiver. When the signal is
received fromthe remote, the unitwill function
accordingly. The remote will operate to
approximately 16'from theremote sensorat an
angle ofaround 30 each direction.
""
OPERATINGTHE
REMOTE CONTROL
10
AUDIO
AUX IN LINE OUT
SW
COAXIAL
AUX
VIDEO IN VIDEO OUTPUT
Pr/Cr
VIDEO
S-VIDEO
Y
Pb/Cb SCART IN/OUT
AM ANTENNA FM
100-240V
50~60Hz
SPEAKER OUTPUT
SWCEN
FL
FL
FR
FR
SLSR
4 4 4 4 4 8
RECORDER
CD/DVD AUX PLAYER 1
ACTIVE
SUBWOOFER (OPTIONAL)
Connection terminals for thisDVD receiver
are foundon therear panel. Read carefully
and follow the manufacturers' instructions
of any video and audio device being
connected tothis unit.
Do notconnect thepower untilall connections
have beenproperly completed.
Red terminal(marked R)is forconnecting the
right channel.The whiteterminal (markedL)
is forconnecting theleft channel. The yellow
terminal isfor videoconnection. Make sure
all connectionsare securelymade. Improper
connections may cause noise, poor perfor-
mance, orcause damageto theequipment.
Do not tie the AV cordwith anyother cords,
such as the powercord orspeaker wires,as
it may result in poor picture and/or sound
quality.
CONNECTING
DEVICES
11

1
2345
67
The configuration and arrangement of a
surround sound system's speakers is critical.
For maximumlistening enjoyment, refer to the
Arrangement ofSpeakers sectionin thismanual
prior toconnecting speakers.
Surround SoundSpeakers
Front ormain rightand leftspeakers;
center speaker
These three speakers provide extensive
sound imagingand augmentthe dynamic effect
of theaudio.Amovie's principaldialogue comes
through thesespeakers.
Rear orsurround soundspeakers
These two speakers provide 3-D dynamic
sound effects, and create an enveloping
atmosphere, asthey addbackground sounds.
.
Subwoofer speaker
Provides rich and powerful bass, addinga
powerful dimensionof realism.
Note:Audio recordedfor thecenter speakerand
subwoofer willbe assignedto thefront and3-D
rear speakers to obtain the optimum 3-D
surround soundeffect.
The ideal surround soundspeaker configur-
ation mayvary accordingto roomsize and wall
material. Thefigure below illustrates a typical
arrangement.
Hints:
Front ormain speakersand central speaker
should beplaced atthe samelevel andin away
that soundis orientedtoward thelistener's ears.
3D surroundsound orrear speakers should
be placed3' higherthan theheight of listener's
ears.
Subwoofer speakermay beplaced anywhere
within theroom, asits location produces little
effect on a listener's sensation to sound. To
obtain theoptimum basseffect, a subwoofer is
recommended inhome theatersystems.
1.TVset orscreen
2. Frontor mainleft speaker
3.Subwoofer
4.Centerspeaker
5.Front ormain rightspeaker
6.3-Dsurround soundleft speaker
7.3-Dsurround soundright speaker
8.Viewer's location
SPEAKERS ARRANGEMENT
OF SPEAKERS
12

AUDIO
AUX IN LINE OUT
SW
COAXIAL
AUX
VIDEO IN VIDEO OUTPUT
Pr/Cr
VIDEO
S-VIDEO
Y
Pb/Cb SCART IN/OUT
AM ANTENNA FM
100-240V
50~60Hz
SPEAKER OUTPUT
SW
SW
CEN
CEN
FL
FR
SLSR
4 4 4 4 4 8
Subwoofer speaker
Surround speaker
Surround speaker
Center speaker
Main speaker Main speaker
This well-designedDVD receiver provides
optimum soundquality whenthe speakersused
are withinthe rangeof theirrated impedance.
Important
The minimumimpedance ofthe fivespeaker
terminals is4 ohm; for the subwoofer, it is
8 ohm.
If youwant touse onlyone speakeror listen
to monophonicmusic, donot parallelconnect
individual speakers to the left and right
channel terminals.See thefigure onthe left
below.
Connecting SpeakerCables
1.Peel offapproximately1/ 2 of cable
insulation
2.Tighten thewire end(#2 below)
3.Open cableterminal bypressing backon
tab
4.Insert wireend intoterminal
5.Release tab;make surewire isin terminal
securely
Note: To prevent damage tothe circuit,care
should betaken toprevent shortcircuiting from
occurring atthe positiveand negativepoles of
the speakercord.
"
CONNECTING
SPEAKERS
12
34
5
13

AM
FM
FM
Outdoor AM antenna
Coaxial cable(75 ohm)
Coaxial cable (75 ohm)
Outdoor FM antenna
Radio signals may bedifficult toreceive in
some buildings and under certain conditions.
The providedantennas willhelp intheir reception.
They areintended forindoor useonly.
AM LoopAntenna
The placement of theAM loop antenna should be
in a direction that provides the clearest
reception. Keepas far as possible from DVD
receiver,TV set,and speakerand powercords.
If receptionremains poor, an outdoor antenna
may benecessary.
Toconnect theAM loopantenna:
1.Holddown thehandle
2.Insertthe wireend intothe hole
3.Releasethe handle
Position forbest reception
FM IndoorAntenna
The FM antenna shouldbe fullyextended and
in a direction that provides the clearest
signal. Securethe antennaends in a location
Where distortion is at a minimum. If reception
remains poor, an outdoor antenna may be
necessary.
2
3
1
CONNECTING
ANTENNA
14

BASIC OPERATION
Before plugging the power cord into theAC outlet, checkto makesure allof theconnections
have beenproperly completed.When theyhave been,carefully plugthe powercord intothe outlet.
Press thePOWER buttonon thefront panel to powerthe unit.The displaypanel willlight up.
When theunit isinitially powered,a briefsurge ofelectricity maycause interference with theother
electronic equipmenton thesame circuit.If thisoccurs, connectthe unit to an outlet on a different
circuit.
Selecting SoundSource
1. Pressany functionbutton (DVD, TUNER,
TV,AUX) toselect thedesired soundsource.
The appropriatesymbol willappear inthe display.
2. Whenthe TUNERbutton ispressed,
the laststation listenedto willbe played.
Note: The desiredprogram sourcewill notplay
unless itand theselected signalbutton coincide
with theactive programsource signalinput.
VolumeControl
The volumemay beadjusted byeither turning
the large volume knob on the front panel or
using the appropriate volume button on the
remote control.
Mute
Pressing theMUTE buttontemporarily mutes
every speaker. To resume audio, press the MUTE
button again.
CONNECTING
POWER SUPPLY
15

Memory number
Wave band Station frequency
ToPlay PresetStations
1.Press the TUNER button to select the
desired waveband.
2.Pressthe PRE/TUNbutton.
3.Press any of the numbered buttons to
select thedesired station'smemory number.
For example,to playthe stationat memory
#5, simplypress the5 button; for memory
#17, pressthe 1button followedby the 7
button.
4.Stations inthe memoryfunction may also
be accessedby pressingthe UPor DOWN
button.
PLAYING THERADIO
Automatic Tuning
This unitwill storeup to40 individualAMor
50 individualFM/AM radiostations inits
1.Press the AUTO button. The wordAUTO
will appearin thedisplay and the automatic
2.Stationswill bestored inascending order
until 50stations of that particular wave band
have beensaved. Whena stationis stored,
thememory storagenumber,as wellas the
station's frequency.
3.Whenthe totalnumber ofstations reaches
50, ina particular wave's (AMor FM)
memory,no furtherstation inthat waveband will
be saved.
Positioning
1.Pressthe TUNERbutton toselect thedesired
wave band (AMor FM).
2.Press CH+ orCH- buttonto finda station.
The frequencywill changewith each press.
When astation's signalis received, it will
appear inthe display.
3.To lockonto astation quickly, hold the UP
or DOWNbutton fortwo seconds. The unit
will startautomatic tuning. When astation
is found,automatic tuningstops.
4. To reducenoise whenan FM-stereoprogram
has beenreceived, pressthe MONObutton.
The wordSTEREO willdisappear fromthe
display.The programis nowheard in
monographic form,reducing thenoise. To
resume stereoplay,press theMONO button
again.
Tuner button
Number button
0
123
456
789
TUNER SCART AUX
SETUP
FM MODE PRE/TUN
MEMO
ENTER
AUTO
STOP
+10
PAUSE/STEP PLAY
+CH
ZOOM PROG SLOW
REPEAT
GOTO TITLE MENU DISPLAY
N/PSUBTITLE LANGUAGE ANGLE
RESUME
A-B
CH.SET
MUTE
RETURN
+
R/L
DVD
VOL
tuning modeis activated.
16

BASIC DVD
OPERATION
NO DISC
LOADING
POWER
If there is no disc, NO DISC will be shown on screen:
OPEN
OPEN/CLOSE
Once the unit is connected to a television
set andany other accessory equipment, you
are readyto enjoythe excitementof DVDvideos
or yourfavorite CDsand MP3files.
Toplay aDVD videodisc:
Turn on theTV andselect theA/Vmode. If
the setfeatures anSCART connection,be sure
the SCARTmode isselected fromthe TVmenu.
Turn onthe amplifier, ifconnected. Select AC-3
or DVD mode.
Toplay anaudio disc:
Turnon the audio system and choose the
input sourcethat isconnected tothe DVDplayer.
Set theSPDIF OUTPUTto SPDIFOFF fromthe
SETUP MENU display if you don't have the
proper equipment for Dolby Digital surround
sound.
1. Press the POWER key onthe front panel.
DISC LOADINGappears onscreen.
2. Pressthe OPEN/CLOSEkey. The disc
tray willopen.
3. Placethe discon thedisc tray. Be sure
label sideis facingup wardson thetray.
4. Pressthe OPEN/CLOSEkey to close tray.
The disc tray will close. The disc type will
appear in the upper-left-hand corner of the
screen.
Once ithas readthe disc,the unitautomati-
cally willbegin playback. When playinga DVD,
the DVDtitle ormenu willappear.CD tracksare
played insequence.
Note:
It ispossible todamage a disc if it is not
placed correctlyon theguides in the disc tray.
This may also cause the DVD player to
malfunction. Do not force or place anything
other thana 5 DVD orCD ontothe disctray.
Never movethe DVDplayer duringplayback,
as thismay causedamage tothe discas wellas
the player. To openand closethe disctray,only
use theOPEN/CLOSE key found on both the
remote controland onthe unit'sfront panel.
"
6.Fast Forward/ReversePlayback
The unit features both fast forward and fast
reverse playback.Either mode will speed up:
2x,4x,8x,20x.
Press PAUSE key:
Press PREV key:
Press NEXT key:
FRONT PANEL
PLAY
FRONT PANEL
REMOTE CONTROL
REMOTE CONTROL
FRONT PANEL
REMOTE CONTROL
REMOTE CONTROL
5. PREV/NEXT playback
Press key or key , play previous or next
track. To resume normal playback, press PLAY key.
REMOTE CONTROL
PAUSE
OPEN/CLOSE
PAUSE
PLAY
17

BASIC DVD
OPERATION FUNCTIONS
Memory Playback
This unit allows the viewer to stop playback,
And continue playbackfrom that exactdiscLocation
Later on Pressthe STOP key to halt playback.
The unitthen willmemorize thelocation where
playback was stopped. To resume watching,
press thePLAYkey andthe unitwill
resume playbackfrom theexact locationwhere
playback wasstopped. (Exclude Mp3DISC)
When youplay DVDdiscs, press the MENU or
TITLE key to return to the menuand title,the unit then
will memorizethe location,To resumewatching
press thePLAYkey andthe unit will resume
playback fromthe exactlocation.
Slow Motion
This DVDreceiver has the ability to play
discs inslow motion
Each timethe SLOWkey is
pressed,the speedwill slow speed1/ 2,1/ 3, 1/4,
1/ 5,1/6,1/7,to normal playback resume normal
playback,press the PLAYkey.
PLAY
SLOW
Screen Display
While adisc isplaying, thestatus ofvarious
functions maybe checked,such asthe tile,track
number,and severaltime categories.
1. Pressthe DISPLAY keyonce andthe title
appears alongwith thechapter and how much
playing timehas passed.
2. Press the DISPLAY key again and the
remaining timefor thatparticular titleappears.
3. Pressthe DISPLAY keyagain andthe total
elapsed timefor thatparticular chapterappears.
4. Press the DISPLAY key again and the
total remainingtime forthat particular chapter
appears.
5. Press the DISPLAY key again and the
display turnsoff.
TT 01/02 CH 02/ 28
00:21:05
TITLE REMAIN
01£º44£º34
CHAPTER ELAPSED
00£º05£º29
CHAPTER REMAIN
00£º07£º36
2X
2X
Toactivate eitherfunction, simplypress the
key or key on the remote control. The
speed changes each timethe key is pressed.
To resumenormal playback,press thePLAYkey.
DISP
.
18

N/P
This DVDreceiver supportsvideo output of
various systems,including auto,NTSC, and PAL.
The picture will blink and becomecolourless
when thewrong systemis selected.(NTSC for
NorthAmerica, PAL forEurope). Formore
information on the output format, refer to the TV
set's manufacturer's instructions.
Subtitles
The unithas thecapability todisplay subtitles
in anyof 32different languages.
1. Press the SUBTITLE key. The subtitle
menu willappear. Select thedesired language
by pressingthe SUBTITLEkey.
2. To remove the subtitlesfrom view, press
the SUBTITLEkey untilthey disappear.
Note: The disc being played must be multi-
subtitle encoded.
SUBTITLE OFF
SUBTITLE 02/08 ENGLISH
Camera Angle
Theability tochange thecamera angleallows
the viewer to play director and watch a movie from
different perspectives.
1. PresstheANGLE keyon theremote control.
With eachpress, thecamera anglechanges.
2. The key may be pressed only whenthe
flashing angleicon appearsin theunit's display
panel.
Note: Camera angle may bechanged onlyin
discs withmulti-angle capabilityencoded
into them.
Language
The unithas thecapability toshow moviesin
one ofeight languages.
1. PresstheAUDIO key. Thelanguage
menu willappear.Select thedesired language
by pressingtheAUDIO key.
Note: The discbeing playedmust bemulti-lan-
guage encoded.
1/4
AUDIO 1/8 AC-3 2CH ENGLISH
LOCATINGATITLE
DVD discs are normally divided intotitles,
which are then sub-divided into chapters. A
specific titlecan be easily found with thisunit.
Specific titlescan befound usingeither thetitle
menu function,if theDVD disc contains atitle
menu, orthrough itsunique titlenumber.
Title MenuFunction
1. Pressthe TITLEkey. The title menu will
appear onthe TVscreen.
2. Pressthe appropriatescroll keyto select
the desiredtitle.Atitle mayalso be located by
pressing itsassigned numberwith the number
buttons.
3. Press the ENTER key . This will start
playback fromchapter 1of theselected title.
Note:
Some discsdo not respond to this function.If
different instructionsappear onthe TV screen,
follow thoseinstructions. TheInstructions given
here describethe basicprocedure. Procedures
may varydepending onthe contentof the DVD
disc. Whenplaying a VCD2.0 disc, the TITLE
key can beused toreturn tomenu.
FUNCTIONS
SUBTITLE
AUDIO
ANGLE
19

Time
This DVDreceiver candisplay variousdata
regarding the disc being played. Press the
DISP buttonfor thefollowing.
1. Press once, the number of titles and
chapters ineach titleappears
.
2. Press again, thetime ofa selectedtitle
appears.
TITLE 01/02 CHAPTER 06/28
TITLE 01/02 TIME£- £-:£- £-:£- £-
MENU: MENU/PBC
Withthe PBCfunction on,choosing asong
on a CD can only be done when you are in
the main menu. Withthe PBCfunction off,song
selections can bemade byentering the relevant
number keys. The menu contentof thedisc will
appear when theMENU buttonis pressedwhile
a DVD disc isplaying.
AUDIO
SUBTITLES
PLAY
Repeat Play
This DVDreceiver allowsrepeated playback
of specific titles, chapters/tracks,or segment.
It evenallows switchingbetween twoitems that
are beingrepeated.
1. Selectthe itemto repeat.
2. Pressthe REPEAT key.
CHAPTER
TITLE
FUNCTIONS
DISP
DISP
REPEAT
MENU
REPEAT
ALL
REPEAT
VOL_L +00db
MONO/
CH.SEL
AMP Volume up/downAdjustment
Press the CH.SEL button on the remote control, TV
OSD appears:
VOL_L +00db
Press CH.SEL twice, OSD Appears:
VOL_R +00db
Press CH.SET three to seven times the OSD
converts into SUR_L,SUR_R,Center And Woofer
VOL_SUR_L +00db
VOL_SUR_R +00db
VOL_Center +00db
VOL_Woofer +00db
Press CH.SET continually And it will Repeat the
cycle.
Press the VOL+ or VOL- button on the remote
control to change the Volume value of L,R,SUR_L ,
SUR_R,Cente or Woofer separately.
The repeat mode changes each time the
REPEATkey ispressed (i.e.,from titlerepeat
to chapterrepeat, allrepeat ,to repeatoff.)
20
Other manuals for DVD-517 H
3
Table of contents
Other LENCO DVD Player manuals

LENCO
LENCO DVD-430 User manual

LENCO
LENCO DVD-320 User manual

LENCO
LENCO DVD-517 H User manual

LENCO
LENCO DVD-322 User manual

LENCO
LENCO DVP-854 User manual

LENCO
LENCO DVP-723 User manual

LENCO
LENCO DVP-933 User manual

LENCO
LENCO DVD-225 User manual

LENCO
LENCO DVD-29 User manual

LENCO
LENCO KDV-309 User manual

LENCO
LENCO DVP-740 X2 User manual

LENCO
LENCO MES-208 User manual

LENCO
LENCO DVD-41 MPEG4 User manual

LENCO
LENCO DVD-28 K - User manual

LENCO
LENCO DVD-07 User manual

LENCO
LENCO DVD-51 User manual

LENCO
LENCO KDV-310 User manual

LENCO
LENCO DVD-30K User manual

LENCO
LENCO DVD-320 User manual

LENCO
LENCO DVD-205 User manual