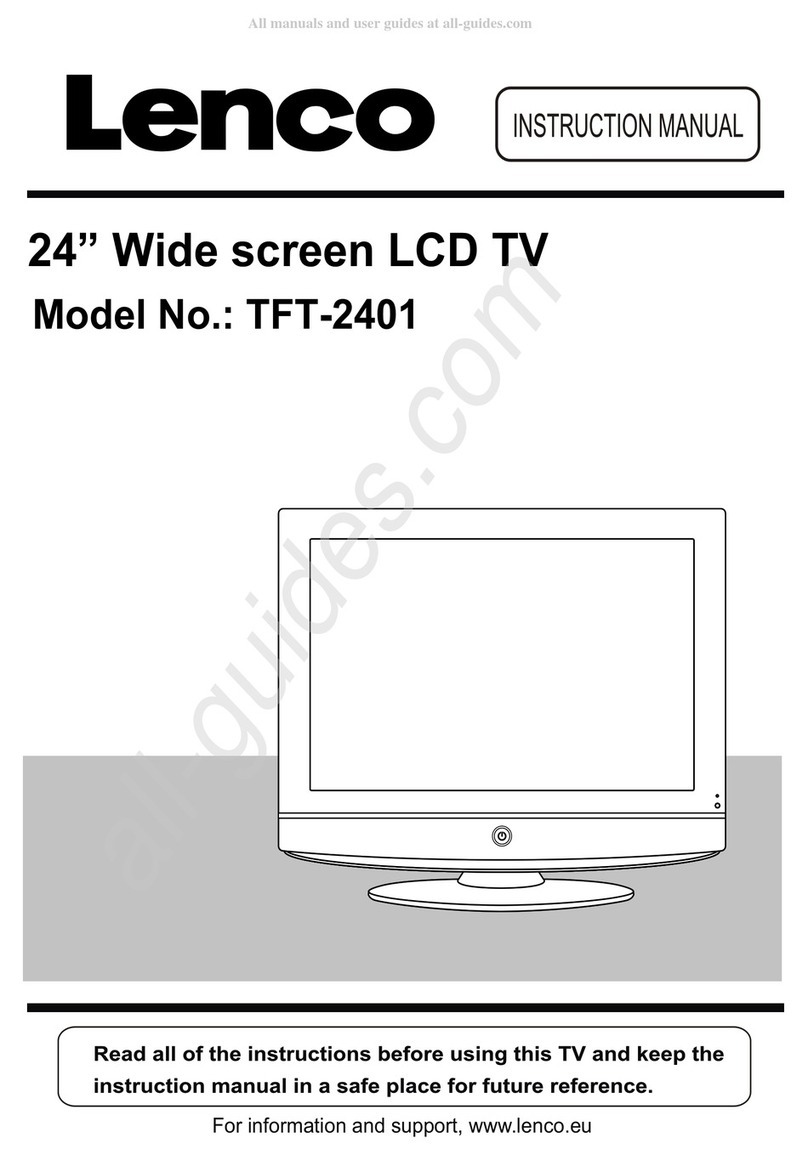
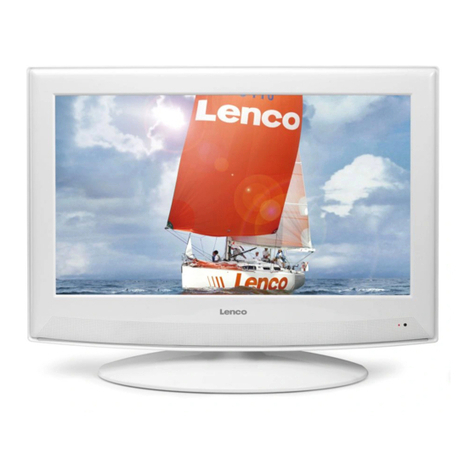
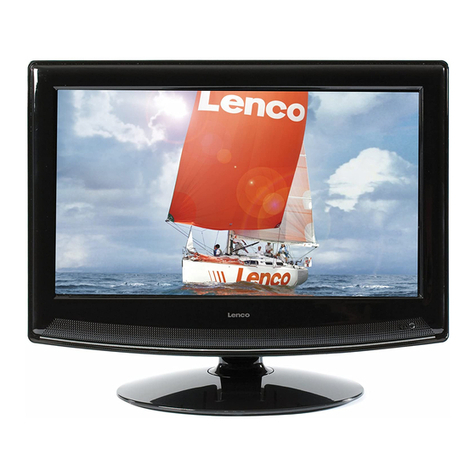
LENCO TFT-2402 User manual

TFT-2402 USER MANUAL
For more information and support, please visit www.lenco.eu

Table of contents
PRECAUTONS…………………………………………………………………………………… E3
CONTROLS ……………………………………………………………………………………… E4
USING THE TV FOR THE FIRST TIME ……………………………………………………… E7
BASIC OPERATIONS…………………………………………………………………………… E8
OSD MENU SETTING …………………………………………………………………………… E9
MAINTENANCE ………………………………………………………………………………… E12
TROUBLE SHOOTING ……………………………………………………………………… E12
SPECIFICATIONS ……………………………………………………………………………… E13

E2
Dear Customer:
Thank you for purchasing this LCD TV. When opening the box for the first time, please check whether all the accessories are
present. Before connecting parts and power, please carefully read the user manual and always keep these instructions handy and
close by your LCD TV.
OK
OK
FAV
FAV
TTX
TTX
HOLD
HOLD
ASPECT
ASPECT
SIZE
SIZE
MIX
MIX
CANCEL
CANCEL
INDEX
INDEX
REVEAL
REVEAL
SUBPAGE
SUBPAGE
MENU
MENU
Remote control X 1 Batteries X 2
Instruction Manual X 1
Please check the accessories when open the package. If anything damaged or lacked, consult with your local dealer .
Note:
This handling description is printed prior to product development.
When a part of the product specification must be changed to improve operability or other functions, priority is given to the
product specification itself. In such instances, the instruction manual may not entirely match all the functions of the actual
product.
Therefore, the actual product and packaging, as well as the name and illustration, may differ from the manual.
The screen shown as an example in this manual may be different from the actual screen display.
Power cord X 1
If at any time in the future you should need to dispose of this product, please note that: Waste
electrical products should not be disposed of with household waste. Please recycle where
facilities exist. Check with your Local Authority or retailer for recycling advice (Waste Electrical
and Electronic Equipment).

E3
PRECAUTIONS
CAUTION
TO ENSURE CONTINUED SAFETY DO NOT REMOVE ANY COVERS OR ATTEMPT TO GAIN ACCESS TO THE INSIDE
OF THE PRODUCT.
REFER ALL SERVICING TO QUALIFIED PERSONNEL.
TO PREVENT FIRE OR SHOCK HAZARD, DO NOT EXPOSE THIS APPARATUS TO RAIN OR MOISTURE.
CAUTION: TO PREVENT THE RISK OF ELECTRIC
SHOCK, DO NOT REMOVE COVER (OR BACK).
NO USER-SERVICEABLE PARTS INSIDE.
REFER SERVICING TO QUALIFIED SERVICE PERSONNEL.
CAUTION
RISK OF ELECTRIC SHOCK
DO NOT OPEN
This symbol indicates that dangerous voltage constituting a risk of electric shock is present within
this unit.
This symbol indicates that there are important operating and maintenance instructions in the
literature accompanying this unit.
Do not install the unit in an unstable space.
Do not exposed the unit to where there are extremes of temperature (below 5°C or exceeding 35°C) or moisture.
Do not expose the unit to directly sunlight or heat nearby.
Do not install this unit in a confined space, such as a bookcase or built-in cabinet. For sufficent ventilation, there should be
at least 20 cm distance around the apparatus.
The ventilation should not be impeded by covering the ventilation openings with items, such as newspapers, table-cloths,
curtains, etc..
Do not place this unit in any liquid.
Do not insert any tiny object into the unit through the ventilation.
The apparatus shall not be exposed to dropping or splashing. No object filled with liquids, such as vases, shall be placed
on the apparatus.
No naked flame sources, such as lighted candles, should be placed on the apparatus.
Never touch the TV screen or antenna / power cord during thunderstorms. Stop use it during thunderstorms.
Do not step on the power cord, or twist the power cord wire.
This product should not be adjusted or repaired by anyone except properly qualified personal when an abnormal condition
or trouble happens. Please consult with the qualified service person.
Always remove the batteries and store in a dry place if the remote control is not to be used for a long time.
Avoid drop down the remote control and damage it.
Always power this unit from an outlet with the same rating (voltage and frequency) as indicated on the rating label at the
back of this unit.
When not in use, disconnect the power cord from the outlet. Grasp the plug, not the cord, when disconnecting the unit.
This CLASS 1 device should be connected to the AC power plug with earthed-protective, and place the AC power plug at
the position easy to plug in and out.
Where the MAINS plug or an appliance coupler is used as the disconnect device, the disconnect device shall remain
readily operable.
•
•
•
•
•
•
•
•
•
•
•
•
•
•
•
•
•
•

E4
Control buttons
CONTROLS
MAIN UNIT
Jacks (Rear Panel)
1
2
3
4
5
7
8
Power/Standby button !!!!!!(POWER)
Input source select button !DŽSOURCE)
Menu button (MENU)
Channel down button !( p CH)
Channel up button (CH o)
Volume decrease button ( - VOL)
Volume increase button (VOL +)
Power indicator
Remote sensor
Power on/off button
1.
2.
3.
4.
5.
6.
7.
8.
9.
10.
General control buttons
High-Definition Multimedia interface input plug (HDMI) !
VGA interface input plug!DŽVGA)
SCART input plug!DŽSCART)
S-video input plug!DŽS-VIDEO)
Composite audio & video input plug !DŽR/L/VIDEO)
PC audio input plug!DŽPC!AUDIO )
Audio ouput plug!DŽ )
Antenna/Cable TV input plug !!)RF 75 )
1.
2.
3.
4.
5.
6.
7.
8.
MENUPOWER SOURCE VOL
CH
3245671
8
9
CP OIDUA S-VIDEOVIDEOLR
)
5
7(
F
R
*Power Supply: Obey the same voltage and
frequency indication on the rating label of the
main unit.
10
SCART AGV IMDH
6

E5
OK
OK
FAV
FAV
TTX
TTX
HOLD
HOLD
ASPECT
ASPECT
SIZE
SIZE
MIX
MIX
CANCEL
CANCEL
INDEX
INDEX
REVEAL
REVEAL
SUBPAGE
SUBPAGE
MENU
MENU
REMOTE CONTROL
Note:
Bright Sunlight or lighting may cause erratic remote operation.
Always remove batteries if the remote control is not to be used for more than a month. Batteries left in it may cause damage.
The buttons on the remote control perform similar function to similarly marked buttons on the main unit.
•
•
•
Two “LR03/AAA” batteries
Inserting Batteries Control Range
30 30
Within approx. 8 metres
Remote
sensor
Control buttons
1. Power/Standby button (z)
2. Sleep timer button (SLEEP)
3. Mute button (MUTE)
4. Number buttons (0, 1~9)
5. Previous channel button ( )
6. Sound mode button (S.STD)
7. Menu button (MENU)
8. Navigation keys (o, a, p, b)
9. Confirm button (OK)
10. Channel select buttons (- PROGRAM +)
11. Volume control buttons (- VOL +)
12. Source select button (SOURCE)
13. Picture mode button (P.STD)
14. Favorite program list button
*. Special buttons:
EXIT: Menu exit button
INFO: Information display button
ASPECT: Display mode select button
I/II: NICAM mode select button
MIX: Teletext mix button
CANCEL: Teletext cancel button
SIZE: Teletext size/zoom button
HOLD: Teletext hold button
INDEX: Teletext index display button
REVEAL: Teletext reveal button
SUBPAGE: Teletext subpage button
TTX: Teletext on/off button
2
1
3
4
5
6
8
9
10
11
*
12
OK
OK
FAV
FAV
TTX
TTX
HOLD
HOLD
ASPECT
ASPECT
SIZE
SIZE
MIX
MIX
CANCEL
CANCEL
INDEX
INDEX
REVEAL
REVEAL
SUBPAGE
SUBPAGE
MENU
MENU
7
13
14

E6
Teletext Function
:Press this button to enter teletext state and display teletext page. If you want to exit teletext state, press this button
again. When teletext page is displayed on the screen, you can select relevant function by using the remote control.
:If you want to display image and teletext page at the same time, press this button. Press it agin to release it.
:It is refer to the subpage of teletext page, i.e subcode page. When it is pressed, the screen display the requirement of
subpage code entry. If there is no subpage, it will not be displayed. In most case, there is no subpage.
: Press this button if you want to keep the displaying of the page and press it again to exit hold state.
:
Press this button if you do not want to display the content of the page, but only the channel image.
Press it again to display the content of the page again.
Number buttons 0~9 on the remote control can be used to get to a certain page. "o/p" button on the remote control can be
used to display the content of previous or next page.
Press the RED/GREEN/YELLOW/CYAN button on the remote control, the page of relevant color displayed on the lower part
of the screen will be displayed.
:Press this button if you want to enlarge the content on the upper part of the page, and press the second time to enlarge
the content on the lower part of the page, and the third time to resume normal display of all the contents on the page.
:Press this button if you want to display the concealed text. Press it again to close the display of concealed text.
:Press this button if you want to display the index for all the teletext page.
FAST TEXT:
The RED, GREEN, YELLOW & CYAN buttons are used for quick access to color coded pages transmitted by FAST TEXT
broadcast.
Example:
RED selects CITY INFORMATION,
CYAN selects TRAVEL INFORMATION,
GREEN selects WEATHER INFORMATION,
YELLOW selects TV PROGRAMMING.
OK
FAV
TTX
TTX
HOLD
HOLD
ASPECT
SIZE
SIZE
MIX
MIX
CANCEL
CANCEL
INDEX
INDEX
REVEAL
REVEAL
SUBPAGE
SUBPAGE
MENU

E7
Connect the antenna to the RF 75Ωsocket .
Turn on the TV unit.
The Installing Guide screen appears as below:
1.
2.
3.
USING THE TV FOR THE FIRST TIME
Press [o] or [p] to select the desired settings.
Press [b] or [a] to adjust the desired settings.
Press [p] to select "YES", and press [OK] to confirm.
Note:
To cancel the first time installation during it's installation process, press [p] to select "NO", below screen appears:
To cancel clearing channel search , press [MENU].
4.
5.
6.
FIRST TIME INSTALLATION
COUNTRY
LANGUAGE
DELETE PROGRAM
SEARCH PROGRAM
OTHER
ENGLISH
YES
YES
NO
YES
MOVE EXIT
MENU
ADJUST
Please Scan Channels!
001
PAL
BG
TV
TV information
Press [INFO] to diaplay the program information.
Program number
Color system
Sound system
Note:
The first time installation screen appears again, when the "reset" operation has been done, and then turn off and turn on the
main unit.
FIRST TIME INSTALLATION
First time installation is not finished!
Are you sure to exit?
YES DO IT NEXTTIME NO
MOVE EXITADJUST MENU

E8
Make sure all necessary connections are correctly
connected before turn on the power.
The power indicator turns red and the unit is in the standby
mode.
Turn on the power
Press [z] to turn on the main unit.
The power indicator turns blue.
Turn off the power
Press [z] again can turn off the main unit.
The unit is automatically set standby mode.
The power indicator turns red.
Using the Sleep Timer
The sleep timer automatically switches off the power after a
preset time has elapsed. There are 9 time periods available,
press [SLEEP] on the remote control repeatedly to
select the desired sleep time:
0 Min v 15 Min v 30 Min v 45 Min
v60 Min v 75 Min v 90 Min v 105 Min v 120 Min
(The sleep timer starts when the setting is finished.)
To check the remain sleep time
Press [SLEEP] on the remote control, the remain sleep time
appears on the screen for a few seconds.
Select the input source
Turn on the connected necessary external
device. Press [SOURCE] to select the
proper input source.
The input source menu appears.
Select the TV channel
After selected "ATV" as input source, you can do either one
of followings to select your channel.
Press [p CH] or [CH o] (or [-PROGRAM] or [PROGRAM+]
on the main unit).
•
Information display
Press [INFO] on the remote control, the related
information of current source appears on the screen
automatically.
NICAM Function
Press [I/II] on the remote control when input source is "TV".
This operation do no effect to the channels without NICAM
signal.
Once [I/II] is pressed, it alternates in the different sound
options such as mono, stereo, dual I, dual II.
Selecting the OSD language
The factory setting of OSD (On Screen Display) language is
"English". To edit the OSD.
1. Press [MENU], OSD menu appears.
2. Press [p] until "Function" menu appears.
3. Press [a] to enter the setting menu, and "Language" is
high-lighted.
4. Press [b/a] to set the language to your desired language.
5. Press [MENU] to exit the submenu.
Adjusting the volume
Press [ - VOL] to reduce the volume.
Press [VOL+ ] to increase the volume.
BASIC OPERATIONS
Press [0, 1~9] to input the channel
number directly.
Press [ ] to go back the previous
channel you've watched last time.
•
•
Mute function
Press [MUTE ] on the remote control to switch off
the sound temporarily.
Press this button again (or [VOL+]), the sound
comes back.
Selecting the picture mode
Press [P.STD ] repeatedly on the remote
control to select the desired picture mode. Selecting the sound mode
Press [S.STD ] repeatedly on the remote control to
select the desired sound mode.
TV
AV
S-VIDEO
SCART
HDMI
PC
OK
FAV
FAV
TTX
HOLD
ASPECT
SIZE
MIX CANCEL
INDEX REVEAL SUBPAGE
MENU
1. Press [o/p] to move the high-lighted
bar to the desired source item.
2. Press [OK] ( or [b/a] )to confirm.
Information of the selected source name appears on the TV
for a few seconds.
CH
VOL

E9
OSD MENU SETTING
Navigating through menus
Press [MENU], OSD main menu appears.
Press [p], the main menu displays sequentially:
PICTURE vSOUND vFUNCTION vTV v…
When some menu option is gray displayed, that means the option is not available in current setting mode.
Structure of OSD menu:
SOUND Sound Mode
Bass
Treble
Balance
FUNCTION Language
Video Size
TT Language
Sleep Timer
TV Country
Auto Tuning
Manual Tuning
Common procedure of operation:
For each menu, press [o, p] on the remote control to select the options of the main menu.
Press [b, a, o, p] on the remote control to change or confirm your settings.
(Follow the tips at the bottom of the related OSD screens.)
After setting of an option is finished, press [MENU] to exit stage by stage, while press [EXIT] to turn off OSD screen
directly.
y
y
y
PICTURE Picture Mode
Brightness
Contrast
Colour
Sharpness
Tint
Colour Temperature
Channel Edit
AFT
Manual Tuning
Channel
Sound System
Colour System
OSD Timer
Blue Screen
Reset
Child Lock
Key Lock
Change Code
Country
Language
Delete Program
Search Program
Child Lock
Installation
Hotel Mode
Hotel Lock
Source Lock
Default Source
Default Prog
Max Volume
Clear Lock
AVC

E10
PICTURE
PICTURE MODE
BRIGHTNESS 50
CONTRAST 50
50
SHARPNESS 5
TINT 50
COL
OUR TEMPERATURE
OUR TEMPERATURE
PERSONAL
NORMAL
MOVE ADJUST
EXITMENU
50
COLOUR
PICTURE MENU
TV
CHANNEL
SOUND SYSTEM
COLOR SYSTEM
AFT
MANUAL TUNING
MANUALTUNING
001
BG
AUTO
OFF
860.25MHz
MOVE ADJUST
BACK
MENU
TV MENU
FUNCTION MENU
SOUND MENU
Main OSD :
TINT 50
COLOUR TEMPERATURE
50
SOUND
PERSONAL
SOUND MODE
BASS 50
TREBLE 50
BALANCE 0
MOVE ADJUST
EXIT
MENU
AVC
OFF
TV
COUNTRY
AUTO TUNING
MANUAL
CHANNEL EDIT
OTHER
MOVE ADJUST
EXIT
MENU
TUNING
(TV Menu is not available when "AV/S-VIDEO" is selected as input source.)
FUNCTION
ENGLISH
LANGUAGE
VIDEO SIZE
TTLANGUAGE
SLEEP TIMER
OSD TIMER
BLUE SCREEN
RESET
16:9
WEST EURO
OFF
60 SECONDS
ON
MOVE ADJUST
EXIT
MENU
FULL
FUNCTION
CHILD LOCK
INSTALLATION
HOTEL MODE
MOVE ADJUST
EXIT
MENU

E11
Hotel Lock: Have the priority than other options below. To
set below options, this item must be set to "ON" firstly.
When it is set to "On", all options below it are available.
Source Lock: Set the lock to the input source (E.g.: TV,
HDMI...) you want to set.
Default Source: Set an input source channel as default
while turning on the TV unit.
Default Prog: Set a TV programme number as default
while alternate into "ATV".
Max Volume: To set the maximum volume value.
Clear Lock: Clear the locks.
About the Hotel Lock function
Expand the sub-menu stage by stage in turn:
FUNCTION vHotel Mode vHotel Lock v…
About the PIN Code:
(The default setting is “0000”.)
If you forget the password...
Input “2008” to enter it.
Avoid young kids know this
password.
FUNCTION
ENGLISH
LANGUAGE
VIDEO SIZE
TTLANGUAGE
SLEEP TIMER
OSD TIMER
BLUE SCREEN
RESET
16:9
WEST EURO
OFF
60 SECONDS
ON
MOVE ADJUST
EXIT
MENU
FULL
FUNCTION
HOTEL LOCK
SOURCE LOCK
DEFAULT SOURCE
16:9
OFF
1
100
MOVE ADJUST
EXIT
MENU
HOTEL LOCK
DEFAULT PROG
MAX VOLUME
CLEAR LOCK
OFF
FUNCTION
CHILD LOCK
INSTALLATION
HOTEL MODE
MOVE ADJUST
EXIT
MENU

E12
MAINTENANCE
Cleaning the LCD Panel
The LCD panel should not be toughed with sharp objects. If dust and fingerprints is on the LCD panel surface, wipe them off
with a clean soft cloth.
Wipe in a straight motion from the center to the outside of the LCD panel.
Never use chemicals such as record cleaning sprays, antistatic sprays or fluids, benzene or thinner to clean the LCD panel.
Cleaning the Main Unit
Clean the outside of the unit with a clean soft cloth moistened with luke-warm water. Do not use benzene, thinner or alcohol
since they will mar the finish of the surface.
WARNING:
FOR YOUR PERSONAL SAFETY, BE SURE TO DISCONNECT THE AC POWER CORD BEFORE
PROCEEDING WITH ANY MAINTENANCE OR CLEANING.
TROUBLESHOOTING
Symptom
Possible cause
Corrective active
No Picture and sound.
Power cord is not correctly connected with the main unit.
Connected the power cord with the main unit.
Power cord is not plugged into an AC outlet.
Plug the power cord into an AC outlet.
The wrong input source is selected.
Select a correct input source.
The input source is failed to connect with the TV.
Make correct connections.
No sound only.
Volume control is set to minimum.
Press the VOL+ button to increase the volume.
The button on the remote control is pressed.
Press the (or VOL+/-) button to release the volume.
An incorrect sound system mode is setted.
Set a correct sound system from the main menu to
match your TV.
Symptom
Possible cause
Corrective active
No picture only, or monochrome picture.
The color system setting doesn't match the program.
Set the proper color system setting.
The sound system setting doesn't match the program.
Set the proper sound system setting.
Interfered sound or picture.
Some equipment that brings interference is nearby the TV.
Keep these things away from the TV.
Multi devices plug into the same one AC outlet collections.
Plug the power cord into another AC outlet.
An incorrect sound system mode is setted.
Set a correct sound system from the main menu to
match your TV.
Note:
A few bright dots and dark dots may appear on the TV screen, that is normal appearance.

E13
SPECIFICATIONS
TFT-2402
Display Features
Display Type LCD
Screen Size 23.6 inch
Aspect ratio 16:9
Active Area 521 (H) X 293 (V)
Panel Resolution 1366 (H) X 768 (V)
Brightness 500 cd/m2
Contrast Ratio 1000:1
Dot Pitch 0.272 (H) X 0.272 (V) mm
Maximum Color 16.7 M
Response Time 8 ms
Features
HD compatible 480I, 480P, 576I, 576P, 720P, 1080I, 1080P
Wall mounting VESA 100
TV Reception
TV System: PAL / SECAM
Sound System B/G , I, D/K, L/L'
Antenna Impedance: 75 Ohm
Tuner receiving range:
ATV 49MHz – 863MHz
Power Requirements
Power Input 100-240V ~ 50/60 Hz
Power Consumption
Maximum < 80W
Connections
Input:
TV Tuner (RF 75Ω) 1
Video Input (AV) 1
S-Video Input (S-VIDEO) 1
SCART 1
VGA Input (VGA) 1
PC audio Input (PC AUDIO) 1
HDMI input (HDMI) 1
Output:
Earphone ( ) 1
VGA Resolutions Supported
up to 1360 x 768
Dimension(WxHxD)
Unit W/stand/speakers 587 x 438 x 196 mm
Unit W/O stand 587 x 395 x 78 mm
Weight(N.W.)
Unit W/stand/speakers 5.7 Kg
Environment
Operating Temperature 0°C-40°C
Operating Humidity 20%-80%
Note:
Specifications subject to change without notice.

BENUTZER-
HANDBUCH
Für weitere Informationen und Support besuchen die Sie Webseite www.lenco.eu
TFT-2402

G1
Inhalt
VORSICHTSMASSNAHMEN .............................................................................................. G3
BEDIENELEMENTE ............................................................................................................ G4
INBETRIEBNAHME............................................................................................................. G7
GRUNDLEGENDE BEDIENUNG ........................................................................................ G8
OSD-MENÜEINSTELLUNGEN ........................................................................................... G9
WARTUNG ........................................................................................................................ G12
FEHLERBEHEBUNG ........................................................................................................ G12
TECHNISCHE DATEN ...................................................................................................... G13

G2
Lieber Kunde,
Vielen Dank für den Kauf dieses LCD-Fernsehers. Wenn Sie das erste Mal die Verpackung aufmachen, vergewissern Sie sich bitte,
dass alle Zubehörteile vorhanden sind. Bevor Sie das Gerät an den Strom anschließen, lesen Sie sich bitte das Benutzerhandbuch
durch und halten Sie es immer griffbereit in der Nähe des LCD-Fernsehers.
Fernbedienung X 1 Batterien X 2
Bedienungsanleitung X 1
Überprüfen Sie bitte alle Zubehörteile, wenn Sie die Verpackung öffnen. Falls etwas beschädigt ist oder fehlt, wenden Sie
sich bitte an Ihren Händler.
Hinweis:
Diese Anleitung wurde vor der Herstellung des Produkt geschrieben.
Es ist deshalb möglich, dass bestimmte Produktspezifikationen sich geändert haben, um die Bedienung oder andere Funktio-
nen zu verbessern. In diesem Fall, kann es vorkommen, dass die Bedienungsanleitung nicht vollständig mit den Funktionen
des eigentlichen Produkts übereinstimmt.
Das Produkt und die Verpackung, sowie Beschreibungen und Abbildungen können dann von denen in der Bedienungsanlei-
tung abweichen.
Das folgende Beispiel zeigt in welcher Weise die Bedienungsanleitung von der Bildschirmangezeige abweichen kann.
Netzkabel X 1
Sollten Sie dieses Produkt zu einem späteren Zeitpunkt entsorgen müssen, beachten Sie bitte:
Elektro- und Elektronik-Altgeräte dürfen nicht mit dem Hausmüll entsorgt werden. Bitte wieder-
verwerten, falls entsprechende Einrichtungen vorhanden sind. Für Hinweise zur Wiederverwer-
tung wenden Sie sich an die zuständigen örtlichen Stellen oder Ihren Händler. (Richtlinie über
Elektro- und Elektronik-Altgeräte)
OK
OK
FAV
FAV
TTX
TTX
HOLD
HOLD
ASPECT
ASPECT
SIZE
SIZE
MIX
MIX
CANCEL
CANCEL
INDEX
INDEX
REVEAL
REVEAL
SUBPAGE
SUBPAGE
MENU
MENU

G3
VORSICHTSMASSNAHMEN
ACHTUNG
UM EINE FORTLAUFENDE BETRIEBSSICHERHEIT ZU GEWÄHRLEISTEN, ÖFFNEN SIE NIEMALS DAS GERÄT UND
VERSUCHEN SIE NICHT AUF DAS INNERE DES GERÄTS ZUZUGREIFEN.
WENDEN SIE SICH IM WARTUNGSFALL IMMER AN AUSGEBILDETES WARTUNGSPERSONAL.
ZUR VERMEIDUNG VON FEUER- ODER STROMSCHLAGGEFAHR, SETZEN SIE DIESES GERÄT BITTE NIEMALS RE-
GEN ODER STARKER FEUCHTIGKEIT AUS.
Das nebenstehende Symbol weist auf Stromschlaggefahr durch gefährliche Spannungen im Inneren
des Geräts hin.
Dieses Symbol verweist auf wichtige Bedienungs- und Wartungshinweise in der dem Gerät beige-
legten Bedienungsanleitung.
Stellen Sie das Gerät niemals an einem instabilen Ort auf.
Stellen Sie das Gerät nicht an Orte, an denen es Extremtemperaturen (unter 5°C oder über 35°C) oder starker Feuchtig-
keit ausgesetzt werden kann.
Vermeiden Sie direkte Sonneneinwirkung oder Heizquellen in der Nähe des Geräts.
Stellen Sie das Gerät nicht in abgeschlossenen Orten auf, wie z.B. Bücherregale oder Einbauschränke. Um eine ausrei-
chende Ventilation zu gewährleisten, sollte mindestens ein Abstand von 20 cm um das Gerät herum beibehalten werden.
Vergewissern Sie sich, dass keine der Ventilationsöffnungen durch Gegenstände wie z.B. Zeitungen, Tischtücher, Vorhän-
ge o.ä abgedeckt ist.
Tauchen Sie die das Gerät niemals in Flüssigkeiten.
Führen Sie keine Fremdgegenstände in die Ventilationsöffnungen des Geräts ein.
Setzen Sie das Gerät niemals Wassertropfen oder -spritzern aus. Gegenstände die mit Flüssigkeiten gefüllt sind, wie z.B.
Vasen sollten niemals auf das Gerät gestellt werden.
Gegenstände mit offenen Flammen wie z.B. Kerzen sollten niemals auf das Gerät gestellt werden.
Berühren Sie den Fernsehbildschirm bzw. die Antenne und das Netzkabel niemals während eines Gewitters. Benutzen Sie
das Gerät nicht während eines Gewitters.
Achten Sie darauf, dass Sie nicht auf das Netzkabel treten und knicken Sie es nicht.
Dieses Produkt sollte nur durch entsprechend ausgebildetes Wartungspersonal eingestellt bzw. repariert werden, falls
Funktionsstörungen oder Probleme auftreten. Wenden Sie sich nur an ausgebildetes Wartungspersonal.
Wenn die Fernbedienung für längere Zeit nicht benutzt wird, entfernen Sie bitte die Batterien.
Vermeiden es die Fernbedienung fallen zu lassen, um Beschädigungen vorzugeuben.
Achten Sie darauf, dass dieses Produkt an eine Steckdose mit den gleichen Spezifikationen (Spannung und Frequenz) an-
geschlossen wird, die auf der Rückseite des Geräts angegeben sind.
Ziehen Sie den Stecker aus der Steckdose, wenn das Gerät nicht benutzt wird. Ziehen Sie immer am Stecker, wenn Sie
das Gerät vom Strom abtrennen wollen.
Dieses Gerät der Laserklasse 1 muss an eine ordungsgemäß geerdete Steckdose angeschlossen werden, die jederzeit
erreichbar ist.
Wenn eine Steckdose mit Schalter zum ein- und ausschalten des Geräts benutzt wird, achten Sie bitte immer darauf, dass
die Steckdose immer durch den Benutzer erreichbar bleibt.
•
•
•
•
•
•
•
•
•
•
•
•
•
•
•
•
•
•
CAUTION: TO PREVENT THE RISK OF ELECTRIC
SHOCK, DO NOT REMOVE COVER (OR BACK).
NO USER-SERVICEABLE PARTS INSIDE.
REFER SERVICING TO QUALIFIED SERVICE PERSONNEL.
CAUTION
RISK OF ELECTRIC SHOCK
DO NOT OPEN

G4
BEDIENELEMENTE
HAUPTGERÄT
Bedientasten
Anschlüsse (Geräterückseite)
Ein/Aus / Bereitschaftstaste (POWER)
Eingangssignaltaste (SOURCE)
Menütaste (MENU)
Kanal zurück ( p CH )
Kanal vor ( CH o)
Lautstärke verringern ( - VOL)
Lautstärke erhöhen (VOL + )
Kontrolllampe
Infrarot-Sensor
Ein/Aus-Schalter
1.
2.
3.
4.
5.
6.
7.
8.
9.
10.
Allgemeine Bedientasten
High-Definition-Multimedia-Interface-Eingang (HDMI)
VGA-Eingang (VGA)
SCART-Eingang (SCART)
S-Video-Eingang (S-VIDEO)
Composite-AV-Eingang (R/L/VIDEO)
PC-Audioeingang (PC AUDIO)
Audioausgang ( )
Antennen-/Kabel-TV-Eingang (RF 75 )
1.
2.
3.
4.
5.
6.
7.
8.
MENUPOWER SOURCE VOL
CH
3245671
8
9
*Stromversorgung: Richten Sie sich nach den
Spannungs- und Frequenzangaben auf dem Ty-
penschild des Hauptgeräts.
10
1
2
3
4
5
7
8
CP OIDUA S-VIDEOVIDEOLR
)
5
7(
F
RSCART AGV IMDH
6

G5
OK
OK
FAV
FAV
TTX
TTX
HOLD
HOLD
ASPECT
ASPECT
SIZE
SIZE
MIX
MIX
CANCEL
CANCEL
INDEX
INDEX
REVEAL
REVEAL
SUBPAGE
SUBPAGE
MENU
MENU
FERNBEDIENUNG
Hinweis:
Helles Sonnenlicht oder andere Beleuchtung kann zu Funktionsstörungen in der Bedienung der Fernbedienung führen.
Nehmen Sie die Batterien heraus, wenn der Player für längere Zeit nicht benutzt wird. Ansonsten können die Batterien Schäden verursa-
chen.
Die Tasten auf der Fernbedienung haben die gleichen Funktionen, wie die entsprechend markierten Tasten auf dem Hauptgerät.
•
•
•
Zwei Batterien des Typs LR03/AAA
Einlegen der Batterien Reichweite
30 30 Innerhalb eines Bereichs
von ca. 8 Metern
Infrarot-Sensor
Bedientasten
1. Ein / Aus / Bereitschaftstaste (z)
2. Einschlaftimer (SLEEP)
3. Ton Aus (MUTE)
4. Nummerntasten (0, 1 ~ 9)
5. Kanal zurück ( )
6. Soundmodus (S.STD)
7. Menütaste (MENU)
8. Navigationstasten (o, a, p, b)
9. Bestätigungstaste (OK)
10. Kanalauswahl (-PROGRAM+)
11. Lautstärke (-VOL+)
12. Eingangssignal (SOURCE)
13. Bildmodus (P.STD)
14. Favoritenliste
*. Sondertasten:
EXIT: Menü verlassen
INFO: Informationsanzeige
ASPECT: Anzeigemodus
I/II: NICAM-Modus
MIX: Fernsehtext-Mix
CANCEL: Fernsehtext Abbrechen
SIZE: Fernsehtext Größe / Zoom
HOLD: Fernsehtext Seitenstopp
INDEX: Fernsehtext Seitenindex
REVEAL: Versteckte Inhalte Anzeigen (Fernsehtext)
SUBPAGE: Unterseite (Fernsehtext)
TTX: Fernsehtext Ein/Aus
OK
OK
FAV
FAV
TTX
TTX
HOLD
HOLD
ASPECT
ASPECT
SIZE
SIZE
MIX
MIX
CANCEL
CANCEL
INDEX
INDEX
REVEAL
REVEAL
SUBPAGE
SUBPAGE
MENU
MENU
2
1
3
4
5
6
7
8
9
10
11
12
13
*
14
Table of contents
Languages:
Other LENCO LCD TV manuals

LENCO
LENCO TFT-2401 User manual

LENCO
LENCO TFT-225 User manual

LENCO
LENCO DVT-194 User manual

LENCO
LENCO TFT-1020 User manual

LENCO
LENCO DVT-2232 User manual

LENCO
LENCO DVT 2233 User manual

LENCO
LENCO TFT-2412 User manual

LENCO
LENCO TFT-2401 User manual

LENCO
LENCO DVT-2421 User manual

LENCO
LENCO TFT-360 User manual

LENCO
LENCO DVT-224 User manual

LENCO
LENCO TFT-920 User manual

LENCO
LENCO DVT-1522 User manual

LENCO
LENCO DVT-1533 User manual

LENCO
LENCO TFT-2411 User manual

LENCO
LENCO DVT-220 User manual

LENCO
LENCO DVT-2621 User manual

LENCO
LENCO DVT-2622 User manual

LENCO
LENCO DVL-2214 User manual

LENCO
LENCO DVT 1926 User manual