LEUCHTWURM 43LED/545 User manual

43LED/545
Feature
Standard DMX512 compliant control interface, enable to set the DMX address freely.
And show address Via digital numueric display.
DMX512 Decoder (Easy)
Three-channel/ four-channel output selectable.
Parameter
43LED/545 12-36VDC 4x8A 4x(96-288)W
Wiring diagram
Product Size
Two types available(Constant Voltage, Constant Current),suitable for different LED lamps.
To work with power repeater to expand output power unlimitedly.
Operation
Through buttons to set desired DMX512 address, 1 key is to set “hundreds” position, 2 is to set “ten” position, 3
is to set “a” bit.
“1" button
“2" button
“3" button
To open the connection of DMX512 controller, then it can work correctly.
Using instruction
Compatible with SR-2811DMX,SR-2201DMX,SR-2812,SR-2816 and any good quality DMX Master
constant voltage
Choose Channel
Press 2nd button and 3rd button at the same time for 2 seconds, cH digital display flashes, then press 1st
button to choose 1/2/3/4, 3 means total 3 channels, 4 means total 4 channels. Press any button for >2 seconds
to confirm the 1,2,3 or 4 channels. The factory preset default is 4 channels outputs.
170
59
29
NOTE:
For example, when we set address to 001
When select 1cH, all four channels will be the same address 001.
When select 2cH, channel one and channel three will be the same address 001, channel two and channel
four will be 002.
When select 3cH, channel 1,2,3 will be address 001,002,003, and channel 4 address is also 001
When select 4cH, channel 1, 2, 3,4 will be address 001, 002,003,004.
D- GND
Power Supply
12-24VDC
Vin D+
Power Supply
12-36VDC
L
N
110V-230VAC
43LED/540-W
GND
LN
110V-230VAC
DC INPUT
12/36VDC
V+
V-
V+
G-
R-
OUTPUT
CH1
2
B-
3
B-
3
W-
4
43LED/545
DMX512 Decoder
GND
DMX+
DMX-
DMX+
DMX-
0-90-5 0-9
DC INPUT
12/36VDC
V+
V-
V+
G-
R-
OUTPUT
CH1
2
B-
3
B-
3
W-
4
43LED/545
DMX512 Decoder
GND
DMX+
DMX-
DMX+
DMX-
0-90-5 0-9
DC INPUT
12/36VDC
V+
V-
V+
G-
R-
OUTPUT
CH1
2
B-
3
B-
3
W-
4
43LED/545
DMX512 Decoder
GND
DMX+
DMX-
DMX+
DMX-
0-90-5 0-9
Bedienungsanleitungen und Schaltdiagramme finden Sie
unter www.leuchtwurm.at mittels Suche der jeweiligen Artikelnummer.
Bedienungsanleitungen und Schaltdiagramme finden Sie
unter www.leuchtwurm.at mittels Suche der jeweiligen Artikelnummer.
Part No. Input Voltage Remarks
Output Current Output Power

Safety & Warnings
Warranty Agreement
1) The product shall be installed and serviced by a qualified person.
2) IP20.Please avoid the sun and rain. When installed outdoors, please ensure it is mounted in a water proof
enclosure.
3) Always be sure to mount this unit in an area with proper ventilation to avoid overheating.
4) Please check if the output voltage of any LED power supplies used comply with the working voltage of the
product.
5) Never connect any cables while power is on and always assure correct connections to avoid short circuits
before switching on.
6)
7) For update information please consult your supplier.
Please ensure that the cable is secured tightly in the connector
1) We provide lifelong technical assistance with this product:
3-year warranty. We print date on every products, for example :1125 means year 2011,week 25.The
warranty is for free repair or replacement and covers manufacturing faults only.
For faults beyond the 3-year warranty we reserve the right to charge for time and parts.
2) Limited Warrenty
Any defects caused by wrong operation.
Any damages caused by unauthorized removal, maintenance, modifying, incorrect connection and
replacement of chips.
Any damages due to transportation, vibration etc. after purchase.
Any damages caused by earthquake, fire, lightning, pollution and abnormal voltage.
Any damages caused by negligence, inappropriate storing at high temperatures and humidity or near
harmful chemicals.
Product has been updated
3) Repair or replacement as provided under this warranty is the exclusive remedy to the customer.
Set DMX address
Choose PWM frequency
P-c
2-2
Press 1st button for 2 seconds, digital display flashes to set the required DMX address, then press any button
for >2 seconds to confirm.
Press 1st button and 3rd button for 2 seconds, digital display flashes to show .
P means PWM frequency, press 1st to show "1", means 1500Hz, "2" means 200Hz.
c means dimming options, press 3rd to show "1", means logarithmic dimming, "2" means linear dimming.
The factory preset default is PWM frequency 200Hz with linear dimming.
Bedienungsanleitungen und Schaltdiagramme finden Sie
unter www.leuchtwurm.at mittels Suche der jeweiligen Artikelnummer.

Merkmale
·Standard DMX512 Decoder mit frei programmierbarer DMX Adresse, Adressanzeige über
digitales Display
·Ausgangsseitig drei oder vier Kanäle wählbar
·Konstantspannungs- oder konstantstromtauglich, geeignet für verschiedene Leuchten
·unlimitierte Ausgangsspannung mit Verstärker
·kompatibel mit hochqualitativen DMX Master Geräten
Bedienungsanleitung
Funktion
Druckknopf um die gewünschte DMX512 Adresse einzustellen.
Schalter 1 zum Einstellen der 100er-Stelle, 2 für die 10er-Stelle, 3 für die 1er-Stelle
Kanalwahl
Knopf 2 und 3 mehrere Sekunden gleichzeitig drücken, Kanal Digitaldisplay blinkt, dann bitte ersten
Knopf drücken um Kanal 1,2 3 oder 4 zu wählen; 3 heißt dabei insgesamt 3 Kanäle, 4 heißt insgesamt
4 Kanäle. Beliebigen Knopf zwei sekundenlang drücken um 1, 2, 3 oder 4 Kanäle zu bestätigen.
Fabrikstandardeinstellung auf 4 Kanal.
Anmerkung
Beispielsweise bei Adresswahl 001
-bei Wahl von 1 Kanal: alle vier Kanäle lauten auf gleiche Adresse 001
-bei Wahl von 2 Kanälen: Kanal eins und drei lauten auf gleiche Adresse 001, Kanal zwei und
vier lauten auf 002
-bei Wahl von 3 Kanälen: 1, 2, 3 lauten auf Adressen 001, 002, 003, Kanal 4 lautet wiederum
auf 001
-bei Wahl von 4 Kanälen: 1, 2, 3, 4 lauten auf Adressen 001, 002, 003, 004
DMX Adresse einstellen
Knopf 1 zwei Sekunden gedrückt halten, Digitale Anzeige blinkt um die erforderliche DMX Adresse
einzugeben. Zur Bestätigung beliebigen Knopf mehr als zwei Sekunden gedrückt halten.
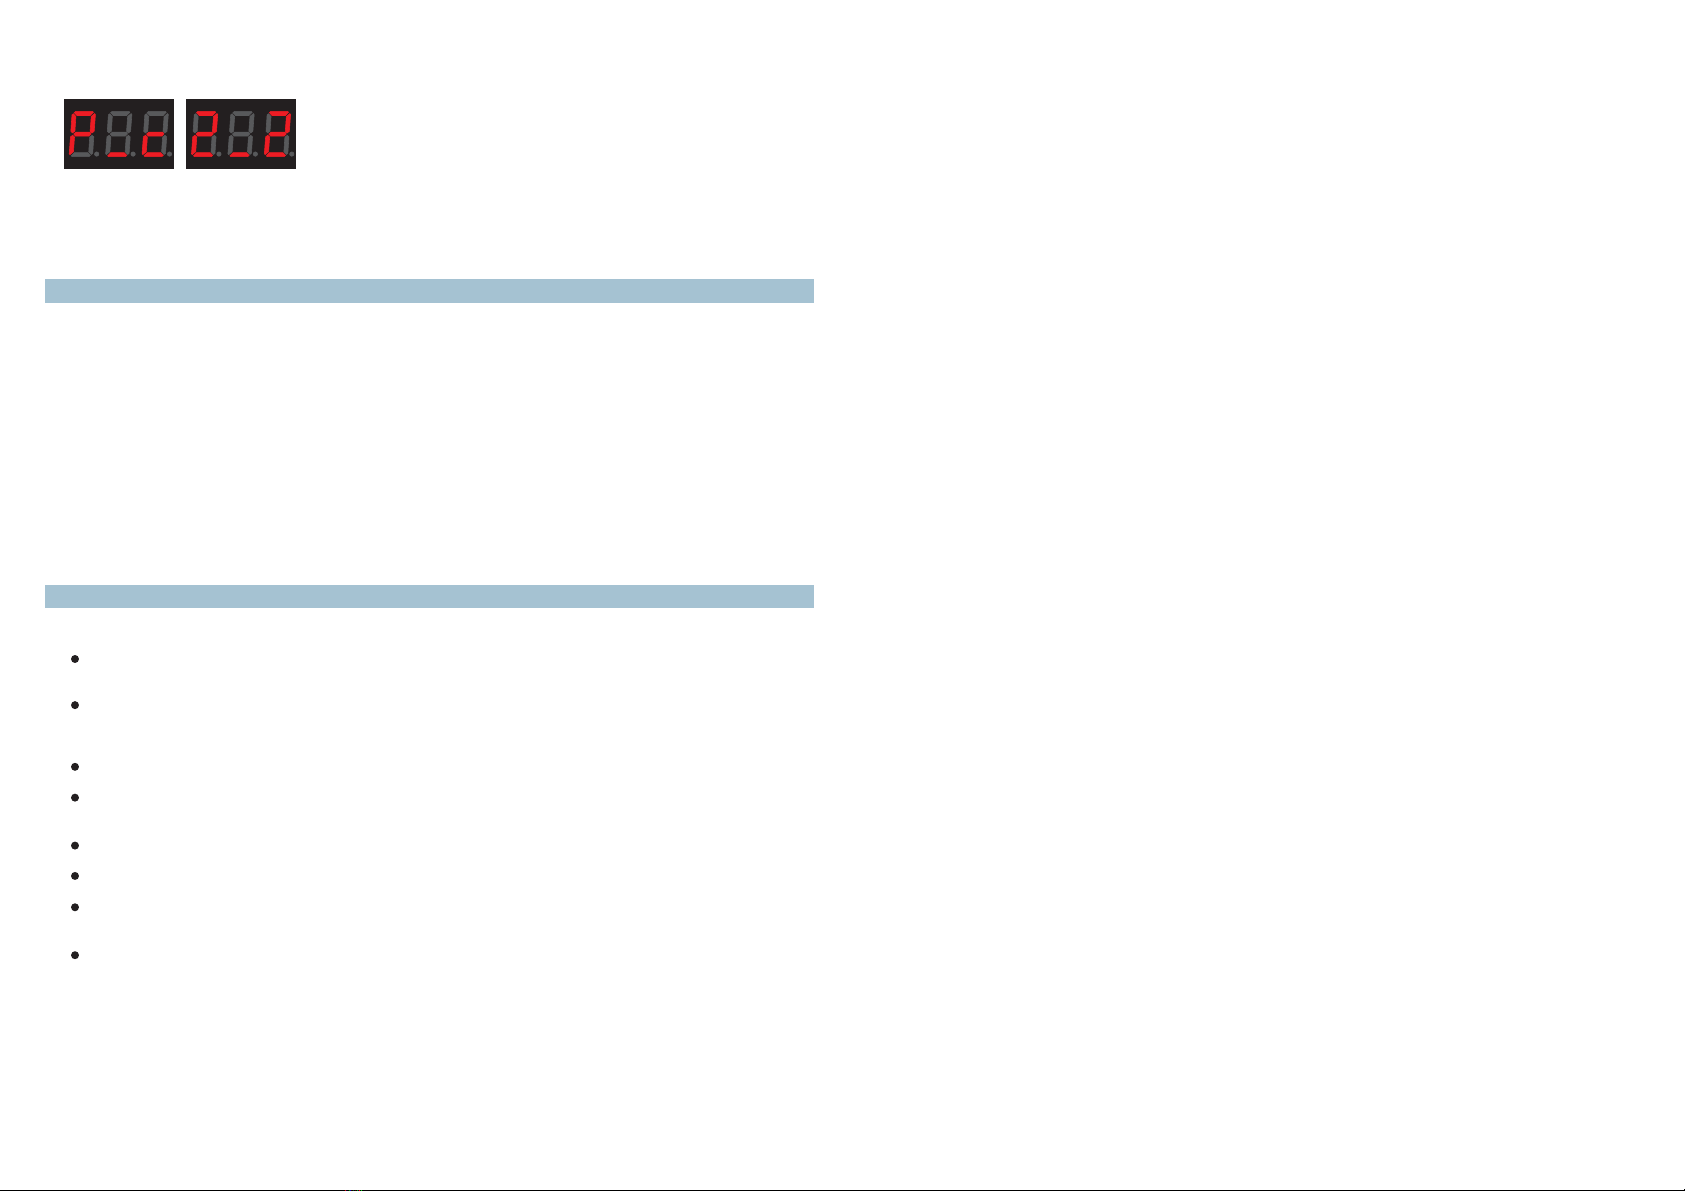
Wahl der PMW Frequenz
Knopf 1 und 3 zwei Sekunden gedrückt halten, Digitale Anzeige blinkt zum Zeigen der P-c.
Pheißt PMW Frequenz, ersten Knopf drücken um „1“zu zeigen –dies bedeutet 1500Hz, „2“
bedeutet 200Hz.
cheißt Dimmoption, drücken Sie 3 um „1“= logarithmische Dimmung zu zeigen, „2“= lineare
Dimmung.
Werksteinstellung ist auf PCW Frequenz 200Hz mit linearer Dimmfunktion voreingestellt. 2-2
Warnhinweise
1) Installation ausschließlich durch qualifiziertes Fachpersonal
2) IP20. Bitte direkte Sonneneinstrahlung und Regen vermeiden. Außenanwendungen
ausschließlich in dichten Gehäusen oder Bereichen.
3) Sorgen Sie stets für ausreichende Belüftung und vermeiden Sie Überhitzung.
4) Bitte prüfen Sie, ob die Ausgangsspannung aller verwendeten LED Netzteile mit der
Betriebsspannung des Produktes übereinstimmt.
5) Anschluss immer im ausgeschalteten Zustand. Stellen Sie stets die Verkabelung um
Kurzschluss beim Einschalten zu vermeiden.
6) Stellen Sie bitte eine korrekten Sitz der Kabel sicher.
7) Für alle weiteren Informationen wenden Sie sich bitte an die technische Hotline
+43/5244/64827-15.
Table of contents
Languages: