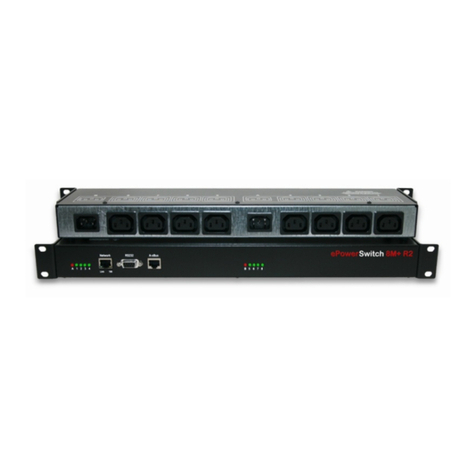
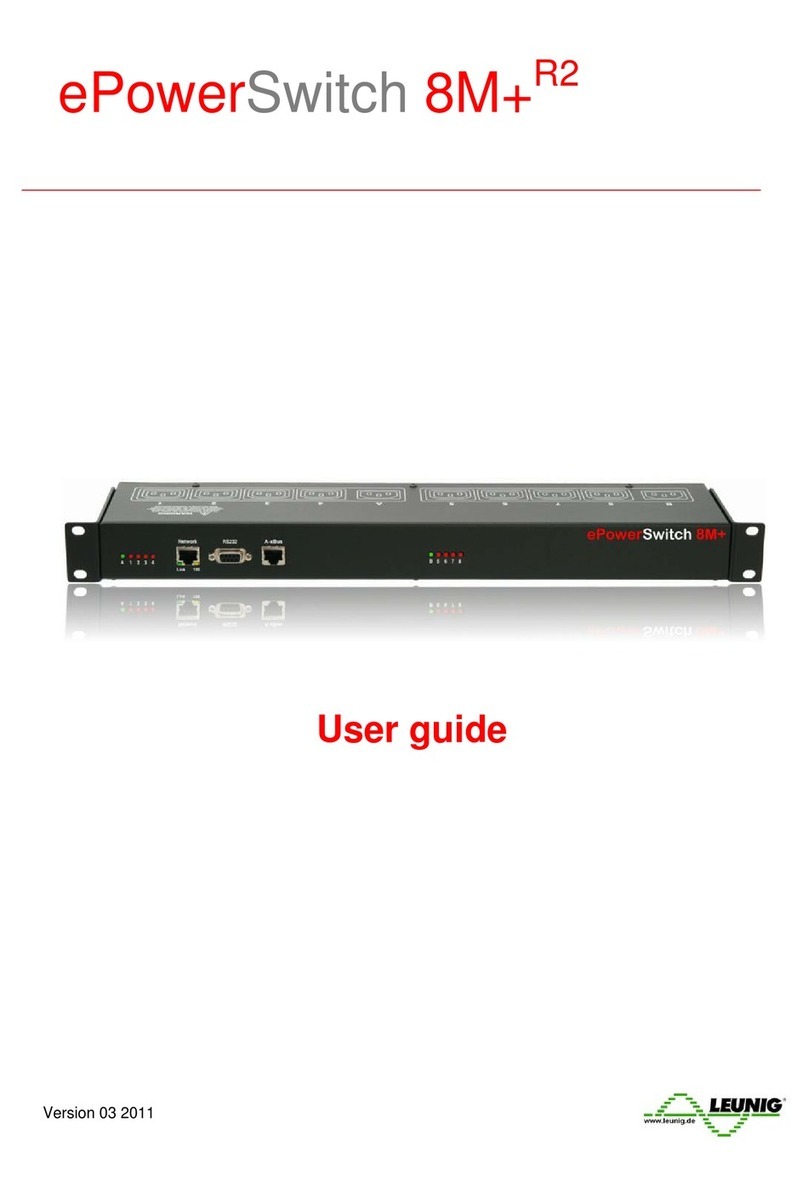
Leunig ePowerSwitch 8XM R2 User manual

ePowerSwitch 8XM
R2
User guide
Version 09/2009

1
© Copyright by LEUNIG GmbH – Wilhelm-Ostwald-Straße 17 – D 53721 Siegburg - Germany
Printed in Germany
All rights reserved. No part of this documentation, accompanying software or other components of the
described product may be reproduced or transmitted in any form or by any means, electronic or mechanical,
including photocopying and recording, for any purpose other than the personal use of the purchaser without
the express written permission of LEUNIG GmbH
This documentation, the ePowerSwitch 8M+R2, its peripherals, accessories and accompanying software were
produced with great care, yet errors are possible.
LEUNIG GmbH assumes no responsibility for errors within the documentation, the hardware or the software.
LEUNIG GmbH reserves the right to change programs or the documentation from time to time without
informing the user, errors and omissions excepted.
Trademarks
All brand names and product names used in this book are trade names, service marks,
trademarks, or registered trademarks of their respective owners.

2
CONTENTS
SAFETY INSTRUCTIONS: To be read before use!...................................................................................... 3
1. DESCRIPTION.......................................................................................................................................... 4
1.1 Diagram............................................................................................................................................... 4
1.2 Package list......................................................................................................................................... 7
2. INSTALLATION......................................................................................................................................... 8
3. CONFIGURATION .................................................................................................................................... 9
3.1. Configuration through the LAN using the Finder program ................................................................. 9
3.2. Configuration through an RS232 Terminal connection.................................................................... 11
3.3. Configuration through the LAN using a standard Browser............................................................... 11
3.3.1. General / IP configuration ...................................................................................................... 12
3.3.2. General / System time............................................................................................................ 14
3.3.3. General / SMTP...................................................................................................................... 15
3.3.4. General / SNMP..................................................................................................................... 16
3.3.5. General / Tools....................................................................................................................... 17
3.3.6. Settings / Accounts................................................................................................................. 18
3.3.7. Settings / Groups.................................................................................................................... 20
3.3.8. Settings / Peripherals............................................................................................................. 22
3.3.8.1. Settings / Peripherals - ePowerSwitch 8XM............................................................. 24
3.3.8.2. Settings / Peripherals - ePowerSwitch Satellite........................................................ 26
3.3.8.3. Settings / Peripherals - Analog inputs....................................................................... 30
3.3.8.4. Settings / Peripherals - Digital Inputs........................................................................ 33
3.3.8.4.1. Digital Input Modules................................................................................ 33
3.3.8.4.2. Temperature and proximity sensors......................................................... 36
3.3.8.4.3. Push Button.............................................................................................. 38
3.3.8.5. Settings / Peripherals - AC Current Probe................................................................ 40
3.3.8.6. Settings / Peripherals - Energy Meter....................................................................... 42
3.3.9. Settings / Rules...................................................................................................................... 44
3.3.9.1. Settings / Rules - Schedule Rule.............................................................................. 46
3.3.9.2. Settings / Rules - Ping Monitoring Rule.................................................................... 49
3.3.9.3. Settings / Rules - Scan Monitoring Rule................................................................... 52
3.3.9.4. Settings / Rules - Power Supply Monitoring Rule..................................................... 55
3.3.9.5. Settings / Rules - Digital Input Monitoring Rule........................................................ 58
3.3.9.6. Settings / Rules - Analog Input Monitoring Rule....................................................... 61
3.3.10. Misc / Control Panel............................................................................................................. 64
3.3.11. Misc / Rule Panel ................................................................................................................. 65
3.3.12. Misc / Log............................................................................................................................. 66
3.3.13. Misc / Log Settings............................................................................................................... 67
4. POWER OUTLET CONTROL AND PERIPHERALS STATUS............................................................... 68
5. APPENDIX............................................................................................................................................... 70
5.1. Sending status information and sensor values using rules.............................................................. 70
5.2. Ping and Scan Methods ................................................................................................................... 71
5.3. Technical Data.................................................................................................................................. 72
5.4. Commonly used Ports...................................................................................................................... 72
5.5. Syslog Messages: Severity Level Definitions................................................................................... 73
Statement of Conformity.............................................................................................................................. 75

3
SAFETY INSTRUCTIONS: To be read before use!
NOTE
•The ePowerSwitch devices can only be installed by qualified people with the following installation and
use instructions. The manufacturer disclaims all responsibility in case of a bad utilization of the
ePowerSwitch devices and particularly any use with equipments that may cause personal injury or
material damage.
•This equipment is designed to be installed on a dedicated circuit that must have a circuit breaker or fuse
protection.
•The electrical power sockets used to plug the power cords of the ePowerSwitch devices must be close
to the ePowerSwitch devices and easily accessible.
•Check that the power cords, plugs and sockets are in good condition.
•The ePowerSwitch devices can only be connected to three-wire 230 VAC (50-60Hz) sockets.
•Always plug the ePowerSwitch devices into properly grounded power sockets (two poles plus ground).
•Never exceed 10 Amp total load for each group of 4 power outlets of an ePowerSwitch device.
•The ePowerSwitch devices are intended for indoor use only. Do NOT install them in an area where
excessive moisture or heat is present.
•Always disconnect the 2 (two) power cords of the ePowerSwitch device if you want to intervene on the
ePowerSwitch device or on the equipment powered from the ePowerSwitch device.
•The power outlets of the ePowerSwitch devices are not circuit breakers! If you want to intervene on
equipments connected to an ePowerSwitch device you must disconnect these equipments from the
ePowerSwitch device.
•Do NOT attempt to disassemble the ePowerSwitch devices, they contain potentially hazardous voltages.
•The ePowerSwitch devices contain no user serviceable parts and repairs are to be performed by factory
trained service personnel only.
•Always use a shielded cable for the Ethernet connection.

4
1. DESCRIPTION
ePowerSwitch*8XM is a power control unit with a built-in Web server, an Ethernet and a RS232
connection. It enables to control the power supply of 8 power outlets through an Ethernet connection. The
number of controlled power outlets can be extended up to 136 by cascading up to 16 ePowerSwitch 8XS
to the Master. It supports a maximum load of 2x10A through 2 separate power inputs.
This high security unit offers HTTPS protocol with Web browsers that support SSL version 2 or 3.
It also supports plenty of control options to increase the security of your facilities and reduce unforeseen
downtimes of your equipment. Its modular conception allows to monitor many sensors and trigger
emergency actions like alert sending via SNMP traps, Email or Syslog messages. It is able to record all
events into a time-stamped log file.
1.1 Diagram
The front panel of the ePowerSwitch 8XM (Master)
A 1 2 3 4 (LEDs)
A Green. Lights up when Power applied on Group A
1 Red. Status of power outlet 1 (On/Off)
2 Red. Status of power outlet 2 (On/Off)
3 Red. Status of power outlet 3 (On/Off)
4 Red. Status of power outlet 4 (On/Off)
10/100 (RJ45 Connector)
Network connection 10/100 Mbits/sec
Link (LED)
Off = Network connection not detected
On = Network connection detected
Flashing = the device is sending or receiving data over this port
5 LEDs (Group A)
A = Power supply A
1 - 4 = Status of outlets 1 - 4
RJ45
Connector
SUB-D9F Connector
Terminal connection
Dip Switches
x Bus Termination
Auxiliary power supply
For the Web Server only
12 VDC 300 mA
SUB-D 25F Connector
8 Inputs / 4 Dry contact
LEDs (Group B)
S = Status
B = Power Supply B
5 -
8 = Status of Outlets 5 -8
LEDs DC (Dry Contact)
Status of output contacts 1 - 4
RJ45 Connector
Cascading Connection

5
100 (LED)
Off = 10 Mbits/sec connection
On = 100 Mbits/sec connection
RS232 (SUB-D 9F Connector)
Serial port RS232 with DB-9 female connector
Pinout
2 = TxD
3 = RxD
5 = Gnd
xBus
The RJ45 connector is used for cascading ePowerSwitch devices and xBus peripherals
Maximal TOTAL line length: 200 meters
Term (RS485 Termination DIP Switch)
The xBus interface (RS485) has built-in termination resistors. To enable these resistors slide the two
DIP Switch to the ON position (down).
Termination should be enabled at the two end stations on an RS485 network.
No more than two stations should be terminated on an RS485 network.
S B 5 6 7 8 1 2 3 4 (LEDs)
S Status
On = ePowerSwitch 8XM software is loaded and functional
Off = power default
1 time repeatedly = power on but not ready
2 times repeatedly = waiting on IP address from DHCP server
3 times repeatedly = SSL key computing in progress (takes several minutes!!!)
4 times repeatedly = System error (contact the manufacturer)
B Green. Lights up when power applied on Group B
5 Red. Status of power outlet 5 (On/Off)
6 Red. Status of power outlet 6 (On/Off)
7 Red. Status of power outlet 7 (On/Off)
8 Red. Status of power outlet 8 (On/Off)
1 Yellow. Status of dry contact output 1 (Open/Closed)
2 Yellow. Status of dry contact output 2 (Open/Closed)
3 Yellow. Status of dry contact output 3 (Open/Closed)
4 Yellow. Status of dry contact output 4 (Open/Closed)
I/O (SUB-D 25F Connector)
Dry Contacts: 4 Outputs and 8 Inputs
Do NOT exceed 24VDC – 20 mA
(see Annexe Table for the Pin configuration)
12 VDC AUX Power Supply
The Web server can be powered either by power input A or power input B.
To increase the operational safety of the Web server, an auxiliary power supply (12 VDC / 300 mA) can
be connected to this input (double insulated, ie. not connected to ground).

6
The back panel of the ePowerSwitch 8XM
Power input B
230 VAC – 10 Amp
Power outlets (Group B)
Power outlets 5 – 8
230 VAC max 10 Am
p
Power outlets (Group A)
Power outlets 1 – 4
230 VAC max 10 Am
p
Power input A
230 VAC – 10 Amp

7
1.2 Package list
The following items are included:
1 ePowerSwitch 8XMR2 19"
1 power adapter 12 VDC
2 power cables, 230 V / 10 Amp, length 1.80 Meters
1 RJ45 M/M cable, 2 Meters
1 serial cable SUB-D 9 points M/F, 1.80 Meters
1 quick installation guide
1 CD with User Guide, Quick Start Guide and Windows configuration program

8
2. INSTALLATION
Remark:
Make sure that the ePowerSwitch 8XM is powered off.
Connection instructions
1. Use a shielded RJ45 network cable to connect your ePowerSwitch 8XM to the network.
2. Use appropriated three-wire power cords (two poles plus ground) to connect your electrical devices to
the ePowerSwitch 8XM unit.
3. Plug the 2 power cables into 2 grounded sockets. The power supply LED of group A and of group B
light on to confirm that power is on.
4. You can now configure the ePowerSwitch 8XM by following the indications of the chapter
"Configuration of the ePowerSwitch 8XM".

9
3. CONFIGURATION
To use the ePowerSwitch 8XM on your network, you must first configure its network parameters. Ask your
network administrator for the parameters to use.
There are three methods to configure the network parameters of the ePowerSwitch 8XM:
3.1. Configuration through the LAN using the Finder program
It is the simplest and fastest configuration method if you use Windows as operating system. It allows to
configure your ePowerSwitch 8XM through your local network even if its network parameters are not
compatible with those of your PC.
1. Start the Finder.exe program contained on the CD-ROM.
2. Open the File menu and choose SCAN (or click on the first left button in the tool bar) to discover the
ePowerSwitch 8XM connected on your LAN.
3. Open the File menu and choose CONFIGURE (or click on the second left button in the tool bar) to
configure the network parameters.
This page enables to define all IP parameters of the ePowerSwitch 8XM device and displays the
version of the Firmware. The HTTP protocol is enabled and the Finder program is authorized at factory
settings.
!!! To achieve the highest security level we suggest to disable the configuration using the
Finder program after the first installation.

10
DHCP:
Check this box is you want to obtain the IP address, the subnet mask and the default gateway for your
ePowerSwitch 8XM via DHCP.
Use of DHCP (Dynamic Host Configuration Protocol) requires a DHCP host to be set up on the
network.
IP Address:
IP address of the ePowerSwitch 8XM, default is 192.168.100.200.
Subnet Mask:
Subnet Mask of the ePowerSwitch 8XM, default is 255.255.255.0.
Gateway:
Generally the address of your router, default is blank.
DNS 1:
Primary DNS (Domain Name Server), default is blank.
DNS 2:
Secondary DNS, default is blank.
Version:
Firmware version of the ePowerSwitch 8XM
Finder authorized:
The Network parameters of the ePowerSwitch 8XM can be configured through a Local Area Network
using the provided Finder Program. It is a simple and fast configuration method if you use Windows as
operating system.
!!! The Finder Program is enabled as default value. For security reasons we suggest to disable the
Finder program after the first configuration.
HTTP / HTTPS Access:
These options enable to choose between the standard HTTP and the HTTP over SSL protocol.
HTTPS encrypts and decrypts the page requests and page information between the client browser and
the web server of the ePowerSwitch 8XM using a Secure Socket Layer (SSL). A URL beginning with
HTTPS indicates that the connection is encrypted using SSL. SSL transactions are negotiated by means
of a Key-based encryption algorithm between your browser and the web server of your ePowerSwitch
8XM.
The HTTP protocol is enabled as default value.
HTTP Port Number:
Port number: default is 80 (HTTP).
Standard HTTP port is 80.
Standard HTTPS port is 443.

11
3.2. Configuration through an RS232 Terminal connection
1. Use the provided RS232 cable to connect the ePowerSwitch 8XM to an available serial port of your
PC.
2. Run a Terminal program such as Windows HyperTerminal.
3. Configure the appropriate serial port @ 9.600, n, 8, 1 and no flow control.
4. On your computer, press <ENTER> until the menu appears on your screen.
5. Press the “M” on your keyboard and follow the menu to configure the network parameters of your
ePowerSwitch 8XM.
NETWORK INTERFACE PARAMETERS:
Should this target obtain IP settings from the network?[N]
Static IP address [192.168.1.250]?
Subnet Mask IP address [255.255.255.0]?
Gateway IP address [192.168.1.2]?
Primary DNS Server IP address [192.168.1.2]?
Secondary DNS Server IP address [0.0.0.0]?
MISCELLANEOUS:
Finder program enabled?[Y]
Configuration menu
3.3. Configuration through the LAN using a standard Browser
During the first installation, change temporarily the network settings of your PC according to the default
network settings of the ePowerSwitch 8XM.
Factory network settings of the ePowerSwitch 8XM:
IP Address: 192.168.100.200 - Port: 80
Gateway: 255.255.255.0
Default factory protocol is HTTP !!!
1. Open your Web browser and type following IP address:
http://192.168.100.200/sysadmin.htm
2. Enter the administrator name and password (default for both = admin)
3. The home page appears, allowing you to configure all settings of your ePowerSwitch 8XM.

12
3.3.1. General / IP configuration
This page enables you to define all the IP parameters of the ePowerSwitch 8XM.
DHCP Client enabled:
Check this box is you want to obtain the IP address, the subnet mask and the default gateway for your
ePowerSwitch 8XM via DHCP. Factory default setting for this option is disabled.
Use of DHCP (Dynamic Host Configuration Protocol) requires a DHCP host to be set up on the
network.
IP Address:
IP address of the ePowerSwitch 8XM, default is 192.168.100.200.
If you use the https protocol and change the IP address, the system needs to compute new SSL
keys. This operation takes several minutes and the LED marked "Status" on the case blinks 3
times repeatedly during all the process. During all this time, you cannot login.
Subnet Mask:
Subnet Mask of the ePowerSwitch 8XM, default is 255.255.255.0.
Default Gateway:
Generally the address of your router, default is blank.
Primary DNS Address:
Primary DNS (Domain Name Server), default is blank
Secondary DNS Address:
Secondary DNS, default is blank
Finder Program enabled:
The Network parameters of the ePowerSwitch 8XM can also be configured through a Local Area Network
using the provided Finder Program. It is a very simple and fast configuration method if you use Windows
as operating system.
The Finder Program is enabled as default value.
!!!For security reasons we suggest to disable the Finder program after the first configuration.
HTTP / HTTPS Access:
This option enables to choose between the standard HTTP and the HTTP over SSL protocol. HTTPS
encrypts and decrypts the page requests and page information between the client browser and the web
server of the ePowerSwitch 8XM using a Secure Socket Layer (SSL). A URL beginning with HTTPS
indicates that the connection is encrypted using SSL. SSL transactions are negotiated by means of a Key-
based encryption algorithm between your browser and the web server of your ePowerSwitch 8XM.
The HTTP Protocol is enabled as default value.
!!!To achieve the highest security level we suggest to choose the HTTPS protocol.

13
HTTP Port:
Port number: default is 80 (HTTP).
Standard HTTP port is 80.
Standard HTTPS port is 443.
LOGOUT:
Click "Logout" at the bottom of the page to exit the session without saving changes.
DISCARD CHANGES:
Click "Discard Changes" at the bottom of the page to discard all the changes you have made on this page.
APPLY CHANGES:
Click "Apply Changes" at the bottom of the page to save changes.

14
3.3.2. General / System time
The system time of the ePowerSwitch 8XM is used for synchronizing scheduling actions and to timestamp
SNMP traps, Syslog information, e-mails and internal logs. The system time can be set manually with the
browser time of the connected computer or can be automatically synchronized with one or two NTP
timeservers.
Current System Time:
This field shows the current system time of the ePowerSwitch 8XM.
As the system time is displayed through the browser, a small difference (1 to 2 sec) can appear as
compared to the exact hour. The system time is nevertheless correct.
Use Browser Time:
If you want to set the system time using the current Browser time of your PC, select this option and click
on the "Set System Time" button.
Use NTP Server:
If you want to set the system time using an NTP timeserver, select this option, choose a refresh interval
and enter the IP address of the timeserver you wish to use in the "Primary" field. The address of a second
timeserver can be specified in the "Secondary" field. The secondary timeserver is optional and is used
only if the primary timeserver is not available.
You can enter either the hostname (in that case you must have specified a DNS server on the IP
configuration page) or the IP address of an NTP server.
NTP uses port 123/UDP.
Time Zone:
Set the time zone corresponding to your location. The system clock will subsequently show local time.
Without setting this, the system clock will show UTC/GMT time. Setting a time zone is only relevant if you
are synchronizing with an NTP server.
Daylight Saving Time:
If you want to set Daylight Saving dates, check this box and specify the date you want to use.
LOGOUT:
Click "Logout" at the bottom of the page to exit the session without saving changes.
DISCARD CHANGES:
Click "Discard Changes" at the bottom of the page to discard all the changes you have made on this page.
APPLY CHANGES:
Click "Apply Changes" at the bottom of the page to save changes.

15
3.3.3. General / SMTP
You can setup the ePowerSwitch*8XM to send the logs to an email account and report all activities
triggered by the rules defined by the administrator.
To send e-mails, you will need a SMTP server on the network and you will have to configure the
following parameters:
SMTP enabled:
Check this box if you want the ePowerSwitch 8XM to be able to send e-mails.
SMTP Server Address:
In this field, enter the address of the e-mail server you want to use.
You can enter either the hostname (in that case you must have specified a DNS server on the IP
configuration page) or the IP address of an NTP server.
NTP uses port 123/UDP.
SMTP Port:
In this field, enter the Port Number you want to use, default and usual port is 25.
From (e-mail Address):
In this field, enter the e-mail address that ePowerSwitch 8XM messages will appear to come from.
The name can be from 1 to 64 characters long, and can contain alphanumeric characters. This should be
a valid address (generally servers reject messages that don't have a valid from address).
Example:
LOGOUT:
Click "Logout" at the bottom of the page to exit the session without saving changes.
DISCARD CHANGES:
Click "Discard Changes" at the bottom of the page to discard all the changes you have made on this page.
APPLY CHANGES:
Click "Apply Changes" at the bottom of the page to save changes.

16
3.3.4. General / SNMP
The ePowerSwitch 8XM provides a built-in SNMP (Simple Network Management Protocol) agent, which
enables you to manage the ePowerSwitch 8XM through SNMP-based network management systems. The
ePowerSwitch 8XM MIB file enables to remotely read out the status of all power outlets and the values of
all sensors (temperature, humidity, ambient light). It also enables to control individually all power outlets
and all groups of power outlets. The MIB file is stored on the ePowerSwitch 8XM and can be downloaded
from the General / Tools Page.
SNMP enabled:
Check this box if you want to enable the SNMP protocol.
Contact:
In this field, enter the name you want to give to the Contact field. The name can be from 1 to 64
characters long, and can contain alphanumeric characters. Default name is "contact".
Name:
In this field, enter the name you want to give to the Name field. The name can be from 1 to 64 characters
long, and can contain alphanumeric characters. Default name is "name".
Location:
In this field, enter the name you want to give to the Location field. The name can be from 1 to 64
characters long, and can contain alphanumeric characters. Default name is "location".
Read Community:
In this field, enter the name you want to give to the Read Community field. The name can be from 1 to 64
characters long, and can contain alphanumeric characters. Default name is "public".
Write Community:
Check this box if you want to be able to control the power outlets through a MIB browser. In the following
field, enter the name you want to give to the Write Community. The name can be from 1 to 64 characters
long, and can contain alphanumeric characters. Default name is "private".
Trap Community:
Check this box if you want to configure the ePowerSwitch 8XM SNMP agent to send traps to a
community. In the following field, enter the name you want to give to the Trap Community. The name can
be from 1 to 64 characters long, and can contain alphanumeric characters. Default name is "trap".
Trap Destination 1:
Check this box and enter the primary SNMP Server address the traps will be sent to.
Trap Destination 2:
Check this box and enter the secondary SNMP Server address the traps will be sent to.
LOGOUT:
Click "Logout" at the bottom of the page to exit the session without saving changes.
DISCARD CHANGES:
Click "Discard Changes" at the bottom of the page to discard all the changes you have made on this page.
APPLY CHANGES:
Click "Apply Changes" at the bottom of the page to save changes.

17
3.3.5. General / Tools
This page enables you to:
- download and save the current settings of your ePowerSwitch 8XM on your PC,
- upload an existing configuration file to your ePowerSwitch 8XM,
- restore the factory settings,
- download the ePowerSwitch 8XM MIB file on your PC.
Save:
Click this button to save the current system settings onto your local hard drive.
Load:
Click this button and select a settings file you want to download to the ePowerSwitch 8XM.
Restore:
Click this button if you want to restore the factory default settings.
Save MIB:
Click this button if you want to download the ePowerSwitch 8XM MIB file onto your local hard drive.
LOGOUT:
Click "Logout" at the bottom of the page to exit the session without saving changes.

18
3.3.6. Settings / Accounts
This page is used to create, activate, deactivate, modify and delete up to 255 accounts.
- To activate or deactivate an account, check or uncheck the corresponding checkbox.
- To modify an account, click on "Edit" next to the corresponding account.
- To delete an existing account, click on "Delete" next to the corresponding account.
- To create an account, click on "Add a New Account" on the right side of the page.
A new page appears, allowing you to set all the parameters of the account.
User Name:
In this field, enter the name you want to give to the user. The name can be from 1 to 32 characters long,
and can contain alphanumeric characters.
Password:
In this field, enter the password you want to give to the user. The password can be from 4 to 32 characters
long, and can contain alphanumeric characters.
Confirm Password:
In this field, enter the password again.

19
Groups:
This field is used to add or remove groups to the current account.
To add Groups to the current account, press the Ctrl key and click on the displayed Groups. The selected
Groups are marked dark blue and their IDs are listed at the right side of the Groups field.
This field appears only if you have already created at least one group (Settings/Groups Tab).
Device:
In this drop-down list, choose a device from which you want to add Inputs or Outputs to the current
account.
Inputs/Outputs:
This field is used to add/remove Inputs or Outputs to/from the current account.
To add Inputs or Outputs to the current account, press the Ctrl key and click on the Inputs/Outputs of the
device selected in the previous field. The selected Inputs/Outputs are marked dark blue and their IDs are
listed at the right side of the Input/Output field.
The ePowerSwitch 8XM supports number of peripherals which are clearly identified by specific ID Codes.
LOGOUT:
Click "Logout" at the bottom of the page to exit the session without saving changes.
DISCARD CHANGES:
Click "Discard Changes" at the bottom of the page to discard all the changes you have made on this page.
APPLY CHANGES:
Click "Apply Changes" at the bottom of the page to save changes.
Table of contents
Other Leunig Switch manuals
Popular Switch manuals by other brands

Cisco
Cisco Edge 300 Series installation guide

Extron electronics
Extron electronics IN1804 Series Setup guide

Patton electronics
Patton electronics SmartNode 4658 Series quick start guide

Lantronix
Lantronix SUN-PC Product guide

Buffalo
Buffalo BSL-WS-G2108M user manual

Extreme Networks
Extreme Networks ExtremeSwitching 3600 Series installation guide