manuals.online logo
Brands
  1. Home
  2. •
  3. Brands
  4. •
  5. LevelOne
  6. •
  7. IP Camera
  8. •
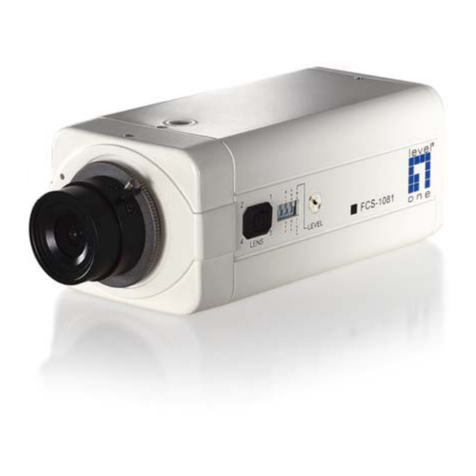
  9. LevelOne fcs-1091 User manual

LevelOne fcs-1091 User manual

Other LevelOne IP Camera manuals
LevelOne WCS-6020 User manual

LevelOne

LevelOne WCS-6020 User manual

LevelOne FCS-3083 User manual

LevelOne

LevelOne FCS-3083 User manual

LevelOne IP CamSecure User manual

LevelOne

LevelOne IP CamSecure User manual

LevelOne FCS-1040 User manual

LevelOne

LevelOne FCS-1040 User manual

LevelOne FCS-9032 User manual

LevelOne

LevelOne FCS-9032 User manual

LevelOne 4 series User manual

LevelOne

LevelOne 4 series User manual

LevelOne FCS-1000 User manual

LevelOne

LevelOne FCS-1000 User manual

LevelOne FCS-1030 User manual

LevelOne

LevelOne FCS-1030 User manual

LevelOne FCS-1040 Installer manual

LevelOne

LevelOne FCS-1040 Installer manual

LevelOne FCS-4201 User manual

LevelOne

LevelOne FCS-4201 User manual

LevelOne FCS-5030 User manual

LevelOne

LevelOne FCS-5030 User manual

LevelOne PIXORD Series User manual

LevelOne

LevelOne PIXORD Series User manual

LevelOne FCS-1030 User manual

LevelOne

LevelOne FCS-1030 User manual

LevelOne FCS-1151 User manual

LevelOne

LevelOne FCS-1151 User manual

LevelOne FCS-1081A User manual

LevelOne

LevelOne FCS-1081A User manual

LevelOne FCS-0030 User manual

LevelOne

LevelOne FCS-0030 User manual

LevelOne FCS-0040 User guide

LevelOne

LevelOne FCS-0040 User guide

LevelOne FCS-1010 User manual

LevelOne

LevelOne FCS-1010 User manual

LevelOne FCS-1081 User manual

LevelOne

LevelOne FCS-1081 User manual

LevelOne FCS-1010 User manual

LevelOne

LevelOne FCS-1010 User manual

LevelOne CamCon FCS-1060 User guide

LevelOne

LevelOne CamCon FCS-1060 User guide

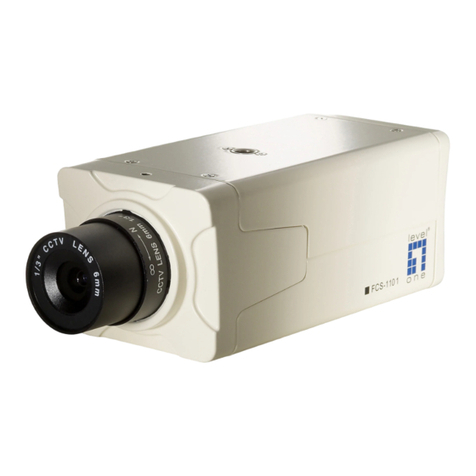
LevelOne FCS-1101 User manual

LevelOne

LevelOne FCS-1101 User manual

LevelOne FCS-1020 User manual

LevelOne

LevelOne FCS-1020 User manual
LevelOne FCS-0030 User manual

LevelOne

LevelOne FCS-0030 User manual
Popular IP Camera manuals by other brands

Challenger Smart Force ASFCAM2 quick start guide

Challenger

Challenger Smart Force ASFCAM2 quick start guide

Foscam FI8903W user manual

Foscam

Foscam FI8903W user manual

BenQ DVY22 user manual

BenQ

BenQ DVY22 user manual

Avigilon H4A-BO1-IR installation guide

Avigilon

Avigilon H4A-BO1-IR installation guide

Digital Watchdog DWCA-C128-64 manual

Digital Watchdog

Digital Watchdog DWCA-C128-64 manual

Ganz ZN8 Series user manual

Ganz

Ganz ZN8 Series user manual

ShareTech AV1 user manual

ShareTech

ShareTech AV1 user manual

HOME8 V33040US quick start guide

HOME8

HOME8 V33040US quick start guide

Ezviz C6C quick start guide

Ezviz

Ezviz C6C quick start guide

Melchioni UCAM 2015 manual

Melchioni

Melchioni UCAM 2015 manual

Zxtech Tropox user manual

Zxtech

Zxtech Tropox user manual

Arecont Vision MegaBall AV3146DN-3310-D-LG installation manual

Arecont Vision

Arecont Vision MegaBall AV3146DN-3310-D-LG installation manual

Mitel 6800i Series Administrator's guide

Mitel

Mitel 6800i Series Administrator's guide

Vitek VTC-IR403-212NP quick start guide

Vitek

Vitek VTC-IR403-212NP quick start guide

THOMSON DSC - 323W user guide

THOMSON

THOMSON DSC - 323W user guide

ACTi TCM-5311 Hardware user manual

ACTi

ACTi TCM-5311 Hardware user manual

Eneo MCB-64A0003M0A Quick installation guide

Eneo

Eneo MCB-64A0003M0A Quick installation guide

deView electronics CBDNI36F instruction manual

deView electronics

deView electronics CBDNI36F instruction manual

manuals.online logo
manuals.online logoBrands
  • About & Mission
  • Contact us
  • Privacy Policy
  • Terms and Conditions

Copyright 2025 Manuals.Online. All Rights Reserved.

LevelOne IP Camera
Wired/Wireless Network Camera
Quick Installation Guide
English Ελληνικά
Deutsch Svenska
Français Slovenščina
Español 한국어
Nederlands 繁體中文
Italiano Русский
Português ﻲﺑﺮﻋ
Dansk
This guide covers only the most common situations. All detail
information is described in the user manual.
Viewing System Requirements
zWindows 98SE, 2000,XP operating systems
zBrowser: Internet Explorer 5.5 or above
NOTE:
All the captured images of installation mentioned in this user manual
were based on Windows XP operating system. For installation on
other Windows OS, e.g. Windows 98SE, all the procedures remains
the same.
Figure 1-1
Figure 1-2
Figure 1-3
Figure 1-4
Figure 1-5
Figure 1-6
Figure 1-7
Figure 1-8
Figure 2-1
Using the Software CD to configure the camera
Power on your PC and insert the CD-ROM
The setup page should load automatically. If it does not, please
select your CD-ROM drive manually to open the setup page.
select “Camera Wizard”->”Setup Camera” to initiate the
installation. (Figure1-1)
English
The screen will list all the Network Cameras on the LAN.
Select the desired camera from the list on the left. The settings
for the camera will be displayed on the right, then click .
(Figure1-2)
Enter “administrator” for the name, and leave the password
blank. (Figure1-3)
Enter a suitable Description, and set Date, Time, and Time
Zone. (Figure1-4)
Choose Fixed IP Address or Dynamic IP Address.
(Figure1-5)
The screen displays all details of the Network Camera. Click
if the settings are correct, or click to modify any
incorrect values. (Figure1-6)
Click OK to save the new settings. Or click Cancel to cancel
your changes, (Figure1-7)
The configurations have been saved. Click OK to quit the
program. (Figure1-8)
Installing IP CamSecure
Click ”IP CamSecure” and follow the onscreen instruction or refer to
the user’s manual to complete installation.(Figure 2-1)
Benutzung der Software CD um die Kamera zu
konfigurieren
Schalten sie ihren PC ein und legen sie die CD ein.
Die CD sollte automatisch starten, wenn nicht, dann wählen
sie ihr CD-Rom Laufwerk aus und starten sie das Setup
manuell.
Wählen sie “Camera Wizard”->”Setup Camera”, um mit der
Installation zu beginnen. (Figure1-1)
Deutsch
Die Seite zeigt alle Netzwerkkameras im LAN an. Wählen Sie
die geünschte Kamera von der Liste links. Die Einstellungen
der Kamera werden recht angezeigt, dann klicken Sie .
(Figure1-2)
Geben Sie “administrator” als Benutzernamen ein und
lassen Sie das Passwort leer. (Figure1-3)
Geben Sie eine Beschreibung ein und stellen Sie Datum,
Uhrzeit und Zeitzone. (Figure1-4)
Wählen Sie Fixed IP Address oder Dynamic IP Address.
(Figure1-5)
Die Seite zeigt all Details der Netzwerkkamera. Klicken Sie
wenn die Einstellungen richtig sind oder um sie zu
ändern. (Figure1-6)
Klicken Sie OK um die neuen Einstellungen zu speichern.
Oder klicken Sie Cancel, um die Änderungen zu verwerfen.
(Figure1-7)
Die Konfiguration wurde gespeichert. Klicken Sie OK, um das
Programm zu beenden. (Figure1-8)
Installing IP CamSecure
Klicken Sie”IP CamSecure” und folgen die den Anweiseungen oder
schauen Sie in die Anleitung um die Installation. (Figure 2-1)
abzuschliessen.(Figure 2-1)
Using the Software CD to configure the camera
Allumez votre ordinateur. et insérez le CD-ROM
La page de configuration devrait se charger automatiquement.
Sinon, veuillez sélectionner votre unité CD-ROM
manuellement pour ouvrir la page de configuration.
Sélectionnez “Camera Wizard” ->“Setup Camera”pour lancer
l'installation. (Figure1-1)
L’écran liste toutes les caméras réseau du LAN. Sélectionnez
la caméra souhaitée à partir de la liste sur la gauche. Les
Français
paramètres de la caméra s’affichent sur la droite, puis cliquez
sur . (Figure1-2)
Saisissez “administrator”pour le nom, et laissez le mot de
passe vierge. (Figure1-3)
Saisissez une Description appropriée, et réglez les Date,
Heure, et Fuseau Horaire. (Figure1-4)
Choisissez entre adresse IP fixe et adresse IP dynamique.
(Figure1-5)
L’écran affiche tous les détails de la caméra réseau. Cliquez
sur si les paramètres sont corrects, ou cliquez sur
pour modifier toute valeur incorrecte. (Figure1-6)
Cliquez sur OK pour enregistrer les nouveaux paramètres. Ou
cliquez sur Cancel (Annuler) pour annuler vos modifications,
(Figure1-7)
Les configurations ont été enregistrées. Cliquez sur OK pour
quitter le programme. (Figure1-8)
Installation IP CamSecure
Cliquez sur “IP CamSecure” et suivez les instructions sur l’écran ou
regardez le manuel pour completer l’installation. (Figure2-1)
Use el CD del software para configurar la cámara
Encienda el PC e introduzca el cd.
La página de instalación se cargará automáticamente. Si no lo
hace, seleccione la unidad CD-ROM manulamente para abrir
la página de instalación.
Seleccione “Camera Wizard”->“Setup Camera” para iniciar la
instalación. (Figure1-1)
La pantalla mostrará todas las cámaras de red de la LAN.
Seleccione la cámara que desee en la lista de la izquierda.
Las opciones de la cámara se mostrarán a la derecha. Haga
clic entonces en . (Figure1-2)
Español
Introduzca “administrator” como nombre, y deje vacío el
campo de contraseña. (Figure1-3)
Introduzca una descripción adecuada y establezca la Fecha,
la Hora y la Zona horaria. (Figure1-4)
Seleccione una Dirección IP fija y una Dirección IP dinámica.
(Figure1-5)
La pantalla mostrará todos los detalles de la cámara de red.
Haga clic en si la configuración es correcta, o en para
modificar los parámetros incorrectos. (Figure1-6)
Haga clic en OK para guardar la nueva configuración. Haga
clic en Cancel para cancelar los cambios. (Figure1-7)
La configuración se ha guardado. Haga clic en OK para salir
del programa. (Figure1-8)
InstalarIPCamSecure
Haga clic en ”IP CamSecure”. Siga las instrucciones en pantalla o
consulte el manual del usuario para completar la
instalación.(Figure2-1)
De software-cd gebruiken om de camera te
configureren
Schakel uw pc in en plaats de cd-rom
De installatiepagina moet normaal automatisch worden
geladen. Als dat niet het geval is, selecteer dan uw
cd-romstation handmatig om de installatiepagina te openen.
Selecteer “Camera Wizard” ->“Setup Camera” om de
installatie te starten. (Figure1-1)
Het scherm zal alle netwerkcamera's op het LAN weergeven.
Selecteer de gewenste camera in de lijst aan de linkerkant. De
instellingen voor de camera worden aan de rechterkant
weergegeven. Klik vervolgens op . (Figure1-2)
Dutch