manuals.online logo
Brands
  1. Home
  2. •
  3. Brands
  4. •
  5. Lexmark
  6. •
  7. All In One Printer
  8. •
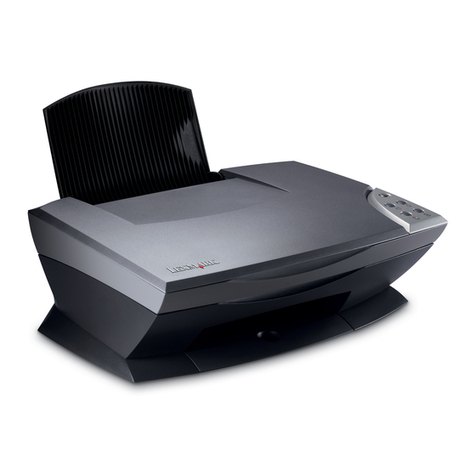
  9. Lexmark X502N Operating and safety instructions

Lexmark X502N Operating and safety instructions

Other manuals for X502N

2

Other Lexmark All In One Printer manuals

Lexmark 201 User manual

Lexmark

Lexmark 201 User manual

Lexmark XS795dte User manual

Lexmark

Lexmark XS795dte User manual

Lexmark 5400 Series Manual

Lexmark

Lexmark 5400 Series Manual

Lexmark MC3326adwe User manual

Lexmark

Lexmark MC3326adwe User manual

Lexmark X546 Series User manual

Lexmark

Lexmark X546 Series User manual

Lexmark Pro715 User manual

Lexmark

Lexmark Pro715 User manual

Lexmark XC2326 User manual

Lexmark

Lexmark XC2326 User manual

Lexmark CX725 Series User manual

Lexmark

Lexmark CX725 Series User manual

Lexmark Pro710 series User manual

Lexmark

Lexmark Pro710 series User manual

Lexmark CX522 User manual

Lexmark

Lexmark CX522 User manual

Lexmark X5470 Owner's manual

Lexmark

Lexmark X5470 Owner's manual

Lexmark XC2130 User manual

Lexmark

Lexmark XC2130 User manual

Lexmark Impact S305 User manual

Lexmark

Lexmark Impact S305 User manual

Lexmark MX6500E Installation and maintenance instructions

Lexmark

Lexmark MX6500E Installation and maintenance instructions

Lexmark 5000 Series User manual

Lexmark

Lexmark 5000 Series User manual

Lexmark XM3150 Installation and maintenance instructions

Lexmark

Lexmark XM3150 Installation and maintenance instructions

Lexmark X940E User manual

Lexmark

Lexmark X940E User manual

Lexmark MS310 Series User manual

Lexmark

Lexmark MS310 Series User manual

Lexmark X340 User manual

Lexmark

Lexmark X340 User manual

Lexmark C925 User manual

Lexmark

Lexmark C925 User manual

Lexmark X7550 User manual

Lexmark

Lexmark X7550 User manual

Lexmark MX610 Series Installation and maintenance instructions

Lexmark

Lexmark MX610 Series Installation and maintenance instructions

Lexmark X644E - With Modem Taa/gov User manual

Lexmark

Lexmark X644E - With Modem Taa/gov User manual

Lexmark X83 User manual

Lexmark

Lexmark X83 User manual

Popular All In One Printer manuals by other brands

Brother MFC-J220 Basic user's guide

Brother

Brother MFC-J220 Basic user's guide

Brother MFC-8510DN Basic user's guide

Brother

Brother MFC-8510DN Basic user's guide

Ricoh Aficio FX200 Service training

Ricoh

Ricoh Aficio FX200 Service training

Olivetti d-Copia 16W Operation manual

Olivetti

Olivetti d-Copia 16W Operation manual

Konica Minolta bizhub C3850FS user guide

Konica Minolta

Konica Minolta bizhub C3850FS user guide

Konica Minolta bizhub 758 manual

Konica Minolta

Konica Minolta bizhub 758 manual

Ricoh Aficio 3224C operating instructions

Ricoh

Ricoh Aficio 3224C operating instructions

Sagem MF 3625 user manual

Sagem

Sagem MF 3625 user manual

Epson Epson Stylus NX530 quick guide

Epson

Epson Epson Stylus NX530 quick guide

Brother MFC9800 - MFC 9800 B/W Laser owner's manual

Brother

Brother MFC9800 - MFC 9800 B/W Laser owner's manual

Konica Minolta 7033 instruction manual

Konica Minolta

Konica Minolta 7033 instruction manual

Ricoh Aficio MP 161F operating instructions

Ricoh

Ricoh Aficio MP 161F operating instructions

Epson WorkForce WF-2510 Basic guide

Epson

Epson WorkForce WF-2510 Basic guide

Epson Stylus Scan 2000 Product information guide

Epson

Epson Stylus Scan 2000 Product information guide

Epson PictureMate Snap PM 240 Start here

Epson

Epson PictureMate Snap PM 240 Start here

Brother MFC-J430w user guide

Brother

Brother MFC-J430w user guide

Konica Minolta BIZHUB 558 Quick reference guide

Konica Minolta

Konica Minolta BIZHUB 558 Quick reference guide

Brother MFC-9760 owner's manual

Brother

Brother MFC-9760 owner's manual

manuals.online logo
manuals.online logoBrands
  • About & Mission
  • Contact us
  • Privacy Policy
  • Terms and Conditions

Copyright 2025 Manuals.Online. All Rights Reserved.

Seite 1 von 4 www.procompsys.de
Manual to replace the CPU-fanof the Lexmark x502n
Attention: This manualrefers exclusively to the altered fandistributed by
ProCompSys! Standard-models of this fan can not be operated withthe Lexmark
x502n in this manner!
Note: Arbitrary modification on your device may void the manufacturer's
warranty! In either case disconnect the device from power before opening!
Voltage can remaininelectronic components of a device, even if power is
disconnected. If needed, consult an expert.
1.
Turn device off
and remove any
cables from the rear side.
2.
Remove the screw fixing the side
-
panel
from the rear side.
3.
Remove the side
-
panelbysliding it
to the rear side of thedevice.
4.
Remove the screw fixing the inner metal
-
side-panel.
Seite 2 von 4 www.procompsys.de
5.
Remove the metal-side-panel by
sliding it to the rear side of the
device.
Remove the defective fan's plug
from the jack on the circuit board.
The fan is fixed with 4 screws.
6.
First, remove the
upper
-
right
and
lower-left screws of the fan. The fan
can alreadybe fullyremoved at this
point.
Two spacers remain attached to the
circuit board. Unscrew the two other
spacers from the defective fanand
attach them to the new fan, just as
diagonally arranged.
7.
Attach the new fan back to the two
spacers that remained on the
circuit boardusing the two
remainingscrews.
8.
Due to variation inproduction on behalf
of Lexmark, it is not possible to equip
the replacement-fan witha plug fitting
all lots of this printer model. In particular
cases it might be necessary to make
some little adjustments.
Given the case that plug and jack do not
fit without further ado, you have to...
(continued on next page)
Seite 3 von 4 www.procompsys.de
either a
) cut off the existing plug
from the defective fanand connect/
solder it to the replacement-fan
(pay attention to the polarity:
rednew àblackold,
blacknew àyellowold,
yellownew àredold!)
or b) file offthe replacement-fans's
pluguntilit fits into the jack
oder c) which appears to be the
most feasible solution remove the
plastc jack from the printer's circuit
board, so the plug's dimensions
don't interfere with the jack's
housing anymore.
If a modification is necessary in
your case, solution No. c) is
depicted below.
If plug and jack do fit without
further ado in your case, you
can skip the following instruct-
tions of this manual, that are
highlighted on a yellow back-
ground.
9.
The white plastic jack is glued to the
circuit boardand can be loosened quite
easily usingp. ex.a pairof long-nosed
pliers.
As soon as the glued connection is
loosened, pull off the white jack-housing
straightforward from the three pin
contacts using slightly circular
movement.
Pay extreme attention to having
powered off the printer and avoid
contact of the used tool with the
circuit board's components!
Seite 4 von 4 www.procompsys.de
10.
The replacement
-
fan's plugcan
now easily be connected to the
contact pins on the circuitboard.
Pay attention to the correct polarity
(red wire to the left)!
("Red wire to the left " also
applies if you did not have to
remove the white plastic jack
from the circuit-board!)
The color-sequence of the
cables of the replacement-fan
does not necessarily have to
coincide with the color-
sequence of the cables of the
defective original fan!
11.
Tentatively connect the printer to
power and switch it on, to check
the new fan's function.
The display-message 'Warning:
CPU Fan is Locked' should be gone
now.
If necessary, check the plug's snug
fit.
12.
Re
-
attach t
he side
-
panels according to
steps 5, 4, 3 and 2.