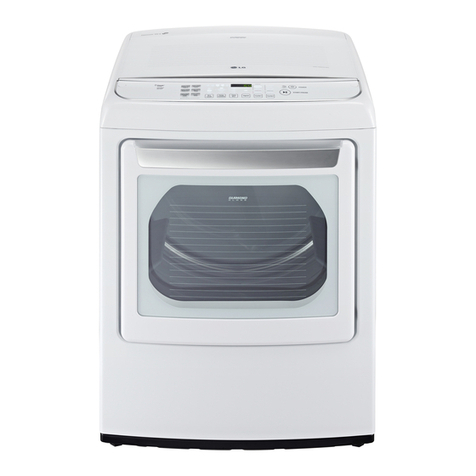
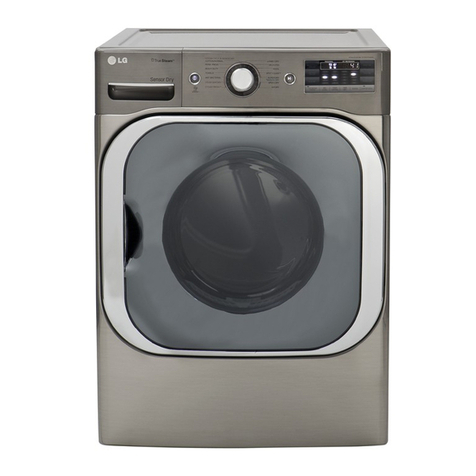
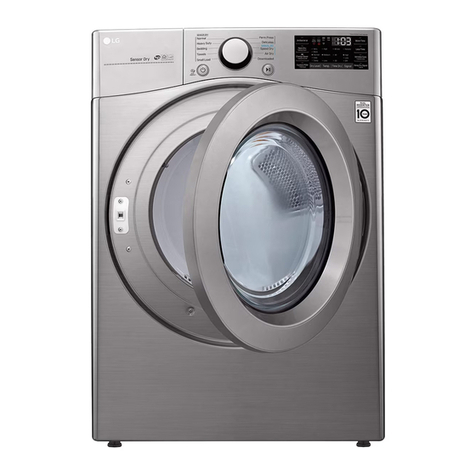
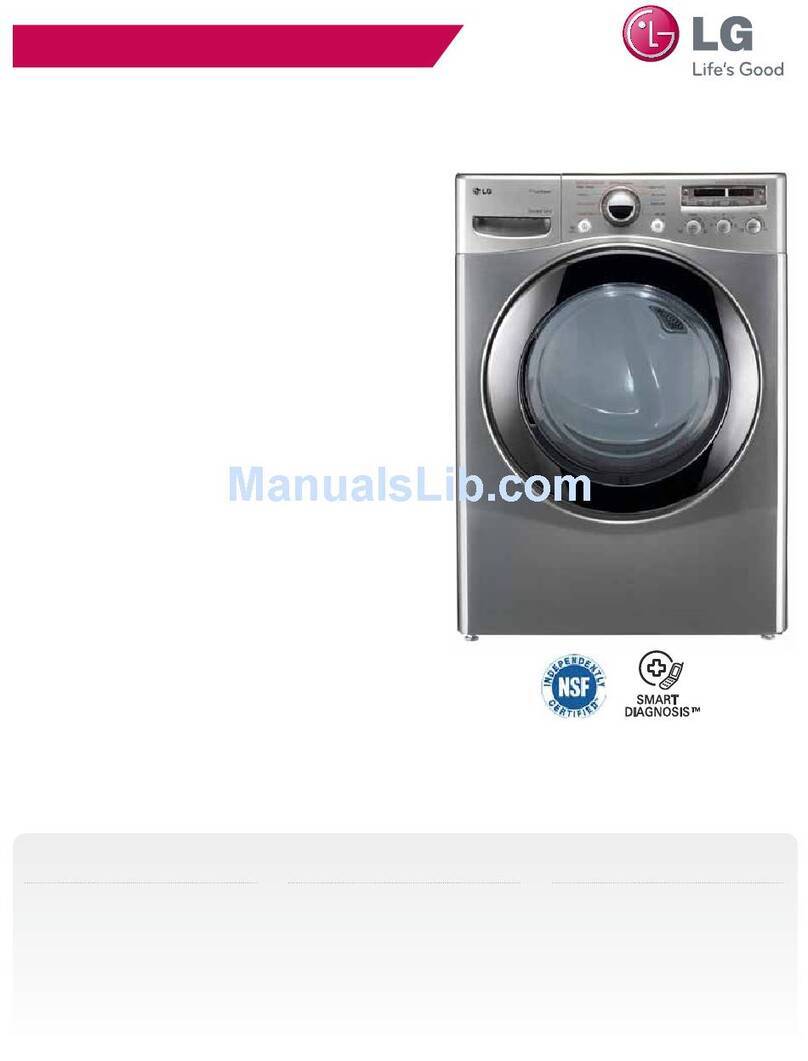
LG DLHX4072 series User manual

OWNER’S MANUAL
DRYER
DLHX4072*
Please read this owner’s manual thoroughly before operating and
keep it handy for reference at all time.
P/No. : MFL67731004 www.lg.com
ENGLISH ESPAÑOL

2SPECIAL FEATURES
SPECIAL FEATURES
EASY-TO-USE CONTROL PANEL
Rotate the cycle selector knob to select the desired dry cycle. Add cycle options or adjust settings with the touch of a button.
EASY-ACCESS REVERSIBLE DOOR
The wide-opening door provides easy access for loading and unloading. The door hinge can be reversed to adjust for installation location.
ULTRA-CAPACITY STAINLESS STEEL DRUM WITH DRUM LIGHT
The ultra-large stainless steel drum offers superior durability. The drum is equipped with a yellow light that illuminates when the dryer
door is open and turns off when the door is closed.
STEAM FUNCTIONS
LG’s steam technology allows you to inject fabrics with a swirling jet of hot steam to refresh clothes, reduce static, and make ironing
easier. Simply select the STEAM FRESH™ cycle, or you can add a Steam option to selected cycles.
FLOW SENSE™ DUCT BLOCKAGE SENSING SYSTEM INDICATOR
The FLOW SENSE™ duct blockage sensing system detects and alerts you to restrictions in the installed household ductwork that reduce
exhaust airflow through the dryer. If you see the alert: Clean or repair the ducts to remove the restrictions. Keep your ducts clean to help
increase efficiency and reduce long drying times caused by blocked ducts.
SMARTDIAGNOSIS™
Should you experience any technical difficulty with your dryer, it has the capability of transmitting data via your telephone to the
Customer Information Center. The call center agent records the data transmitted from your machine and uses it to analyze the issue,
providing a fast and effective diagnosis.
HYBRID DRYER TECHNOLOGY
LG Heat pump dryers use less energy then conventional dryer due to Optimized heat exchanger and self cleaning technology.
This LG Heat pump dryer has been designed to save your money.
C
E
R
T
I
F
I
E
D
D
E
S
I
G
N

3
ENGLISH
TABLE OF CONTENTS
TABLE OF CONTENTS
2SPECIAL FEATURES
4IMPORTANT SAFETY INSTRUCTIONS
5 BASIC SAFETY PRECAUTIONS
5 CALIFORNIA SAFE DRINKING WATER AND TOXIC
ENFORCEMENT ACT
6 GROUNDING INSTRUCTIONS
6 SAFETY INSTRUCTIONS FOR INSTALLATION
7 SAFETY INSTRUCTIONS FOR STEAM FUNCTIONS
8 SAFETY INSTRUCTIONS FOR CONNECTING
ELECTRICITY
9
INTRODUCING YOUR DRYER
9 Parts
9 Accessories
10 Control Panel Features
11 Display
12 What is a Hybrid dryer?
14 INSTALLATION INSTRUCTIONS
14 Preview Installation Order
15 Installation Location Requirements
15 Clearances
16 Installation with Optional Pedestal Base or Stacking
Kit
17 Leveling the Dryer
18 Reversing the door
20 Connecting the drain hose
21 Venting the dryer
23 Connecting Electric Dryers
28 Special Requirements for Manufactured or Mobile
Homes
28 Final Installation Check
29 Installation Test (Duct)
31 HOW TO USE
31 Operating the Dryer
32 Cycle Guide
33 Sorting Load
33 Loading the Dryer
33 Check the Lint Filter before every Load
34 Cycle Setting Buttons
35 Special Functions
36 Custom Program
36 Steam Functions
38 Steam Cycle Guide
39 MAINTENANCE
39 Regular Cleaning
40 FAQS
41 TROUBLESHOOTING
41 Before Calling for Service
43 SPECIFICATIONS
44 USING SMARTDIAGNOSISTM
45 OPTIONAL ACCESSORIES
45 Stacking Kit Installation
47 WARRANTY

4IMPORTANT SAFETY INSTRUCTIONS
IMPORTANT SAFETY INSTRUCTIONS
READ ALL INSTRUCTIONS BEFORE USE
WWARNING
For your safety, the information in this manual must be followed to minimize the risk of fire or explosion, electric shock, or to prevent
property damage, personal injury, or death.
Your Safety and the safety of others are very important.
We have provided many important safety messages in this manual and on your appliance. Always read and obey all safety messages.
This is the safety alert symbol.
This symbol alerts you to potential hazards that can kill or hurt you and others.
All safety messages will follow the safety alert symbol and either the word DANGER, WARNING, or CAUTION.
These words mean:
WDANGER
You will be killed or seriously injured if you don’t immediately follow instructions.
WWARNING
You can be killed or seriously injured if you don’t follow instructions.
WCAUTION
You may be slightly injured or cause damage to the product if you do not follow instructions.
All safety messages will tell you what the potential hazard is, tell you how to reduce the chance of injury, and tell you what can happen if
the instructions are not followed.
For your safety, the information in this manual must be followed to minimize the risk of fi re, explosion or electric shock, or to
prevent property damage, personal injury, or loss of life.
t%POPUJOTUBMMBDMPUIFTESZFSXJUIGMFYJCMFQMBTUJDWFOUJOHNBUFSJBMT*GGMFYJCMFNFUBMGPJMUZQFEVDUJTJOTUBMMFEJUNVTUCFPG
a specific type identified by the appliance manufacturer as suitable for use with clothes dryers. Flexible venting materials are
known to collapse, be easily crushed, and trap lint. These conditions will obstruct clothes dryer airflow and increase the risk of
fire.
t%POPUTUPSFPSVTFHBTPMJOFPSPUIFSGMBNNBCMFWBQPSTBOEMJRVJETJOUIFWJDJOJUZPGUIJTBQQMJBODFPSBOZPUIFSBQQMJBODFT
t*OTUBMMBUJPOBOETFSWJDFNVTUCFQFSGPSNFECZBRVBMJGJFEJOTUBMMFSTFSWJDFBHFODZPSUIFHBTTVQQMJFS
t*OTUBMMUIFDMPUIFTESZFSBDDPSEJOHUPUIFNBOVGBDUVSFSTJOTUSVDUJPOTBOEMPDBMDPEFT
t4BWFUIFTFJOTUSVDUJPOT
WWARNING:This product contains chemicals known to the State of California to cause cancer and birth defects or other reproductive
harm.
Wash hands after handling.
W

5
ENGLISH
IMPORTANT SAFETY INSTRUCTIONS
READ ALL INSTRUCTIONS BEFORE USE
WWARNING
For your safety, the information in this manual must be followed to minimize the risk of fire or explosion, electric shock, or to prevent
property damage, injury to persons, or death.
#"4*$4"'&5:13&$"65*0/4
WWARNING
To reduce the risk of fire, electric shock, or injury to persons when using this appliance, follow basic precautions, including the following:
$"-*'03/*"4"'&%3*/,*/(8"5&3"/%509*$&/'03$&.&/5"$5
This act requires the governor of California to publish a list of substances known to the state to cause cancer, birth defects, or other
reproductive harm and requires businesses to warn customers of potential exposure to such substances.
Gas appliances can cause minor exposure to four of these substances, namely benzene, carbon monoxide, formaldehyde, and soot, caused
primarily by the incomplete combustion of natural gas or LP fuels.
Properly adjusted dryers will minimize incomplete combustion. Exposure to these substances can be minimized further by properly
venting the dryer to the outdoors.
t3FBEBMMJOTUSVDUJPOTCFGPSFVTJOHUIFESZFS
t#FGPSFVTFUIFESZFSNVTUCFQSPQFSMZJOTUBMMFEBTEFTDSJCFEJO
this manual.
t%POPUQMBDFJUFNTFYQPTFEUPDPPLJOHPJMTJOZPVSESZFS Items
contaminated with cooking oils may contribute to a chemical
reaction that could cause a load to catch fire.
t%POPUESZBSUJDMFTUIBUIBWFCFFOQSFWJPVTMZDMFBOFEJOXBTIFE
in, soaked in, or spotted with gasoline, dry-cleaning solvents, or
other flammable or explosive substances as they give off vapors
that could ignite or explode.
t%POPUSFBDIJOUPUIFESZFSJGUIFESVNPSBOZPUIFSQBSUJT
moving.
t%POPUSFQBJSPSSFQMBDFBOZQBSUPGUIFESZFSPSBUUFNQUBOZ
servicing unless specifically recommended in this Owner’s Manual
or in published user-repair instructions that you understand and
have the skills to carry out.
t%POPUUBNQFSXJUIDPOUSPMT
t#FGPSFUIFESZFSJTSFNPWFEGSPNTFSWJDFPSEJTDBSEFESFNPWFUIF
door to the drying compartment.
t%POPUBMMPXDIJMESFOUPQMBZPOPSJOUIFESZFS$MPTFTVQFSWJTJPO
of children is necessary when the dryer is used near children.
t%POPUVTFGBCSJDTPGUFOFSTPSQSPEVDUTUPFMJNJOBUFTUBUJDVOMFTT
recommended by the manufacturer of the fabric softener or
product.
t%POPUVTFIFBUUPESZBSUJDMFTDPOUBJOJOHGPBNSVCCFSPS
similarly textured rubber-like materials.
t,FFQBSFBBSPVOEUIFFYIBVTUPQFOJOHBOEBEKBDFOUTVSSPVOEJOH
areas free from the accumulation of lint, dust, and dirt.
t5IFJOUFSJPSPGUIFESZFSBOEFYIBVTUWFOUTIPVMECFDMFBOFE
periodically by qualified service personnel.
t%POPUJOTUBMMPSTUPSFUIFESZFSXIFSFJUXJMMCFFYQPTFEUPUIF
weather.
t"MXBZTDIFDLUIFJOTJEFPGUIFESZFSGPSGPSFJHOPCKFDUT
t$MFBOMJOUTDSFFOCFGPSFPSBGUFSFBDIMPBE
t%POPUTUPSFQMBTUJDQBQFSPSDMPUIJOHUIBUNBZCVSOPSNFMU
on top of the dryer during operation.
t8BSOJOHThis product contains chemicals known to the State of
California to cause cancer and birth defects or other reproductive
harm. 8BTIIBOETBGUFSIBOEMJOH

6IMPORTANT SAFETY INSTRUCTIONS
IMPORTANT SAFETY INSTRUCTIONS
READ ALL INSTRUCTIONS BEFORE USE
WWARNING
For your safety, the information in this manual must be followed to minimize the risk of fire or explosion, electric shock, or to prevent
property damage, injury to persons, or death.
(306/%*/(*/4536$5*0/4
WWARNING
Improper connection of the equipment-grounding conductor can result in a risk of electric shock. Check with a qualified electrician or
service person if you are in doubt that the appliance is properly grounded.
4"'&5:*/4536$5*0/4'03*/45"--"5*0/
WWARNING
To reduce the risk of fire, electric shock, or injury to persons when using this appliance, follow basic precautions, including the following:
t1SPQFSMZHSPVOEESZFSUPDPOGPSNXJUIBMMHPWFSOJOHDPEFT
and ordinances. Follow details in the installation instructions.
Electric shock can result if the dryer is not properly grounded.
tBefore use, the dryer must be properly installed as described
in this manual. Electric shock can result if the dryer is not properly
grounded.
t*OTUBMMBOETUPSFUIFESZFSXIFSFJUXJMMOPUCFFYQPTFEUP
temperatures below freezing or exposed to the weather.
tAll repairs and servicing must be performed by an authorized
TFSWJDFSVOMFTTTQFDJGJDBMMZSFDPNNFOEFEJOUIJT0XOFST
.BOVBM6TFPOMZBVUIPSJ[FEGBDUPSZQBSUTFailure to follow this
warning can cause serious injury, fire, electric shock, or death.
tTo reduce the risk of electric shock, do not install the dryer in
humid spaces. Failure to follow this warning can cause serious
injury, fire, electric shock, or death.
t$POOFDUUPBQSPQFSMZSBUFEQSPUFDUFEBOETJ[FEQPXFS
circuit to avoid electrical overload. Improper power circuit can
melt, creating electric shock and/or fire hazard.
t3FNPWFBMMQBDLJOHJUFNTBOEEJTQPTFPGBMMTIJQQJOH
materials properly. Failure to do so can result in death, explosion,
fire, or burns.
t1MBDFESZFSBUMFBTUJODIFTBCPWFUIFGMPPSGPSBHBSBHF
installation. Failure to do so can result in death, explosion, fire, or
burns.
t,FFQBMMQBDLBHJOHGSPNDIJMESFO Packaging material can be
dangerous for children. There is a risk of suffocation.
t%POPUJOTUBMMOFBSBOPUIFSTPVSDFPGIFBUTVDIBTBTUPWF
cooking oven. Failure to do so can cause deform, smoke and fire.
t%POPUQMBDFDBOEMFTTNPLJOHNBUFSJBMTPSPUIFSGMBNNBCMFT
on top of the product. Dripping wax, smoke, or fire can result.
t3FNPWFBMMQSPUFDUJWFWJOZMGJMNGSPNUIFQSPEVDUFailure to do
so can cause product damage, smoke or fire.
This appliance must be grounded. In the event of malfunction
or breakdown, grounding will reduce the risk of electric shock
by providing a path of least resistance for electric current. This
appliance must be equipped with a cord having an equipment-
grounding conductor and a grounding plug. The plug must be
plugged into an appropriate outlet that is properly installed and
grounded in accordance with all local codes and ordinances.
Do not modify the plug provided with the appliance. If it will not fit
the outlet, have a proper outlet installed by a qualified electrician.
This appliance must be connected to a grounded metal, permanent
wiring system or an equipment-grounding conductor must be
run with the circuit conductors and connected to the equipment-
grounding terminal or lead on the appliance.
Electric shock can result if the dryer is not properly grounded.

7
ENGLISH
IMPORTANT SAFETY INSTRUCTIONS
READ ALL INSTRUCTIONS BEFORE USE
WWARNING
For your safety, the information in this manual must be followed to minimize the risk of fire or explosion, electric shock, or to prevent
property damage, injury to persons, or death.
4"'&5:*/4536$5*0/4'03*/45"--"5*0/
WWARNING
To reduce the risk of injury to persons, follow all industry recommended safety procedures including the use of long sleeved gloves and
safety glasses. Failure to follow all of the safety warnings in this manual could result in property damage, injury to persons, or death.
Exhaust/Ducting:
4"'&5:*/4536$5*0/4'0345&".'6/$5*0/4
WWARNING
To reduce the risk of fire, electric shock, or injury to persons when using this appliance, follow basic precautions, including the following:
t%POPUPQFOUIFESZFSEPPSEVSJOHTUFBNDZDMFT Failure to
follow these instructions can result in a burn hazard.
t%POPUESZBSUJDMFTUIBUIBWFCFFOQSFWJPVTMZDMFBOFEJO
washed in, soaked in, or spotted with gasoline, dry-cleaning
solvents, or other flammable or explosive substances as they
give off vapors that could ignite or explode. Failure to follow
these instructions can result in fire or death.
t%POPUGJMMUIFTUFBNGFFEFSXJUIHBTPMJOFESZDMFBOJOH
solvents, or other flammable or explosive substances. Failure
to follow these instructions can result in fire or death.
t%POPUUPVDIUIFTUFBNOP[[MFJOUIFESVNEVSJOHPSBGUFSUIF
steam cycle. Failure to follow these instructions can result in a
burn hazard.
t%POPUGJMMUIFTUFBNGFFEFSXJUIIPUXBUFSPWFS'$
Failure to follow these instructions can result in a burn hazard.
t(BTESZFST.645CFFYIBVTUFEUPUIFPVUTJEF Failure to follow
these instructions can result in fire or death.
tThe dryer exhaust system must be exhausted to the outside of
UIFEXFMMJOH*GUIFESZFSJTOPUFYIBVTUFEPVUEPPSTTPNFGJOF
lint and large amounts of moisture will be expelled into the
laundry area. An accumulation of lint in any area of the home can
create a health and fire hazard.
t6TFPOMZSJHJENFUBMPSGMFYJCMFNFUBMJODIEJBNFUFS
ductwork inside the dryer cabinet or for exhausting to the
PVUTJEF6TFPGQMBTUJDPSPUIFSDPNCVTUJCMFEVDUXPSLDBO
cause a fire. Punctured ductwork can cause a fire if it collapses or
becomes otherwise restricted in use or during installation.
t%VDUXPSLJTOPUQSPWJEFEXJUIUIFESZFSBOEZPVTIPVME
obtain the necessary ductwork locally. The end cap should
have hinged dampers to prevent backdraft when the dryer is
not in use. Failure to follow these instructions can result in fire or
death.
t5IFFYIBVTUEVDUNVTUCFJODIFTDNJOEJBNFUFSXJUI
no obstructions. The exhaust duct should be kept as short as
QPTTJCMF.BLFTVSFUPDMFBOBOZPMEEVDUTCFGPSFJOTUBMMJOH
your new dryer. Failure to follow these instructions can result in
fire or death.
t3JHJEPSTFNJSJHJENFUBMEVDUJOHJTSFDPNNFOEFEGPSVTF
CFUXFFOUIFESZFSBOEUIFXBMM*OTQFDJBMJOTUBMMBUJPOT
when it is impossible to make a connection with the above
SFDPNNFOEBUJPOTB6-MJTUFEGMFYJCMFNFUBMUSBOTJUJPOEVDU
may be used between the dryer and wall connection only.
The use of this ducting will affect drying time. Failure to follow
these instructions can result in fire or death.
t%0/05VTFTIFFUNFUBMTDSFXTPSPUIFSGBTUFOFSTXIJDI
extend into the duct that could catch lint and reduce the
efficiency of the exhaust system. Secure all joints with duct tape.
For complete details, follow the Installation Instructions. Failure to
follow these instructions can result in fire or death.

8
IMPORTANT SAFETY INSTRUCTIONS
READ ALL INSTRUCTIONS BEFORE USE
WWARNING
For your safety, the information in this manual must be followed to minimize the risk of fire or explosion, electric shock, or to prevent
property damage, injury to persons, or death.
4"'&5:*/4536$5*0/4'03$0//&$5*/(&-&$53*$*5:
WWARNING
To reduce the risk of fire, electric shock, or injury to persons when using this appliance, follow basic precautions, including the following:
4"7&5)&4&*/4536$5*0/4
t%POPUVOEFSBOZDJSDVNTUBODFTDVUPSSFNPWFUIFHSPVOE
prong from the power cord. To prevent injury to persons or
damage to the dryer, the electrical power cord must be plugged
into a properly grounded outlet.
tFor personal safety, this dryer must be properly grounded.
Failure to do so can result in electric shock or injury.
t3FGFSUPUIFJOTUBMMBUJPOJOTUSVDUJPOTJOUIJTNBOVBMGPSTQFDJGJD
FMFDUSJDBMSFRVJSFNFOUTGPSZPVSNPEFM Failure to follow these
instructions can create an electric shock hazard and/or a fire
hazard.
tThis dryer must be plugged into a properly grounded outlet.
&MFDUSJDTIPDLDBOSFTVMUJGUIFESZFSJTOPUQSPQFSMZHSPVOEFE
)BWFUIFXBMMPVUMFUBOEDJSDVJUDIFDLFECZBRVBMJGJFE
electrician to make sure the outlet is properly grounded.
Failure to follow these instructions can create an electric shock
hazard and/or a fire hazard.
tThe dryer should always be plugged into its own individual
electrical outlet which has a voltage rating that matches
the rating plate. This provides sparkling performance and also
prevents overloading house wiring circuits which could cause a
fire hazard from overheated wires.
t/FWFSVOQMVHZPVSESZFSCZQVMMJOHPOUIFQPXFSDPSE"MXBZT
grip plug firmly and pull straight out from the outlet. The
power cord can be damaged, resulting in a risk of fire and electric
shock.
t3FQBJSPSSFQMBDFJNNFEJBUFMZBMMQPXFSDPSETUIBUIBWF
CFDPNFGSBZFEPSPUIFSXJTFEBNBHFE%POPUVTFBDPSEUIBU
shows cracks or abrasion damage along its length or at either
end. The power cord can melt, creating an electric shock and/or
fire hazard.
t8IFOJOTUBMMJOHPSNPWJOHUIFESZFSCFDBSFGVMOPUUPQJODI
crush, or damage the power cord. This will prevent injury and
prevent damage to the dryer from fire and electric shock.
IMPORTANT SAFETY INSTRUCTIONS

9
ENGLISH
INTRODUCING YOUR DRYER
PART AND ACCESSORIES
Parts
NOTE
t$POUBDU-($VTUPNFS4FSWJDFBUJO$BOBEBJGBOZBDDFTTPSJFTBSFNJTTJOH
t'PSZPVSTBGFUZBOEGPSFYUFOEFEQSPEVDUMJGFVTFPOMZBVUIPSJ[FEDPNQPOFOUT5IFNBOVGBDUVSFSJTOPUSFTQPOTJCMFGPSQSPEVDU
malfunction or accidents caused by the use of separately purchased unauthorized components or parts.
t5IFJNBHFTJOUIJTNBOVBMNBZCFEJGGFSFOUGSPNUIFBDUVBMDPNQPOFOUTBOEBDDFTTPSJFTBOEBSFTVCKFDUUPDIBOHFCZUIFNBOVGBDUVSFS
without prior notice for product improvement purposes.
Accessories
1FEFTUBM
TPMETFQBSBUFMZ
Stacking kit
TPMETFQBSBUFMZ
*ODMVEFEBDDFTTPSJFT
%SZJOHSBDL %SBJOIPTF )PTFFYUFOTJPO
$POOFDUPS
%SBJOIPTF
fitting
&MCPXCSBDLFU
GPSTFDVSJOHIPTF
Tie strap
GPSTFDVSJOHIPTF
0QUJPOBMBDDFTTPSJFT
This dryer can only be vented to the rear.
There is no side vent kit available
Condensate
water exhaust
outlet
Terminal Block
Access Panel
Control panel
Leveling feet
Reversible
door
Lint filter
*For information on installing the drain hose, see page 20

10 INTRODUCING YOUR DRYER
Control panel features
Following are instructions for starting and using your new dryer. Please refer to specific sections of
this manual for more detailed information.
WWARNING:To reduce the risk of fire, electric shock, or injury to persons, read this entire manual,
including the Important Safety Instructions, before operating this dryer.
Button %FTDSJQUJPO
108&30/0''#6550/
ü- Press to turn the dryer ON. Press again to turn the dryer OFF.
/05& Pressing the ON/OFF button during a cycle will cancel that cycle and any load settings will be lost.
$:$-&4&-&$503,/0#
ü- Turn this knob to select the desired cycle. Once the desired cycle has been selected, the standard presets
will be shown in the display. On MANUAL DRY cycles, these settings can be adjusted using the cycle setting
buttons anytime before starting the cycle.
45"351"64ᦖ/
ü- Press this button to START the selected cycle. If the dryer is running, use this button to PAUSE the cycle
without losing the current settings.
/05&*GZPVEPOPUQSFTTUIF45"351"64&CVUUPOUPSFTVNFBDZDMFXJUIJONJOVUFTUIFESZFSUVSOTPGG
automatically and all settings are lost.
.03&5*.&-&445*.ᦖ/4
ü-
Use these buttons with MANUAL DRY and TIME DRY cycles to adjust the drying time. Press the MORE TIME button
to increase the selected manual cycle time by a minute; press LESS TIME to decrease the cycle time by a minute. Use
XJUI45&".'3&4)DZDMFTBOEUIF3&%6$&45"5*$BOE&"4:*30/PQUJPOTUPBEKVTUMPBETJ[FNPSFPSGFXFSJUFNT
$:$-&4&55*/(#6550/4
ü- Use these buttons to select the desired cycle settings for the selected cycle. The current settings are shown
in the display. Press the button for that option to view and select other settings.
015*0/#6550/4
ü- The OPTION buttons allow you to select additional cycle options. Certain buttons also allow you to activate
TQFDJBMGVODUJPOTCZQSFTTJOHBOEIPMEJOHUIFCVUUPOGPSTFDPOET
45&".'6/$5*0/4
ü- LG’s steam technology allows you to inject fabrics with a swirling jet of hot steam to refresh clothes, reduce
static, and make ironing easier. Simply select the steam fresh™ cycle, or you can add a STEAM option to
selected cycles.
Operation

11
ENGLISH
INTRODUCING YOUR DRYER
Display
The display shows the settings, estimated time remaining, options, and status messages for your dryer. When the
dryer is turned on, the light in the display will illuminate.
WWARNING
To reduce the risk of fire, electric shock, or injury to persons, read this entire manual, including the Important Safety
Instructions, before operating this dryer.
%JTQMBZBOE*DPOT %FTDSJQUJPO
&45*."5&%5*.&3&."*/*/(
ü8IFOUIF45"351"64&CVUUPOJTQSFTTFEUIFESZFSXJMMEJTQMBZUIFFTUJNBUFE4&/403%3:PSTFUUJNF
5*.&%3:SFNBJOJOHBOECFHJOUVNCMJOH
/05& The cycle time on SENSOR DRY cycles may fluctuate as the dryer recalculates drying time for optimal
results
$:$-&$0.1-&5*0/*/%*$"5038*5)$)&$,'*-5&33&.*/%&3
ü5IJTQPSUJPOPGUIFEJTQMBZTIPXTXIJDITUBHFPGUIFESZJOHDZDMFJTDVSSFOUMZVOEFSXBZ$)&$,'*-5&3
%3:*/($00-*/(PS83*/,-&$"3&"UUIFCFHJOOJOHPGUIFDZDMFUIFDIFDLGJMUFSJDPOXJMMCMJOLUP
remind you to emplty the lint filter. During the cycle, the current stage will blink while remaining stages
remain lit.
$)*-%-0$,*/%*$"503
ü- When CHILD LOCK is set, the CHILD LOCK indicator will appear and all buttons are disabled except the
POWER button. This prevents children from changing settings while the dryer is operating. CHILD LOCK
remains set after the dryer shuts off. The dryer can be powered on, but it cannot be operated. Disengage
CHILD LOCK to resume normal use.
$)&$,'*-5&33&.*/%&3
ü- The display will show CHECK FILTER when the dryer is turned on as a reminder to check the filter. It turns off
when the START/PAUSE button is pressed.
$6450.130(3".
ü- If you have a special combination of settings that you use frequently, you can save these settings as a
CUSTOM PROGRAM. Once saved, you can select your saved settings with the press of a single button.
'-084&/4&%6$5#-0$,"(&4&/4*/(4:45&.*/%*$"503
ü- The FLOW SENSE™ duct blockage sensing system detects and alerts you to restrictions in the installed
household ductwork that reduce exhaust airflow through the dryer. If you see the alert: Clean or repair the
ducts to remove the restrictions. Keep your ducts clean to help increase efficiency and reduce long drying
times caused by blocked ducts.

12 INTRODUCING YOUR DRYER
WHAT IS A HYBRID DRYER?
What is hybrid dryer technology?
LG hybrid dryers use a combination of conventional heating
elements and a heat pump system to dry your clothes.
The heat pump recovers heat from the hot, moist air that is
normally exhausted to the outside and lost.
Using a heat pump to preheat the air coming into the dryer
recovers this heat and saves electricity, because it takes less
electricity to move the heat than to create it with a conventional
heater. This LG hybrid dryer has been designed to save you
money.
How does the LG hybrid dryer use
less energy than a conventional
dryer?
t#FDBVTFIFBUQVNQTUSBOTGFSIFBUJOTUFBEPGDSFBUJOHJUGSPN
scratch, they use less energy to produce heat than regular
heaters, in most cases.
t*ODPOWFOUJPOBMESZFSTBMMUIFFOFSHZUIBUJTVTFEUPFWBQPSBUF
the moisture in the clothes is vented outside and lost. The hybrid
dryer technology is able to recover some of this wasted energy
and use it to evaporate more moisture, saving energy.
How does it work?
Heat naturally moves from warmer areas toward cooler areas.
Heat pumps control this movement by trapping hot air. Rather
than using a lot of energy to create heat, heat pumps use a little
energy to transfer heat from one place to another using a heat
exchanger.
The heat pump in the dryer is similar to those used in air
conditioners or dehumidifiers. The cold part of the system is used
to condense water and cool the exhaust air, while the hot part of
the system is used to heat the air coming into the drum to dry the
clothes.
How much energy can it save?
The amount of energy saved will depend on cycle selection, load
size, options, vent condition, and many other factors.
The cycles and options that save the most energy will take longer
to dry, but the energy saved in heating more than offsets the
energy used to tumble the clothes, which is relatively small.
2. Vapor
Vapor is channelled into an electric
compressor, increasing the pressure
and temperature of the vapor.
Condensed refrigerant
High pressure side
Hot gas
Compressor
Expansion
valve
Cool gas
Cold refrigerant
Low pressure side
Heated air into
dryer drum
Heat exchanger
Evaporator
Exhaust air
Room air
4. Condensed vapor
Condensed vapor returns to liquid,
passes through the expansion valve,
reducing pressure and temperature.
The cycle repeats.
1. Exhaust
Hot, moist air from the
dryer drum flows over the
evaporator. The refrigerant
boils and evaporates
cooling the air and
condensing the moisture.
3. Room Air
Cool room air flows over
the hot condenser as
it enters the dryer. The
refrigerant condenses and
cools, preheating the air
entering the dryer.

13
ENGLISH
INTRODUCING YOUR DRYER
Do I have to use any special settings
to save energy while using my LG
hybrid dryer?
#ZEFTJHOBOZUJNFZPVVTFBIFBUFEDZDMFUIFESZFSXJMMTBWF
some energy. However, some cycles and options will take greater
advantage of the hybrid technology than others, so using those
cycles and options when appropriate may save you even more
energy.
How can I save the most energy
while using my LG hybrid dryer?
The LowTemp Dry+ cycle
Choose this cycle when you have normal cotton or poly fabrics
and a load of less than 9 pounds. This cycle may extend your
drying time in order to maximize the energy savings.
The Eco Hybrid option
If you are using the LowTemp Dry+, Cotton/Normal, Heavy Duty
or Towels cycles, you can add the Eco Hybrid option to increase
your energy savings. Adding the Eco Hybrid option to these cycles
will increase the drying time.
The LowTemp Dry+ cycle with the Eco Hybrid option
The LowTemp Dry+ cycle in combination with the Eco Hybrid
option will give you the most energy savings. Your dry times will
also be the longest on this setting.

14 INSTALLATION INSTRUCTIONS
INSTALLATION INSTRUCTIONS
Preview installation order
Checking and choosing
the proper location
Leveling the dryer Connect the drain hose
Vent the dryer Plugging in the power
cord and grounding
Connect the electrical
cord to the dryer
Exhaust check test
(Refer to page 29.)
Test run
240V(USA)
230V(CANADA)
NOTE
This dryer cannot be vented to
the side or the bottom.

15
ENGLISH
INSTALLATION INSTRUCTIONS
Installation location requirements
WWARNING
3FBEBMMJOTUBMMBUJPOJOTUSVDUJPOTDPNQMFUFMZCFGPSFJOTUBMMJOHBOEPQFSBUJOHZPVSESZFSIt is important that you review this entire
manual before installing and using your dryer. Detailed instructions concerning electrical connections, gas connections, and exhaust
requirements are provided on the following pages.
%POPUPQFSBUFZPVSESZFSBUUFNQFSBUVSFCFMPX¡'¡$BOEUFNQFSBUVSFPWFS¡'¡$"UMPXFSUFNQFSBUVSFTUIFESZFSNJHIUOPU
shut off at the end of an automatic cycle. This can result in longer drying times. The dryer must not be installed or stored in an area where it
will be exposed to water and/or weather. Check code requirements. Some codes limit, or do not permit, installation of the dryer in garages,
closets, mobile homes or sleeping quarters. Contact your local building inspector.
Clearances
INSTALLATION SPACING FOR RECESSED AREA OR CLOSET INSTALLATION
5IFGPMMPXJOHTQBDJOHEJNFOTJPOTBSFSFDPNNFOEFEGPSUIJTESZFS5IJTESZFSIBTCFFOUFTUFEGPSTQBDJOHPGJODIFTDNDMFBSBODFPO
the sides and rear. Recommended spacing should be considered for the following reasons:
t"MPDBUJPOUIBUBMMPXTGPSQSPQFSFYIBVTUJOTUBMMBUJPO"HBTESZFS
must be exhausted to the outdoors. See Venting the dryer.
t"HSPVOEFEFMFDUSJDBMPVUMFUMPDBUFEXJUIJOGUDNPGFJUIFS
side of the dryer. See $POOFDUJOHFMFDUSJDESZFST.
t"TUVSEZGMPPSUPTVQQPSUUIFUPUBMESZFSXFJHIUPGMCT
LH5IFDPNCJOFEXFJHIUPGBDPNQBOJPOBQQMJBODFTIPVMEBMTP
be considered.
tNo other fuel-burning appliance can be installed in the same
closet as a dryer.
t"EEJUJPOBMTQBDJOHTIPVMECFDPOTJEFSFEGPSFBTFPGJOTUBMMBUJPO
and servicing.
t"EEJUJPOBMDMFBSBODFTNJHIUCFSFRVJSFEGPSXBMMEPPSBOEGMPPS
moldings.
t"EEJUJPOBMTQBDJOHTIPVMECFDPOTJEFSFEPOBMMTJEFTPGUIFESZFS
to reduce noise transfer.
For closet installation, with a door, minimum ventilation openings
in the top and bottom of the door are required. Louvered doors
with equivalent ventilation openings are acceptable.
t$PNQBOJPOBQQMJBODFTQBDJOHTIPVMEBMTPCFDPOTJEFSFE
24 in.2*
(155 cm2)
18" min.*
(45.7 cm)
1"*
(2.5 cm)
30"
(76.1 cm)
30"
(76.1 cm)
5"**
(12.7 cm)
48 in.2*
(310 cm2)
14" max.*
(35.6 cm)
3"*
(7.6 cm)
3"*
(7.6 cm)
1"
(2.5 cm)
27"
(68.6cm)
1"
(2.5 cm)
1"*
(2.5 cm)
5"**
(12.7 cm)
14" max.*
(35.6 cm)
18" min.*
(45.7 cm)
0"
(0 cm)
39"
(99.1 cm)
1"
(2.5 cm)
27"
(68.6 cm)
1"
(2.5 cm)
NOTE
t5IFGMPPSNVTUCFMFWFMXJUIBNBYJNVNTMPQFPGJODIDNVOEFSFOUJSFESZFS*GTMPQFJTHSFBUFSUIBOJODIDNJOTUBMMUIF
Extended Dryer Feet Kit. Clothes may not tumble properly, and automatic sensor cycles may not operate correctly if dryer is not level.
t'PSBHBSBHFJOTUBMMBUJPOZPVXJMMOFFEUPQMBDFUIFESZFSBUMFBTUJODIFTDNBCPWFUIFGMPPS5IFTUBOEBSEQFEFTUBMJTJODIFT
:PVXJMMOFFEJODIFTDNGSPNUIFHBSBHFGMPPSUPUIFCPUUPNPGUIFESZFS
NOTE
5IFSFTIPVMECFBUMFBTUBMJUUMFTQBDFBSPVOEUIFESZFSPSBOZPUIFSBQQMJBODFUPFMJNJOBUFUIFUSBOTGFSPGWJCSBUJPOGSPNPOFUPUIF
other. Too much vibration, it could cause them to make noise or touch each other causing paint damage and making even more
noise.

16 INSTALLATION INSTRUCTIONS
Installation with optional pedestal base or stacking kit
RECOMMENDED INSTALLATION SPACING FOR CABINET INSTALLATION
tFor cabinet installation with a door, minimum ventilation openings in the top of the cabinet are required.
*Required spacing
**For side or bottom venting,
JODIFTDNTQBDJOHJTBMMPXFE
CLOSET VENTILATION REQUIREMENTS
Closets with doors must have both an upper and lower vent to prevent heat and moisture buildup in the closet. One upper vent opening
XJUIBNJOJNVNPQFOJOHPGTRJODNNVTUCFJOTUBMMFEOPMPXFSUIBOGFFUBCPWFUIFGMPPS0OFMPXFSWFOUPQFOJOHXJUIB
NJOJNVNPQFOJOHPGTRJODNNVTUCFJOTUBMMFEOPNPSFUIBOPOFGPPUBCPWFUIFGMPPS0OFFYBNQMFTIPXOVTFTWFOUHSJMMFTJO
the door.
RECOMMENDED INSTALLATION SPACING FOR RECESSED OR CLOSET INSTALLATION, WITH STACKED WASHER AND DRYER
tThe dimensions shown are for the recommended spacing.
*Required spacing
**For side or bottom venting,
JODIFTDNTQBDJOHJTBMMPXFE
7"* (17.8 cm)
9"*
(22.9 cm)
7"* (17.8 cm)
5"**
(12.7 cm)
27"
(68.6 cm)
1"*
(2.5 cm) (2.5 cm)
(2.5 cm)
30"
(76.1 cm)
48 in.
2
*
(310 cm
2
)
3"* (7.6 cm)
3"* (7.6 cm)
1"* (2.5 cm)
24 in.
2
*
(155 cm
2
)
6"* (15.2 cm)
76"
(193 cm)
27"
(68.6 cm)
1"
(2.5 cm)
1"
(2.5 cm)
5 "**
(14 cm)
2/4

17
ENGLISH
Leveling the dryer
WWARNING
t5PSFEVDFUIFSJTLPGJOKVSZUPQFSTPOTBEIFSFUPBMMJOEVTUSZ
recommended safety procedures including the use of
long sleeved gloves and safety glasses. Failure to follow this
warning can cause serious injury or death.
t5IFBQQMJBODFTBSFIFBWZ5XPPSNPSFQFPQMFBSFSFRVJSFE
when installing the dryer. Failure to follow this warning can
cause serious injury or death.
To ensure that the dryer provides optimal drying performance,
it must be level. To minimize vibration, noise, and unwanted
movement, the floor must be a perfectly level, solid surface.
1PTJUJPOUIFESZFSJOUIFGJOBMMPDBUJPO1MBDFBMFWFMBDSPTTUIF
top of the dryer.
t"MMGPVSMFWFMJOHGFFUNVTUSFTUTPMJEMZPOUIFGMPPS(FOUMZQVTI
on the top corners of the dryer to make sure that the dryer does
not rock from corner to corner.
If you are installing the dryer on the optional pedestal, you must
use the leveling feet on the pedestal to level the dryer. The dryer
leveling feet should be fully retracted.
6TFBOBEKVTUBCMFXSFODIUPUVSOUIFMFWFMJOHGFFU5VSO
clockwise to raise the dryer or counterclockwise to lower it.
Raise or lower the leveling feet until dryer is level from side to
side and front to back.
.BLFTVSFUIBUBMMMFWFMJOHGFFUBSFJOGJSNDPOUBDUXJUIUIFGMPPS
Level
Leveling Feet
INSTALLATION INSTRUCTIONS
NOTE
Adjust the leveling feet only as far as necessary to level the
dryer. Extending the leveling feet more than necessary can
cause the dryer to vibrate.

18
Reversing the door
INSTALLATION INSTRUCTIONS
Open Door
Hinge
Dummy
Screw
3FNPWFUXPTDSFXTBOEEJTBTTFNCMZ-BUDI
)PMEPOUIFIJOHFXIJMFSFNPWFTDSFXTPGIJOHFUPQSFWFOU
EPPSESPQQJOH
3FNPWFEPPSGSPNDBCJOFUDPWFS
Remove
Door
Latch Screw
Hinge Screw
CAUTION
#FTVSFUPTVQQPSUUIFXFJHIUPGUIFEPPSCFGPSFSFNPWJOHUIF
hinge screws.
0QFOUIFEPPSUPSFWFSTF
$IFDLTDSFXTUPSFNPWF-FGU3JHIU
3FNPWFGPVSEVNNZTDSFXTCZESJWFS
WARNING
t5PBWPJEEBNBHFUPUIFESZFSPSUIFEPPSTVQQPSUUIF
door with a stool or box that fits under the door, or have
an assistant support the weight of the door.
t"MXBZTSFWFSTFUIFEPPS#&'03&TUBDLJOHUIFESZFSPOUPQ
of the washer.
t"WPJEESPQQJOHUIFEPPSUPBWPJEEBNBHFUPUIFEPPSPS
the floor.
t6OQMVHUIFESZFSPSUVSOPGGQPXFSBUUIFNBJODJSDVJU
breaker before beginning door reversal.
THE DRYER DOOR IS VERY LARGE AND HEAVY. Failure to follow
the instructions below can result in damage to the dryer,
property damage or injury to persons.

19
ENGLISH
Reversing the door (cont.)
Move door to left side and insert a hinge to hinge hole.
)PMEPOIJOHFXIJMFTDSFXEPXOBIJOHF
UPQSFWFOUEPPSESPQQJOH
9. Insert latch to right side and install screws.
4DSFXEPXOGPVSEVNNZTDSFXTSJHIUTJEF
$IFDLUIBUUIFEPPSDMPTFTBOEMBUDIFTQSPQFSMZ
INSTALLATION INSTRUCTIONS
Latch
Screw
Hinge
Dummy
Screw
Hinge Screw
Swing Door
Hinge hole
CAUTION
#FTVSFUPTVQQPSUUIFXFJHIUPGUIFEPPSCFGPSFJOTUBMMJOHUIF
hinge screws.
WARNING
t5PBWPJEEBNBHFUPUIFESZFSPSUIFEPPSTVQQPSUUIF
door with a stool or box that fits under the door, or have
an assistant support the weight of the door.
t"MXBZTSFWFSTFUIFEPPS#&'03&TUBDLJOHUIFESZFSPOUPQ
of the washer.
t"WPJEESPQQJOHUIFEPPSUPBWPJEEBNBHFUPUIFEPPSPS
the floor.
t6OQMVHUIFESZFSPSUVSOPGGQPXFSBUUIFNBJODJSDVJU
breaker before beginning door reversal.
THE DRYER DOOR IS VERY LARGE AND HEAVY. Failure to follow
the instructions below can result in damage to the dryer,
property damage or injury to persons.

20 INSTALLATION INSTRUCTIONS
CONNECTING THE DRAIN HOSE
t5IFESBJOIPTFUIBUJTFODMPTFEXJUIUIFESZFSNVTUCF
connected to the nozzle in the rear of the cabinet before using
the dryer in order to drain the condensed water from the
compressor.
t5IFESBJOIPTFJTOPUDPOOFDUFEXJUIUIFTUFBNGVODUJPOTPGUIF
dryer and must be connected even if you do not use the steam
functions of the dryer.
t5IFESBJOIPTFTIPVMEBMXBZTCFQSPQFSMZTFDVSFE'BJMVSF
to properly secure the drain hose can result in fl ooding and
property damage.
t%POPUJOTUBMMUIFFOEPGUIFESBJOIPTFIJHIFSUIBO
GFFUNBCPWFUIFCPUUPNPGUIFESZFS
t.BLFTVSFUIBUUIFESBJOIPTFJTOPUTUSFUDIFEQJODIFEDSVTIFE
or kinked.
Option 1: Using a standpipe
Install the end of the drain hose into the elbow bracket. Do not
FYUFOEUIFESBJOIPTFNPSFUIBOJODIFTQBTUUIFFOEPGUIF
elbow bracket. Use a tie strap to secure the drain hose in place.
Use the following alternatives to the standpipe:
t*GZPVEPOPUIBWFBTUBOEQJQF
tJGUIFTUBOEQJQFJOZPVSIPNFJTUPPOBSSPXUPBDDPNNPEBUF
both the hose from your washer and the drain hose from the
dryer.
tJGZPVSXBTIFSESBJOJTIJHIFSUIBOGFFUN
Option 2: Using a Y connector
Purchase and install a Y connector in your standpipe.
Option 3: Using a laundry tub or
bucket
As shown below, the drain hose can be connected to a laundry
tub or utility sink. The elbow bracket should be installed near the
end of the drain hose. Hang the end of the drain hose over the
side of the utility sink. Use a tie strap to secure the drain hose in
place.
If necessary, the hose can also be drained into a floor drain or
bucket. If a bucket is used, the bucket must then be emptied
periodically. Install the elbow bracket near the end of the drain
hose. Hang the end of the drain hose over the side of the bucket.
Make sure to stabilize the bucket if necessary so it won’t tip over.
Secure the hose if possible.
t5IFBNPVOUPGXBUFSQSPEVDFENBZDIBOHFEFQFOEJOHPOUIF
kind of load, the moisture in the load and the size of the load.
Some loads may produce little or no water, other loads may
QSPEVDFVQUPP[DDPSNPSF
t*GUIFMFOHUIPGUIFESBJOIPTFJTUPPTIPSUUPSFBDIUIFMBVOESZ
tub or bucket, purchase an extension hose and attach it to the
existing drain hose using the hose extension connector included
with the dryer.
WARNING
Failure to connect the drain hose before using the dryer may
result in dryer malfunction, electric shock, or fl ooding.
WARNING
Do not drink the water from the drain hose. The water contains
impurities and may cause illness or personal injury.
NOTE
If the drain hose is too long, cut it to the proper length to fi t the
installation location. If it is too short, attach an extension hose
OPUJODMVEFEVTJOHUIFIPTFFYUFOTJPODPOOFDUPSJODMVEFE
with the dryer.
GFFU
N
$PSSFDU$POOFDUJPO
The maximum water drain
IFJHIUJTGFFUN
*ODPSSFDU$POOFDUJPO
Make sure that the hose is
not twisted
Drain Hose
Drain Hose
Elbow Bracket
Elbow Bracket
Typical Y-connector Y-connector installed
Maximum
drain Height
GFFUN
Other manuals for DLHX4072 series
3
Table of contents
Languages:
Other LG Dryer manuals

LG
LG DLE3733W Instruction Manual

LG
LG SteamDryer DLGX3251V User manual

LG
LG RV1365ESZ User manual

LG
LG DLEX3470 Series User manual

LG
LG WM5500HVA-DLEX5500V User manual

LG
LG DLE1001W User manual

LG
LG RC8066 Series User manual

LG
LG DLGX3701W User manual

LG
LG RC8066**F Series User manual

LG
LG DLEX3570 series User manual
Popular Dryer manuals by other brands

AEG
AEG T6DHE842B user manual

Bosch
Bosch WTX88MH0AU Installation and operating instructions

AEG
AEG LAVATHERM 340 operating instructions

Siemens
Siemens WT47U640ES Installation and operating instructions

Miele
Miele TWH620WP operating instructions

Bosch
Bosch WTM85260SG Installation and operating instructions