LG LP860 Series User manual

Printed in Korea www.lg.com
INSTALLATION MANUAL
LED LCD TV
Please read this manual carefully before operating
your set and retain it for future reference.
LP860*
P/NO: MFL67738206 (1306-REV00)


1
CONTENTS
INSTALLATION MENU
Introduction12
LGHotelModeSetup13~17
USBCloning18
SendToUSB19
ReceiveFromUSB19
LogeImageDownload20
PasswordChange21
SetIDSetup22
ConfigurationSetup23~25
ExternalSpeaker26
SpeakerOutputSetup27
IRSetup28
NetworkSetup29~30
Pro:Centric31~32
PowerSaving33
CECSetup34
ClockSetup35
PreLoadedAppSetup36
MediaShare37
DOWNLOAD EXTRA CONTENTS 38~39
DOWNLOAD A SPLASH IMAGE 40~41
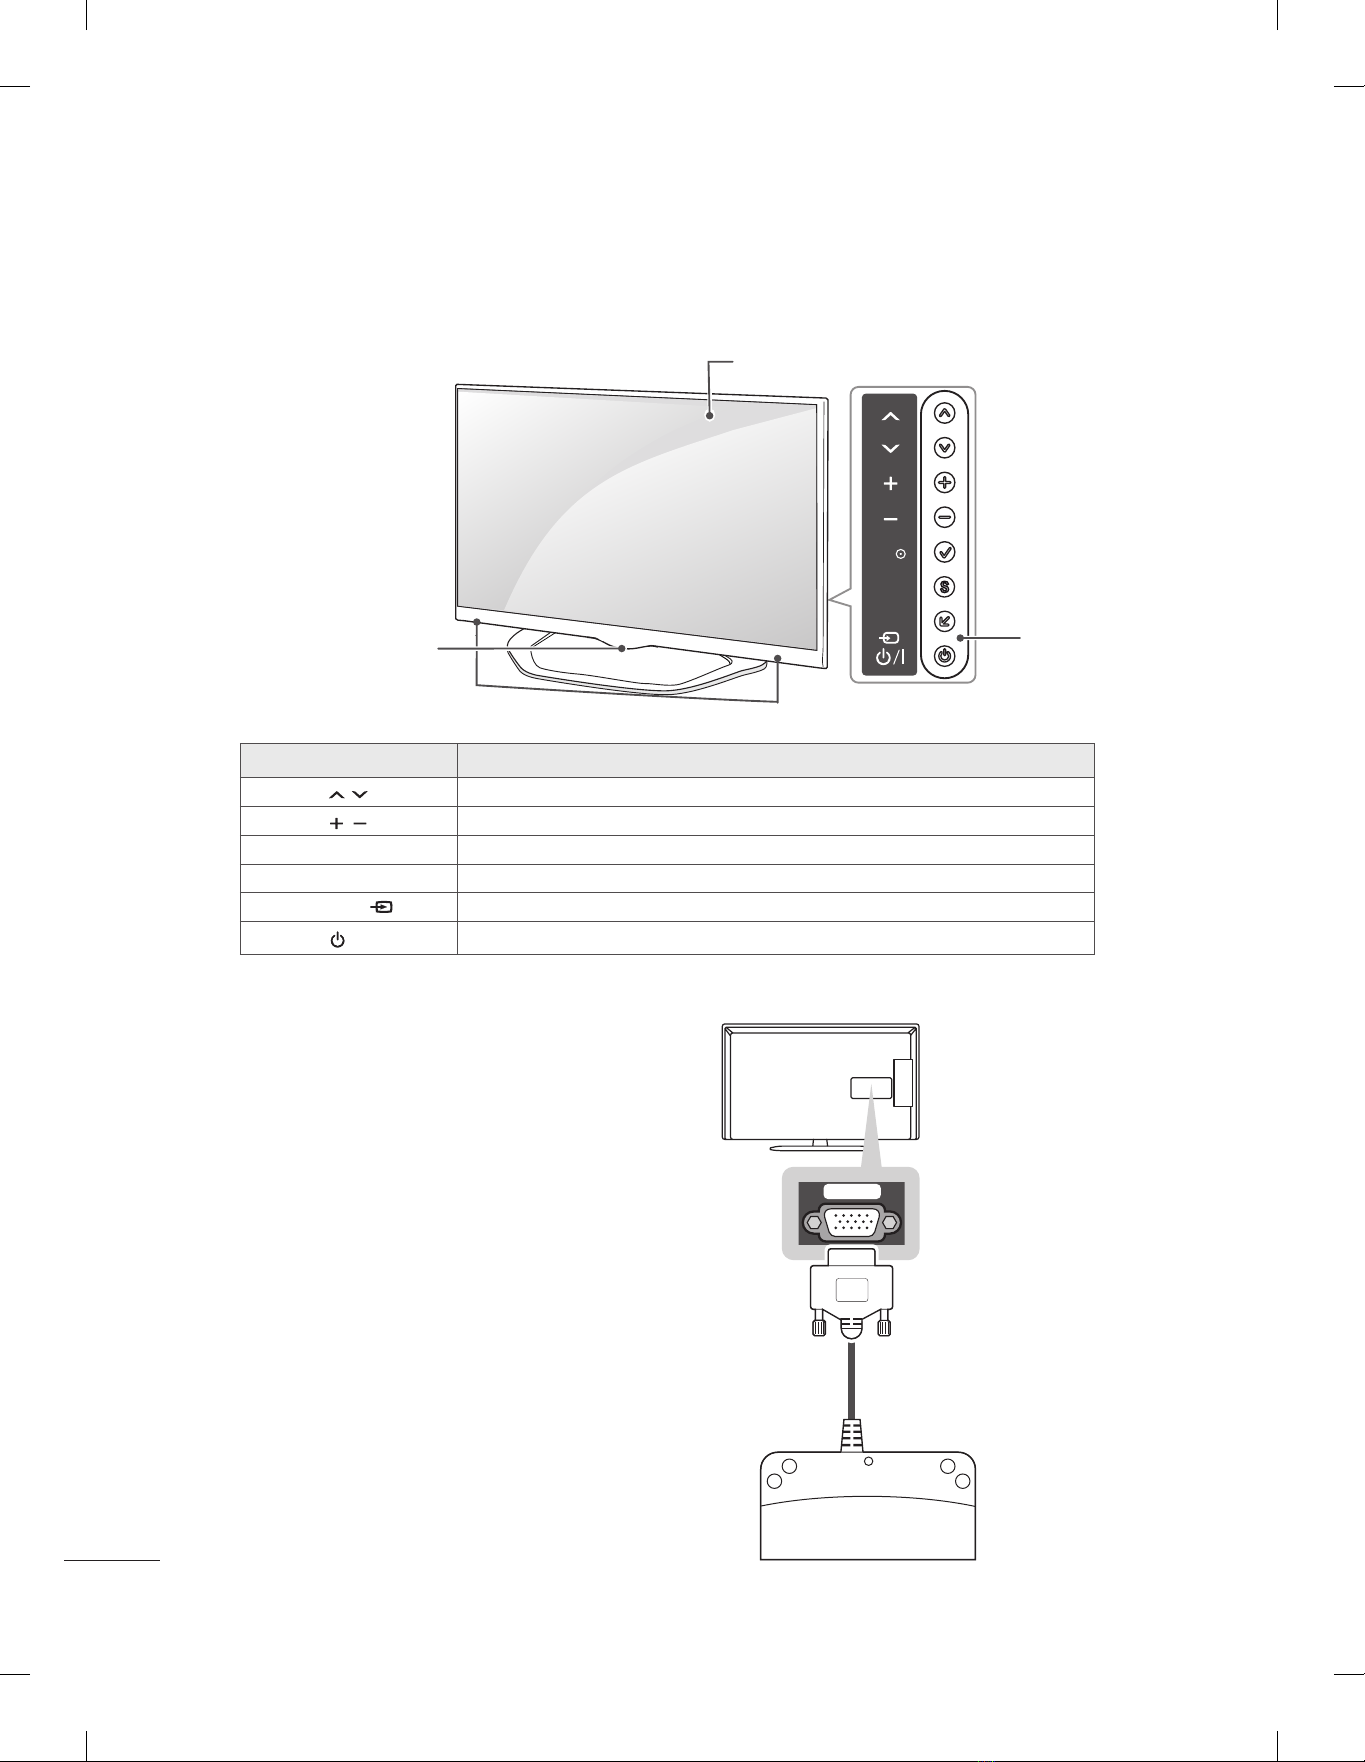
LOCATION AND FUNCTION OF CONTROLS2
EZMANAGER
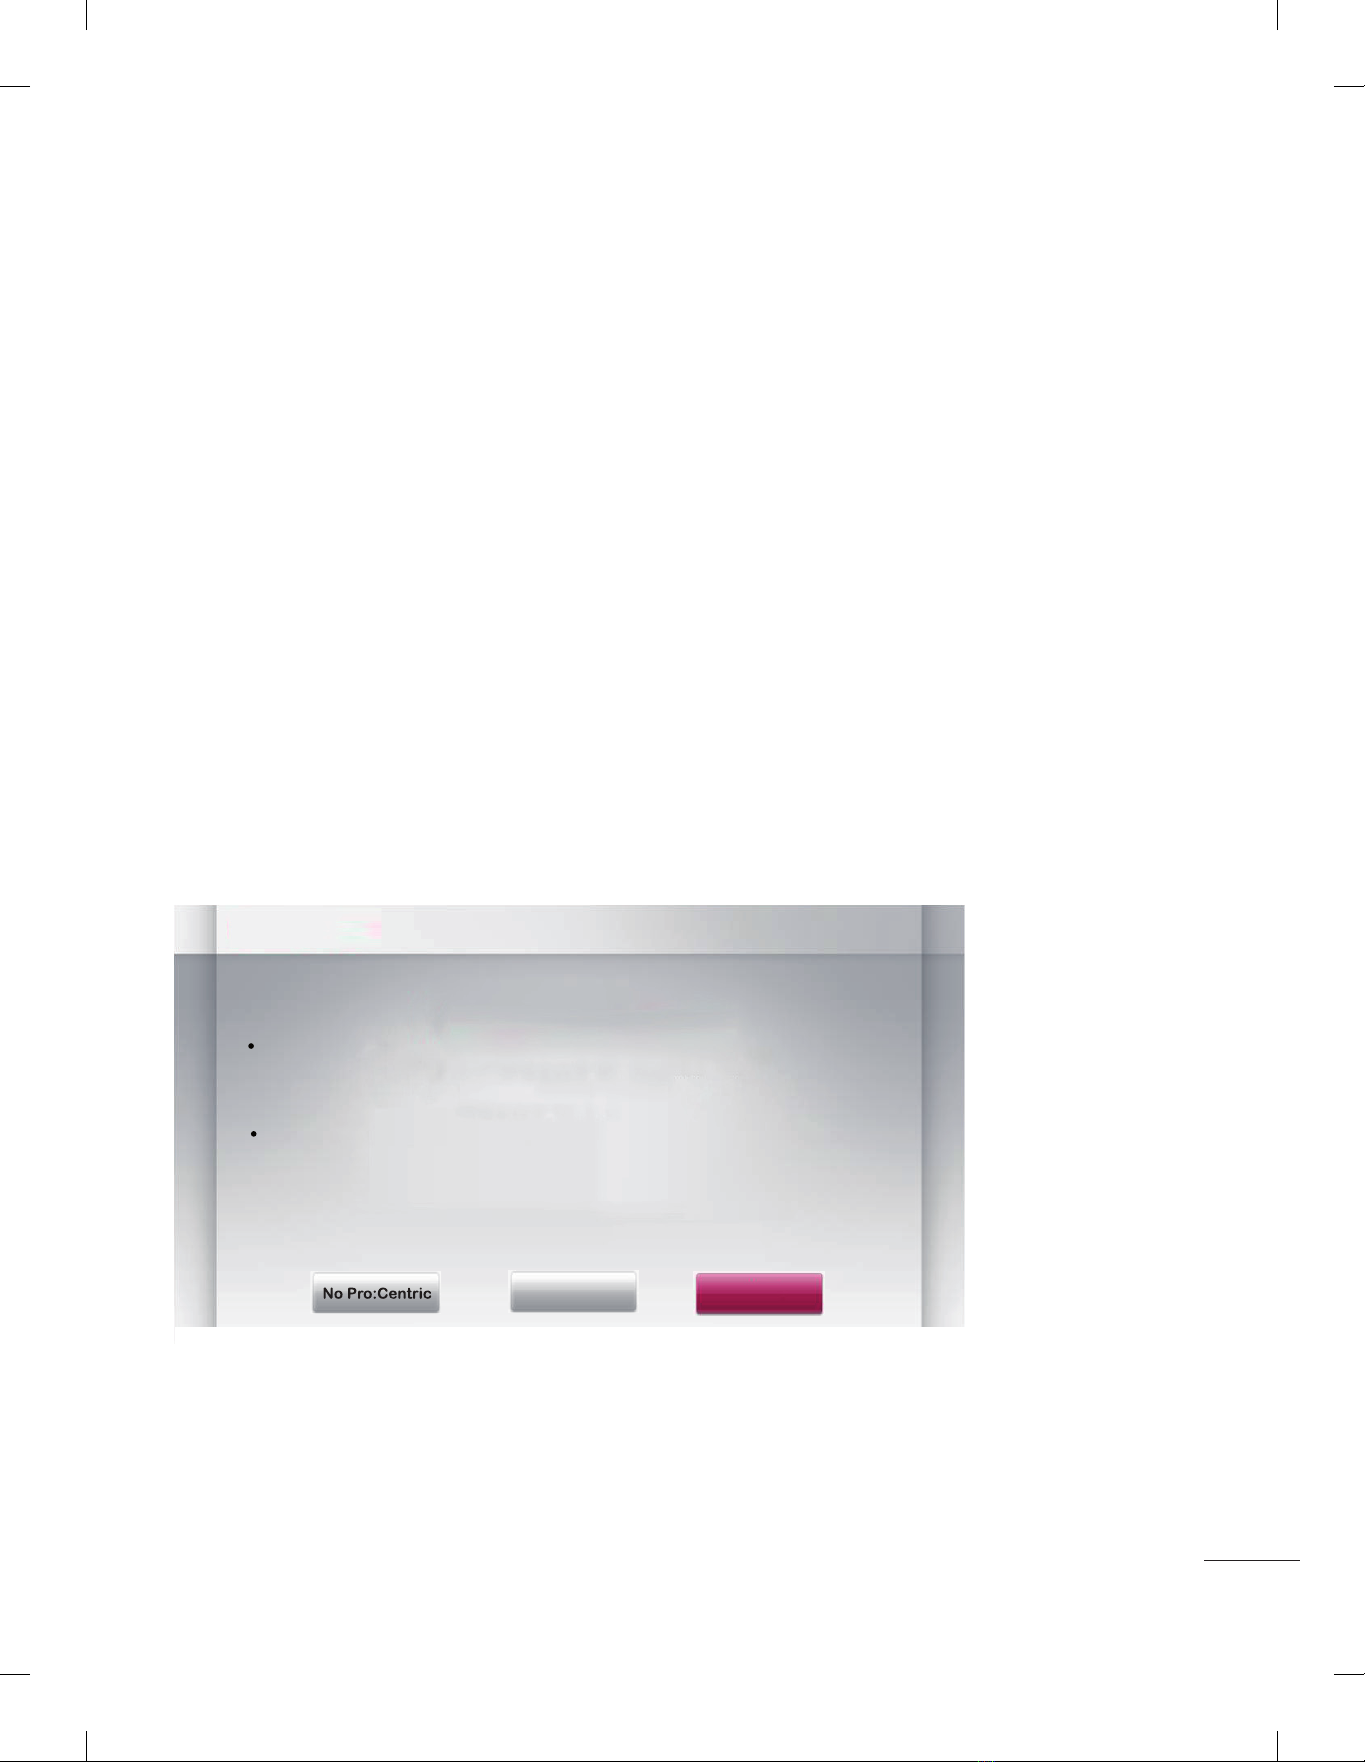
EZ-Manager21-Introduction3
EZ-ManagerWizard3
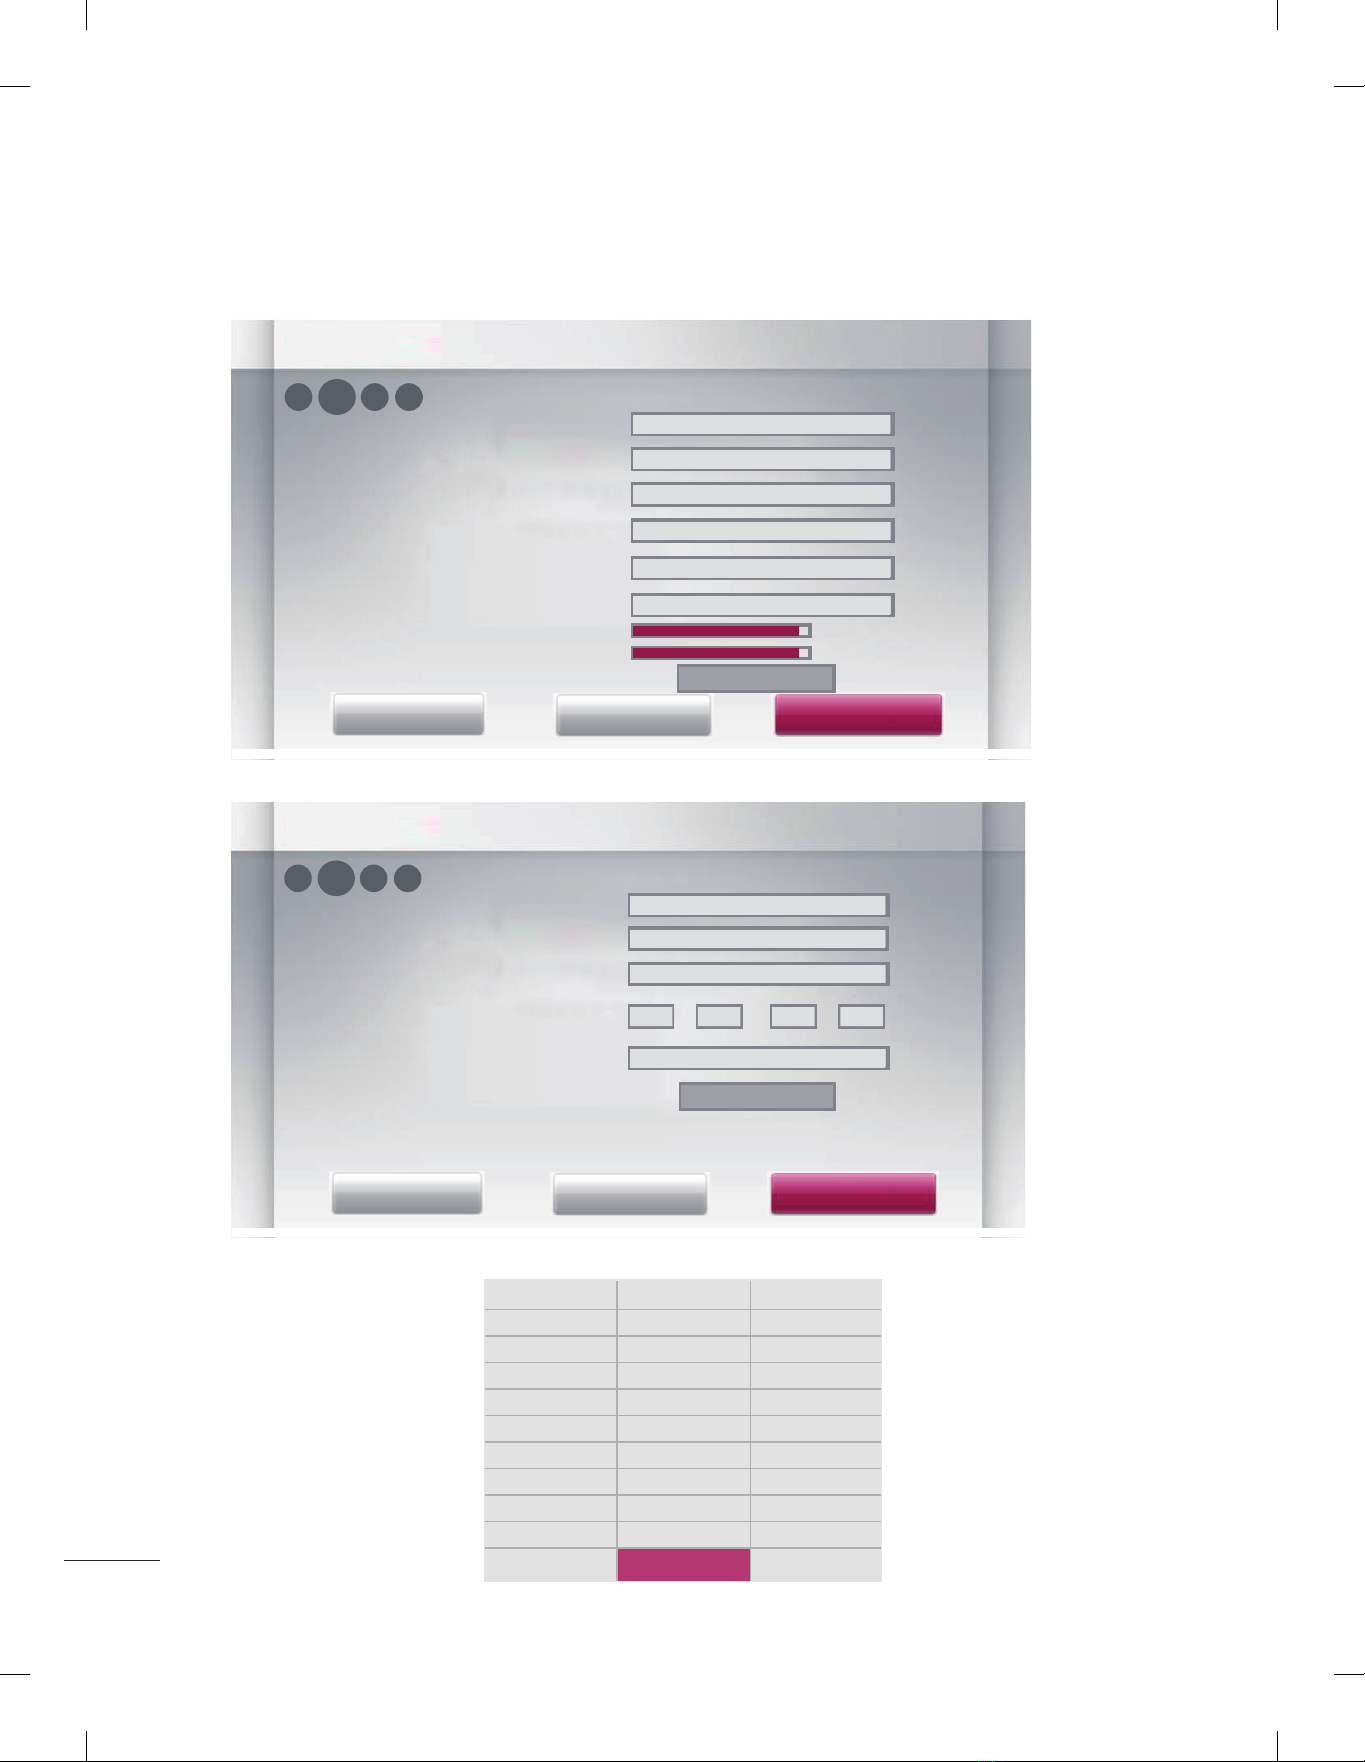
AutomaticallyforSetup 4~6
ManuallyforSetup7~9
USBLGSmartInstallUtility 10~11
Partsandbuttons2
LEDClockconnection2

2
LOCATION AND FUNCTION OF CONTROLS
*ImageshownmaydifferfromyourTV
Button Description
H
Scrollsthroughthesavedprogrammes
H
Adjuststhevolumelevel
OKꔉSelectsthehighlightedmenuoptionorconfirmsaninput
SETTINGS Accessesthemainmenu,orsavesyourinputandexitsthemenus
INPUT Changestheinputsource
/ITurnsthepoweronoroff
SETTINGS
INPUT
OK
Speakers
Buttons
Screen
LGLogoLightand
Remotecontrolsensor
ThisTVcanbeconnectedtoaLEDClock
viatheCLOCKport
AV
(RGB)
/DVI IN
1 2
COMPONENT
IN
LAN ANTENNA/
CABLE IN
OPTICAL
AUDIO OUT
AUDIO IN
(COMPONENT/RGB/DVI)
(CONTROL & SERVICE)
RS-232C IN LNB IN
Satellite
H/P OUT
IN 3USB IN PCMCIA CARD SLOT
SPEAKER OUT
VOLUME CONTROL
STEREO (8 Ω)
CLOCK
LED Clock
(*NotProvided)
LEDClockconnection
Partsandbuttons

3
EZMANAGER
EZ-ManagerWizard
ImageshownmaydifferfromyourTV
Introduction
ThePro:CentricPlatformenablesyoutosimplyinstall,manageanduseguest-centricsolutions
ThedefaultDomain"procentriclocal"andIPServerAddressareneededtoberegisteredinDNS
TVwillcontacttheIPServerusingthedefaultDomain"procentriclocal"viaIPonserversearchpage
IfTVdoesn'tcontacttheServer,TVwillsearchthepre-definedchannelearlierthanallchannels
(DVB-Conly)
The frequencies of pre-defined channels are ‘794000, 714000, 634000, 554000, 474000, 394000,
314000,234000,154000,90000khz’
EZ-Manager Wizard
Exit Next
No Pro:Centric
Welcome to LG’s EZ-Manager Wizard
Use this setup wizard to configure the TV for Pro:Centric and/or Free-
To-Guest (FTG) operation.
Select ‘Next’ to continue.
If a Pro:Centric Server will not be installed and/or you do not wish to
use the wizard to configure this TV for FTG Mode, you may exit the wizard.
Select ‘No Pro:Centric’ to disable the Pro:Centric feature of this TV, or
select ‘Exit’ to quit.
This setup wizard will start automatically in 10 seconds.
-IfyouareusingPro:Centric,thissetupwizardtillhelpyoueasilysetuptheTV
Select'Next'tocontinue
-Otherwise,youmayselecteither'NoPro:Centric',
ifyouwillnotbeinstallingaPro:CentricServeror'Exit'toquit

4
EZ-ManagerWizard-AutomaticallyforSetup
-IfyouintendtosetRoomNumberaspartoftheTVconfiguration,usetheRoomNumberoptionto
assigntheRoom#forthisTVbeforeyoucontinuewithadditionalconfiguration
-IntheLabelfield,usetheUp/DownarrowkeystospecifyaNorth,South,East,orWestdesignation
forthisTV
-IntheRoomNumberfield,youcanusethenumberkeysontheInstallerRemotetodirectentera
roomnumber
-Tocontinue,moveandselect'Next'
1FromtheTVConfigurationOptionsscreen,youcanchoosehowtoproceedwiththeconfiguration
ofthisTVWhetheryouwillconfiguretheTVforPro:Centricoperationviathewizardoruse
aUSBmemorydevicetoconfiguretheTV,youmayfirstwishtosettheRoomNumberontheTV
EZ-Manager Wizard
12 3 4
Exit Next
Room Number
USB Configuration
TV Configuration Options
To configure the TV for Pro:Centric operation, select ‘Next’.
To set the optional Room Number, select ‘Room Number’.
To access the TV’s USB Download Menu, select ‘USB Configuration’.
This setup wizard will continue automatically in 60 seconds.
EZ-Manager Wizard
12 3 4
Exit Next
Room Number
USB Configuration
Label, Room Number
Select a Label and/or use the alpha/numeric keypad on the remote to input the Room Number.
When done, select ‘Next’ to continue.
Label Room Number
1 7 1 6

5
2ThisstepautomaticallysearchesforthePro:CentricServer
IfwasfoundthePro:Centricdatachannel,selectthe"Next"
EZ-Manager Wizard Room # 1716
2
1 3 4
Exit Manual Pro:Centric
Back
Pro:Centric Server was found...
It may take 5 min 00 second(s).
The Pro:Centric data channel was found!! (Data Channel: 698000, Mode:GEM)
The Download window will open in 5 seconds. You may wait or select ‘Next’.
Otherwise, if you select ‘Exit’, the Pro:Centric Server settings can be retained
and used during the next download when you select ‘Save & Exit’ in the Exit Window.
Status : Tuning Frequency 698000 (KHz)
The Pro:Centric data channel is found!!
(Data Channel: 698000, Mode: GEM)
EZ-Manager Wizard Room # 1716
2
1 3 4
Exit Manual Pro:Centric
Back
Searching for Pro:Centric Server...
It may take 1 min 00 second(s).
This step automatically searches for the pro:centric Server.
If there is no Pro:Centric Server installed, you do not need continue
with this procedure. Please select either ‘Exit’ or ‘Manual Pro:Centric’.
Status : Tuning Frequency 698000 (KHz)
TV is now searching all of the channels for the data channel...

6
EZ-Manager Wizard Room # 1716
3
1 2 4
Processing the Pro:Centric Configuration...
Downloading the Pro:Centric application files takes a few minutes.
Please wait...
Application files
Maintenance files
- Updating Configuration File
- Updating Splash Logo Image
In progress...
Pending...
10%
Retrieving files from data Freuquency 698000
Warning - Do not remove AC power or the signal cables during these steps.
3DownloadingthePro:Centricapplicationfilestakesfewminutes
4Aftertheinstallationiscompleted,thefollowingscreenwillbedisplayed
EZ-Manager Wizard Room # 1716
4
1 32
Turn OffReboot
EZ-Manager Configuration Complete
The TV will turn off in 10 second(s).
Installed Components
Pro:Centric Application
Maintenance Files
GEM application downloaded
Internal _CATV_ChMap_chOnly.tll
marriott_logo.jpg

7
EZMANAGER
EZ-ManagerWizard-ManuallyforSetup
2Pleaseselectthe'Pro:Centric Manually'
1SelectaLabeland/orentertheRoomNumberusingthenumerickeypadontheremotes
Tocontinue,moveandselect'Next'
EZ-Manager Wizard
12 3 4
Exit Next
Room Number
USB Configuration
TV Configuration Options
To configure the TV for Pro:Centric operation, select ‘Next’.
To set the optional Room Number, select ‘Room Number’.
To access the TV’s USB Download Menu, select ‘USB Configuration’.
This setup wizard will continue automatically in 60 seconds.
EZ-Manager Wizard Room # 1716
2
1 3 4
Exit Manual Pro:Centric
Back
Searching for Pro:Centric Server...
It may take 1 min 00 second(s).
This step automatically searches for the pro:centric Server.
If there is no Pro:Centric Server installed, you do not need continue
with this procedure. Please select either ‘Exit’ or ‘Manual Pro:Centric’.
Status : Tuning Frequency 698000 (KHz)
TV is now searching all of the channels for the data channel...

8
EZ-Manager Wizard Room # 1716
2
1 3 4
Exit Next
Back
Pro:Centric Mode
GEM
UK
RF
698000
6900
data channel found
256QAM
99%
99%
Country
Media Type
Frequency (KHz)
Symbolrate (kS/s)
Modulation
Signal Strength
Signal Qualit
y
3. Configure the appropriate Pro:Centric settings in the TV.
EZ-Manager Wizard Room # 1716
2
1 3 4
Exit Next
Back
Pro:Centric Mode GEM
IP
192 168 05
80
IP Server found
UK
Country
Media Type
IP Address
Port
- If you select Country, you can change a country.
Albania Austria Belarus
Belgium Bosnia Bulgaria
Croatia Czech Estonia
France Germany Greece
Hungary Ireland Italy
Kazakhstan Latvia Lithuania
Luxembourg Morocco Netherlands
Poland Portugal Romania
Russia Serbia Slovakia
Slovenia Spain Switzerland
Turkey UK Ukraine

9
EZ-Manager Wizard Room # 1716
3
1 2 4
Processing the Pro:Centric Configuration...
Downloading the Pro:Centric application files takes a few minutes.
Please wait...
Application files
Maintenance files
- Updating Configuration File
- Updating Splash Logo Image
In progress...
Pending...
10%
Retrieving files from data Freuquency 698000
Warning - Do not remove AC power or the signal cables during these steps.
4DownloadingthePro:Centricapplicationfilestakesfewminutes
5Aftertheinstallationiscompleted,thefollowingscreenwillbedisplayed
EZ-Manager Wizard Room # 1716
4
1 32
Turn OffReboot
EZ-Manager Configuration Complete
The TV will turn off in 10 second(s).
Installed Components
Pro:Centric Application
Maintenance Files
GEM application downloaded
Internal _CATV_ChMap_chOnly.tll
marriott_logo.jpg

10
EZ-ManagerWizard-USBLGSmartInstallUtility
1Selectthe'USBConfiguration→USBDownloadMenu→AccessingUSBStorageDevice'
*IfyouhaveUSBMemoryfor"lgsmartinstall"or"LGSMARTINSTALL"folder,
thisstepautomaticallysearchesfortheUSBfilelistpage
TV Software Update(Expert)
The Follwing update les are found in the USB device.
Select the le you want to apply to update this TV
Or press EXIT to cancel the update.
TV Software Update
LOGO Image Download
or
EZ-Manager Wizard
12 3 4
Exit Room Number
USB Configuration
Configure the TV using USB Memory Device
Insert a USB memory device, and then select ‘USB configuration’ to
access the TV’s USB Download Menu.
(See Commercial Mode Setup Guide for more Information.)
Next
Previous Next
Integrated USB Downloading
All checked files will be downloaded when you press enter key.
USB LG Smart Install Utillity
xxLP860H-ZA_Bootlogo.jpg
xxLP860H-ZA_Bootlogo2.jpg
xxLP860H-ZA_TLL_EU.tll
xxLP860H-ZA_CPU.epk

11
USB LG Smart Install Utillity Room # 1716
Warning - Do not remove the USB device during this process
Downloading Data...
ComleteMaintenance File
File Name:
Boot Logo File
File Name:
Software File(CPU)
File Name:
Ready
Ready
xxLP860H-ZA_TLL_EU.til
xxLP860H-ZA_Bootlogo.jpg
xxLP860H-ZA_CPU.epk
2DownloadingthePro:Centricapplicationfilestakesfewminutes
3Aftertheinstallationiscompleted,thefollowingscreenwillbedisplayed
Complete
This window will close in 3 second(s).
Mainenance File :
Boot Logo File :
Software File (CPU) :
xxLP860H-ZA_TLL_EU.tll
xxLP860H-ZA_Bootlogo.jpg
xxLP860H-ZA_CPU.epk
Installed Components
USB LG Smart Install Utillity Room # 1716

12
INSTALLATION MENU
Introduction
The abundant functions for Hotel TV linked with software installation can be projected on OSD as
‘InstallationMenu’
Thewiderangeof hotelfeaturescanbeperformed simplyonadditionalwindowtoenhancetheLG
hotelTV’seasyinstallationandconvenientoperationforHotelierandSystemIntegrators
Press the Home button for more than 5 seconds using the user remote control, programme
informationwillappearattopleftonthescreen
EnterafourdigitpasswordandpressOKbutton
•TheTVissetwiththeinitialpassword“1-1-0-5”
Usethe buttontoselectthedesiredmenu
1
2
3
TV
7
C05
ImageshownmaydifferfromyourTV InstallationMenu(V223)
LGHotelModeSetup
USBCloning
PasswordChange
SetIDSetup
ConfigurationSetup
ExternalSpeaker
IRSetup
NetworkSetup
Pro:Centric
PowerSaving
CECSetup
ClockSetup
PreLoadedAppSetup
MediaShare
LG Hotel Mode Setup
OK
S/WV02030001/MCUV0205/FPGAVd279
PICTURE SETUP TIMEAUDIO
OPTIONLOCK Smart Share
INPUT

13
INSTALLATION MENU
InstallationMenu(V2.23)
LGHotelModeSetup
USBCloning
PasswordChange
SetIDSetup
ConfigurationSetup
ExternalSpeaker
IRSetup
NetworkSetup
Pro:Centric
PowerSaving
CECSetup
ClockSetup
PreLoadedAppSetup
MediaShare
LG Hotel Mode Setup
OK
S/WV02.03.00.01/MCUV02.05/FPGAVd.279
LGHotelModeSetup
-DecidetoselectworkingstatusofTVSetwhenturnonmainpower.
-YoucansetwithPWR,STD,LST.
-PWRalwaysmakeTVsetOnstatuswhenturnonmainpower.
-STDmakeStand-bystatuswhenturnonmainpower.
-LSTmakeTVSetworklikepreviouspowerstatus.AssameconceptasPowerBackupmode;Ifmain
powerwereturnedoffinPowerOnstatus,TVSetwouldworkinOnstatus.Ifmainpowerwereturned
offinStand-bystatus,TVSetwouldworkinStand-bystatus.
(2)
Power On Status
- Decide to work all functions of 'Hotel Mode Operation' or not by setting' Hotel Mode Operation' as
Yes(Work)orNo(DoNotWork)
-When'HotelModeOperation'issettoYes(Work),allfunctionsofHotelModeapply.
-When'HotelModeOperation'issettoNo(DoNotWork),allfunctionsofHotelModeDoNotapply.
-Whenitissetto‘Yes’,‘KeyLock’itemoftheUsermenuisdisabledandtheOSDisdisplayedsame
totheLocalKeyOperationsettingoftheHotelmode.
-Whenitissetto‘Yes’,allitemsreservedattheSchedulelistaredeletedandthereservationfunction
isnotsupported.(appliedforthemodelofferingthereservationfunction)
-TheTVtriggeredbytheexternaldevice(ex:SIMPLINK,TVLink-Tuner,etc.)operatesseparatelyfrom
theHotelmode.
-Whenitissetto‘Yes’,UserMenu->Option->‘FactoryResetandDemoMode’aredisabled.
-When‘HotelModeOperation’issettoYes(Work),allskippedprogramsarenottunedbynumberkeys.
-When‘HotelModeOperation’issettoYes(Work),DetailedInformationabouttheprogrammeisnot
availableintheEPG.
(1 ) Hotel Mode Operation
Usethe buttontoselecttheLGHotelModeSetup.
Usethe OK buttonandthen buttontoselectHotelModeOperation.
*When'HotelModeOperation'issettoYes(Work),allfunctionsofHotelModeapply.
1
2
ImageshownmaydifferfromyourTV.
LGHotelModeSetup(V2.23)
HotelModeOperation
•PowerOnStatus
•SetupMenuDisplay
•ProgrammeChange
•InputSourceChange
•MenuDisplay
•OSDDisplay
•LGIROperation
OK
Yes
Yes
Yes
Yes
Yes
Yes
◄
Yes
►
▼
▲
Previous
STD

14
-Decidetoenter'SetupMenuDisplay'ornot in the 'Main Menu' by setting 'Setup Menu Display' as
Yes(EnterPossible)orNo(EnterImpossible)onthe"LGHotelModeSetup"OSD
(3) Setup Menu Display
- Decide to change channel or not by setting 'Programme Change' as Yes(Change Possible) or
No(ChangeImpossible)whenpresentsourceisTV
-When'ProgrammeChange'issettoNo(ChangeImpossible),ProgrammeKey,NumeralKey,ListKey,
TV/RADKey,QViewKeydoesn'tworkandentering'ChannelMenu'intheMainMenuOSDisimpos-
sible
-When'ProgrammeChange’issettoYes(ChangePossible),ProgrammeKey,NumeralKey,ListKey,
TV/RADKey,QViewKeydoesworkandentering'ChannelMenu'intheMainMenuOSDispossible
-When'ProgrammeChange'issettoNo(ChangeImpossible),'Programme'itemin'OnTime'menuwill
befixed
-When'ProgrammeChange'issettoNo(ChangeImpossible),entering'SetupMenu'inthe'MainMenu'
OSDisimpossibleregardlessof'SetupMenuDisplay'item
(4) Programme Change
-Decidetochangeinputsourceornotbysetting'InputSourceChange'asYes(Changepossible)orNo
(Changeimpossible)
-When'InputSourceChange'issettoNo(Changeimpossible),TV/RADIOkeyandINPUTkeydoesn't
work
-When'InputSourceChange'issettoNo(Changeimpossible),user'sinput(pressingProgrammekey,
numeralkey,Listkey,QViewkeyinallInputsourceexceptTVsource)doesn'tworkandwhenenter-
ing'SetupMenu'iteminthe'MainMenuOSD'exceptTVmodedoesn'taccepted
Becauseentering'SetupMenu'itemmakespresentmodeasTVmodeeventhoughpresentmodeis
notTVmode
ForthefunctionthatturnstoTVmodedoesn'twork
-When'InputSourceChange'issettoYes(Changepossible),thenchanginginputsourceisavailable
- When 'Input Source Change' is set to No(Change Impossible), TV set always turns on fixed input
sourceandvolumeinformationregardlessofalreadysetProgrammeinformation
-When'InputSourceChange'issettoNo(ChangeImpossible),entering'SetupMenu'exceptTVmode
doesn'tpossibleregardlessof'ProgrammeChange'or'SetupMenuDisplay'item
-WhenthisissettoNo,itwillonlybeturnedonwiththevolumeinformationintheinputsourceirrelevant
fromthePRandinformationsetinOnTime
(5) Input Source Change
-Functiontodecidewhetherworkwithmenuoflocalkeyornot
-SetYES(Work)orNO(DoNotWork)
- Although select NO(Do Not Work), the action that press a Home button for 5 seconds to enter
InstallationMenuisavailable
-WhenselectYes(Work),Menuworks
(6) Menu Display

15
-DecidetodisplayOSDornotbysetting'OSDDisplay'asYes(Mark)orNo(NoMark)
-When'OSDDisplay'issettoNo(NoMark),allOSDisnotdisplayedexceptinstallaionmenu
(7) OSD Display
-Decide'MaxVolume'betweenchangingrange0~100
-When'MaxVolume'isset,usercanchangeuptosetvolumevalue
-When'MaxVolume'isset,volumejustgoesuptothe'MaxVolume’valuein'OnTimeMenu’
(10)
Max Volume
-DecidewhetherworktheLGremotecontrolornot
-SettoYes(Work)orNo(DoNotWork)
-When‘LGIROperation’issettoNO(NotWork),allkeysdon’twork
-AlthoughsettoNo,itcanworkinServicemode
-AlthoughsettoNo,Homekeyactiontoenterthe‘InstallationMenu’andkeyactiontoenterPassword
areavailable
-When‘LGIROperation’issettoYes(Work),allkeysareavailable
(8) LG IR Operation
(9) Local Key Operation
- Decide to operate 'Local Key' or not by setting “Local Key Operation" as Yes(Work) or No(Do Not
Work)
-When'LocalKeyOperation'issettoNo(DoNotWork),allLocalKeydoesn'tworkexceptvolumeup/
downkeyandpowerkey
-When'LocalKeyOperation'issettoNo(DoNotWork),LocalKeyworkinginservicemodeisstillavail-
able
-When'LocalKeyOperation'issettoYes(Work),allLocalKeyworkingisavailable
-Whensetboth'LocalKey'and'RemoconOperation’asNo(DoNotWork),PowerkeyofRemoconwork
asexceptionalcase
-EvenwhenthelocalkeyoperationissettoNo,whenyoupressthelocalkeyfor5seconds,theHome
keywilloperatetoaccesstheInstallationMenu
-Exception:Incaseofthecommercialmodel,althoughbothIRandLocalkeyoperationaresetto'No'
(nooperation),youcanoperatethevolume+/-keyandthepowerkey
Itisamodetosetwhethertoupdatedtvchannelautomaticallyornot
WhenDTVChannelUpdateissetto’Auto’,thefunctiontoupdateTV’sprogrammemapaccordingto
dtvprogramme’sstreaminformation
DTVChannelUpdateissetto‘Manual’,thefunctiontokeepTV’sprogrammemapeventhoughdtv
programme’sinformationischanged
(11)
DTV Channel Update (Thisfeatureisnotavailableforallmodels)
-SetthechanneltodisplayandVolumeLevel,etcwhenturnonpowerinACPowerOnorStand-by
status
-SettoYes(Work)orNo(DoNotWork)
-When‘PowerOnDefault’issettoNo,itisnotappliedtothesubordinateProgramme,Volume,A/V
Settingmenu
-WhenPowerOnDefaultissettoYes,itcansetbyenteringthesubordinatemenu
(12)
Power On Default

16
- Set to Yes(Work) or No(Do Not Work).
- Programme that is set to ‘Radio Programme’ and only has Sound should decide whether to set
‘Video Blank’ or not.
- When ‘Radio Video Blank’ is set to Yes(Work), ‘Video Blank’ works only in case of Radio Programme.
- Although set to Yes(Work), if there are Video signal, ‘Video Blank’ wouldn’t work. In consideration
of case that display background screen and broadcast only with Radio, ‘Video Blank ’works only
when there is no Video signal.
- When set to No(Do Not Work), ‘Video Blank’ do not work although it is the Radio Programme.
- This operates only in the Analog TV Mode.
- If both 'Volume' data and 'On Time' is set, but just the value is different, then 'Volume' has priority.
-This sets whether to apply the Volume Level or not when the power is turned on.
When both the Volume and ON TIME Volume are set and have different values, the Volume Level
value is set as the ON TIME Volume value, and cannot move to the ON TIME Volume item.
- The next value for the max volume is OFF. And next it will be changed to 0.
(12-3) Volume
- Set to Yes(Work) or No(Do Not Work).
- If ‘A/V Setting’ is changed from No to Yes, parameters that are set before entering Installation Menu
are applied whenever turn on power.
- Following Parameters are applied to basic.
Picture section - PSM mode, Picture Data (Contrast, Brightness, Colour, Sharpness, Tint)
Sound section - SSM mode, Sound Data (Balance, Equalizer Data) and AVL and Language, Teletext
language, ARC Data.
Except these, other Parameters are applied differently according to the TVSet.
(12-4) A/V Setting
(13)
Radio Video Blank
- If the Input source is DTV or ATV, or Radio the set programme is played when the power is turned on.
- Only when the Input source is DTV or ATV, it can be entered into the Programme item.
- When the Input source is turned off, the Last input at the time of the power-off is turned on, and when
the Last input is the RF, the Last programme is played.
- If the Input source is the DTV, ATV, RADIO, the programme number existing at the programme table
can be selected.
- The programme should be rotated.
- If both the programme and the ON TIME are set, the programme takes the priority.
(12-2) Programme
- Set whether it is turned on by the set input source or by the last stored input source.
- It is turned on by the Last Memory Input if the Input source is turned off.
- It is turned on by the Last Pr. If the Input source is turned off and the Last Memory Input is the RF.
- All sources supported by the said model can be set as Input source. (The Input source value should
be rotated.)
- If both the Input source and the ON TIME are set, the Input source takes the priority.
- If the DTV/Radio Channel does not exist at the map, the DTV/Radio is skipped while navigating.
- When the Input source is changed to the DTV/Radio, the Programme No. is set to the first programme
of the Channel map of the DTV/Radio.
- When the Input source is changed to the ATV, the Programme No. is set to 0. (If the channel map
structure does not support this, it follows the structure of the said model.)
(12-1) Input Source

17
-ItemtosetstartingprogrammeofRadioProgramme
-Availableprogrammestosetare0~199
(13-1) Start PR. No.
-SpecifythenumberofprogrammetosettoRadioProgramme
-ThemaxvaluefortheNoofPRis10
-CannotsetmorethanmaximumavailableprogrammenumberInotherwordsifStartPRare
setto195,numberofprogrammecannotsetmorethan5
-RadioProgrammeshouldbeinsequencewithstartingprogramme
(13-2) No. of PR.
Initial Configuration and Configuration Detail
Item Active De-active Initial
Yes
-
Yes
Yes
Yes
Yes
Yes
Yes
Yes
Auto
Yes
ATV~MAX_INPUT
(1-MaxPR)
0~100
Yes
Yes
0~100
0~199
0~10
No
-
No
No
No
No
No
No
No
Manual
No
Off
0
Off
No
No
No
STD
Yes
Yes
Yes
Yes
Yes
Yes
Yes
100
Auto
No
Off
0
Off
No
No
1
1
HotelModeOperation
PowerOnStatus
SetupMenu
ProgrammeChange
InputSourceChange
MenuDisplay
OSDDisplay
LGIROperation
LocalKeyOperation
MaxVolume
DTVChannelUpdate
PowerOnDefault
InputSource
Programme
Volume
A/VSetting
RadioVideoBlank
StartPRNo
NoofPR

18
Commercial TVs have the capability to support cloning internalTV data and programme information
withanexternalclonedevicecalled“TVLink-Loader”,inordertocopyTVdataaccuratelyandquickly.
The clone internal functions use slightly different internal processes for the two types of commercial
TVs.However,theUIofcloningfeatureremainsthesameinboth.
Regardingthedemandsoverthecurrentcloningfeatureforquickercloning,betterportabilityandetc,
wewouldliketoannouncethecloningprocessviaUSBport,namedasUSBCloning.
USBcloningprocessisdividedinto2mainprocesses.OneiswritingthepreviouslysavedTVdatainto
theTV,andoneanotherisreadingofcurrentTVdataintoUSBmemorycard.Toavoidanyconfusion
duetothewords,itisclearlyspecifiedas“ReceivefromUSB”and“SendtoUSB”inthewholeprocess.
ThedataclonedarethesamedataclonedbypreviousTVLink-Loader.Detailsareexplainedinthefol-
lowing:
1.TVdataincludes:
A.InstallerMenusettings
B.Mainmenusettings(Audio,Pictureetc)
2.Analog/DigitalChannelinformationincludes:
A.Channelnumbers
B.Channellabel
C.Channelattributesincludingchanneltype,skippingstatusandetc.
TheuserneedsaUSBmemorycardwithFATformattedtomakesuccessivecloningviaUSBport.A
USBmemorycardsizemorethan128MegaBytesandlessthan4GigaBytesisrecommended.
USBCloningProcedure
(1) Overview USB Cloning Procedure
(2) Data To Be Cloned
(3) Requirements for USB
NOTE
Currently,supporttheprecedingUSBfilesystemforFATfileformatonly.Otherfileformatsincluding
NTFSis not currently supported.MicrosoftWindowsofficiallysupportsFATfor theUSBmemory
card.
Table of contents
Other LG LCD TV manuals