LG UW760H Series User manual

INSTALLATION MANUAL
LED TV*
* LG LED TV applies LCD screen with LED backlights.
Please read this manual carefully before operating your
set and retain it for future reference.
www.lg.com
UW760H*

2TABLE OF CONTENTS
ENGLISH
TABLE OF CONTENTS
3 LOCATION AND FUNCTION OF
CONTROLS
3 Parts and Button
4 EZMANAGER
4 INTRODUCTION
4 EZ-MANAGER WIZARD
5 LANGUAGE & COUNTRY SELECTION
6 - Automatically for Setup
9 - Manually for Setup
12 - USB LG Smart Install Utility
14 INSTALLATION MENU
14 INTRODUCTION
15 PUBLIC DISPLAY SETTINGS
15 - Public Display Settings Operation
15 - Power On Status
16 - Volume
16 - Key Management
17 - Limited Mode
17 - DTV Channel Update
18 - Power On Default
18 - Aux Source Setting
18 - Power Management
18 - Factory Reset
19 NETWORK
19 - MAC Address
19 - Network Setting
20 - IP Stream Control
20 - Wake On LAN
20 PRO:CENTRIC
20 - Mode
21 - P:C IP Setting
21 - Update Event
21 - Room Number Setting
21 GENERAL
21 - Configuration Setup
24 - External Speaker
24 - Set ID Setup
24 - Power Saving
25 - HCEC Setup
26 - Clock Setup
26 - Password Change
26 - PreLoaded App
26 - Lock Mode
27 MEDIA SHARE
27 - SmartShare
27 - Screen Share
27 - DMR
27 - Bluetooth Sound Sync
27 - DIAL
27 - TV Name
28 - SoftAP
29 TV MANAGER
29 - USB Download Menu
35 - Diagnostics Menu

3
LOCATION AND FUNCTION OF CONTROLS
ENGLISH
LOCATION AND FUNCTION OF CONTROLS
Parts and Button
Screen
Remote control and
Intelligent1sensors
Power Indicator
1 Intelligent sensor - Adjusts the image quality and brightness based on the surrounding environment.
2 Dome Button - This button is located below the TV screen.
NOTE
yYou can set the power indicator light to on or off by selecting General in the main menus.
Dome Button2

4EZMANAGER
ENGLISH
EZMANAGER
•
•Image shown may differ from your TV.
INTRODUCTION
The Pro:Centric Platform enables you to simply install, manage and use guest-centric solutions.The default Domain“procentric.local”and IP Server Address
are needed to be registered in DNSTV will contact the IP Server using the default Domain“procentric.local”via IP on server search page.
EZ-MANAGER WIZARD
-If you are using Pro:Centric, this setup wizard till help you easily set up theTV. Select‘NEXT’to continue.
-Otherwise, if you will not be installing a Pro:Centric Server, select ‘EXIT’to quit.

5
EZMANAGER
ENGLISH
LANGUAGE & COUNTRY SELECTION
-Please select the Language, Country and Time Zone.

6EZMANAGER
ENGLISH
Automatically for Setup
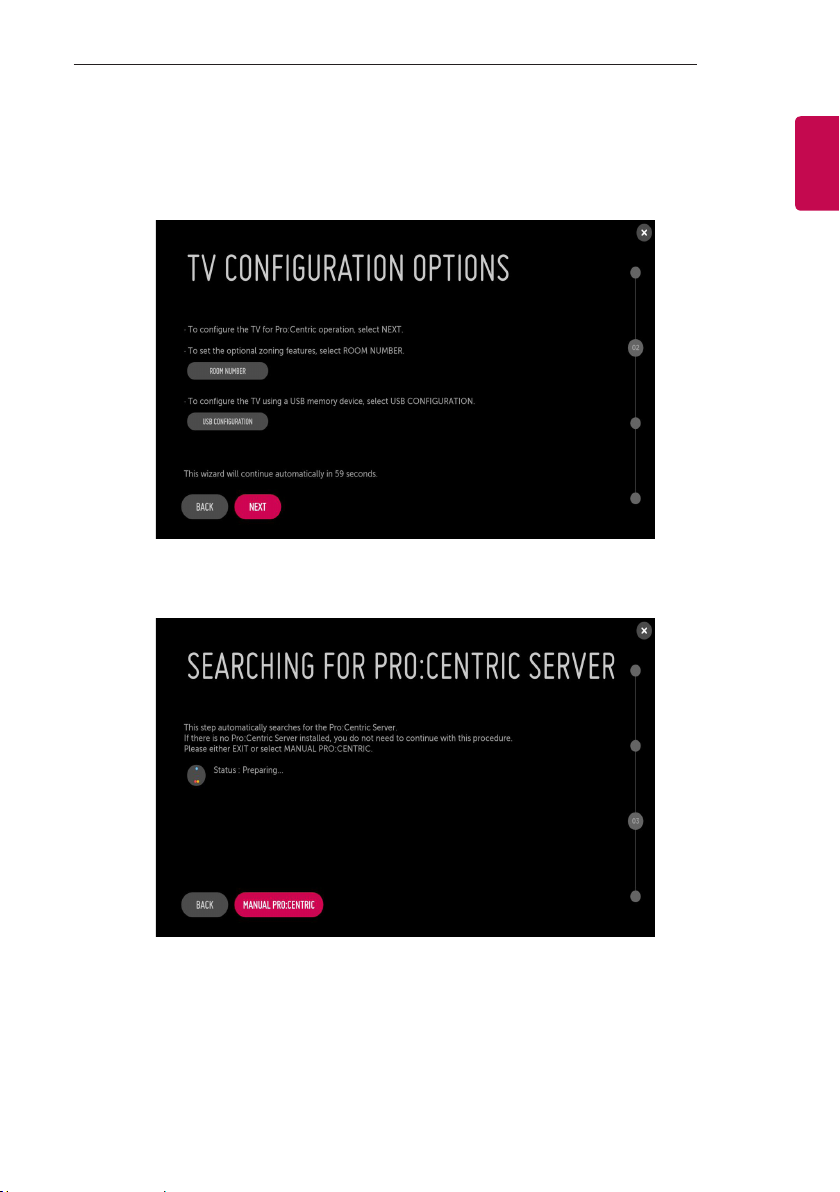
1 From theTV Conguration Options screen, you can choose how to proceed with the conguration of thisTV. Whether you will congure the TV for
Pro:Centric operation via the wizard or use a USB memory device to congure theTV, you may rst wish to set the Room Number on theTV.
-If you intend to set Room Number as part of theTV configuration, use the Room Number option to assign the Room # for this TV before you
continue with additional configuration.
-In the Label field, use the Left/Right arrow keys to specify a North, South, East, orWest designation for this TV.
-In the Room Number field, you can use the number keys on the Installer Remote to direct enter a room number or use the virtual keyboard
on the TV screen.
-To continue, move and select‘SAVE’. . If not, select 'BACK'.

7
EZMANAGER
ENGLISH
2 This step automatically searches for the Pro:Centric Server. If was found the Pro:Centric data channel, select the‘NEXT’.

8EZMANAGER
ENGLISH
3 Downloading the Pro:Centric application les takes few minutes.
4 After the installation is completed, the following screen will be displayed.

9
EZMANAGER
ENGLISH
Manually for Setup
1 Select a Label and/or enter the Room Number using the numeric keypad on the remotes or using the virtual keyboard on the TV screen.To continue,
move and select‘NEXT’.
2 Please select the‘MANUAL PRO:CENTRIC’.

10 EZMANAGER
ENGLISH
3 Congure the appropriate Pro:Centric settings in theTV.
4 Downloading the Pro:Centric application les takes few minutes.

11
EZMANAGER
ENGLISH
5 After the installation is completed, the following screen will be displayed.

12 EZMANAGER
ENGLISH
USB LG Smart Install Utility
1 Select the ‘USB CONFIGURATION’ →‘TV MANAGER’.
-If you have USB Memory for “LG_DTV”or“lg_dtv”folder, this step shows the USB file list for downloading the items.

13
EZMANAGER
ENGLISH
2 Downloading the Pro:Centric application les takes few minutes.
3 After the installation is completed, the following screen will be displayed.

14 INSTALLATION MENU
ENGLISH
INSTALLATION MENU
•
•Image shown may differ from your TV.
INTRODUCTION
The abundant functions for HotelTV linked with software installation can be projected on OSD as‘Installation Menu’.
The wide range of hotel features can be performed simply on additional window to enhance the LG hotel TV’s easy installation and convenient operation for
Hotelier and System Integrators.
TV
1 Press the Setting button for more than 5 seconds using the user remote control, Channel
information will appear at top left on the screen.
2 Enter a four digit password and press‘OK’button.
-TheTV is set with the initial password“1-1-0-5”.
3 Use the button to select the desired menu.

15
INSTALLATION MENU
ENGLISH
PUBLIC DISPLAY SETTINGS
1 Use the button to select the PUBLIC DISPLAY SETTINGS.
2 Use the‘OK’button and then button to select Public Display Mode.
-When‘Public Display Mode’is set to On (Work), all functions of Public Display Mode apply.
Public Display Settings Operation
-Decide to work all functions of‘Public Display Mode’or not by setting‘Public Display Mode’as On(Work) or Off(Do Not Work)
-When‘Public Display Mode’is set to On(Work), all functions of Public Display Mode apply.
-When‘Public Display Mode’is set to Off(Do NotWork), all functions of Public Display Mode Do Not apply.
-When it is set to‘On’,‘Key Lock’item of the User menu is disabled and the OSD is displayed same to the Local Key Operation setting of the
Public Display Mode.
-When it is set to‘On’, all items reserved at the Schedule list are deleted and the reservation function is not supported.(applied for the model
offering the reservation function)
-TheTV triggered by the external device (ex: SIMPLINK, TVLink-Tuner, etc.) operates separately from the Public Display Mode.
-When it is set to‘On’, User Menu →General →‘Reset to Initial Settings and Demo Mode’are disabled.
-When‘Public Display Mode’is set to On(Work), all skipped programs are not tuned by number keys.
-When‘Public Display Mode’is set to On(Work), Detailed Information about the Channel is not available in the EPG.
Power On Status
-Decide to select working status ofTV Set when turn on main power.
-You can set with PWR, STD, LST.
-PWR always makeTV set On status when turn on main power .
-STD make Stand-by status when turn on main power.
-LST makeTVSet work like previous power status. As same concept as Power Backup mode; If main power were turned off in Power On status,
TVSet would work in On status. If main power were turned off in Stand-by status,TVSet would work in Stand-by status.
-If there Block All is both IR Operation and Local Key Operation from Key Management, In order to provide the Option that must be able to
turn on the TV in theTV turned off situation, change the value of the PWR. (Reference the Key Management)

16 INSTALLATION MENU
ENGLISH
Volume
-Decide to apply volume policy of‘Start Volume’,‘Maximum Volume’and ‘Minimum Volume’as On(Work) or Off(Do NotWork).
-(0 ≤ Min ≤ Start ≤ Max ≤ 100)
Start Volume
yThis entry sets the start volume level when is power on.
-The level is specified as a number between minimum volume to maximum value. (Min ≤ Start ≤ Max)
-The default setting is‘Off’(disabled).
-When enabled, if the value is lower then the minimum specified in the minimum volume entry, the minimum volume entry must be used.
-When enabled, if the value is larger then the maximum specified in the maximum volume entry, the maximum volume value must be used.
-Access to a volume in‘OnTimer’must be fixed to start volume when‘Public Display Mode’(On) and‘Start Volume’(Off, 0 ~ 100) were set
simultaneously.
Maximum Volume
yThis entry sets the maximum volume level the set.The level is specied as a number between‘Minimum Volume’to 100. (Min ≤ Max ≤ 100).
-If the command volume up to higher than maximum volume’is received, that should be ignored.
-The default value is 100.
Minimum Volume
yThis entry sets the minimum volume level the set will produce.
-The level is specified as a number between 0 to‘Maximum Volume’. (0 ≤ Min ≤ Max)
-If the command volume down to lower than minimum volume is received, that should be ignored.
-The default value is 0.
Key Management
-Manage key usability of Local(Front) Key and Remote Control. When selected to‘On’, following‘IR Operation’and ‘Local Key Operation’will be
worked by below.
IR Operation
yDecide whether work the LG remote control or not.
-When‘IR Operation’is set to 'Normal', all remote keys are available.
-'Use PWR Only' makes block all remote keys except power key.
-When‘IR Operation’is set to 'Block All', all normal remote keys don’t work.
Local Key Operation
yDecide to operate 'Local/Front Key' working behavior by setting‘Local Key Operation’ as 'Normal', 'Use PWR Only' and 'Block All'.
-When‘Local Key Operation’is set to 'Normal', all local keys are available.
-'Use PWR Only' makes block all local keys except power key.
-When‘Local Key Operation’is set to 'Block All', all local keys don’t work.

17
INSTALLATION MENU
ENGLISH
Limited Mode
-ConfigureTV function’s limitation. When selected to‘On’, following sub-menus will be worked by below.
Setup Menu
-Decide to enter 'Setup’Menu’as ‘On’(Enter possible) or‘Off’(Enter impossible)
Channel Change
yDecide to change channel or not by setting‘Program Change' as‘On’(Change Possible) or‘O’(Change Impossible) when present source isTV.
-When‘Channel Change' is set to Off (Change Impossible)
»Program Key, Numeral Key, List Key, Q.View Key don't work and entering 'Channel Menu' in the Main Menu OSD is impossible.
»‘Channel' item in 'OnTime' menu will be fixed.
»Entering‘Setup Menu' in the 'Main Menu’OSD is impossible regardless of‘Setup Menu' item.
-When 'Program Change’is set to On(Change Possible),‘Program Key’, ‘Numeric Key’, ‘List Key’, ‘Q.View’Key does work and entering‘Channel
Menu' in the Main Menu OSD is possible.
Menu Display
yFunction to decide whether work with menu (including relevant menus too) of control key (On – Enter possible) or not (O – Enter Impossible).
-Although select Off(Enter impossible), the action that press a Menu button for 5 seconds to enter‘Installation Menu’is available.
-When select On(Enter possible), Menu works.
OSD Display
yDecide to display OSD or not by setting‘OSD Display’ as On(Display) or O(Do not Display).
-When‘OSD Display’is set to ‘Off’(Do not Display), all OSD is not displayed except some exception.
-Although select‘Off’(Do not Display), the action that press a Menu button for 5 seconds to enter‘Installation Menu’and entering service
menu are available. (In-Start, Power-Only, Adjust, Installation Menu…)
System Provider Mode
y‘System Provider Mode’allows access to the menu system from the front panel or remote control but access is controlled as follows:
-When value is‘On’, Accessible Items on the menu system, others are not permissible.
»Input select screens
»Sleep timer
»Aspect Ratio
»Subtitles
»‘Safety’ / 'Photo & Video' / 'Music' /‘Network’ / ‘Support’/‘Bluetooth’Menu
-If the channel map is empty,‘Auto-tuning’guide dialog should be blocked by pressing‘List’,‘Fav’,‘CH+’,‘CH-’keys.
DTV Channel Update
-It is a mode to set whether to update dtv Channel automatically or not.
-When DTV Channel Update is set to‘Auto’, the function to update TV’s Channel map according to dtv Channel’s stream information.
-DTV Channel Update is set to‘Manual’, the function to keepTV’s Channel map even though dtv Channel’s information is changed.

18 INSTALLATION MENU
ENGLISH
Power On Default
-Set the channel to display andVolume Level, etc. when turn on power in AC Power On or Stand-by status.
-Set to On(Work) or Off(Do Not Work).
-When‘Power On Default’is set to Off, it is not applied to the subordinate Channel,Volume,
A/V Setting menu.
-When Power On Default is set to On, it can set by entering the subordinate menu.
Input
-Set whether it is turned on by the set input source or by the last stored input source.
Channel
-Select major part of start channel number if Input source value isTV. (in case of ATV, it means physical channel number.)
A/V Setting
-If‘A/V Setting’is changed from‘Off’to ‘On’, A/V parameters that are set before entering‘Installation Menu’are applied whenever turn on
power.
Aspect Ratio
-The aspect ratio determines the default aspect ratio that the set returns to on power up.
Aux Source Setting
-Set to On(Work) or Off(Do Not Work).
-The Auxiliary (Input) Source Setting feature will enable or disable for each external input.
-User cannot disable the current input’s‘Aux Source Setting’.
Power Management
yThe Power Management feature will turn o the television receiver if no input control command is received from either the Local or IR Key within a
selected hours.
-Activity on either of these inputs shall reset the‘Power Management’timer and prevent interruption ofTV viewing.
-This entry can be set to a value which is corresponding to the desired hours (1Hour to 7Hours).
-Default value is‘Off(disabled)’.
Factory Reset
-Change all settings to their default values.

19
INSTALLATION MENU
ENGLISH
NETWORK
1 Use the button to select the NETWORK.
MAC Address
-Displays the MAC address (not customizable).
Network Setting
One-click network connection
-Connects easily to a wired/wireless network.
-Network Connection to connect to an available network automatically. Follow the prompts on theTV.
To connect to a network through Set Expert
-For use in special circumstances such as in offices (in cases where a static IP is used).
1 Select a network connection, either Wired or Wireless.
2 When connecting via Wired, Congures the IP settings of the TV set.You can set the IP address, subnet mask, gateway and DNS server.
3 When connecting via Wi-Fi, use the one of the following network connection methods.
AP List
Connects to the network selected from the AP List.
Enter the SSID Connects to the wireless AP typed in.
WPS-PBC Connects easily when the button of a wireless AP supporting PBC is pressed.
WPS-PIN Connects easily when the PIN of the wireless AP that you wish to connect to is entered in to the AP website.
Ad-hoc Connects to a network via a wireless-enabled PC or mobile phone.

20 INSTALLATION MENU
ENGLISH
IP Stream Control
Audio PTS Offset
-Controlling output stream timing of audio.
-You can set the '-500~500' (Change step is -10 or +10)
Video PTS Offset
-Controlling output stream timing of video.
-You can set the '-500~500' (Change step is -10 or +10)
IGMP
-You can set IGMP version. (2 or 3)
Wake On LAN
ySets the Wake On LAN function to Enable or Disable.
-TheWake On LAN feature enables theTV to receive software updates and/or be powered ON upon receipt ofWake Up Frame packets and/or
Magic Packet data via the wired LAN.To facilitate use of this feature, note that the appropriate wired connection must be made.
PRO:CENTRIC
1 Use the button to select the PRO:CENTRIC.
Mode
-Sets whether or not enable Pro:Centric and the service method .
-You can set to Off, Configuration Only, Flash, GEM or HTML using the button .The default value is Off; when it is set to Off, all the
sub items are disabled. (Except for Room Number Setting)
Table of contents
Other LG LED TV manuals