10
ENG
ENGLISH
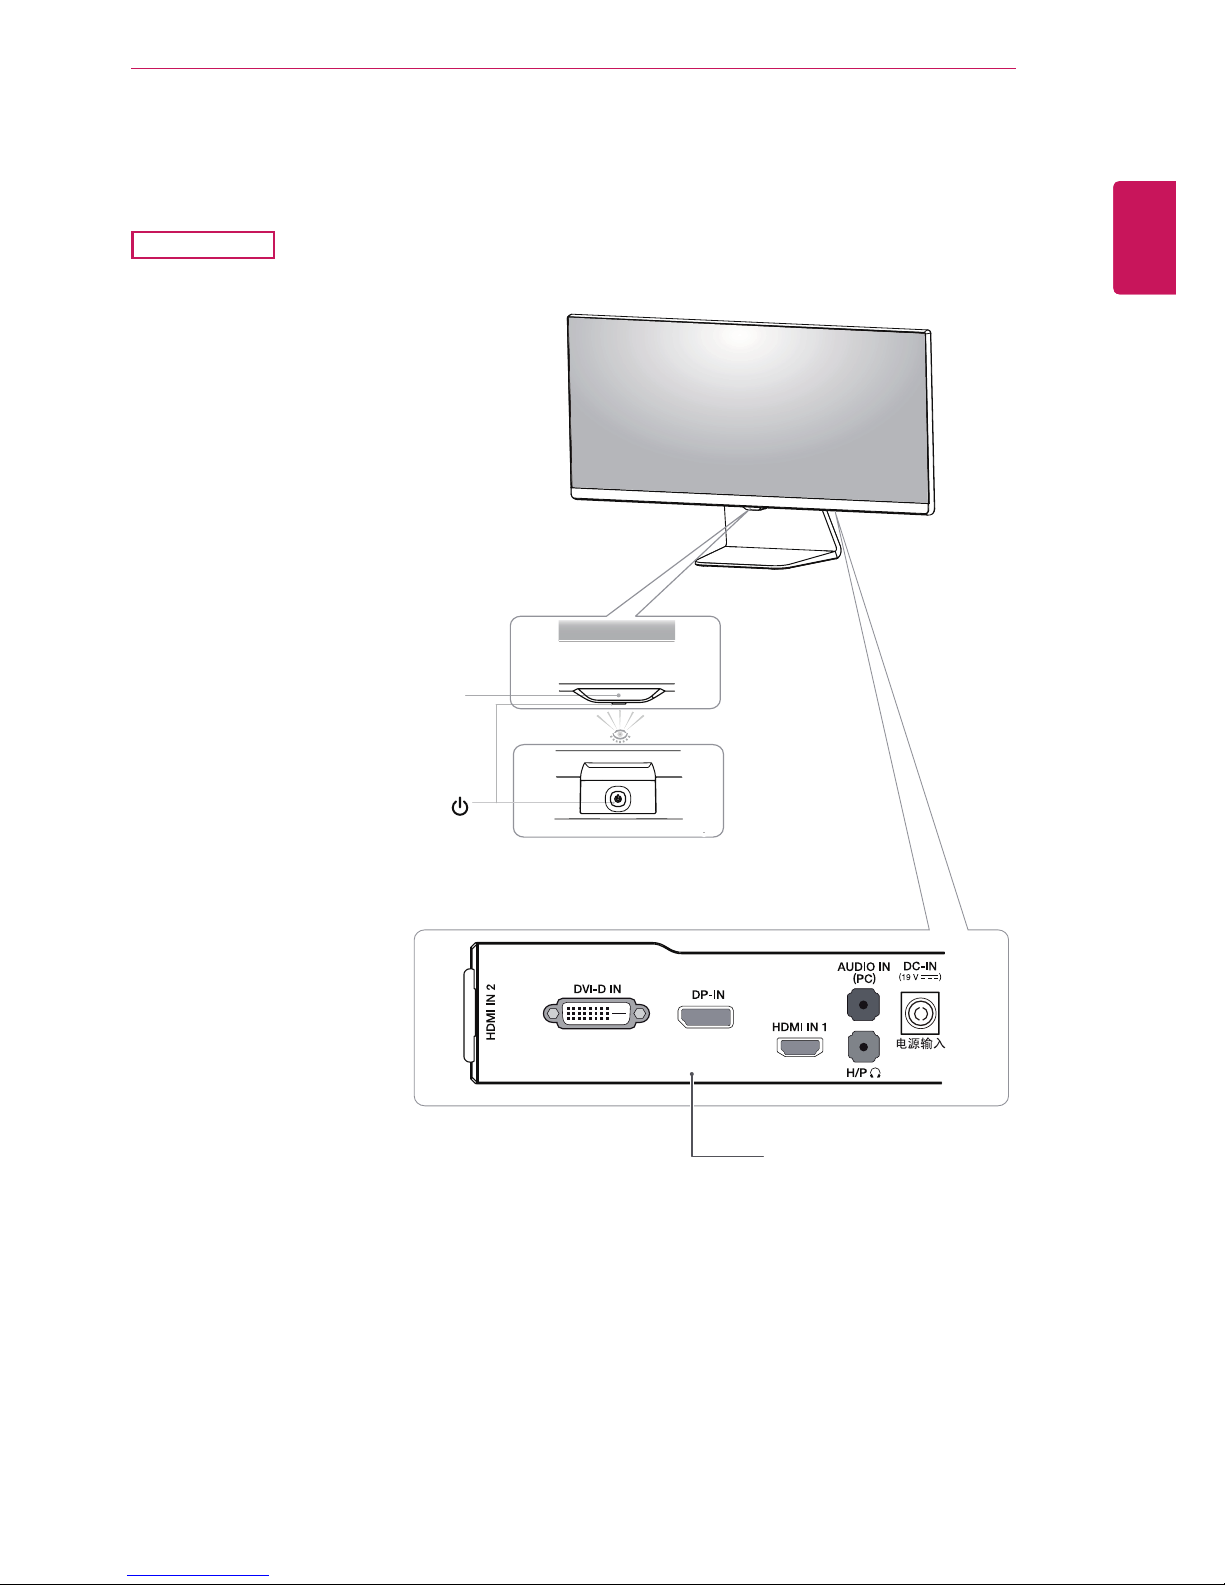
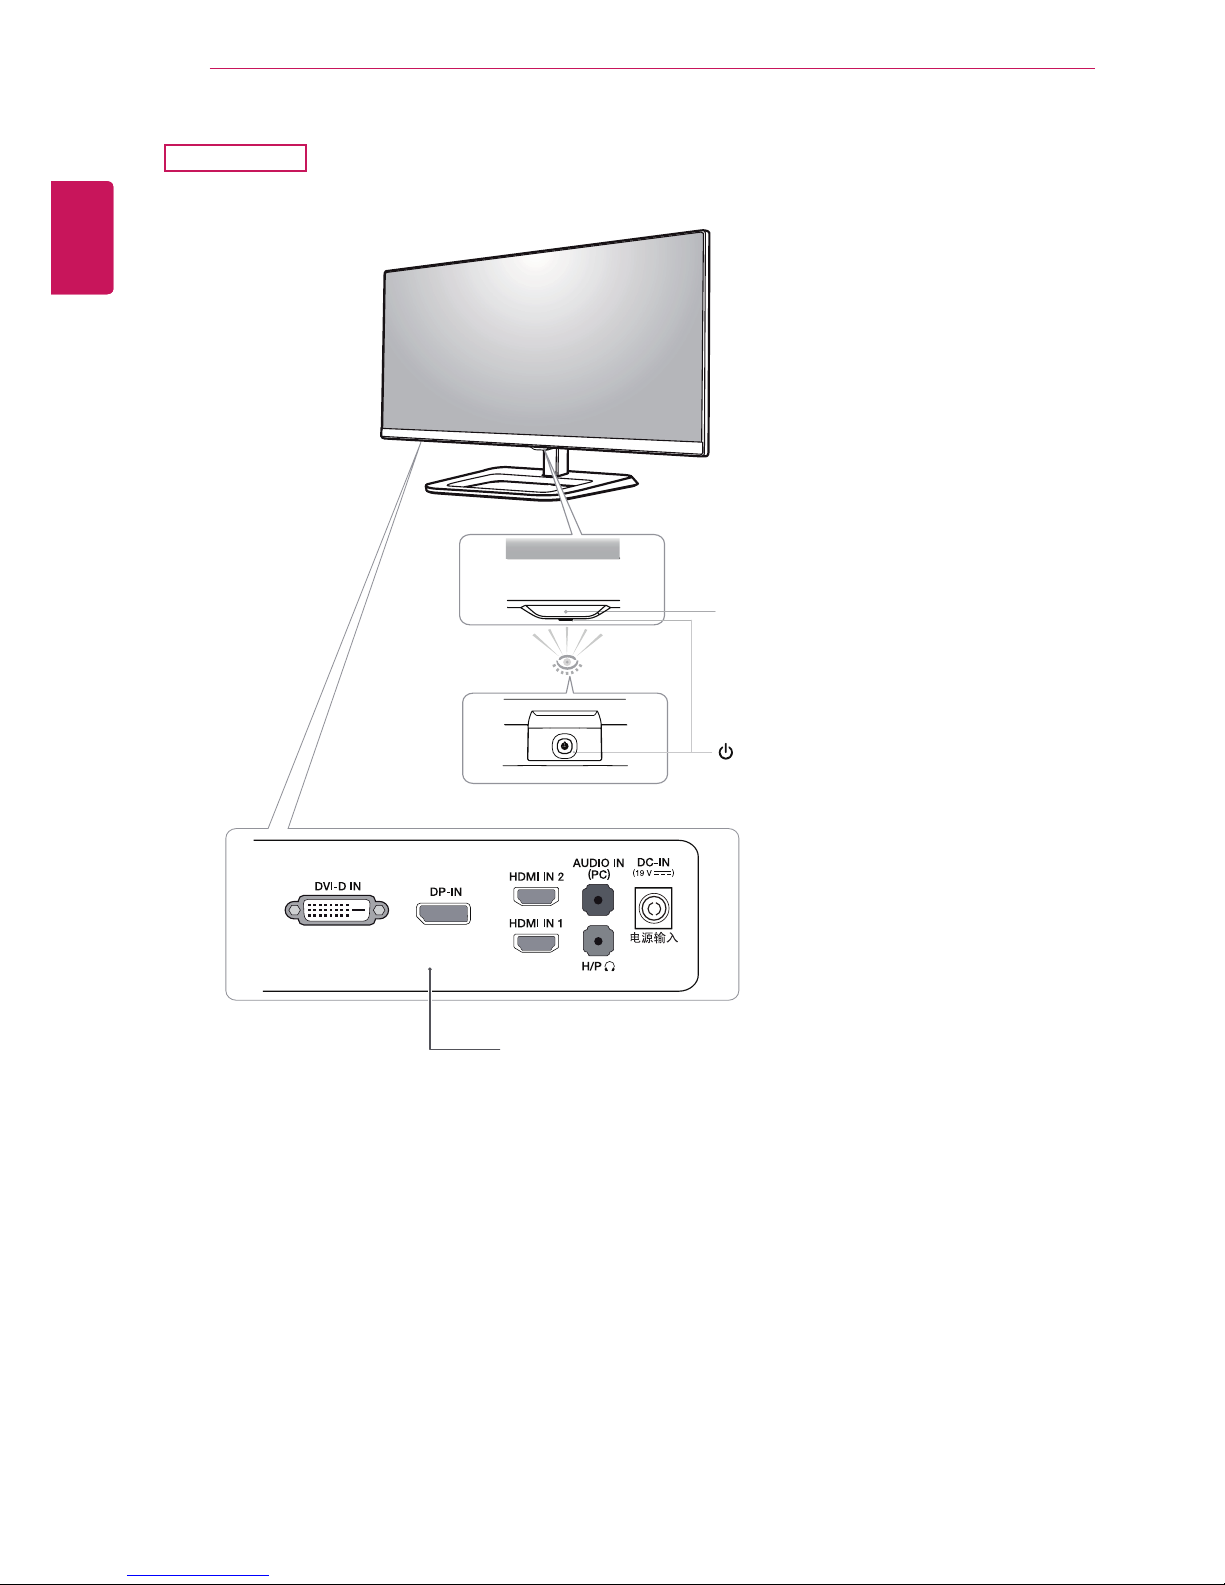
ASSEMBLING AND PREPARING
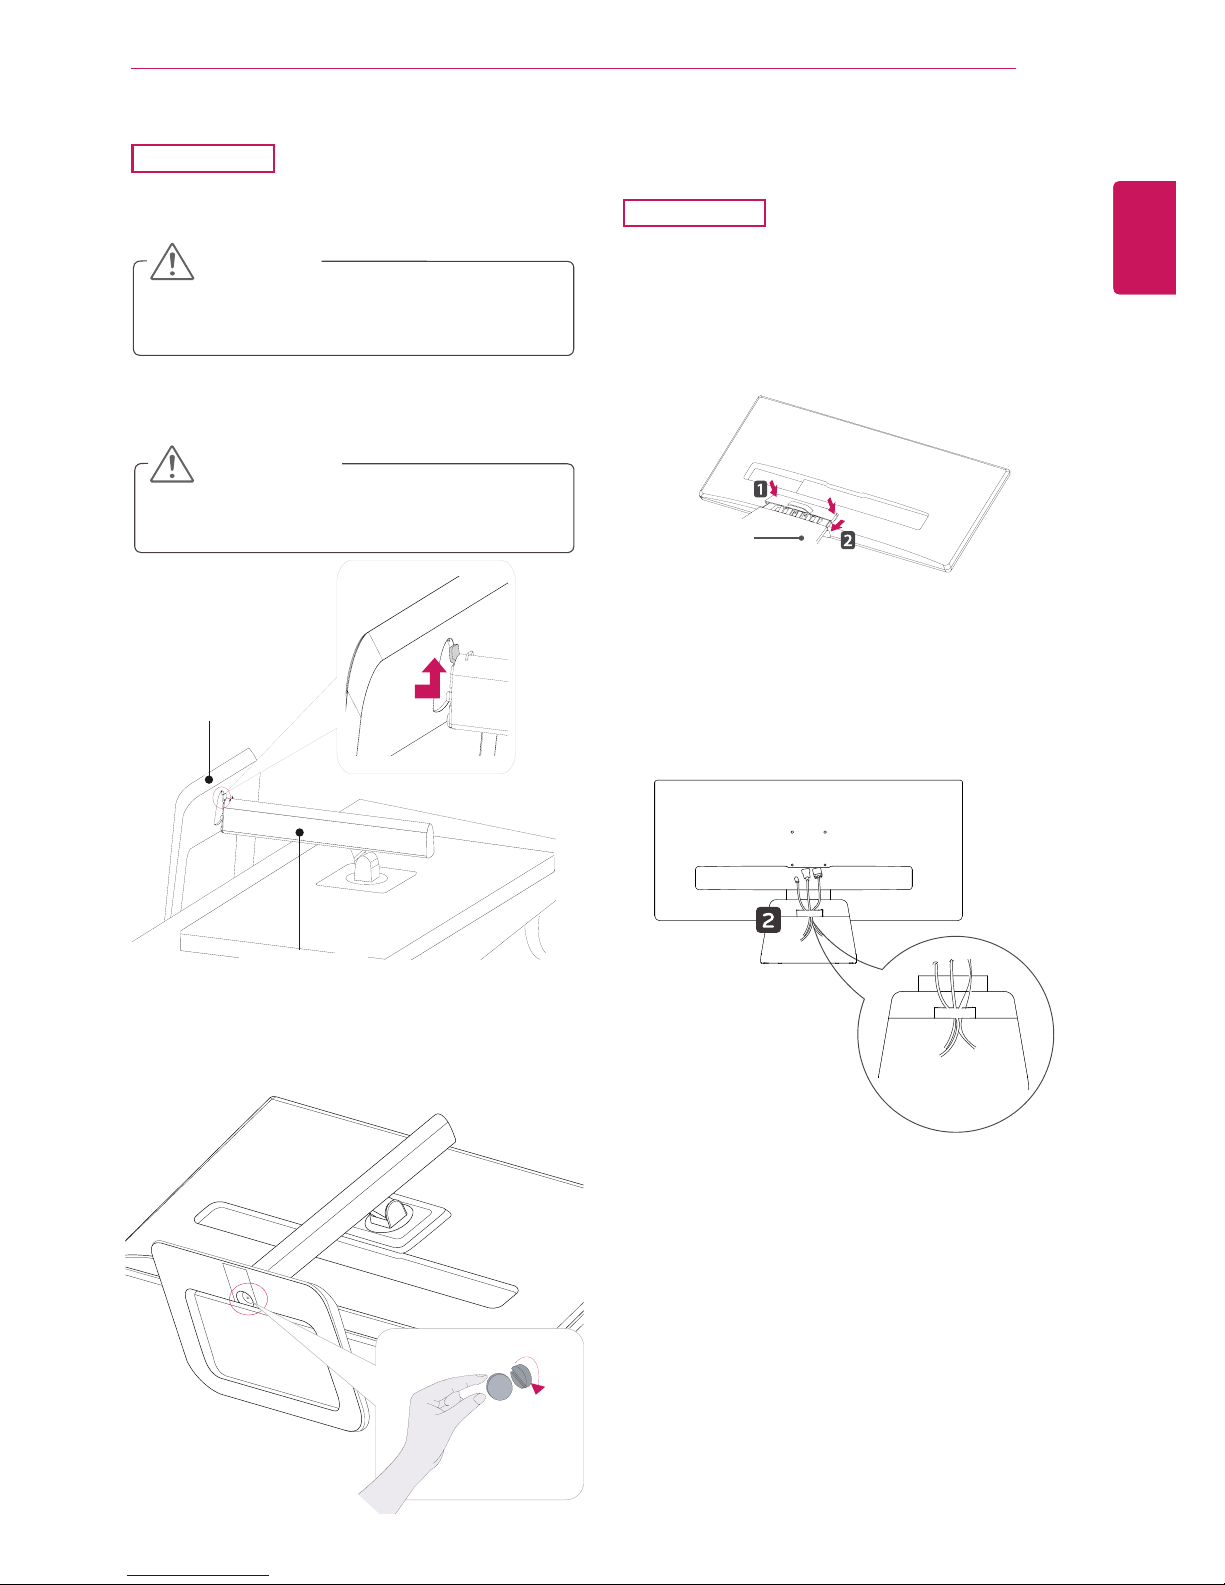
Detaching the stand base
2 First,pressthethecableholderasshownin
theillustration,Second,Removethecable
holderfromthestandbody.
Toprotectthescreenfromscratches,cover
thesurfacewithasoftcloth.
CAUTION
Illustrationsinthisdocumentrepresenttypi-
calprocedures,sotheymaylookdifferent
fromtheactualproduct.
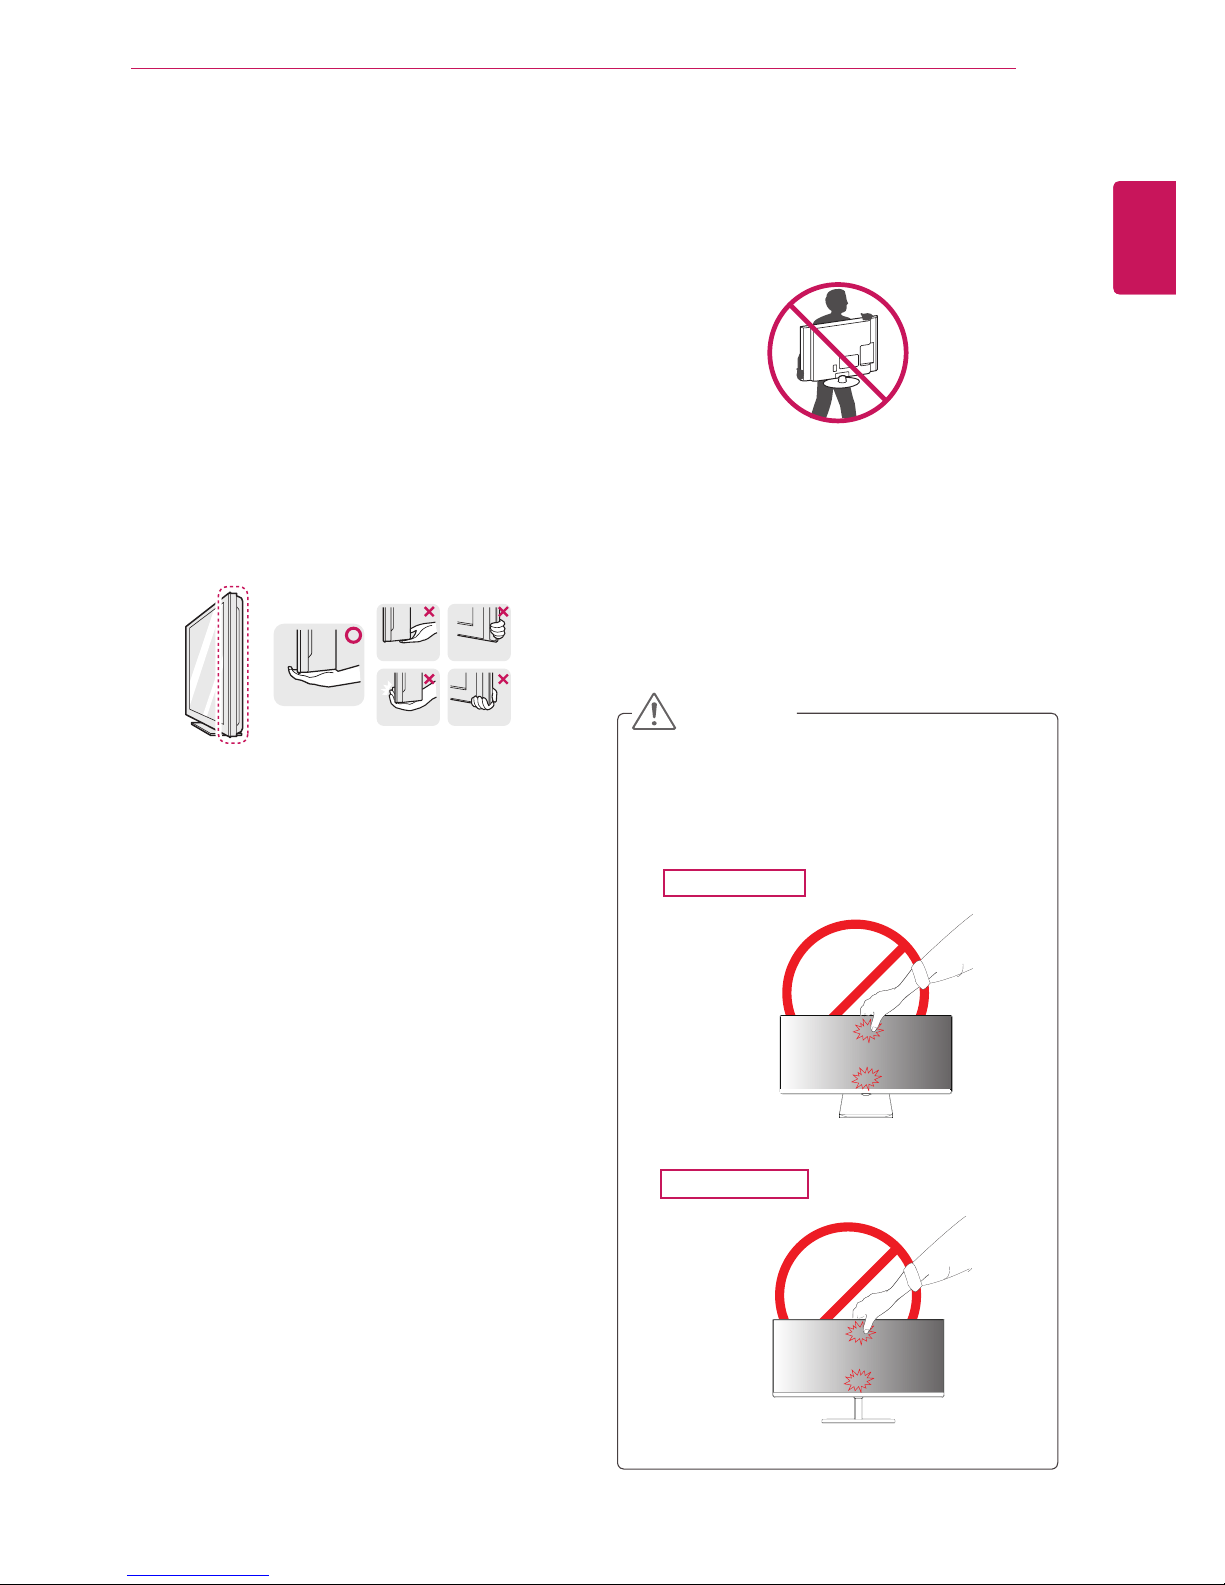
Donotcarrythemonitorupsidedownbyjust
holdingthestandbase.Thismaycausethe
monitortofalloffthestandandcouldresult
inpersonalinjury.
Whenliftingormovingthemonitor,donot
touchthemonitorscreen.Applyingforceor
pressuremaydamagethemonitorscreen.
Instead,holdthestandbodyortheplastic
frameoftheproduct.
CAUTION
1 Placethescreenfacedown.
29UM65
4 RemovethetwoscrewsfromtheStandBase.
RemovetheStandBasefromtheStandBody.
3 Removethetwoscrewsonthebackofstand
body.
Asshownintheillustration,disconnectthe
stand body from the stand hinge.
Stand Hinge
Stand Body
Stand Body
Stand Body
Stand Base
(Black) (Black)
(Silver)
or


 User manual")