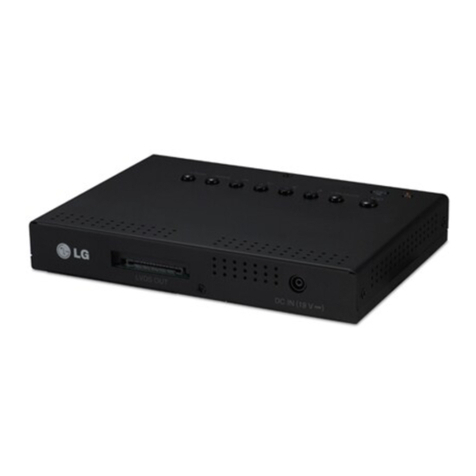
LG 43UD79 User manual

Internal Use Only
CHASSIS : LM 6OB
MODEL : 43UD79
CAUTION
BEFORE SERVICING THE CHASSIS, READ THE SAFETY PRECAUTIONS IN THIS MANUAL.
SERVICE MANUAL
LED MONITOR
SERVICE MANUAL
P/NO : MFL69406825(1702-REV00)

- 2 -
Copyright © LG Electronics. Inc. All rights reserved.
Only for training and service purposes
CONTENTS .............................................................................................. 2
SAFETY PRECAUTIONS ........................................................................ 3
SPECIFICATION ....................................................................................... 4
Firmware Upgrade Method ............................................................... 8
TROUBLE SHOOTING GUIDE .............................................................. 18
BLOCK DIAGRAM ................................................................................. 14
EXPLODED VIEW .................................................................................. 15
DISASSEMBLY ...................................................................................... 16
CONTENTS

- 3 -
Copyright © LG Electronics. Inc. All rights reserved.
Only for training and service purposes
Many electrical and mechanical parts in this chassis have special safety-related characteristics. These parts are identified by in the
Schematic Diagram and Exploded View.
It is essential that these special safety parts should be replaced with the same components as recommended in this manual to prevent
Shock, Fire, or other Hazards.
Do not modify the original design without permission of manufacturer.
General Guidance
An isolation Transformer should always be used during the
servicing of a receiver whose chassis is not isolated from the AC
power line. Use a transformer of adequate power rating as this
protects the technician from accidents resulting in personal injury
from electrical shocks.
It will also protect the receiver and it's components from being
damaged by accidental shorts of the circuitry that may be
inadvertently introduced during the service operation.
If any fuse (or Fusible Resistor) in this TV receiver is blown,
replace it with the specified.
When replacing a high wattage resistor (Oxide Metal Film Resistor,
over 1 W), keep the resistor 10 mm away from PCB.
Keep wires away from high voltage or high temperature parts.
Before returning the receiver to the customer,
always perform an AC leakage current check on the exposed
metallic parts of the cabinet, such as antennas, terminals, etc., to
be sure the set is safe to operate without damage of electrical
shock.
Leakage Current Cold Check(Antenna Cold Check)
With the instrument AC plug removed from AC source, connect an
electrical jumper across the two AC plug prongs. Place the AC
switch in the on position, connect one lead of ohm-meter to the AC
plug prongs tied together and touch other ohm-meter lead in turn to
each exposed metallic parts such as antenna terminals, phone
jacks, etc.
If the exposed metallic part has a return path to the chassis, the
measured resistance should be between 1 Mȍand 5.2 Mȍ.
When the exposed metal has no return path to the chassis the
reading must be infinite.
An other abnormality exists that must be corrected before the
receiver is returned to the customer.
Leakage Current Hot Check (See below Figure)
Plug the AC cord directly into the AC outlet.
Do not use a line Isolation Transformer during this check.
Connect 1.5 K / 10 watt resistor in parallel with a 0.15 uF capacitor
between a known good earth ground (Water Pipe, Conduit, etc.)
and the exposed metallic parts.
Measure the AC voltage across the resistor using AC voltmeter
with 1000 ohms/volt or more sensitivity.
Reverse plug the AC cord into the AC outlet and repeat AC voltage
measurements for each exposed metallic part. Any voltage
measured must not exceed 0.75 volt RMS which is corresponds to
0.5 mA.
In case any measurement is out of the limits specified, there is
possibility of shock hazard and the set must be checked and
repaired before it is returned to the customer.
Leakage Current Hot Check circuit
IMPORTANT SAFETY NOTICE
To Instrument's
exposed
METALLIC PARTS
Good Earth Ground
such as WATER PIPE,
CONDUIT etc.
AC Volt-meter
SAFETY PRECAUTIONS
0Q
+VGO %QPVGPV /GCUWTGOGPV 4GUWNV 4GOCTM
&XVWRPHU %5$1' &KHFNHG
%5$1'/*(3URGXFW
8VHU 0RGHO 1DPH 8' &KHFNHG
6DOH UHJLRQ :RUOGZLGH &KHFNHG
)HDWXUH Ě/&' 021,725 ,36 8+' &KHFNHG
&KDVVLV 1DPH /02% &KHFNHG 3&% 3URGXFW VSHF $GMXVWPHQW VSHF
*HQHUDO
6FRSH
([WHUQDO 6:
$GM ZD\ MR\VWLFN VZLWFK
(
8S'RZQ
/HIW5LJKW2.3RZHU
&KHFNHG 3UHVVDQG+ROG3RZHURII
)XQFWLRQ 3LFWXUH 0RGH 5DWLR 6(6 6L[ &RORU 2Q 6FUHHQ &RQWURO
'XDO &RQWUROOHU )DFWRU\ FDOLEUDWLRQ 3%33,3 56&
&KHFNHG
,QSXW
+'0,,1 +'0, +'0, &KHFNHG
'3,1 'LVSOD\ 3RUW &KHFNHG
86%&,1 '3 3' 9 $ VXSSRUW &KHFNHG 3'3RZHUGHOLYHU\
86%'1 86% 'RZQVWUHDP [ SRUW TXLFN FKDUJLQJ VXSSRUW
&KHFNHG 4XLFNFKDUJLQJVXSSRUW86%GRZQVWUHDP
3RUW
8SWR9
$'&
+3287 $XGLR /5 &KHFNHG
56& 56& &KHFNHG
3RZHU&RUG
/HQJWK
P 6KDSH :DOORXW
'HWDFKDEOH 7\SH
P
5HIHUWR6XIIL[VWDQGDUGDQGSRZHUFRUG7DEOH
:HLJKWNJ&RORU%ODFN NJ
SPECIFICATION
-4 - LGE Internal Use OnlyCopyright © LG Electronics. Inc. All rights reserved.
Only for training and service purposes

&DEOH
3KRQHWR56
/HQJWK P 6KDSH 'HWDFKDEOH 7\SH
P 31 ($'
5HIHU WR %20
:HLJKWNJ&RORU%ODFN NJ
86% $ 7R &
*HQGHU
/HQJWK PP 6KDSH 'HWDFKDEOH 7\SH
P 31 ($*
5HIHU WR %20
:HLJKW NJ &RORU %ODFN NJ
,PSHGDQFH ȚȚ
aRKP
'LVSOD\3RUW
/HQJWK PP 6KDSH 'HWDFKDEOH 7\SH P 31 ($'
5HIHU WR %20
:HLJKW NJ&RORU%ODFN
NJ
,PSHGDQFH
&$%/( ȚȚ
&211(&725 ȚȚ
aRKP
aRKP
+'0,
/HQJWK PP 6KDSH 'HWDFKDEOH 7\SH P 31 ($'&RORU %ODFN
5HIHU WR %20
:HLJKWNJ&RORU%ODFN
NJ
,PSHGDQFH
&$%/( ȚȚ
&211(&725 ȚȚ
aRKP
aRKP
3RZHU/%3
,QSXW $&a9 a+] $ &KHFNHG 31 ($<%XLOWLQ SRZHU
5HIHU WR %20
$FFHVVRU\ %R[ 1RWDSSOLHG
$SSO\LQJ PRGXOH OLVW
31R 6SHFLILFDWLRQ &KHFNHG
Ě 8+' 02'8/( /*'LVSOD\
5HIHU WR %20
($- /0(4()+$
-5 - LGE Internal Use OnlyCopyright © LG Electronics. Inc. All rights reserved.
Only for training and service purposes

mode
section
polarity
DOT
CLOCK
[MHz]
Frequency
[kHz]/[Hz]
Total
Period
(E)
Display
(A)
Front
Porch
(D)
Sync.
(C)
Back
Porch(B)
Resolution
1
H(Pixels)
-
25.175
31.469
800
640
16
96
48
640 x 480
V(Lines)
-
59.94
525
480
10
2
33
2
H(Pixels)
+
40.0
37.879
1056
800
40
128
88
800 x 600
V(Lines)
+
60.317
628
600
1
4
23
3
H(Pixels)
-
65.0
48.363
1344
1024
24
136
160
1024 x 768
V(Lines)
-
60.0
806
768
3
6
29
4
H(Pixels)
+
79.99
54.347
1472
1152
32
96
192
1152 x 864
V(Lines)
+
60.05
905
864
1
3
37
5
H(Pixels)
+
74.25
45
1650
1280
110
40
220
1280x720
V(Lines)
+
60
750
720
5
5
20
6
H(Pixels)
+
108.0
63.981
1688
1280
48
112
248
1280 x1024
V(Lines)
+
60.02
1066
1024
1
3
38
7
H(Pixels)
+
108.0
60.00
1800
1600
24
80
96
1600 x 900
V(Lines)
+
60.00
1000
900
1
3
96
8
H(Pixels)
+
148.50
67.50
2200
1920
88
44
148
1920 x 1080
V(Lines)
-
60
1125
1080
4
5
36
9
H(Pixels)
+
241.5
88.79
2720
2560
48
32
80
2560 x 1440
V(Lines)
-
59.95
1481
1440
3
5
33
10
H(Pixels)
+
297.0
67.5
4000
3840
176
88
296
*1)
3840 x 2160
V(Lines)
-
30
2250
2160
8
10
72
11 H(Pixels) + 594.0 135 4400 3840 176 88 296 *2)
3840 x 2160
V(Lines)
-
60
2250
2160
8
10
72
*1) Preferred timing in Normal mode : HDMI1,2,3,4
*2) Preferred timing in Normal mode : HDMI3,4 ÎIn case of *2) Timing, HDMI1/2 port does not support.
ÎIn case of HDMI 3,4 port can support *2) Timing , When select On the “HDMI ULTRA HD Deep Color” menu.
2. Signal Timing (Resolution)
2.1. Signal (Video & Sync)
G
+97LPLQJ
3UHIHUUHGWLPLQJ
A
B
C
DEF
Video
Sync
.
-6 - LGE Internal Use OnlyCopyright © LG Electronics. Inc. All rights reserved.
Only for training and service purposes

G
3HDMI Video input(Refer to Manual)
Factory support mode
(Preset Mode)
Horizontal
Frequency(kHz)
Vertical
Frequency(Hz) Remarks
480p 31.5 60
720p 45.0 60
1080p 67.5 60
2160p 135 60
-7 - LGE Internal Use OnlyCopyright © LG Electronics. Inc. All rights reserved.
Only for training and service purposes

How to download monitor Firmware
jG¯GYWXYGsnGlGpUGhGGU
vGGGGG
ඖ
How to do ISP
Step1. Connect Realtek Jig to the monitor and PC.
Step2. Install like as attached file.
5HDOWHN'ULYHU
,QVWDOO*XLGH
jGGt
jGGwj
r
and
PC.

How to download monitor Firmware
jG¯GYWXYGsnGlGpUGhGGU
vGGGGG
Step3. Run “RTDToll”
Step4. [ISP] Icon Click

How to download monitor Firmware
jG¯GYWXYGsnGlGpUGhGGU
vGGGGG
Step5. Check “Access method”.
[LG Monitor JIG: FTDIUsb]
LG Monitor JIG(P/N RAD33028001)

How to download monitor Firmware
jG¯GYWXYGsnGlGpUGhGGU
vGGGGG
Step6. Option Check
Enter [ Communication Option ] menu and then uncheck the [ Check ACK]
Set User data(FE2P) area select option

How to download monitor Firmware
jG¯GYWXYGsnGlGpUGhGGU
vGGGGG
Step7. Following below step
1 Check the Bank 0 checkbox
2 Click [ … ] button
3 select the SW update file( *.bin or *. hex) and then click [ open ] button.

How to download monitor Firmware
jG¯GYWXYGsnGlGpUGhGGU
vGGGGG
Step8. ISP
Click Thunder icon button
Îyou see the progress bar and the status window.
after finishing SW update, you see the [success] message on status window.

BLOCK DIAGRAM
- - LGE Internal Use OnlyCopyright © LG Electronics. Inc. All rights reserved.
Only for training and service purposes

-15 - LGE Internal Use OnlyCopyright © LG Electronics. Inc. All rights reserved.
Only for training and service purposes
EXPLODED VIEW
Many electrical and mechanical parts in this chassis have special safety-related characteristics. These parts
are identified by in the Schematic Diagram and EXPLODED VIEW.
It is essential that these special safety parts should be replaced with the same components as recommended
in this manual to prevent Shock, Fire, or other Hazards.
Do not modify the original design without permission of manufacturer.
IMPORTANT SAFETY NOTICE
200 400
510
500
900
910
920
940
810
520
800 120 121
330
130 131
A2

■Assemble method
1. B/door latch 2ea fix 1. B/Cover screw 12ea fix 1. Assemble wafer of Control PCB assy
1. Speaker L/R assemble
2. Attach EMI tape
3. PCB bracket assemble
1. Rear shield screw 8ea fix
2. Speaker bracket L/R screw 4ea fix
1. after LVDS cable connect,attach EMI tape
General drivers
Tool Description
1. B/cover assemble
1. Stand screw 4ea fix
1. Stand base
thumb screw 1ea fix
Waring: use hand driver in the
bottom of joystick cover screw 2ea
(Screw Torque : 4~6kgf)
- 16-
Copyright © LG Electronics. Inc. All rights reserved.
Only for training and service purposes

■Disassemble method
1. B/door latch 2ea
disassemble
1. Stand base
thumb screw 1ea disassemble 1. Stand screw 4ea disassemble 1. B/Cover screw 12ea disassemble
1. Disassemble wafer of Control PCB assy
2.Disassemble B/Cover
1. Disassemble EMI tape
2. Disassemble Speaker L/R
3. Disassemble PCB bracket
1. Rear shield screw 8ea disassemble
2. Speaker bracket L/R screw 4ea disassemble
1. Disassemble LVDS EMI tape
2. Disassemble LVDS cable
1. PCB screw 12ea disassemble
General drivers
Tool Description
waring: disassemble LVDS
cable when rear shield up
- 17 -
Copyright © LG Electronics. Inc. All rights reserved.
Only for training and service purposes

TROUBLESHOOTING GUIDE
-18 -
Copyright © 2010 LG Electronics. Inc. All right reserved.
Only for training and service purposes LGE Internal Use Only
1. NO POWER
5HSODFH;
1
&KHFN-3
9ROWDJH/HYHO9
&KHFN3RZHU
FRQQHFWRU
2."
5HSODFH3RZHU
%RDUG
<
1<
&KHFN,&2XWSXW
9ROWDJH/HYHO9
9
5HSODFH,&
5HFKHFN
<
1
&KHFN;&ORFN
0+]
&KHFN,&
2XWSXW
9ROWDJH/HYHO96
5HSODFH,&
5HFKHFN
1
<
5HSODFH,&
)ODVK0HPRU\
<

-19 -
Copyright © 2010 LG Electronics. Inc. All right reserved.
Only for training and service purposes LGE Internal Use Only
2. NO SCREEN ON
5HSODFH&DEOH
1
0RGXOH%DFN/LJKW
2Q"
&KHFN,&
5HSODFH0DLQ6FDOHU,&
<
11
&KHFN3DQHO3RZHU
9-3
&KHFN,&2XWSXW
9
5HSODFH,&
5HFKHFN
<
1
&KHFN3DQHO&ORFN
3
&KHFN,&
5HSDLU0DLQ%'
<
1
&KHFN))&&DEOH
IRU'DPDJHRU
2SHQ&RQGXFWRUV
&KHFN/(''ULYHU
)%
3
5HSODFH7&RQ
%RDUGRU0RGXOH
<

-20 -
Copyright © 2010 LG Electronics. Inc. All right reserved.
Only for training and service purposes LGE Internal Use Only
3. No Video
yGtG
zGOpjXWWP
jGGG
pGGf
jG
qrYWWSYWXSYWYSwYW
WGGG
GG
k
yGj
u
jGpYjG
zOqrYWWSYWXSY
WYSwYWW
yGkGlkpkG
k
u
jGkGjG
GkGG
vGj
Table of contents
Other LG Monitor manuals