manuals.online logo
Brands
  1. Home
  2. •
  3. Brands
  4. •
  5. LG
  6. •
  7. Monitor
  8. •
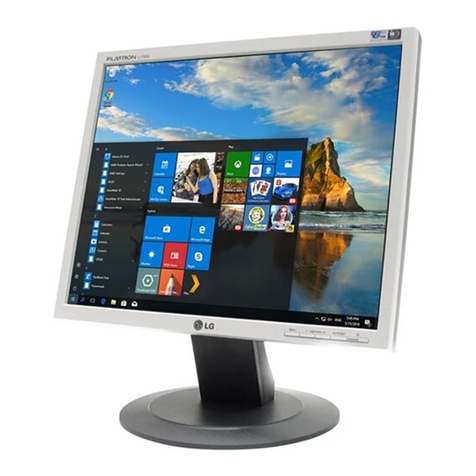
  9. LG M2362D-PM User manual

LG M2362D-PM User manual

This manual suits for next models

1

Other LG Monitor manuals

LG 27QN880P User manual

LG

LG 27QN880P User manual

LG FLATRON L226WTQ-BFQ.A MQF Series User manual

LG

LG FLATRON L226WTQ-BFQ.A MQF Series User manual

LG 29WR30MR User manual

LG

LG 29WR30MR User manual

LG 27BN55U-B User manual

LG

LG 27BN55U-B User manual

LG 71PY1M -  - 71" Plasma Panel User manual

LG

LG 71PY1M - - 71" Plasma Panel User manual

LG W2053TP-PF User manual

LG

LG W2053TP-PF User manual

LG E2350V User manual

LG

LG E2350V User manual

LG 29WL500 User manual

LG

LG 29WL500 User manual

LG Flatron M2794DP User manual

LG

LG Flatron M2794DP User manual

LG 43UD79T User manual

LG

LG 43UD79T User manual

LG UltraGear 27GQ50F User manual

LG

LG UltraGear 27GQ50F User manual

LG E2050T-PN User manual

LG

LG E2050T-PN User manual

LG M2280DF User manual

LG

LG M2280DF User manual

LG UltraGear 32GP850 User manual

LG

LG UltraGear 32GP850 User manual

LG IPS231B User manual

LG

LG IPS231B User manual

LG 38BQ85C User manual

LG

LG 38BQ85C User manual

LG L197WH-PF User manual

LG

LG L197WH-PF User manual

LG One:Quick Flex 43HT3WN User manual

LG

LG One:Quick Flex 43HT3WN User manual

LG VS20 Series User manual

LG

LG VS20 Series User manual

LG 27UL650-W.AMF User manual

LG

LG 27UL650-W.AMF User manual

LG D2342P User manual

LG

LG D2342P User manual

LG 27UL550-W User manual

LG

LG 27UL550-W User manual

LG L1972H User manual

LG

LG L1972H User manual

LG L1752S-SF User manual

LG

LG L1752S-SF User manual

Popular Monitor manuals by other brands

Samsung ME32C user manual

Samsung

Samsung ME32C user manual

ViewSonic VA926-LED user guide

ViewSonic

ViewSonic VA926-LED user guide

Furuno Mu 120c Operator's manual

Furuno

Furuno Mu 120c Operator's manual

Asus VB171D - 17" LCD Monitor Service manual

Asus

Asus VB171D - 17" LCD Monitor Service manual

AOC 9GLR Technical specifications

AOC

AOC 9GLR Technical specifications

DMG RAFFAELLO manual

DMG

DMG RAFFAELLO manual

AOC LM720 - 17" Technical specifications

AOC

AOC LM720 - 17" Technical specifications

Sony Trinitron GDM-F500 Service manual

Sony

Sony Trinitron GDM-F500 Service manual

Memorex MT1701 user guide

Memorex

Memorex MT1701 user guide

ViewSonic VE510s-4 Service manual

ViewSonic

ViewSonic VE510s-4 Service manual

Farenheit T-1503CM instruction manual

Farenheit

Farenheit T-1503CM instruction manual

Ditel DINOS DN129/AT Quick installation guide

Ditel

Ditel DINOS DN129/AT Quick installation guide

Sony SDM-S51 Specifications

Sony

Sony SDM-S51 Specifications

Kenwood DMX1025BT quick start guide

Kenwood

Kenwood DMX1025BT quick start guide

Dell S2409WFP user guide

Dell

Dell S2409WFP user guide

EverFocus EN-7517E instruction manual

EverFocus

EverFocus EN-7517E instruction manual

Dell P3222QE user guide

Dell

Dell P3222QE user guide

Panasonic TH152UX1 - 152" PLASMA TV Service manual

Panasonic

Panasonic TH152UX1 - 152" PLASMA TV Service manual

manuals.online logo
manuals.online logoBrands
  • About & Mission
  • Contact us
  • Privacy Policy
  • Terms and Conditions

Copyright 2025 Manuals.Online. All Rights Reserved.

www.lg.com
OWNER’S MANUAL
MONITOR TV
MONITOR TV MODELS
Please read this manual carefully before operating
your set and retain it for future reference.
ENGLISH
M2362D
1
PREPARATION
FRONT PANEL CONTROLS
■
This is a simp ified representation of the front pane . The image shown may be somewhat different from your
set.
INPUT
Button
INPUT
MENU
PR
VOL
OK
MENU
Button
OK(ENTER)
Button
VOLUME
Buttons
PROGRAMME
(CHANNEL)
Buttons
Power
Button
Headphone
Jack
IR receiver
(Remote contro er
receiver)
LLiigghhtt SSeennssoorr
This is ens for ight sensor
se ect outside uminance,
when setting AUTO
BRIGHT ON.
PPoowweerr IInnddiiccaattoorr
i uminates b ue when the
set is switched on.
Note:You can adjust
Power indicator in the
OPTION menu.
2
PREPARATION
BACK PANEL INFORMATION
■
This is a simp ified representation of the back pane . The image shown may be somewhat different from your
set.
AV 1 AV 2
AC IN
VIDEO
COMPONENT
IN
AV-IN
VIDEO
S-VIDEO
AUDIO
Y
P
B
P
R
L
R
RS-232C IN
(CONTROL & SERVICE)
SERVICE
ONLY
RGB IN (PC)
DVI-D IN (PC)
HDMI IN
1
2
OPTICAL
DIGITAL
AUDIO OUT
AC IN
AUDIO IN
(RGB/DVI)
ANTENNA/
CABLE IN
AUDIO
(MONO)
LR
2
910 11
1
87 12
56
3 4
PPoowweerr CCoorrdd SSoocckkeett
This set operates on AC power. The vo tage is indicated
on the Specifications page. Never attempt to operate
the set on DC power.
HHDDMMII IInnppuutt
High definition inputs. These two inputs accept TV
Video, not PC Video. They a so accept TV Video from a
DVI connection when using an adapter. The HDMI
inputs support video and audio. When using an adapter
for DVI, they on y accept video.
DDVVII--DD IInnppuutt
Digita PC input.
RRSS--223322CC IINN ((CCOONNTTRROOLL && SSEERRVVIICCEE)) PPOORRTT
Seria port used for externa contro or service.
RRGGBB IINNPPUUTT ((PPCC))
Ana og PC input. A so known as VGA.
SS--VViiddeeoo IInnppuutt
Standard definition (480i), but better qua ity than
standard A/V input.
SSEERRVVIICCEE OONNLLYY PPOORRTT
RRGGBB//DDVVII AAuuddiioo IInnppuutt
This is the audio input for the RGB and DVI-D video
inputs.
OOppttiiccaa DDiiggiittaa AAuuddiioo OOuutt
Use this to export audio to an externa amp ifer.
CCoommppoonneenntt IInnppuutt
High definition ana og input.
AAuuddiioo//VViiddeeoo IInnppuutt
Standard definition input.
AAnntteennnnaa IInnppuutt
Connect over-the-air or cab e signa s to this jack.
1
2
3
4
5
7
6
8
9
10
11
12
3
PREPARATION
STAND INSTALLATION
■
The image shown may be somewhat different from your set.
12
3
Carefu y p ace the product screen side down on a
cushioned surface that wi protect product and
screen from damage.
Insert the SSttaanndd BBaasseeinto the product.
Turn the SSttaanndd BBaassee LLoocckkthrough 90°to fix the stand base to the stand body.
SSttaanndd BBaassee LLoocckk
<<LLoocckkeedd>>
4 5
O
P
E
N
O
P
E
N
O
P
E
N
O
P
E
N
SSttaanndd BBaassee
4
PREPARATION
DETACHING STAND
■
The image shown may be somewhat different from your monitor.
12
3
4
P ace the set screen side down on a cushion or
soft c oth.
Detach the monitor to the SSttaanndd BBaasseeby
turning the screw to the eft.
Turn the SSttaanndd BBaassee LLoocckkthrough 90°to separate the stand base from the stand body.
Pushing LLaattcchhinside, Take the stand base from stand body.
O
P
E
N
O
P
E
N
O
P
E
N
O
P
E
N
O
P
E
N
O
P
E
N
LLaattcchh
SSttaanndd BBaassee
5
PREPARATION
DETACHING STAND BODY
1. Remove the screw 2 point.
2. Pu the stand body.
■
The image shown may be somewhat different from your set.
■
Remove the Stand Body in the same way as the fo owing when using it as a Wa Hook.
6
PREPARATION
DESKTOP PEDESTAL INSTALLATION
For proper ventilation, allow a clearance of 10 cm on eac side and from t e wall.
WALL MOUNT: HORIZONTAL INSTALLATION
For proper ventilation, allow a clearance of 10 cm on eac side and from t e wall. Follow t e instructions includ-
ed wit t e wall mount.
1100 ccmm
1100 ccmm
1100 ccmm
1100 ccmm
1100 ccmm
1100 ccmm
1100 ccmm1100 ccmm
1100 ccmm
7
PREPARATION
POSITIONING YOUR DISPLAY
■
T e image s own may be somew at different from your set.
Adjust t e position of t e panel in various ways for maximum comfort.
•• TTiilltt rraannggee
LOCATION
Position your set so t at no brig t lig t or sunlig t falls directly onto t e screen. Care s ould be taken not to expose
t e set to any unnecessary vibration, moisture, dust or eat. Also, ensure t at t e set is placed in a position to allow a
free flow of air. Do not cover t e ventilation openings on t e back cover.
If you intend to mount t e set to a wall, attac t e wall mounting interface (optional parts) to t e back of t e set.
W en you install t e set using t e wall mounting interface (optional parts), attac it carefully so it will not drop.
- Be sure to use screws and a wall mount t at meet VESA standards.
- Using screws longer t an t ose recommended mig t damage t e product.
- Using screws t at do not meet VESA standards mig t eit er damage t e product or result in it coming away from t e
wall. We will not be eld responsible for any damage resulting from failure to follow t ese instructions.
< Screw Mounting Interface Dimension >
••
100 mm x 100 mm ole spacing
- Wall mount interface(LG) : RW120
WWaarrnniinngg::
W en adjusting t e angle of t e screen, do not put
your finger(s)in between t e ead of t e monitor
and t e stand body. You can urt your finger(s).
RW120
-5
°
15
°
8
PREPARATION
KENSINGTON SECURITY SYSTEM
- The product is equipped with a Kensington Security System connector on the back pane . Connect the
Kensington Security System cab e as shown be ow.
- For detai ed insta ation and use of the Kensington Security System, refer to the user’s guide provided with the
Kensington Security System.
For further information, contact hhttttpp::////wwwwww..kkeennssiinnggttoonn..ccoomm, the internet homepage of the Kensington
company. Kensington se s security systems for expensive e ectronic equipment such as notebook PCs and LCD
projectors.
NOTE
- The Kensington Security System is an optiona accessory avai ab e at most e ectronics stores.
NOTES
a. If the product fee s co d to the touch, there may be a sma “f icker” when it is turned on.
This is norma , there is nothing wrong with product.
b. Some minute dot defects may be visib e on the screen, appearing as tiny red, green, or b ue spots. However, they
have no adverse effect on the monitor's performance.
c. Avoid touching the LCD screen or ho ding your finger(s) against it for ong periods of time.
AV 1 AV 2
AC IN
ANTENNA/
CABLE IN
AV 1 AV 2
AC IN
ANTENNA/
CABLE IN
9
EXTERNAL EQUIPMENT SETUP
■For optimum picture qua ity, adjust antenna direction.
■An antenna cab e and converter are not supp ied.
■To prevent equipment damage, never p ug in any power cords unti you have finished connecting a equipment.
Mu ti-fami y Dwe ings/Apartments
(Connect to wa antenna socket)
Sing e-fami y Dwe ings /Houses
(Connect to wa jack for outdoor antenna)
Outdoor
Antenna
(VHF, UHF)
Wa
Antenna
Socket
RF Coaxia Wire (75 )
ANTENNA CONNECTION
Antenna
UHF
VHF
■In poor signa areas, to get better picture qua ity, insta a signa amp ifier to the antenna as shown above.
■If signa needs to be sp it for two TVs, use an antenna signa sp itter for connection.
Signa
Amp ifier