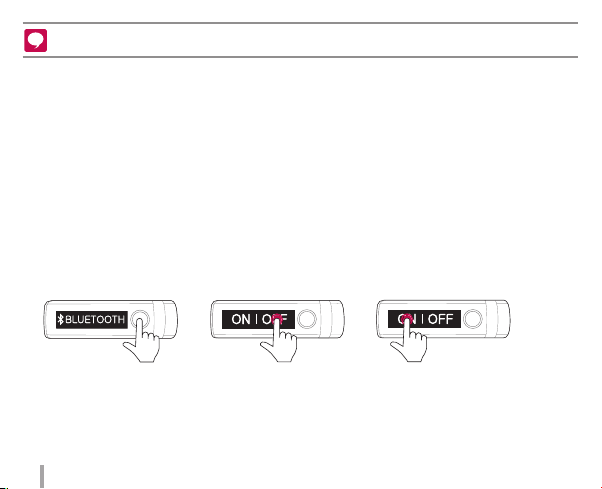
LG Lifeband Touch FB84-BM User manual

LG Lifeband Touch
Model : FB84-BM / FB84-BL / FB84-BX /FB84-SM / FB84-SL /
FB84-SX / FB84-RM / FB84-RL / FB84-RX
For more details, please refer to the Owner’s manual at
LG Fitness App or www.lg.com
Quick Setup Guide
The actual device may differ from the image.
This device is not intended to diagnose, treat or
prevent any disease or medical condition.
Always seek the advice of a qualied professional
before making any changes to your exercise,
sleep or nutrition.

2
USB cable
LG Lifeband Touch
Quick setup guide/
Warranty card
USB gender
vStretch the tip of the band and slide it on to
your wrist. Face the open end towards the
outside for a more comfortable t.
Package Contents
Wearing the LG Lifeband Touch

3
Product Overview
Power On
vWhen Powering on the LG Lifeband Touch for the rst
time, press and hold the Menu button for 2 seconds.
�Menu button :
Holding down or pressing the Menu button will allow
you to access dierent menu functions.
�Display :
Shows detailed information. Swipe left or right and
touch to select an item.
�LED :
Shows information such as Goal achievement rate.
Menu button
Display
LED
Charging Battery
vInsert the Micro USB connector to the charging dock,
then connect the USB connector to a USB AC adapter.
vFully charge the device before using for the rst time.
vIt takes 3 hours to fully charge battery.
vTo charge this product, you must always use a AC
5V, 100mA or more. Certied /Listed Adapter which
complies with LPS.
AC Adapter is not supplied.

4
v
You can view your workout data recorded by the this device using the app.
To use this function, sign up for the app and register your device.
You can view time and music control mode on LG Lifeband Touch after syncing with the app.
1. Search for“LG Fitness”in Play Store (Android phone) or App Store (iPhone) and then, install the app.
2. Turn on the LG Lifeband Touch. (Press and hold Menu button for 2 seconds.)
3. Run the “LG Fitness”app. And select [Sign Up] to register device .
4. Touch [Search] in the [Register Device] screen.
When using Bluetooth® technology, you have to make
a connection between the LG Lifeband Touch and the
smartphone as close as possible and keep the distance.
Note : Bluetooth function is available if your smartphone
supports Bluetooth 4.0 LE or later.
5. [Pairing?
/YES | NO] appears on the screen. Touch [YES].
To connect to the smartphone, touch [YES] within 10 seconds.
In case that the connection has failed, repeat step 4 and step 5.
Installing LG Fitness Smartphone App and Connecting
Bluetooth

5
1. Each time you press the Menu button, 3 types of modes are displayed in the following order.
2. To display more information in each mode, swipe left or right.
Display
Time Date Battery life
Total consumed calories / Goal consumed calories / Goal achievement rate
Total distance Number of steps Workout
v
To display your Goal consumed calories or Goal achievement rate, touch the screen in the Total
consumed calories repeatedly.
Play or Pause Forward or Backward Volume Up or Down
v
Music control function is available when you sync LG Lifeband Touch with the app and have music
stored on your smartphone.
Time mode
Activity mode
Music Control mode
Time mode Activity mode Music Control mode

6
1. Press Menu button to select Activity mode.
2. Swipe the screen in the Activity mode to select [START].
3. Touch [START] to start Workout.
4. To check various workout information, swipe left or right.
Time Calories Distance Number of steps Speed Pace Heart Rate
5. Touch the screen in Workout mode. [STOP] and [PAUSE] button will appear. To complete Workout mode,
touch [STOP]. To pause Workout mode, touch [PAUSE].
Using Workout

7
Button Functions Initial Bluetooth
Connection
Select Orientation
(Left or Right) Power o Restart
automatically
Press and hold
for
About 2 seconds,
1st vibration
About 4 seconds,
2nd vibration
More than 6
seconds,
3rd vibration
More than 10
seconds
Display
Performance LED indicator
Ready to pair Violet / Blinks.
Paired Violet / Fade in and out.
Battery LED indicator
Low (less than 10%) Red / Blinks.
Charging Red / Turned on dimly.
Charged LED o / When pressing MENU button, Green LED indicator turned on.
Menu Button Functions
LED Indications

8
vThe LG Lifeband Touch is splash resistant not waterproof. It should not be used underwater or under
running water.
vActivity records are reset every night at 12:00 AM local time. Data that has not been updated can be
saved on the device for up to 1 month. The data will be updated when you sync the device to LG
Fitness App on your Smartphone.
Auto display On/O
vThis device features gesture recognition technology. The display will turn on when motioning your arm
up to check the time. The display will turn o when motioning your arm back down.
Note : You can set [Screen auto-o time] on the LG Fitness app. [More /LG Lifeband Touch Settings]
Reconnecting Bluetooth
vTo reconnect to the smartphone, turn Bluetooth setting [OFF] and [ON] again by pressing and holding
for 2 seconds the Menu button when the app is running.
/ /
vPairing is kept even if the Bluetooth connection on your smartphone is turned o and on again.
Notice

9
Appendix
For Wireless product European Union Notice
LG Electronics hereby declares that this/these
product(s) is/are in compliance with the essential
requirements and other relevant provisions of
Directive 1999/5/EC, 2004/108/EC, 2006/95/EC,
2009/125/EC and 2011/65/EU.
Please contact to the following address for
obtaining a copy of the DoC (Declaration of
Conformity).
Contact oce for compliance of this product :
LG Electronics Inc.
EU Representative, Krijgsman 1,
1186 DM Amstelveen, The Netherlands
�Please note that this is NOT a Customer
Service contact point. For Customer Service
Information, see Warranty Card or contact the
dealer that you purchased this product.
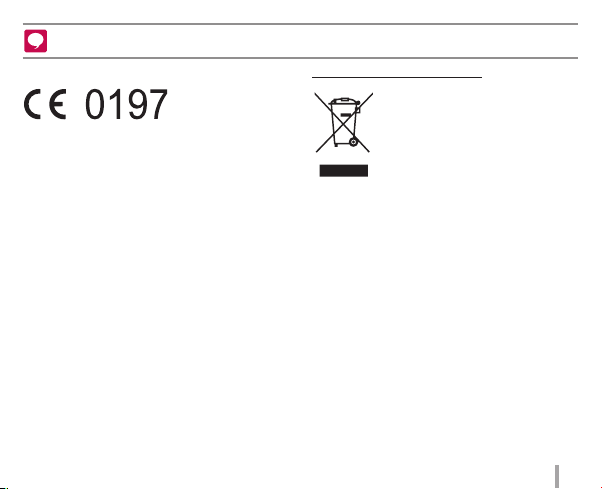
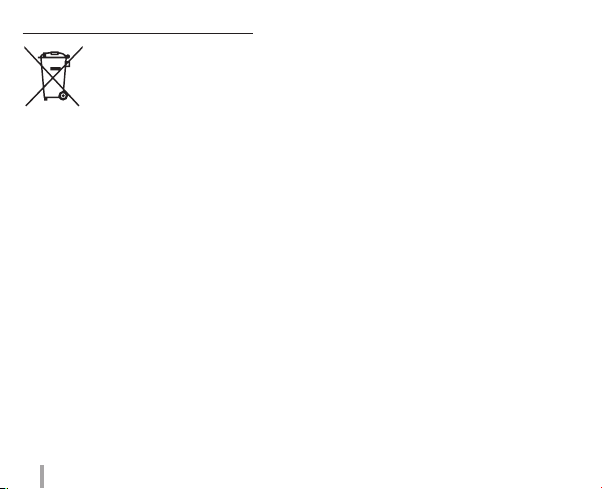
Disposal of your old appliance
1. When this crossed-out wheeled bin
symbol is attached to a product it
means the product is covered by
the European Directive 2002/96/EC.
2. All electrical and electronic products
should be disposed of separately
from the municipal waste stream
via designated collection facilities
appointed by the government or
the local authorities.
3. The correct disposal of your
old appliance will help prevent
potential negative consequences
for the environment and human
health.
4. For more detailed information
about disposal of your old
appliance, please contact your city
oce, waste disposal service or
the shop where you purchased the
product.

10
Disposal of waste batteries/accumulators
1. When this crossed-out wheeled
bin symbol is attached to batteries/
accumulators of Your product
it means they are covered by
European Directive 2006/66/EC.
2. This symbol may be combined with
chemical symbols for mercury(Hg),
cadmium(Cd) or lead(Pb) if the
battery Contains more that 0.0005%
of mercury, 0.002% of cadmium or
0.004% of lead.
3. All batteries/accumulators should
be disposed separately from
the municipal waste stream via
designated collection facilities
appointed by the government or
the local authorities.
4. The correct disposal of Your old
batteries/ accumulators will help
to prevent potential negative
consequences for the environment,
animal and human health.
5. For more detailed information about disposal of
Your old batteries/ accumulators, please contact
Your city oce, waste disposal service or the
shop where You purchased the product.

11
Wiring: This unit is supplied with a BS 1363
approved main plug. When replacing the fuse,
always use of the same rating approved to BS 1362.
Never use this plug with the fuse cover omitted.
To obtain a replacement fuse cover contact your
dealer. If the type of plug supplied is not suitable
for the mains sockets in your home, then the plug
should be removed and a suitable type tted.
Please refer to the wiring instructions below:
Warning: A mains plug removed from the mains
lead of this unit must be destroyed. A mains plug
with bared wires is hazardous if inserted in a mains
socket. Do not connect either wire to the earth pin,
marked with the letter E or with the earth symbol 6
or coloured green or green and yellow. If any other
plug is tted, use same rating of fuse in the plug.
Important: The wires in this mains lead are
coloured in accordance with the following codes:
- BLUE: NEUTRAL, BROWN: LIVE: As the colours
of the wires in the mains lead of this unit may not
correspond with the coloured marking identifying
the terminals in your plug, proceed as follows: The
wire which is coloured blue must be connected
to the terminal which is marked with the letter
N or coloured black. The wire which is coloured
brown must be connected to the terminal which is
marked with the letter L or coloured red.
Please see the separate enclosed warranty card
for details on the manufacturer warranty for this
product.
For further product details and customer assistance
please visit our web site
www.lg.com/uk
or call the LG customer Information Centre on:
UK: 0844-847-5454 IE: 0818-27-6955
MODEL
NO.* SERIAL NO.* DATE OF
PURCHASE.*

Other manuals for Lifeband Touch FB84-BM
1
This manual suits for next models
8
Table of contents
Popular Pedometer manuals by other brands

Oregon Scientific
Oregon Scientific PE326CA user manual

Omron
Omron GOSMART HJ-720ITC instruction manual

Tanita
Tanita Fit Tunes PD640 instruction manual

Accusplit
Accusplit Eagle AE1590M12 operating instructions

Huawei
Huawei TalkBand B3 quick start guide

Golden Smart Home Technology
Golden Smart Home Technology LS405-B user manual