aConnect the power cord of wireless receiver to
the outlet.
bTurn on the unit: The unit and wireless receiver
will be automatically connected. The receiver's
yellow - green LED turns on.
Wireless Receiver Connection Manually
If the rear speakers do not make sound, try to
connect manually.
aPress PAIRING button on the rear of the
wireless receiver.
yThe yellow - green LED on the wireless receiver
blinks quickly.
bTurn on the main unit.
cPairing is completed.
yThe yellow - green LED on the wireless receiver
turns on.
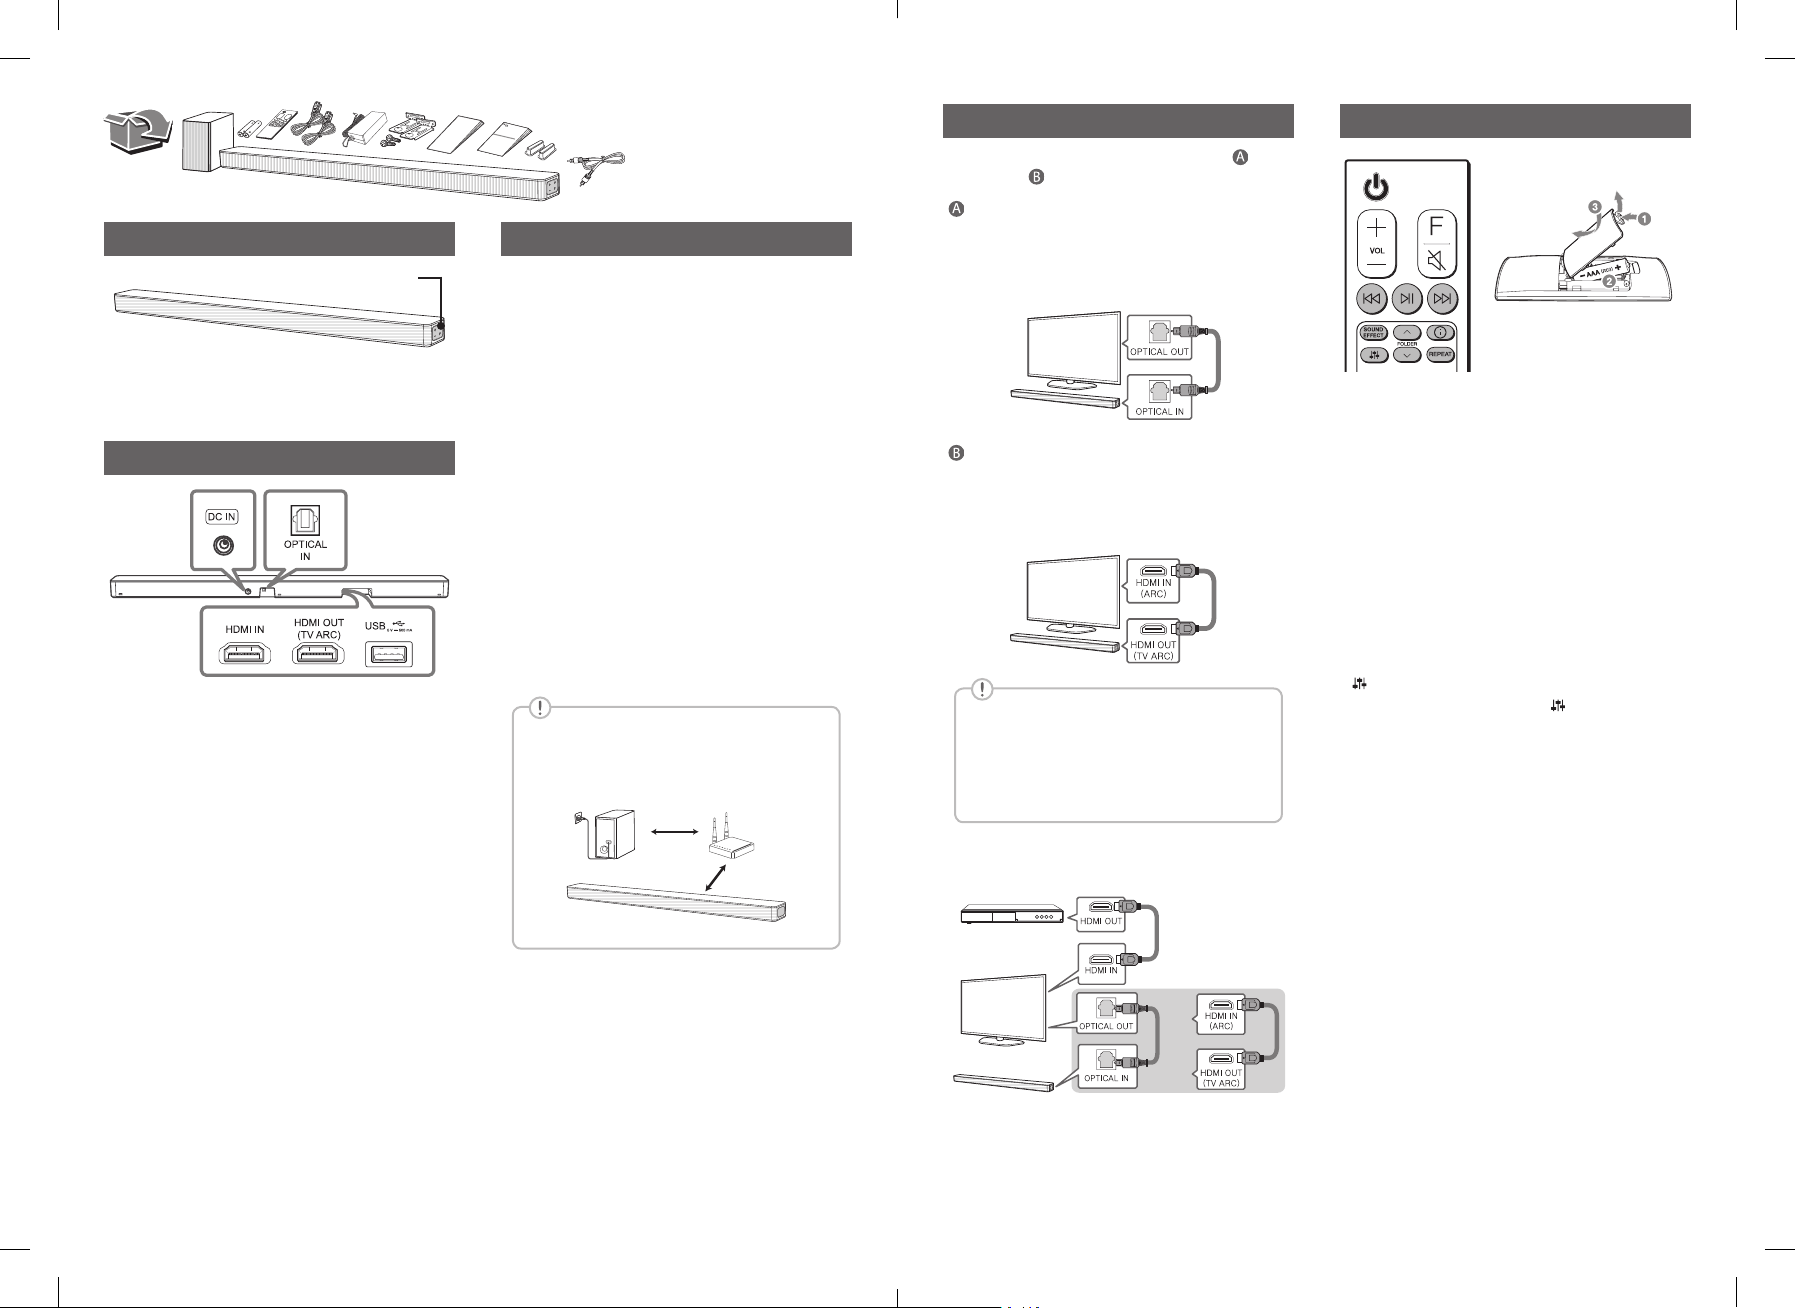
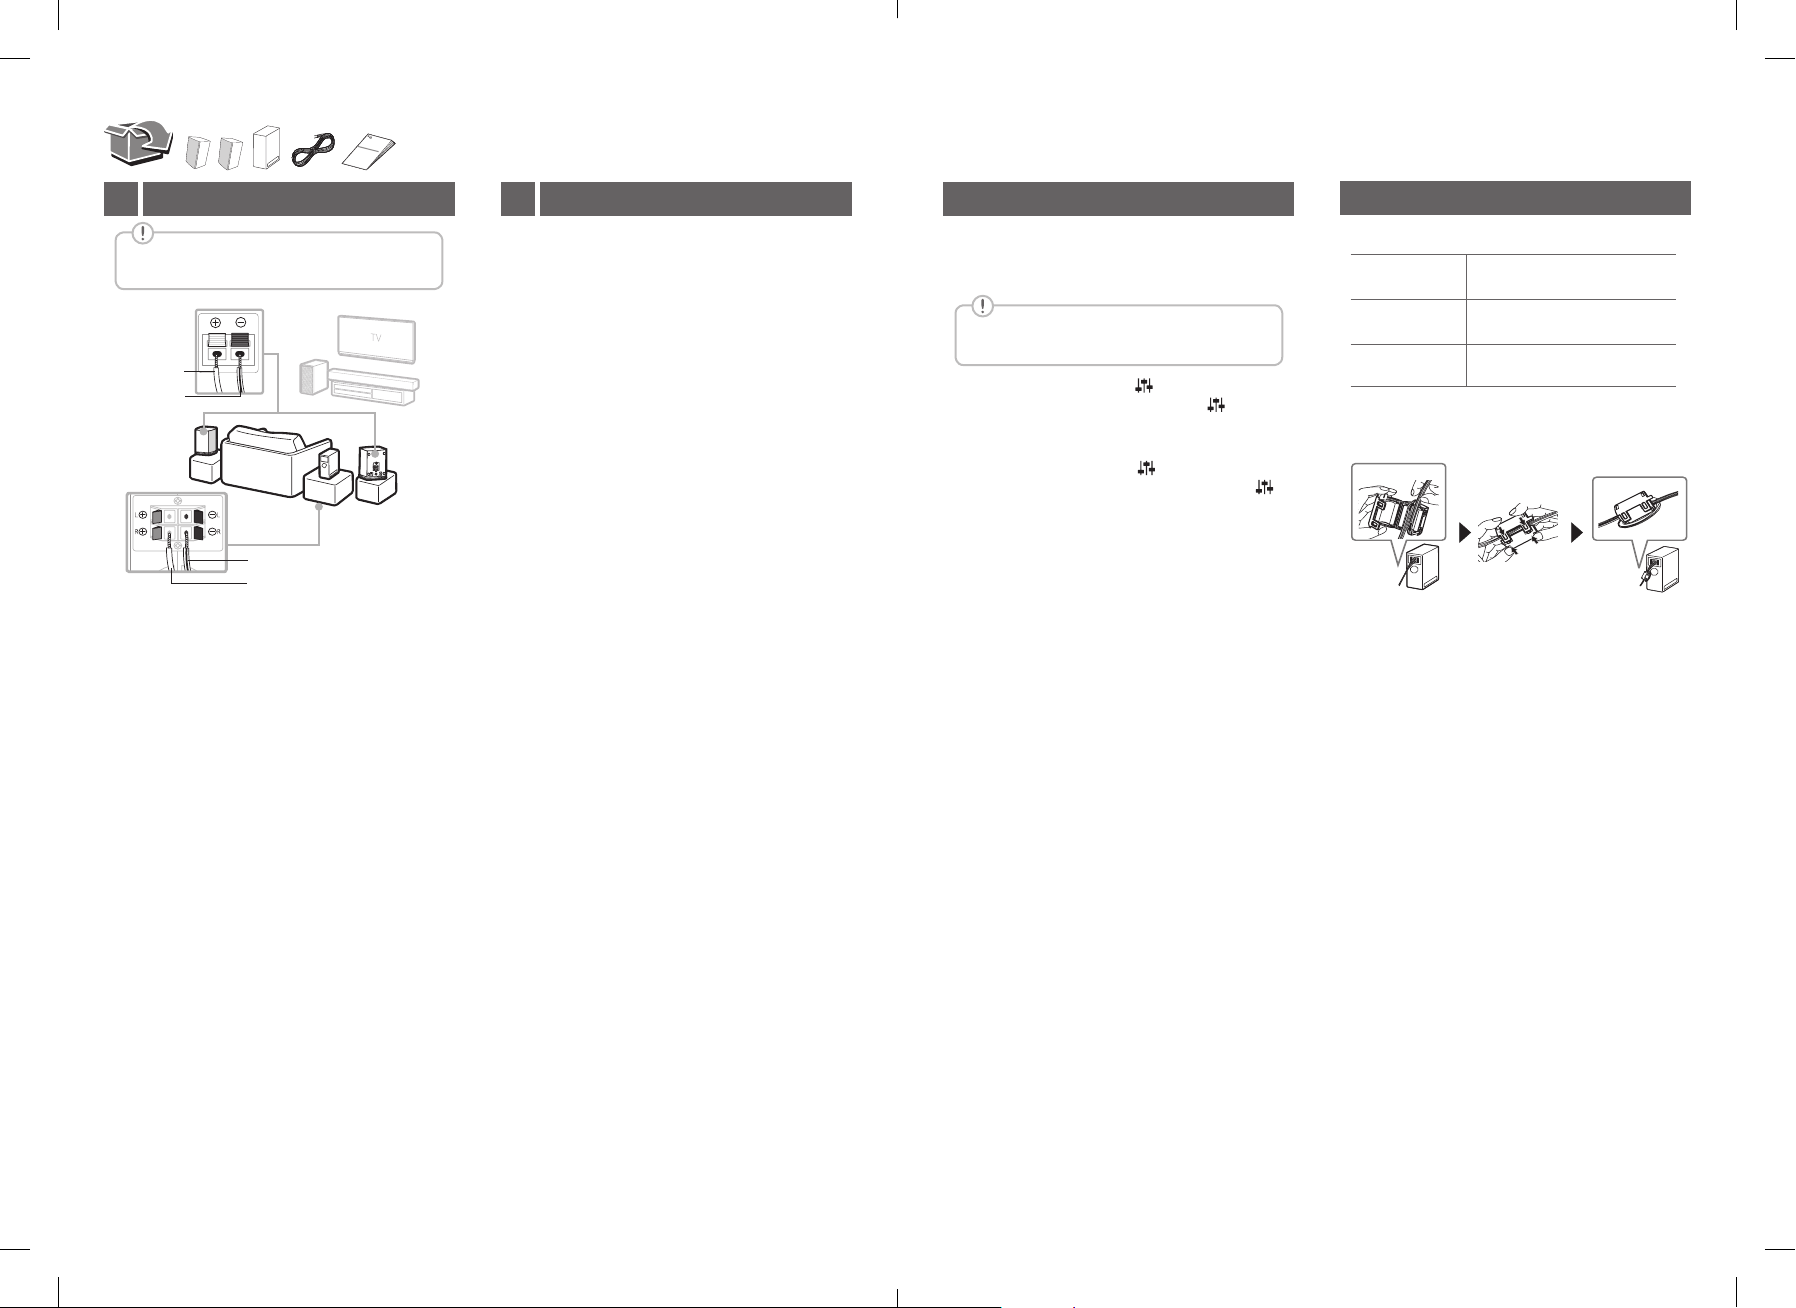
Rear Speakers Connection1 Wireless Receiver Connection2
aConnect the speaker cables to rear speakers
correctly.
bConnect the Wireless Receiver and the rear
speakers (Grey: right, Blue: left) with the speaker
cables.
cTurn on the Surrond function to enjoy surround
sound.
Speaker design and connection method may be
different according to models.
Rear speaker
(Left)
Wireless
Receiver Rear speaker
(Right)
Transparent
Black stripe
Transparent
Black stripe
Additional Information
Specication of Wireless reciever
Power
requirement
Refer to the main label on the
wireless receiver.
Power
consumption
Refer to the main label on the
wireless receiver.
Dimensions
(W x H x D)
Approx.
60 mm x 220 mm x 175 mm
Design and specications are subject to change
without notice.
About Ferrite Core (Optional)
twice
POWER: This unit operates on a mains supply of
200 - 240 V ~ 50 / 60 Hz.
Wiring: This unit is supplied with a BS 1363 approved
main plug. When replacing the fuse, always use a fuse
of the same rating and approved to BS 1362. Never
use this plug with the fuse cover omitted. To obtain
a replacement fuse cover contact your dealer. If the
type of plug supplied is not suitable for the mains
sockets in your home, then the plug should be removed
and a suitable type tted. Please refer to the wiring
instructions below:
Warning: A mains plug removed from the mains lead
of this unit must be destroyed. A mains plug with bared
wires is hazardous if inserted in a mains socket. Do not
connect either wire to the earth pin, marked with the
letter E or with the earth symbol 6or coloured green
or green and yellow. If any other plug is tted, use same
rating of fuse in the plug.
Important: The wires in this mains lead are coloured in
accordance with the following codes:
- BLUE: NEUTRAL, BROWN: LIVE - As the colours
of the wires in the mains lead of this unit may not
correspond with the coloured marking identifying
the terminals in your plug, proceed as follows: The
wire which is coloured blue must be connected to the
terminal which is marked with the letter N or coloured
black. The wire which is coloured brown must be
connected to the terminal which is marked with the
letter L or coloured red.
Surround Sound On/Off
When you turn on surround function, you can enjoy
magnificent surround sound for all the input sound
source with rear speakers.
The initial setting for the surround function is
OFF, turn the surround function ON to use it.
Surround On: Press and hold button on the remote
control about 3 seconds. and then press button
repeateadly to select ON - SURROUND in the display
window.
Surround Off: Press and hold button on the
remote control about 3 seconds. and then press
button repeateadly to select OFF - SURROUND in the
display window.
SPJ4-S(SL5R).DNGAFLK_SIM (Sheet)_ENG_MFL71440091.indd 3-4 2019-06-05 10:47:19