Adding an Output
Select MENU > Configurations. Select a configuration from
the list. Select Outputs > Add New Output. Select type:
Light: Enter a name for the output. Select sensor input 1, 2,
or 3.
Math: Enter a name for the output. Select Operation. See
"Configuring a Math Output" (below) to configure the
operation type.
Prompt: Enter a name for the output. select Type > Full
Alphanumeric or Numeric Only, then press EXIT. During
manual logging, allows a different data entry into each record.
For continuous or automatic routines, allows adding the
same entry into each record.
Battery: Logs battery voltage.
GPS: Logs GPS data such as latitude, longitude, and UTC.
Configuring a Math Output
Select MENU > Configurations. Select a configuration from
the list. Select Outputs and select a Math output from the
list or see "Adding an Output" (above) to add a new Math
output. Select Operation and select an operation type:
Addition – Select parameters
Subtraction – Select parameters
Multiplication – Select parameters
Division – Select parameters
Integration – Select a parameter and duration
Daily Integral – Select a parameter. Set start/stop times with
a Daily logging routine (see "Changing the Logging Routine").
Attenuation – Select parameters and separation distance
Logarithm – Select a parameter
A parameter is a numeric constant or an output to which
the operation will be applied. Press EXIT when finished.
Example: Select the Addition operation type and the Output
parameter type. Choose INPUT1 and INPUT2 as parameters.
Readings from each one will be added together in the new output.
Enabling Averaging
Select MENU > Configurations. Select a configuration from
the list. Select Outputs and select an existing "Light" output
or add a new one. Select Averaging and select an averaging
window. Select Min/Max > Yes to include minimum and
maximum sampled values in the output. Press EXIT twice.
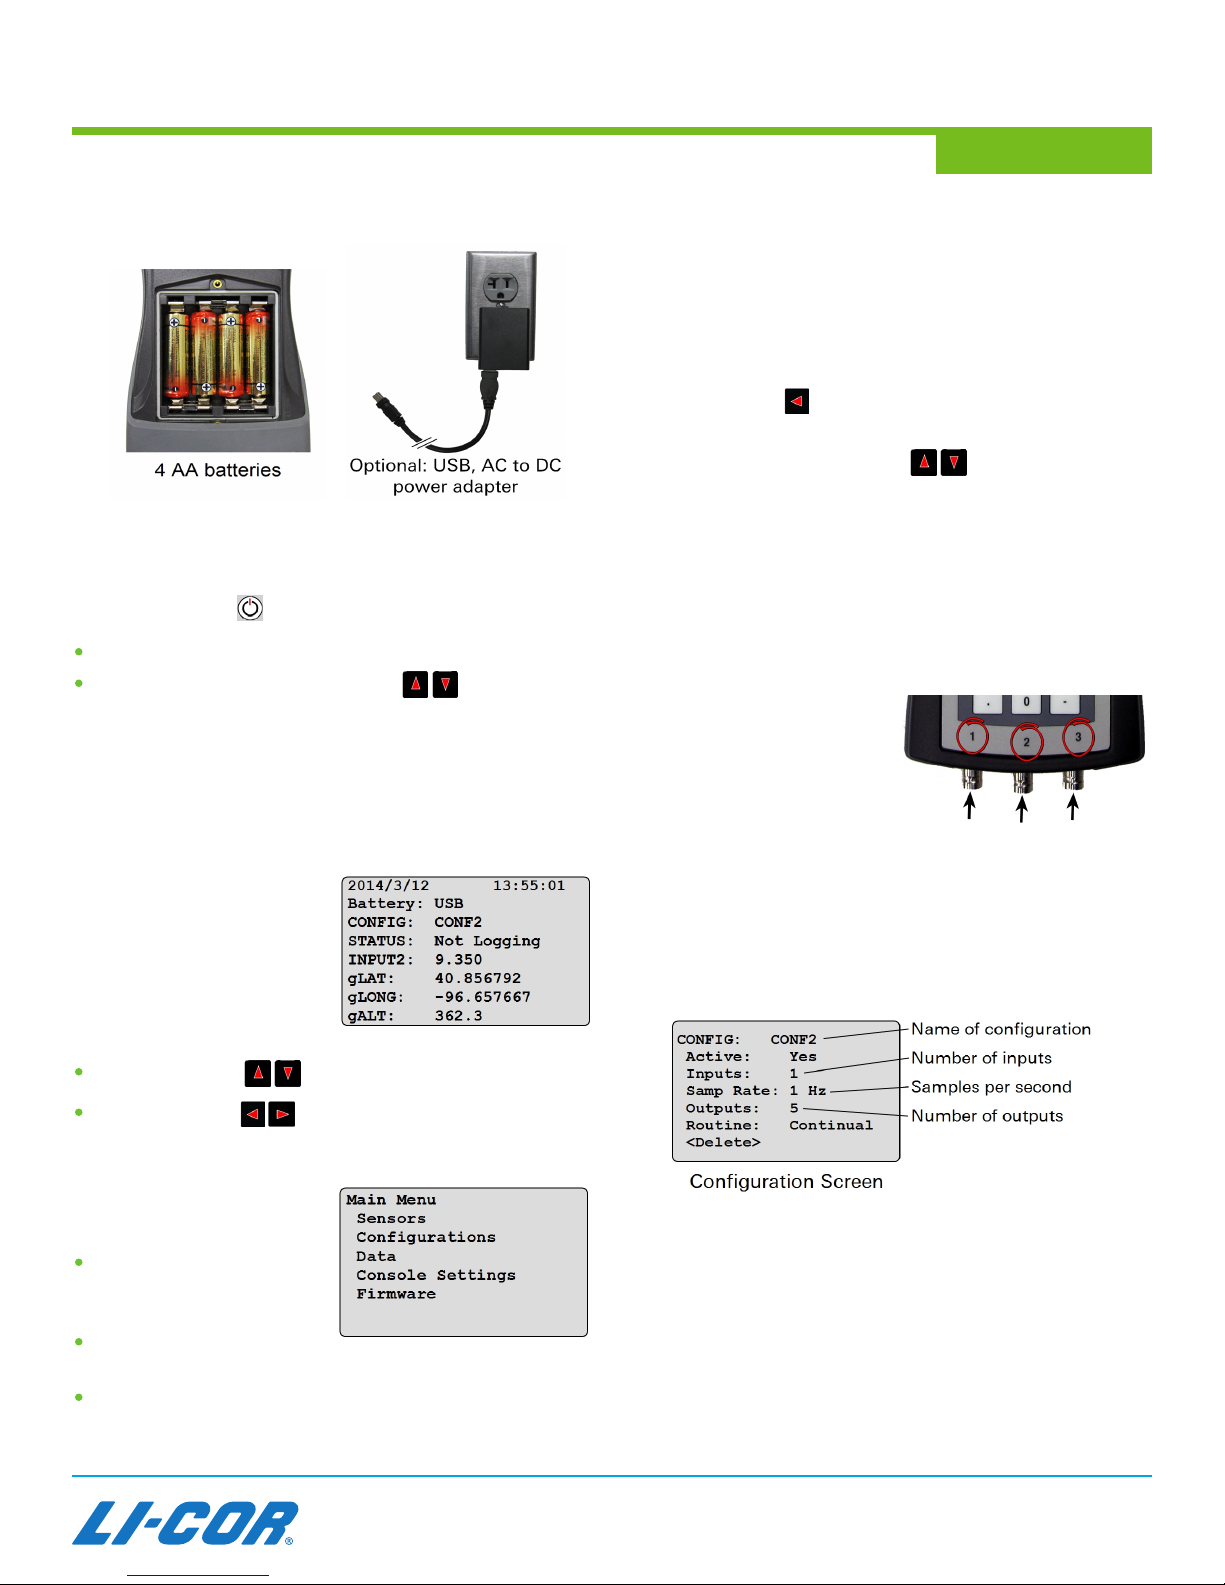
Changing the Logging Routine
Select MENU > Configurations. Select a configuration from
the list. Select Routine. Select a routine type:
Manual:Logs a reading each time LOG is pressed.
Continual:Set a logging rate. Logs automatically while the
logging file is open. Close the file to stop.
Daily:Set a logging rate, start time, and stop time. Logs
automatically during a set time period every day.
One Time:Set a logging rate, start time/date, and stop time/
date. Logs automatically during a single set time period.
Press EXIT when finished.
Global Positioning System (GPS)
For GPS-equipped units, Select MENU > Console Settings >
GPS > Enabled. GPS data are now visible in Monitor Mode.
Add the GPS output to the active configuration to log GPS
data with sensor data. This also enables GPS tagging – press
a numbered key (1–9) to add GPS data to the file during a
logging session.
Logging Data
1. From Monitor Mode, press START|STOP.
2. Select New File (enter a file name) or Existing File
(select a file from the list).
3. Enter a session remark or press OK.The logging file is
now open. Leave the power on and the logging file open until
any automatic logging routines are complete.
4. In the default Manual Log routine, Press LOG to record
the current data point for all attached sensors.
5. Optional: Press period to enter a remark in the
logging file. The remark is time-stamped when you
press OK. Logging continues uninterrupted.
6. Press START|STOP to close the logging file.
The STATUS line in Monitor Mode indicates Logging
when a logging routine is active. A dot (.) flashes at the end
of the STATUS line while data are being recorded.
Viewing Logged Data on the Display
Select MENU > Data > Files, select a logging file, then
select View. Select a logging session and then Records.
Select an individual record to view data.
LI-COR Biosciences – Global Headquarters
4647 Superior Street • Lincoln, Nebraska 68504
Phone: +1-402-467-3576 • Toll free: 800-447-3576 • Fax: +1-402-467-2819
envsales@licor.com • envsupport@licor.com • www.licor.com/env
Regional Offices
LI-COR GmbH, Germany
Serving Andorra, Albania, Cyprus, Estonia, Germany, Iceland, Latvia, Lithuania,
Liechtenstein, Malta, Moldova, Monaco, San Marino, Ukraine, and Vatican City.
LI-COR Biosciences GmbH
Siemensstraβe 25A • 61352 Bad Homburg
Germany
Phone: +49 (0) 6172 17 17 771 • Fax: +49 (0) 6172 17 17 799
envsales-gmbh@licor.com • envsupport-gmbh@licor.com
LI-COR Ltd., United Kingdom
Serving Denmark, Finland, Ireland, Norway, Sweden, and UK.
LI-COR Biosciences UK Ltd.
St. John’s Innovation Centre • Cowley Road • Cambridge • CB4 0WS
United Kingdom
Phone: +44 (0) 1223 422102 • Fax: +44 (0) 1223 422105
envsales-UK@licor.com • envsupport-UK@licor.com
LI-COR Distributor Network:
www.licor.com/env/distributors
988-14407
Rev 1, 7/15