WARNING:
UV Bulb, quartz sleeve, and ballast must be installed first before operating the unit. Never
operate bulb outside of unit as brief exposure to ultraviolet radiation will damage eyes and skin.
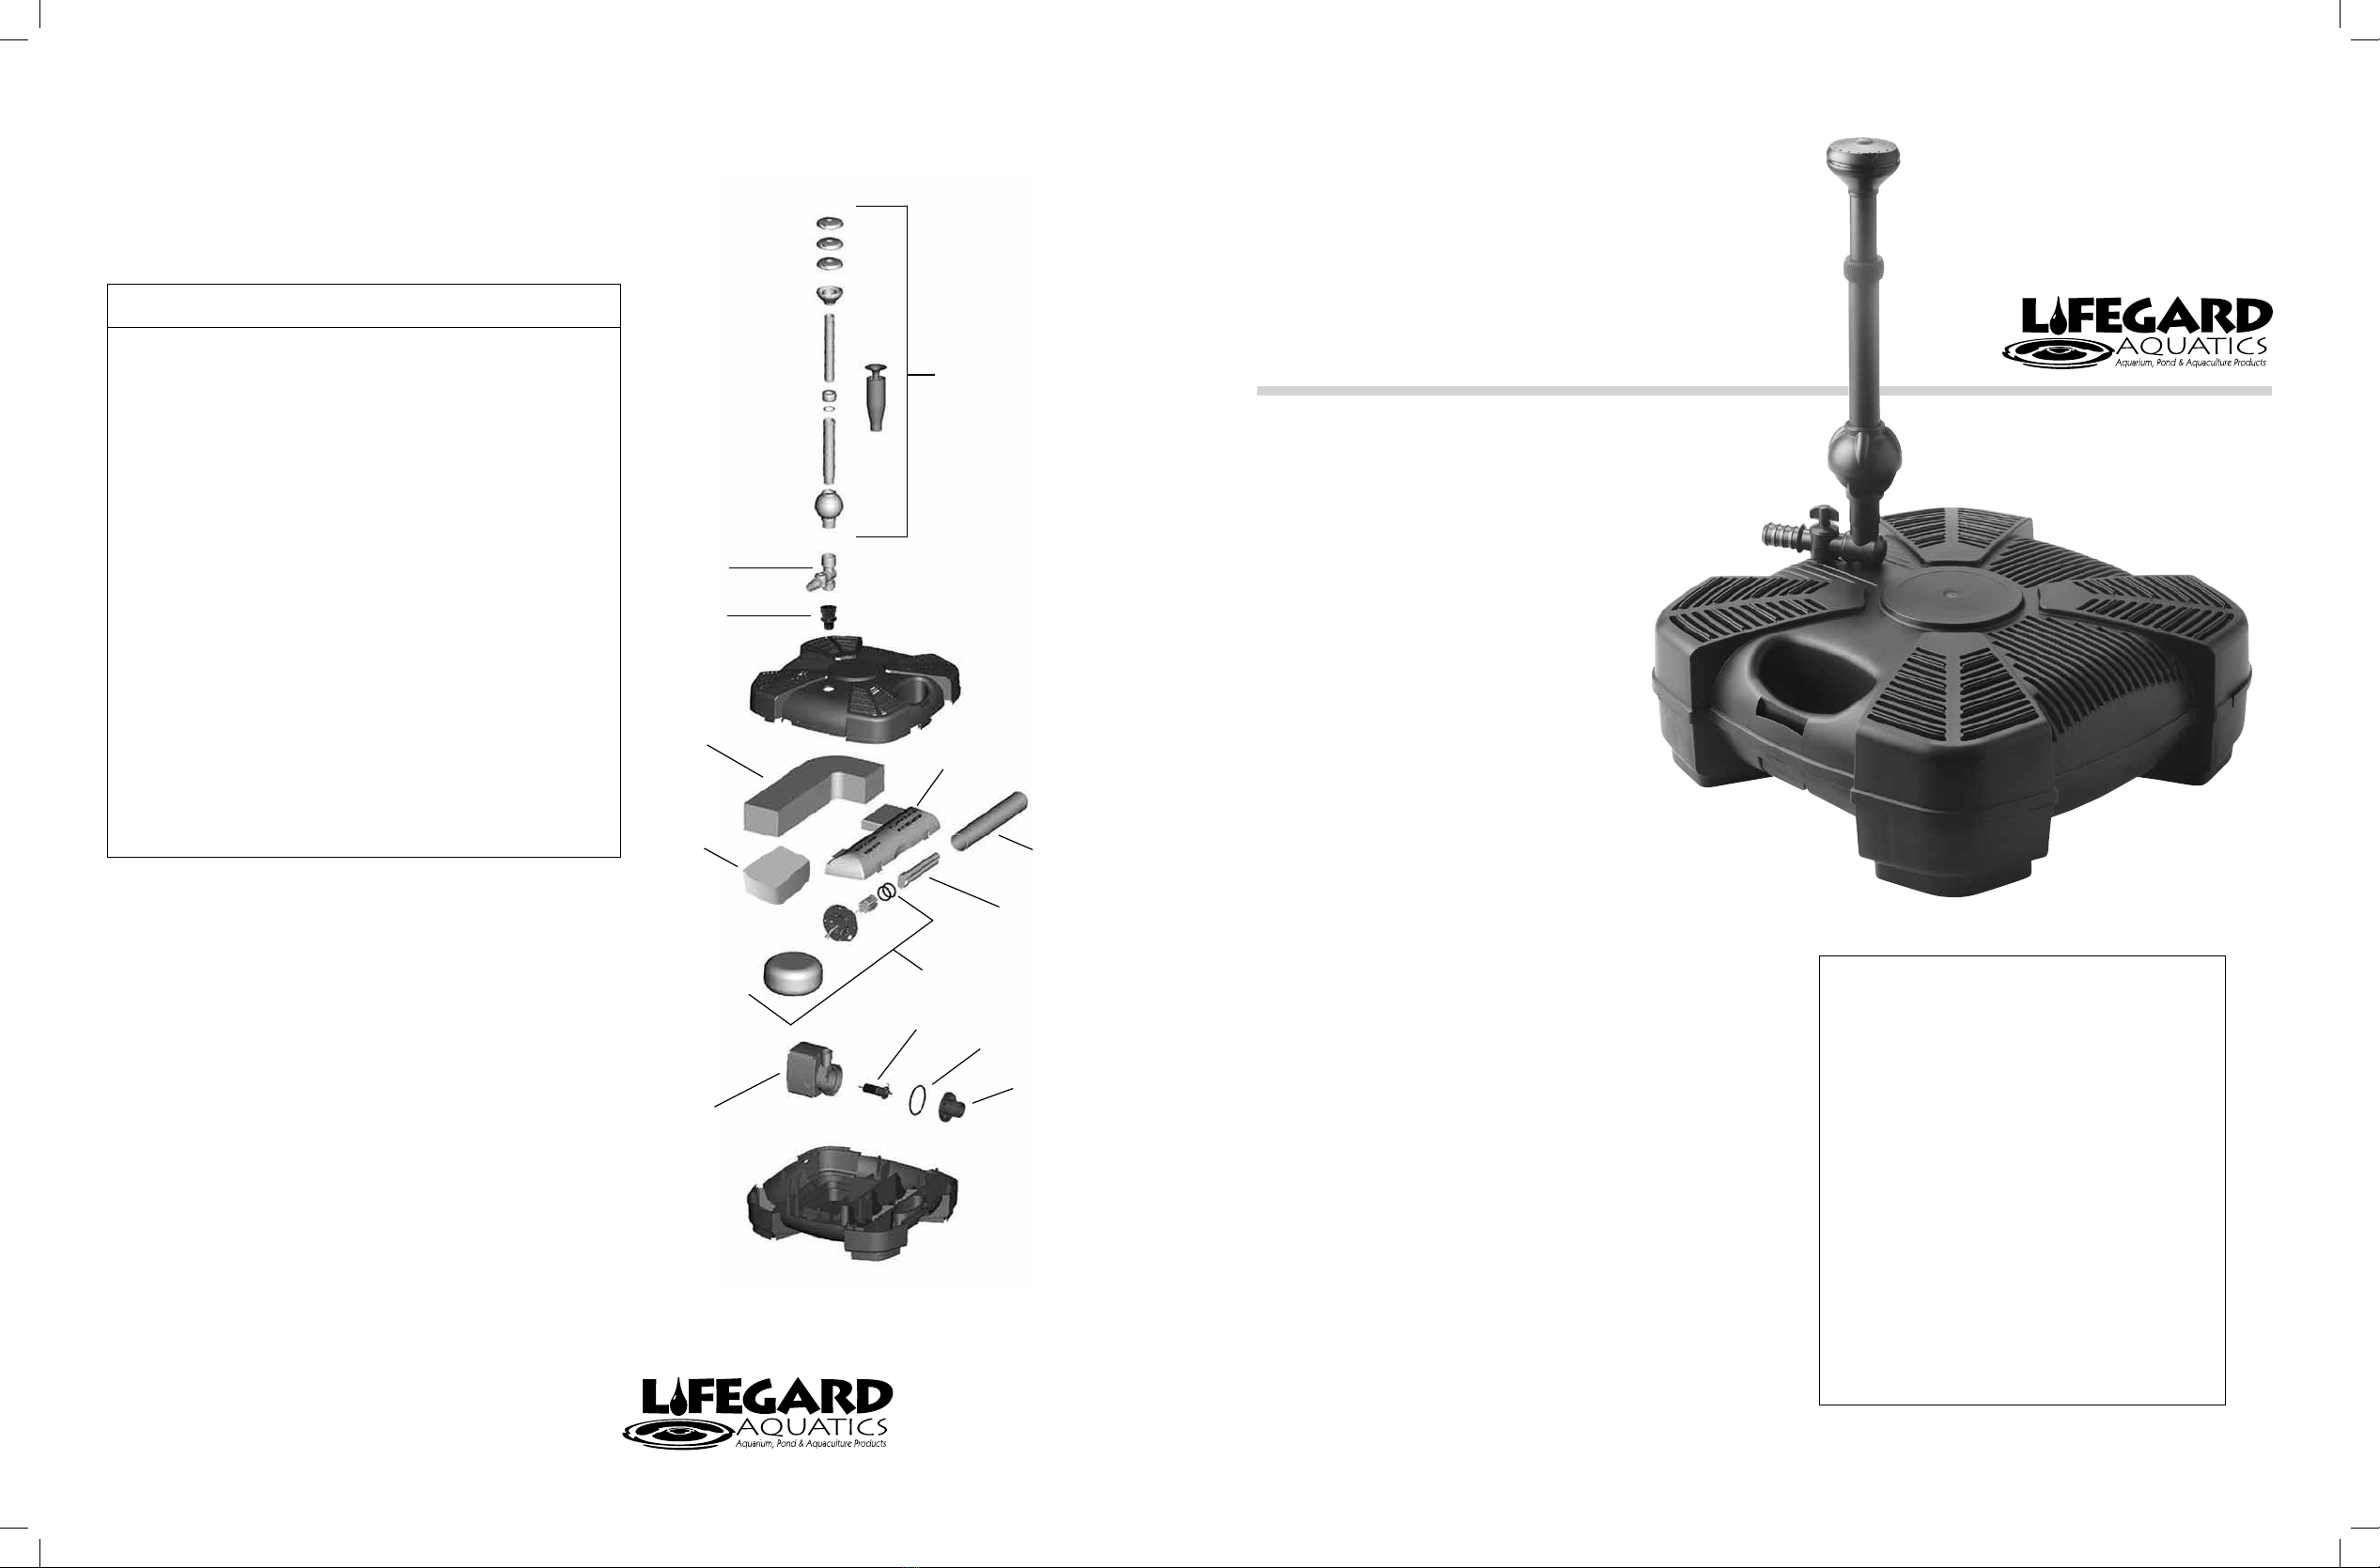
1. Unscrew and remove adapter tting on top of unit. 2. Press tab on front handle of unit and remove the
upper top half of lter.
3. Unscrew and remove uv cover.
5. Gently unpack UV bulb, quartz sleeve and
ballast assembly. Carefully place aside as parts are
extremely fragile.
6. Carefully slide uv bulb into receptable on ballast.
7. Carefully slide quartz sleeve over bulb and onto
ballast making sure sleeve is pushed all the way over
both “O” rings and next to the at end of the ballast
assembly.
8. Carefully lay ballast assembly with uv bulb and
quartz sleeve attached inside lter.
9. Replace uv cover and secure with screws.
10. Replace top half of lter making sure pump and uv
cord is in the proper groove.
11. Replace adapter tting on top of unit. 12. Attach diverter valve and fountain assembly.
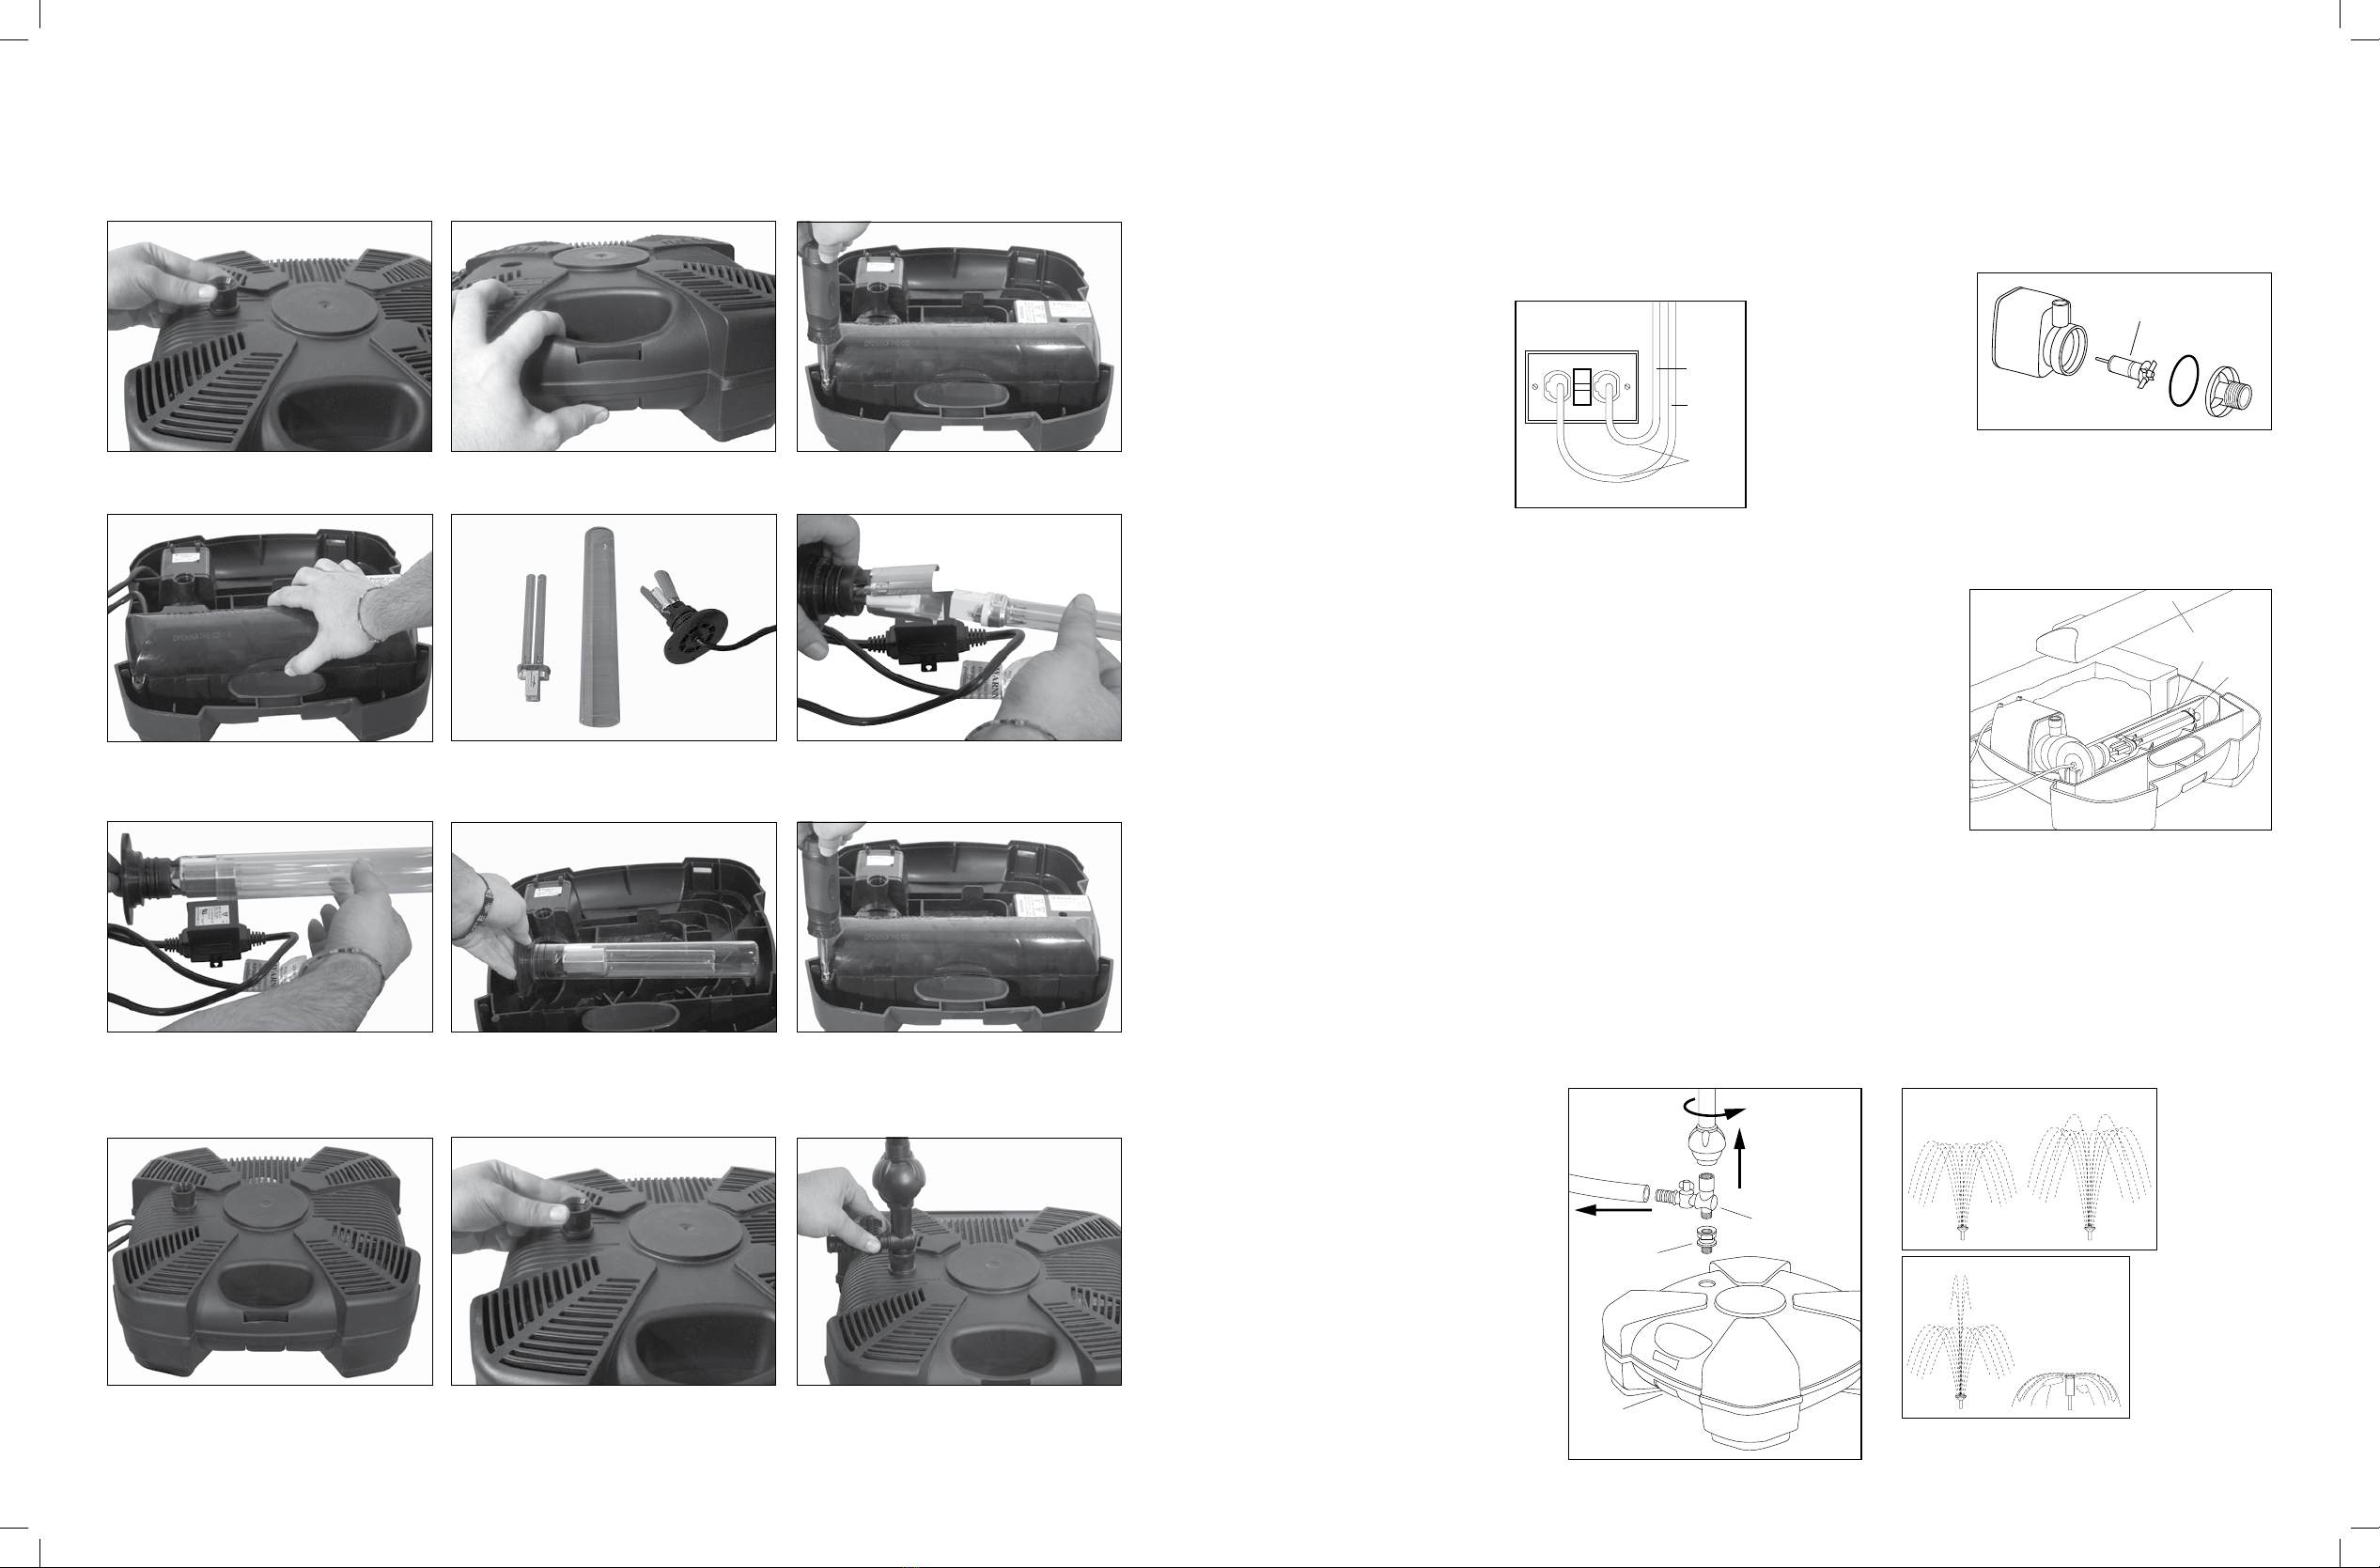
Installation
WARNING: Disconnect the unit from power source
before performing any maintenance or installation in the
water or out.
DANGER: Do not operate UV bulb outside housing.
Ultraviolet radiation can be harmful to skin and eyes. To
check if the UV
bulb is operating, observe lit bulb through
holes of the upper lid.
DRIP LOOP: To prevent
accidental dripping of water
on power plug or outlet, use
the cord to create a drip loop.
Connect both power cords to
a grounded (GFCI) outlet.
1. Determine the exact place
to install lter. The shape
of your Filter System unit makes it stable and easy
to place in any pond.
2. Connect the diverter valve and ball-joint leveling
device, the telescopic tube and your choice of water
nozzle to the outlet of the pump. Turn diverter valve
into closed position.
3. Place the lter on a horizontal surface about 4” from the
bottom, away from mud and algae.
4. In order to have a good fountain spray, the bottom
surface must be horizontal and the jet must be in a
vertical position. Use the
ball-joint on the telescopic
pole to adjust it to a vertical position.
5. The lter is now ready for use. Plug in the power cord
to the pump.
(NOTE: The power cord to the UV sterilizer should only be used
when free oating algae control is required).
Maintenance
WARNING: Unplug pump and UV sterilizer before
removing unit from pond and performing and
maintenance. Maintenance is required when the height
of the water fountain or pump ow decreases. Usually,
maintenance is required every two months.
1. To Open Filter: Unscrew,
counterclockwise, the fountain
assembly, diverter valve and
tting. Unlock lter housing and
open the 2 sides. The fountain
assembly, diverter valve and
tting must be removed from
the pump prior to opening
up the lter housing.
2. To Clean Filter: Open upper lid
and remove mechanical lter
sponge. Wash sponge with
water. Do not use solvents or
detergents.
3. To Clean Pump: If necessary to remove pump, rst
remove media and UV cover. Turn the front housing
counterclockwise, extract the impeller being careful not
to lose any internal parts. Wash the parts with water and
check the wear condition by turning the impeller while
keeping the shaft rm. The impeller should turn
smoothly. Reassemble all parts paying attention to
proper placement
of all components.
4. To Clean UV Sleeve: If algae proliferate it may be
necessary to check proper functioning of the UV bulb.
If bulb is functioning, it may be necessary to clean
quartz sleeve. To do this, make sure unit is unplugged
(both pump and lamp). Remove upper lid and extract
the quartz sleeve. Use rubbing alcohol to remove
any build up of
dirt or slime.
Check that quartz
sleeve has not
been damaged
and both o-rings
are in place.
5. To Change UV Bulb: For best eciency UV bulb
should be replaced yearly. (Approx 9000 hours of use).
Unplug both pump and UV. Remove the upper lid.
Remove the bulb lid and extract the quartz sleeve and
UV bulb and replace with a new one available from your
dealer. Reassemble all parts making sure that all o-rings
in the ballast are placed correctly.
Filter Power
Cord
UV Sterilizer
Power Cord
GFCI Grounded Outlet
Drip Loop
Unscrew Fountain
Assermbly, Diverter
Valve and Fitting
Unlock Filter
Housing
Fitting
Connect a Hose
to Water Feature
if Desired
Diverter Valve
Remove Upper Lid
Quartz Sleeve
UV Bulb
Four Dierent Spray
Patterns Included
4.