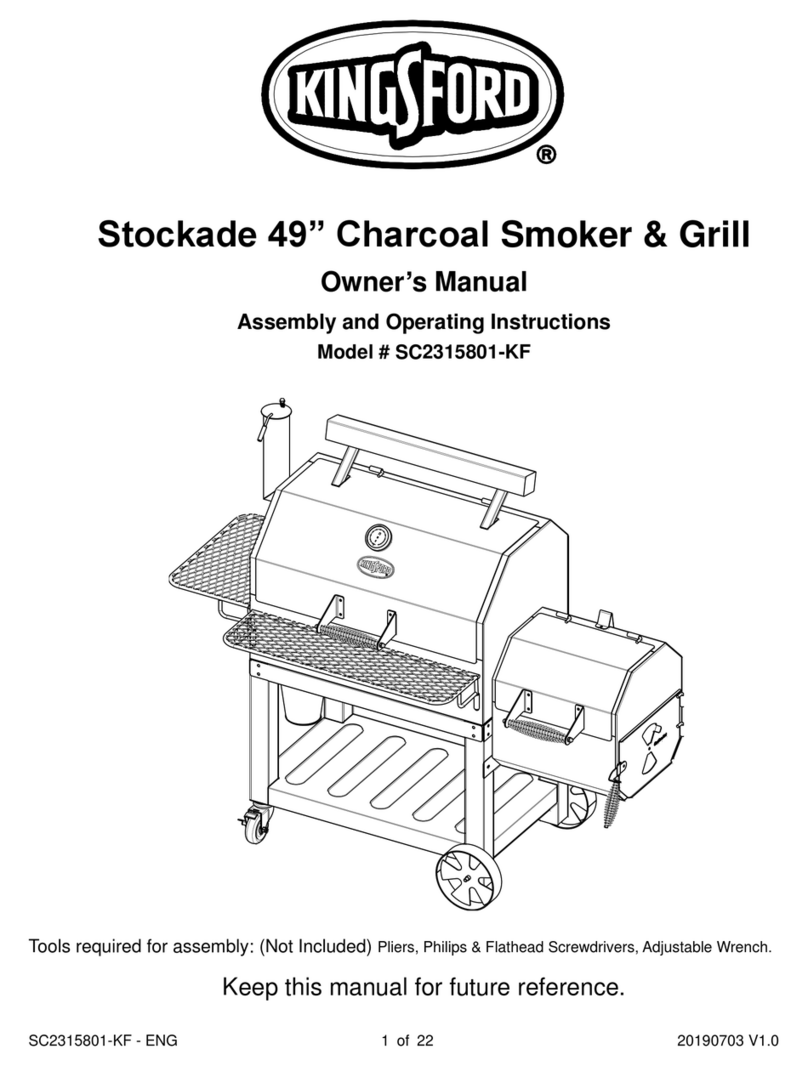
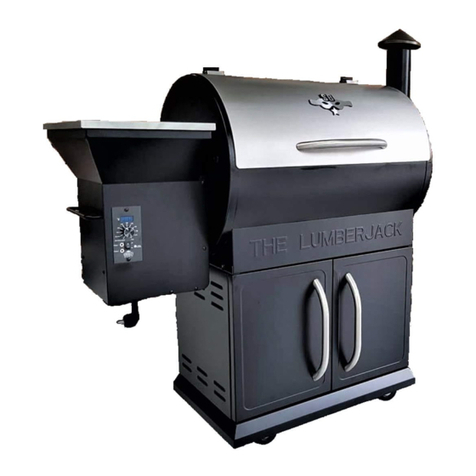
Lifestyle SRPG1093L Owner's manual

Lifestyle Big Horn Pellet Grill/BBQ Smoker
Assembly Instructions & User’s Manual
Model No.:SRPG1093L/LFS256
WARNING
PLEASE READ THIS ENTIRE MANUAL BEFORE INSTALLATION AND USE
OF THE PELLET FUEL-BURNING APPLIANCE. FAILURE TO FOLLOW
THESE INSTRUCTIONS COULD RESULT IN PROPERTY DAMAGE, BODILY
INJURY OR EVEN DEATH.
CONTACT LOCAL BUILDING OR FIRE OFFICIALS ABOUT RESTRICTIONS
AND INSTALLATION INSPECTION REQUIREMENTS IN YOUR AREA.
SAVE THESE INSTRUCTIONS.

Before proceeding, make certain that you understand the IMPORTANT INFORMATION
sections of this manual.
Failure to adhere to the safety instructions in this manual could result in a
hazardous fire.
It is the customer’s responsibility to see that the grill is properly assembled, installed, and
maintained. Failure to follow the instructions in this manual could result in bodily injury
and/or property damage.
FOR OUTDOOR USE ONLY – do not use indoors.
●
●
This grill is not intended to be installed in or on boats. It is not intended to be installed
in or on recreational vehicles. Do not use it for purposes other than intended.
This grill is not for commercial use.
Do not use this grill in extremely windy conditions.
K
Install on noncombustible floors or floors protected with noncombustible surfaces
where the protective surface has been approved for such use by the authority having
jurisdiction.
eep the grill on a hard, non-combustible, smooth and level surface.
Minimum clearance from sides, rear and top of unit to combustible material is 1 m
from the sides, rear and top of the grill.
Do not install or operate the grill under a combustible ceiling or overhang.
Do not use this grill in wet or rainy conditions. Keep it at least 3 m away from the
large body of water, such as a pond, lake, swimming pool, etc..
Do not use in an area with flammable objects, structures, or surfaces.
In case of fire, turn “OFF” the grill. Shut off the electric power, leave the fire to burn
out on its own. Do not try to extinguish the fire by water.
Parts of this grill can become very hot. Keep children or pets away from the grill when
it is in use or after use until it has cooled down.
Use only dry potholders. Moist or damp potholders on hot surfaces may cause burns
from steam. Do not use a towel or bulky cloth in place of potholders. Do not let
potholders touch hot portions of the grill or cooking grates.
To protect against electric shock, never immerse cord, plugs or electric elements in
water or in any liquid.
Never operate the grill with a damaged powder cord or plug, or after the grill has
malfunctioned or been damaged in any manner.
Keep any power cord away from any heated surfaces.
Use only extension cords with a 3 prong grounding plug, rated for the power of the
equipments, and approved for outdoor use with BS1363/A marking.
Keep the extension cord connection dry and off the ground.
●
●
●
●
●
●
●
●
●
●
●
●
●
●
●
●
●
●Only use a properly-grounded power source.
●Do not alter or remove the grounding plugs on the power cord or household outlet.
!WARNING
A MAJOR CAUSE OF FIRES IS FAILURE TO MAINTAIN REQUIRED
CLEARANCES (AIR SPACES) TO COMBUSTIBLE MATERIALS. IT IS OF
UTMOST IMPORTANCE THAT THIS PRODUCT BE INSTALLED ONLY IN
ACCORDANCE WITH THESE INSTRUCTIONS.
WARNING:
Consult your local fire offial, home association or building authority to obtain
permission or information regarding the restriction or installation requirements
within your area.
!
2

●Never move the grill while it is operating, or when it contains hot pellets or ashes.
●Always open the grill lid carefully. The heat and steam inside grill body is hot.
●Before using the grill, be sure that it has been completely assembled, and all parts
have been securely fastened and tightened.
●Unplug the grill from electric power when it is not in use. Make sure the grill is cool
before cleaning or other maintenance.
●Keep the grill covered when not in use. Keep children out of reach of the grill. Do
not clean the grill with water spray or similar.
●Check the grill periodically. Make sure that the Command Center control panel and
power cord are not abraded, worn, cut or damaged.
●Keep the grill clean.
●Do not use accessories that are not specified for use with this grill.
●Never add the pellets to the Fire Pot by hand. You could be seriously burned. If the
Pellet Hopper runs out, or the fire goes out, or let the grill completely cool and then
follow the Lighting Instructions.
●YOU MUST only use all natural wood bbq pellets, designed for burning in pellet bbq
grills. Any other type of fuel burn in this appliance will void the warranty and
safety listing.
●DO NOT use pellet fuel labeled as having additives.
●Never use gasoline, gasoline-type lantern fuel, kerosene, charcoal lighter fluid, or
similar liquids to start or ’freshen up’ a fire in this appliance. Keep all such liquids
well away from the appliance when in use.
●
Always store the wood pellets away from the heat.
●Keep wood pellets in a dry location to prevent moisture from swelling or degrading
the pellets. Keep extra pellets in a dry place.
KEEP Hopper Lid closed during operation. NEVER reach into the Hopper.
●Disposal of Ashes - Ashes should be placed in a metal container with a tight fitting lid.
The closed container of ashes should be placed on a noncombustible floor or
on the ground, well away from all combustible materials, pending final disposal. If
the ashes are disposed of by burial in soil or otherwise locally dispersed, they should
be retained in the closed container until all cinders have thoroughly cooled.
CARBON MONOXIDE (CO) HAZARD
TO PREVENT CARBON MONOXIDE POISONING, FOLLOW THESE GUIDELINES TO
PREVENT THIS COLORLESS, ODORLESS GAS FROM POISONING YOU, YOUR
FAMILY OR OTHERS:
●
●
●
●
Know the symptoms of carbon monoxide poisoning: Headaches, Dizziness, Weakness,
Nausea, Vomiting, Sleepiness, and Confusion. Carbon monoxide reduces the blood’s
ability to carry oxygen. Low blood oxygen levels can result in loss of consciousness
and death.
See a doctor if you or others develop cold or flu-like symptoms while cooking or in the
vicinity of this appliance. Carbon monoxide poisoning, which can easily be mistaken for
a cold or flu, it often detected too late.
Alcohol consumption and drug use increase the effects of carbon monoxide poisoning.
Carbon monoxide is especially toxic to mother and child during pregnancy, infants,
the elderly, smokers, and people with blood or circulatory system problems, such as
anemia, or heart disease.
WARNING:
!
3

1 2 3
4
5
6
7
8
9
10
11
12
13
14
15
19
16
17
18
20
21
22
23
24
25
26
27
28
29
30
31
32
33
4
Exploded View - A

34
35
36
37
38
39
40
41
42 43 44 45
49
48
47
46
5
Exploded View - B

Smokestack Gasket
Smokestack
Cooking Chamber
Chamber Right Bracket
Grease Bucket Bracket
Side Handle
Grease Bucket
Front Shelf Bracket R
8
9
10
11
12
Bottom Shelf13
Back Right Leg14
Front Right Leg15
Front Left Leg18
Back Left Leg19
Front Shelf20
Hopper Gasket21
Front Shelf Bracket L22
Hopper-Bottom Assembly23
Protection Guard24
Hopper-Top25
Hopper-Lid26
Flame Tamer27
Hopper Latch28
Power Cord Bracket29
Grease Tray30
Warming Rack Bracket31
Hopper-Top Gasket32
Cooking Grate33 3
2
Wagon Wheel16
Wheel Axle17
2
6
Parts List

1
1
1
1
1
34 Hopper Inner
35 Circuit Board Box
36 Rubber Ring
37 Hopper-Bottom
38 Rubber Sealer
39 Digital Controller
40 Controller Knob
41 Hopper Bottom Panel
42 Auger Motor
43 Auger
44
1
1
1Blower Fan
45 1Auger Housing
46 1Fire Pot
47 1Hot Rod
48 1Power Cord
49 1Grill Probe
Part # QtyDescription Picture QtyDescription PicturePart #
7
1
1
Parts List

Hardware # Description
M6 x 12 Bolt 37
4
Picture Qty
M6 Nut 34
BB
M6 x 55 Bolt
AA
CC
DD M12 Flat Washer 2
EE
M4 x 8 Bolt 1
FF
M5 x 10 Bolt 8
GG
M12 Lock Nut 2HH
Tools Required
Phillips Head Screwdriver
(Not included)
Adjustable Wrench
(Not included)
M4 Cap Nut 1
8
Hardware

Step 1
Assembly Instructions
Step 2 Step 2
Step 1
Remove the lid from the cooking chamber
by removing bolt and washer and sliding
the hinge pins on the lid out of the hinge
holes on the cooking chamber. Set bolt and
washer aside for Step17.
Choose a suitable, clear area for assembly. Ask a friend for help as some parts are heavy or difficult for one
person to hold and assemble. To help protect the smoker’s finish, cover the area with cardboard.
Hardware Used
M6 Nut
M6 x 12 Bolt 16pcs
16pcs
BB
CC
BB
18
19
14
7
15
CC
9
With the help of a friend, place the cooking
chamber (7 ) on its end. Orient the cooking
chamber (7 ) so the hopper side faces up.
Make
sure that another person is holding the
cooking
chamber (7 ) during the assembly
process. Hopper side
Find legs labeled "Front Right"(15 ), "Front
Left"
(18),
"Back Right"(14 ) and "Back Left"
(19 ). Attach
the
legs
to its place of the
cooking
chamber
(7)one by one
using
(16)
M6
x
12
bolts
(BB)
and
(16)
M6
nuts
(CC).
NOTE:
Leave
hardware
loose
for
now.

Assembly Instructions
3petS
Step 3
Step 4
Step
4
Attach bottom shelf (13) to legs with (4) M6 x 55
bolts (AA) and (4) M6 nuts (CC) as illustrated. 18
Hardware Used
M6 Nut
M6 x 55 Bolt 4pcs
4pcs
AA
CC
18
17
15
AA
CC
15
19
13
14
14
19
HH DD
Hardware Used
M12 Nut
M12 Flat Washer 2pcs
2pcs
DD
HH
10
Tighten all leg hardware.
Insert the wheel axle (17) through the bottom holes
in the "Front Left" (18) and "Back Left" (19) legs.
Attach the wagon wheels (16) onto the wheel axle
(17) using (2) M12 flat washers (DD) and (2) M12
lock nuts (HH) as figure shown. Do not over tighten.
16

Assembly Instructions
Step 6
Step 5
Step 6
Step 5
With assistance, turn the cooking chamber
assembly to be horizontal.
Attach chamber right bracket (8) onto cooking
chamber right endcap inside with (2) M6 x 12
bolts (BB) and (2) M6 nuts (CC).
Fix grease bucket bracket (9) on the square tube
end of chamber right bracket (8) with (1) M6 x 12
bolt (BB) as illustrated.
Attach smokestack (6) and smokestack gasket
(5) to chamber right endcap with (4) M6 x 12
bolts (BB) and (4) M6 nuts (CC) as illustrated.
Attach side handle (10) to chamber right
endcap with (4) M6 x 12 bolts (BB) and (4)
M6 nuts (CC) as illustrated.
Hardware Used
M6 Nut
M6 x 12 Bolt 3pcs
2pcs
BB
CC
Hardware Used
M6 Nut
M6 x 12 Bolt 8pcs
8pcs
BB
CC
8
6
BB
5
9
BB
CC
10
CC
11

Assembly Instructions
Step 8
Step 7
Step 7
Install protection guard (24) into the hopper
assembly with (2) M5 x 10 bolts (GG).
Attach power cord bracket (29) to the back of the
hopper assembly with (2) M5 x 10 bolts (GG) as
illustrated.
Connect hopper-top (25) to hopper-bottom assembly
(23) with (4) M5 x 10 bolts (GG) as illustrated.
Note: Insert all 4 bolts before tightening completely.
Step 8
Hardware Used
M5 x 10 Bolt 4pcs
GG
Hardware Used
M5 x 10 Bolt 4pcs
GG
25
GG
23
24
29
GG
12

Step 9
Step 10 Step 10
Step 9
Slide hopper gasket (21) over auger housing.
Then place the pellet hopper assembly onto the
cooking chamber (7) by inserting the auger
housing through the left endcap. While holding
the hopper assembly away from the endcap,
insert grill probe (49) through the endcap wall.
The grill probe (49) should be turned an angle
as illustrated. Tighten the grill probe (49) into
the place with (1) M4 x 8 bolts (FF) and (1) M4
cap nut (EE) as illustrated.
Note:Make sure grill probe tip end is facing towards
the chamber back and up when installing.
Tighten the hopper assembly to the left endcap of
cooking chamber (7) with (6) M6 x 12 bolts (BB) as
illustrated.
Note: Step must be performed by two adults.
Hardware Used
M4 x 8 bolt
M4 Cap Nut 1pc
1pc
EE
FF
Hardware Used
M6 x 12 Bolt 6pcs
BB
49
7
7
21
EE
FF
Hopper Assembly
Tip points to back and up of grill
BB
21
13
Assembly Instructions
BACK

Assembly Instructions
Step 11
Step 11
Step 12
Step 12
Attach front shelf bracket L (22) to the front of
cooking chamber (7) near the left leg with (2)
M6 x 12 bolts (BB) and (2) M6 Nuts (CC).
Connect front shelf (20) to front shelf bracket R
(12) by inserting the shelf hooks through the
bracket. Then insert the left side of the shelf
through the left bracket (22) on the cooking
chamber (7).
Attach front shelf bracket R (12) to the front
of the cooking chamber (7) with (2) M6 x 12
bolts (BB) and (2) M6 nuts (CC).
See illustration for proper orientation.
Place flamer tamer (27) over the fire pot inside the
cooking chamber. It should rest in place as
illustrated.
Hardware Used
M6 Nut
M6 x 12 Bolt 4pcs
4pcs
BB
CC
14
Tighten all hardware.
12
12
22
7
20
CC
BB
Position Slot
27

Assembly Instructions
Step 13
Step 14
Step 14
Place cooking grates (33) onto cooking chamber
grid brackets/rails as illustrated.
15
Step 13
Place grease tray (30) on the chamber right side
bracket and chamber left side bracket as
illustrated.
Chamber Left Side Bracket
Tray should fit into
chamber left bracket
Left Side Right Side
30
30
33
33

Assembly Instructions
Step 16
Step 15
Step 15
Step 16
Insert warming rack brackets (31) into the
mounting tabs found on cooking chamber
endcaps.
Place warming rack (3) onto warning rack
brackets (31) so that it securely rests in
bracket.
31
31
3
31
16

Assembly Instructions
Step 17
Step 17
Reconnect cooking chamber lid (2) by sliding
the hinge pins into the hinges. Secure it with
the washer and bolt removed in Step 1.
Screw temp gauge (1) fully into the lid (2).
Adjust the orientation and lock the gauge into
position using the pre-attach nut.
Screw chimney cap (4) to smokestack (6) by
clockwised.
4
1
2
6
17
Hang grease bucket (11) from the square
tube end of the chamber right side bracket as
illustrated.
11

CONTROLLER FUNCTIONS
Temperatures table in Fahrenheit and Centigrade
The maximum temperature that the pellet grill can achieve is influenced by the ambient temperature. In
colder weather, the grill may not be able to achieve the highest set temperature and it will continually feed
pellets into the fire pot attempting to reach the set temperature.
NOTE:
There might be some discrepancy between the digital temperature displayed and the temperature
observed on the analog lid gauge. Some variance is normal due to the location and calibration differences.
When changing the operating temperature, allow up to 15 minutes for the temperature to stabilize.
If lowering the temperature, it is best to leave the open lid for a few minutes to help decrease quicker.
SMOKE PRESET
COOK TEMP. SETTING
ACTUAL TEMP.
LCD SCREEN
ADJUSTMENT DIAL PIN
TEMP. CONTROL
Displays Grill Temperature, Smoke
Settings, igniter, temperature status
and error.
Turn the pin to change the smoke
preset with the range of P0 to P7.
Turn the control knob to
change the temperature
Centigrade ℃Fahrenheit ℉
setpoint.
18
Controller Instructions
95
110
120
150
175
205
230
245
200
230
250
300
350
400
450
475
Smoke
Off
245
230
205
175
150
120
110
95
High℃
“P” SET

PRECAUTIONS:
Read and follow all warnings on Page 2 and 3 of this manual, before operating the grill.
For the first time operation of the grill, please follow the “SET UP PROCEDURE” to ensure the
auger tube is fully loaded with pellets. For subsequent operation of the grill, please follow the
“LIGHTING INSTRUCTIONS” to ignite the grill.
SETUP PROCEDURE
!
!
Never add pellets to a hot fire pot by hand. You could be seriously burned. If the pellets run out
or the fire goes out, wait until the grill cools down, and then follow the “SET UP PROCEDURE”
to restart.
Never put water in the fire pot as this could cause the auger to jam.
Never use water to extinguish flare-ups. Close the lid and turn off the grill and wait for the fire to
extinguish itself.
WARNING:
!
Never use any flammable liquids, such as gasoline, gasoline-type lantern fuel, kerosene,
charcoal lighter fluid, or similar liquids, to start or freshen-up the fire! Keep all such liquids
well away from the grill while it is in use.
PLACE THE GRILL OUTDOORS ON A HARD, LEVEL, NON-COMBUSTIBLE SURFACE AWAY FROM ROOF,
OVERHANG OR ANY COMBUSTIBLE MATERIAL. NEVER USE ON WOODEN OR OTHER SURFACES THAT COULD
BURN. PLACE THE GRILL AWAY FROM OPEN WINDOWS OR DOORS TO PREVENT SMOKE FROM ENTERING
YOUR HOUSE. IN WINDY WEATHER OR RAINY WEATHER, PLACE THE GRILL IN AN OUTDOOR AREA THAT IS
PROTECTED FROM THE WIND AND RAIN.
READ ALL SAFETY WARNINGS AND INSTRUCTIONS CAREFULLY BEFORE OPERATING YOUR GRILL.
NOTE: During shipping or moving around on your deck, some components may have shifted
from position. A complete visual inspection of the grill assembly is required. Follow these
initial Setup Procedures to ensure proper and safe operation.
Follow this procedure before the first use and after every other use, or after a long cook time.
This should ONLY be performed when the grill is cool, before being used.
Step 1
Open the grill lid; remove the warming rack and cooking grates.
Step 2
Remove the grease tray and clean off any excess food drippings or grease build-up.
Step 4
Remove the flame tamer. Inspect the bottom of grill body and clean out pellet ash. Also inspect
and clean out fire pot. Ensure there are no foreign objects in the fire pot and that the ignitor is
clean and clear of debris.
Step 3
Inspect and clean chamber right bracket. Ensure the drain tube is not blocked.
NOTE: Line the bottom of the cooking chamber with heavy-duty aluminum foil. This will
help prevent flare-ups as well as make cleaning easier.
Step 5
Open the hopper lid and check for any foreign objects. Fill the hopper with your choice of wood
pellet fuel made for barbecue and close the hopper lid.
19
Preparation for Use & Lighting Instructions

Re-install the flame tamer, grease tray, cooking grates and warming rack. Close the grill lid.
The grill is now ready for use. Follow the LIGHTING INSTRUCTIONS to continue.
Step 6
Step 9
Step 8
LIGHTING INSTRUCTIONS
NOTE: If the grill fails to light, inspect the fire pot for the presence of pellets or build-up of pellet
ash. If the fire pot contains too much ash, clean it out using a shop vacuum. Also be certain the
fan blower motor and auger are working by observing these parts after starting the grill. If they
are working, turn OFF the power and reassemble all components.
!WARNING: Never inspect or perform maintenance on a hot grill. Allow to properly
cool before inspecting or cleaning your grill.
1. With the grill properly setup and located for operation, plug the power cord into a 230V grounded
electrical outlet. (Refer to SETUP PROCEDURE for more information.)
2. Open the grill lid. Ensure all components are properly installed and ready for use.
3. Ensure the hopper does not contain any foreign objects and is properly filled with barbecue wood
pellets.
5. Close the grill lid.
6. Select the desired cooking temprature or smoking preset. (Refer to COOKING INSTRUCTIONS
for more operating information.)
AUTOMATIC METHOD
4. Turn the control knob to 'Smoke' in temperature controller. Listen for operation of fan and
auger motors. Within 5 minutes smoke should become visible. If smoke does not initially appear,
turn OFF power and wait 5 minutes before attempting to relight. (Refer to the troubleshooting
section of the manual for more information.)
Turn the control knob to ‘High' in temperature controller.
Observe the auger turning as pellets fill the tube. Once pellets reach the fire pot, turn OFF the
grill. DO NOT reach into the fire pot.
!WARNING:
The pellet hopper must be properly setup with pellets in the auger tube prior to lighting the grill.
Never add or use wood chips or particles in the hopper. Use only barbecue grade pellets.
Use only extension cords with a 3 prong grounding plug rated for power of the equipment and
approved for outdoor use with BS1363/A marking.
Do not break the ground end off the cord or use a non-grounded outlet or extension cord.
Never immerse cord, plugs or electric elements in water or any liquid.
Never operate the grill with a damaged power cord or plug, or after the grill has malfunctioned
or been damaged in any manner.
Keep any power cord away from any heated surfaces.
Plug the power cord into a properly grounded 230V electrical outlet. DO NOT use if the ground
tip has been removed from the power cord. DO NOT use an extension cord or ungrounded outlet.
Step 7
20
NOTE: We recommend setting the Control Knob to ”High” for 10 to 15 minutes to preheat the grill.
Preparation for Use & Lighting Instructions
This manual suits for next models
1
Table of contents