manuals.online logo
Brands
  1. Home
  2. •
  3. Brands
  4. •
  5. Lifetime
  6. •
  7. Outdoor Storage
  8. •
  9. Lifetime 60283 User manual

Lifetime 60283 User manual

Other manuals for 60283

1

Other Lifetime Outdoor Storage manuals

Lifetime 60375 User manual

Lifetime

Lifetime 60375 User manual

Lifetime 6418 User manual

Lifetime

Lifetime 6418 User manual

Lifetime 60374 User manual

Lifetime

Lifetime 60374 User manual

Lifetime 60310 User manual

Lifetime

Lifetime 60310 User manual

Lifetime 60318 User manual

Lifetime

Lifetime 60318 User manual

Lifetime 60296 User manual

Lifetime

Lifetime 60296 User manual

Lifetime 60040 User manual

Lifetime

Lifetime 60040 User manual

Lifetime 60013 User manual

Lifetime

Lifetime 60013 User manual

Lifetime 60387 User manual

Lifetime

Lifetime 60387 User manual

Lifetime 60020 User manual

Lifetime

Lifetime 60020 User manual

Lifetime 60324 User manual

Lifetime

Lifetime 60324 User manual

Lifetime 60138 User manual

Lifetime

Lifetime 60138 User manual

Lifetime 60356 User manual

Lifetime

Lifetime 60356 User manual

Lifetime 60280 User manual

Lifetime

Lifetime 60280 User manual

Lifetime 60001 User manual

Lifetime

Lifetime 60001 User manual

Lifetime 6422 User manual

Lifetime

Lifetime 6422 User manual

Lifetime 60190 User manual

Lifetime

Lifetime 60190 User manual

Lifetime 60393 User manual

Lifetime

Lifetime 60393 User manual

Lifetime 60120 User manual

Lifetime

Lifetime 60120 User manual

Lifetime 125 Quick start guide

Lifetime

Lifetime 125 Quick start guide

Lifetime 60371 User manual

Lifetime

Lifetime 60371 User manual

Lifetime 6406 User manual

Lifetime

Lifetime 6406 User manual

Lifetime 6413 User manual

Lifetime

Lifetime 6413 User manual

Lifetime 60065 User manual

Lifetime

Lifetime 60065 User manual

Popular Outdoor Storage manuals by other brands

LIVING AND HOME 0735940285711 user guide

LIVING AND HOME

LIVING AND HOME 0735940285711 user guide

USP DURAMAX 10 Ft x 8 Ft StoreMax Plus owner's manual

USP

USP DURAMAX 10 Ft x 8 Ft StoreMax Plus owner's manual

rollaway container ARPCA24 manual

rollaway container

rollaway container ARPCA24 manual

Duratuf GL105 Assembly instructions

Duratuf

Duratuf GL105 Assembly instructions

Viking SD5300SS Use & installation guide

Viking

Viking SD5300SS Use & installation guide

USP DURAMAX Apex Pro 10.5 Ft x 8 Ft 40116 owner's manual

USP

USP DURAMAX Apex Pro 10.5 Ft x 8 Ft 40116 owner's manual

ModuLaro Lojo WC202200 manual

ModuLaro

ModuLaro Lojo WC202200 manual

Outdoor Life Products FP2030 F Assembly instructions

Outdoor Life Products

Outdoor Life Products FP2030 F Assembly instructions

Royalcraft Faro 295L Storage Box Assembly instructions

Royalcraft

Royalcraft Faro 295L Storage Box Assembly instructions

TYGO Nyland Building Instruction

TYGO

TYGO Nyland Building Instruction

Riverlea Duratuf KIWI KS3 Assembly instructions

Riverlea

Riverlea Duratuf KIWI KS3 Assembly instructions

Rubbermaid 5L45 manual

Rubbermaid

Rubbermaid 5L45 manual

garofalo TUSCANY EVO user manual

garofalo

garofalo TUSCANY EVO user manual

OLT GS84D-FJ-Plywood Assembly manual

OLT

OLT GS84D-FJ-Plywood Assembly manual

Palram CANOPIA RUBICON 6x10 How to assemble

Palram

Palram CANOPIA RUBICON 6x10 How to assemble

Duratuf Havelock Assembly instructions

Duratuf

Duratuf Havelock Assembly instructions

Keter DUOTECH HIGH-STORE+ user manual

Keter

Keter DUOTECH HIGH-STORE+ user manual

Palram CANOPIA RUBICON 6x5/2x1.5 How to assemble

Palram

Palram CANOPIA RUBICON 6x5/2x1.5 How to assemble

manuals.online logo
manuals.online logoBrands
  • About & Mission
  • Contact us
  • Privacy Policy
  • Terms and Conditions

Copyright 2025 Manuals.Online. All Rights Reserved.

Scan the code, or visit go.lifetime.com/adironchair
OR WATCH THE HOW-TO ON YOUTUBE
3D ANIMATION
OF THE FULL ASSEMBLY
WATCH
SCAN THE
CODE OR SEARCH
1201119
YouTube®and the YouTube logo are trademarks of Google, LLC.
Icon Legend...............................4
Warnings & Notices.....................5
Chair Assembly...........................6
Cleaning & Care........................11
Registration............................12
Warranty.............................13
TOOLS REQUIRED TABLE OF CONTENTS
CONTACT LIFETIME CUSTOMER SERVICE:
Call: 1-800-225-3865
7:00 am–5:00 pm (Monday–Friday) MST
and 9:00 am–1:00 pm Saturday MST
Live Chat: www.lifetime.com
(click on “LIVE CHAT” tab)
QUESTIONS?
MODEL# AND PRODUCT ID (you will need both when contacting us)
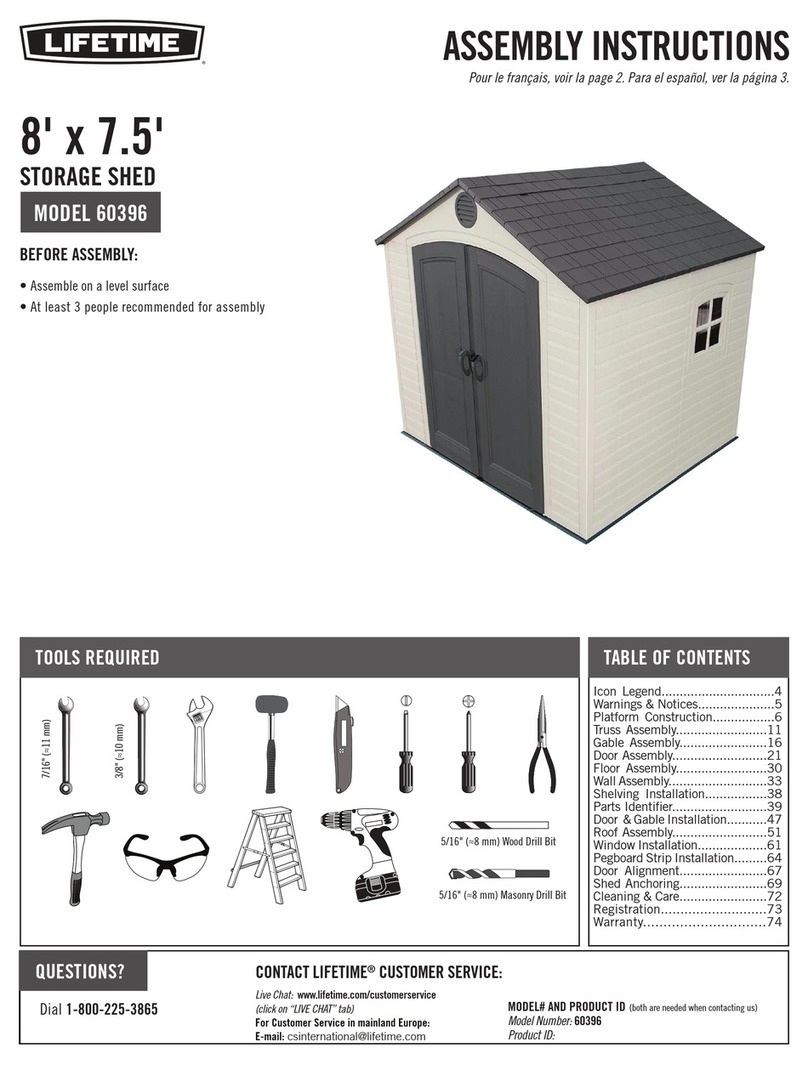
Model Number: 60283
Product ID:
Pour le français, voir la page 2. Para el español, ver la página 3.
ASSEMBLY INSTRUCTIONS
MODEL 60283
CWT (x1)
(Included)
FYE (x1)
(Included)
(x2)
(x1)
BEFORE ASSEMBLY:
• Assemble on a level surface
• At least 2 people recommended for assembly
ADIRONDACK
CHAIR
For Customer Service in Mainland Europe and the United Kingdom,
E-mail:[email protected]
COPY
2
Scanner le code, ou visiter go.lifetime.com/adironchair
OU REGARDER LA VIDÉO SUR YOUTUBE
ANIMATION 3D
DE L'ASSEMBLAGE COMPLET
REGARDER
SCANNER LE
CODE OU CHERCHER
1201119
YouTube®et le logotype YouTube sont des marques déposées de Google, LLC.
Légende des icônes.....................4
Avertissements et avis.................5
Assemblage de la chaise...............6
Nettoyage et entretien...............11
Enregistrement......................12
Garantie.................................14
OUTILS REQUIS SOMMAIRE
CONTACTER LES SERVICES À LA CLIENTÈLE LIFETIME®:
Composer le 1-800-225-3865
Du lundi au vendredi 7 h – 17 h (HNR)
et samedi 9 h – 13 h (HNR)
t’Chat en direct: www.lifetime.com
(cliquer sur la languette « LIVE CHAT »)
QUESTIONS ?
N° DE MODÈLE ET RÉFÉRENCE DU PRODUIT
(il faut avoir les deux au moment de nous contacter)
N° de modèle : 60283
Référence du produit :
For English, see page 1. Para el español, ver la página 3.
INSTRUCTIONS D’ASSEMBLAGE
MODÈLE n° 60283
CWT (x1)
(Incluse)
FYE (x1)
(Incluse)
(x2)
(x1)
AVANT L’ASSEMBLAGE :
• Assembler sur une surface de niveau
• Nous recommendons, au moins, 2 adultes pour
l’assemblage
CHAISE DU STYLE
ADIRONDACK
Pour nos services à la clientèle du continent européen et au Royaume-Uni,
É-mail : [email protected]
COPY
3
Escanear el código, o visitar go.lifetime.com/adironchair
O MIRAR EL VIDEO EN YOUTUBE
LA ANIMACIÓN 3D
DEL ENSAMBLAJE COMPLETO
MIRAR
ESCANEAR EL
CÓDIGO O BUSCAR
1201119
YouTube®y el logotipo YouTube son marcas registradas de Google, LLC.
Leyenda de íconos......................4
Advertencias y avisos...................5
Ensamble de la silla....................6
Limpieza y cuidado...................11
Registro.............................12
Garantía................................15
INSTRUMENTAL REQUERIDO ÍNDICE
PÓNGASE EN CONTACTO CON LOS SERVICIOS DE CLIENTES LIFETIME®:
Llamar : 1-800-225-3865
De lunes hasta viernes 7:00 h–17:00 h (MST)
y sábado 9:00 h–13:00 h (MST)
Chat en vivo: www.lifetime.com
(cliquear en la lengüeta «LIVE CHAT»)
¿PREGUNTAS?
MODEL E ID DEL PRODUCTO (se necesitan los dos al contactarnos)
Número de modelo: 60283
ID del producto:
For English, see page 1. Pour le français, voir la page 2.
INSTRUCCIONES DE ENSAMBLE
MODEL #60091
MODELO n° 60283
CWT (x1)
(Incluida)
FYE (x1)
(Incluida)
(x2)
(x1)
ANTES DEL ENSAMBLE:
• Ensamblar sobre una superficie nivelada
• Recomendamos, al menos, 2 adultos para el ensamble
SILLA DE ESTILO
ADIRONDACK
Para nuestros servicios a clientes en el continente europeo y el Reino Unido,
correo eléctronico: [email protected]
COPY
4
CHAIR ASSEMBLY / ASSEMBLAGE DE LA CHAISE / ENSAMBLAJE DE LA SILLA
1
• Indicates the parts/no parts required for a section.
• Indique les pièces à utiliser/qu’aucone pièce n’est requise pour une section.
• Indica las piezas que se usarán/que no necesitan en una sección.
• Indicates special heed should be taken when reading.
• Indique qu’une attention spéciale doit être portée à la lecture.
• Indica que uno debe prestar atención al leer.
• Indicates the hardware to be used for a section.
• Indique la quincaillerie à utiliser pour une section.
• Indica los artículos de ferretería que se usarán para una sección.
• Indicates the tools to be used for a section.
• Indique les outils à utiliser pour une section.
• Indica las herramientas que se utilizarán para una sección.
• Indicates no hardware required for a specific page or section.
• Indique qu’aucun matériel n’est requis pour une page précise.
• Indica que no se necesitan los artículos de ferretería para una página específica.
• Indicates to use/not use an electric drill for a specific step.
• Indique quand utiliser une/que ne pas utiliser de perceuse électrique pour une étape précise.
• Indica la utilización de/que no utilizar un taladro eléctrico para un paso específico.
ICON LEGEND / LÉGENDE DES ICÔNES / SIGNIFICADO DE LOS ÍCONOS
• These nuts are centerlock nuts. They are designed to be tight; therefore, they will be harder to tighten. Tighten until flush
with the metal or plastic.
• Ces écrous sont des écrous de blocage central. Ils sont conçus pour être serrés; de ce fait, ils seront plus difficiles à
resserrer. Serrer jusqu’à ce qu’ils soient au ras du métal ou du plastique.
• Estas tuercas son tuercas de bloqueo central. Están diseñadas para estar apretadas; por lo tanto, serán más difíciles de
apretar. Apriételas hasta que estén al ras del metal o plástico.
1201119_B 12/02/2021
5
CHAIR ASSEMBLY / ASSEMBLAGE DE LA CHAISE / ENSAMBLAJE DE LA SILLA
1
English:
•Failure to follow these warnings may result in serious injury or property damage and will void warranty.
• To ensure safety, do not attempt to assemble this product without following the instructions carefully.
• Assemble the product on level ground.
• Be aware that plastic pieces can be damaged by overtightening the screws. To avoid damage, we strongly recommend
the use of a drill with a low torque setting. A straight Allen wrench (FYE) (included) may also be used.
• Two capable adults are required for assembly.
• All who participate in the assembly process should wear safety glasses throughout the assembly.
• Do not use or store hot objects near the product.
• Proper and complete assembly are essential to reduce the risk of accident or injury.
• If you desire to paint the chair, you may paint it before or after assembly. Please use a solvent-based paint.
• Most injuries are caused by misuse and/or not following instructions. Use caution when using this product.
Le français :
• Un manquement de suivre ces avertissements peut entraîner des blessures graves ou des dommages à la propriété et annulera la garantie.
• Afin d’assurer la sécurité, ne pas tenter d’assembler ce produit sans suivre les instructions avec attention.
• Assembler le produit sur une surface nivelée.
• Être conscient que les pièces de plastique peuvent être endommagées en serrant trop les vis. Afin d’éviter les dommages,
nous recommandons fortement l’utilisation d’une perceuse à faible couple. Une clé Allen droite (FYE) (incluse) peut aussi être
utilisée.
• Deux adultes en bonne condition physique sont requis pour assembler ce produit.
• Tout ceux qui participent au processus de l’assemblage doivent porter des lunettes de sécurité tout au long de
l’assemblage.
• Ne pas utiliser ou entreposer d’objet très chaud près de ce produit.
• Un bon assemblage complet est nécessaire pour réduire le risque d’accident ou de blessure.
• Pour peindre la chaise, peindre-la avant ou après le montage. Veiller à utiliser une peinture à base de solvant.
• La majorité des blessures sont causées par une mauvaise utilisation et/ou le non suivi des instructions. Être prudent lors de l’utilisation de
ce produit.
El español:
• El incumplimiento de seguir estas advertencias puede resultar en lesiones graves o daño a la propiedad y anulará la garantía.
• Para asegurar la seguridad, no intentar armar este producto sin seguir detenidamente las instrucciones.
• Ensamblar el producto sobre una superficie nivelada.
• Es posible endañar las piezas de plástico por apretar los tornillos. Para evitar dañar el plástico, recomendamos el uso de
un taladro eléctrico de baja potencia. Se puede usar también una llave Allen recta (FYE) (incluida).
• Dos adultos competentes son requeridos para ensamblar el producto.
• Todos los que participan en el ensamble del producto deben llevar gafas de seguridad a lo largo del ensamble.
• No usar ni almacenar objetos calientes cerca el producto.
• El armado propio y completo son esenciales para reducir el riesgo de accidentes y lesiones.
• Para pintar la silla, se lo puede hacer antes o después del ensamble. Darse cuenta de usar una pintura a base de
solvente.
• La mayoría de las lesiones son causadas por el uso erróneo y/o el incumplimiento de seguir las instrucciones. Tener cuidado al usar este
producto.
WARNINGS & NOTICES / AVERTISSEMENTS ET AVIS / ADVERTENCIAS Y AVISOS
6
CHAIR ASSEMBLY / ASSEMBLAGE DE LA CHAISE / ENSAMBLAJE DE LA SILLA
1
HARDWARE BAG / SAC DE QUINCAILLERIE / BOLSA DE HERRAJE
PLASTIC PARTS / PIÈCES EN PLASTIQUE / PIEZAS DE PLÁSTICO
CWD (x1)
CWG (x1)CWF (x1)
CWE (x1)
CWQ (x1)
CWI (x1)
CWP (x1)
CWH (x1)
CWJ (x1)
CWK (x1)
CXX (x1)
FMQ
TOOLS AND HARDWARE REQUIRED / OUTILS ET QUINCAILLERIE REQUIS / INSTRUMENTAL Y HERRAJE REQUERIDOS
7
XSECTION 1 (CONTINUED) / SECTION 1 (SUITE) / SECCIÓN 1 (CONTINUACIÓN)
CWP
CWE
CWQ
FMO
FMO
FMO
FMO
FMO
FMO
FMO (x6)
1.1 • Attach the two Outer Back Rest Panels (CWP & CWQ) to the Back Rest (CWE) using six (6) Screws (FMO). Tighten firmly, but do
not overtighten.
• Attachez les deux panneaux externs du dossier (CWP & CWQ) au dossier (CWE) à l’aide de six (6) vis (FMO). Serrez bien, mais
ne les serrez pas excessivement.
• Sujete los dos paneles externos del respaldo (CWP
& CWQ) al respaldo (CWE) usando seis (6) tornillos
(FMO). Apriete bien, mas no los apriete demasiado.
LIFETIME©
• In case of problems with this section, follow the code below to view a video on the assembly in this section.
• En cas d’avoir des problèmes avec cette section, suivre le code en bas pour voir un vidéo sur l’assemblage dans cette section.
• En caso de tener problemas con esta sección, seguir el código debajo para ver un video sobre el ensamble en esta section.
CWT (x1)
or, ou, o
FYE (x1)
http://go.lifetime.com/adironchair
TOOLS AND HARDWARE REQUIRED / OUTILS ET QUINCAILLERIE REQUIS / INSTRUMENTAL Y HERRAJE REQUERIDOS
8
XSECTION 1 (CONTINUED) / SECTION 1 (SUITE) / SECCIÓN 1 (CONTINUACIÓN)
FMO
FMO
CXX
CWJ
CWK
FMO (x8)
1.2
1.3 • Attach the Panel (CXX) to the
Backrest Supports (CWJ & CWK) using
four (4) Screws (FMO).
• Attachez le panneau (CXX) aux
supports du dossier (CWJ et CWK) à
l’aide de quatre (4) vis (FMO).
• Sujete el panel (CXX) a los Soportes
del respaldo (CWJ y CWK) usando
cuatro (4) tornillos (FMO).
FMO
FMO
CWD
• Attach the Back Rest (CWE) to the Seat (CWD)
using four (4) Screws (FMO). Do not completely
tighten any Screw until instructed.
• Attachez le dossier (CWE) au siège (CWD)
à l’aide de quatre (4) vis (FMO). Ne serrez pas
complètement les vis jusqu’à ce qu’on vous demande
de le faire.
• Sujete el respaldo (CWE) al asiento (CWD)
usando cuatro (4) tornillos (FMO). No apriete por
completo los tornillos hasta se le indique.
CWT (x1)
or, ou, o
FYE (x1)
TOOLS AND HARDWARE REQUIRED / OUTILS ET QUINCAILLERIE REQUIS / INSTRUMENTAL Y HERRAJE REQUERIDOS
9
XSECTION 1 (CONTINUED) / SECTION 1 (SUITE) / SECCIÓN 1 (CONTINUACIÓN)
FMO (x5)
CWG
FMO (x4)
CWI
FMO (x21)
1.4
1.5 1.6
• Attach the Right Front Leg (CWG) to the Seat using
five (5) Screws (FMO).
• Attachez le pied avant droit (CWG) au siège à l’aide
de cinq (5) vis (FMO).
• Sujete la pata delantera derecha (CWG) al asiento
usando cinco (5) tornillos (FMO).
• Attach the Right Arm Rest (CWI) to the Right Front
Leg using four (4) Screws (FMO).
• Attachez l’accoudoir droit (CWI) au pied avant droit
à l’aide de quatre (4) vis (FMO).
• Sujete el reposabrazos derecho (CWI) a la pata
delantera derecha usando cuatro (4) tornillos (FMO).
FMO
FMO
FMO
FMO
• Attach the Backrest Supports to the Backrest and
Seat using twelve (12) Screws (FMO). Do not completely
tighten any Screw until instructed.
• Attachez les supports du dossier au dossier à l’aide
de douze (12) vis (FMO). Ne serrez pas complètement les vis
jusqu’à ce qu’on vous demande de le faire.
• Sujete los Soportes del respaldo al respaldo y el
asiento usando doce (12) tornillos (FMO). No apriete por
completo los tornillos hasta se le indique.
CWT (x1)
or, ou, o
FYE (x1)
TOOLS AND HARDWARE REQUIRED / OUTILS ET QUINCAILLERIE REQUIS / INSTRUMENTAL Y HERRAJE REQUERIDOS
10
XSECTION 1 (CONTINUED) / SECTION 1 (SUITE) / SECCIÓN 1 (CONTINUACIÓN)
FMP (x4)
FMO (x9)
FMP
FMP FMP
FMP
X
!
1.7
1.8 • Attach the Armrests to the Backrest Supports
using four (4) Screws (FMP). Tighten all Screws now.
• Attachez les accoudoirs aux supports du dossier
à l’aide de quatre (4) vis (FMP). Serrez bien tous les
vis maintenant.
• Sujete los reposabrazos a los soportes del
respaldo usando cuatro (4) tornillos (FMP). Apriete
todos los tornillos ahora.
• Repeat steps 1.5–1.6 for the Left Front Leg (CWF) and Left Armrest
(CWH).
• Répétez les étapes 1.5 – 1.6 pour le pied avant gauche (CWF) et
l’accoudoir gauche (CWH).
• Repita los pasos 1.5–1.6 para la pata delantera izquierda (CWF) y el
reposabrazos izquierdo (CWH).
CWT (x1)
or, ou, o
FYE (x1)