manuals.online logo
Brands
  1. Home
  2. •
  3. Brands
  4. •
  5. Lifetime
  6. •
  7. Storage
  8. •
  9. Lifetime 619885 User manual

Lifetime 619885 User manual

Lifetime’s Assembly Experts offer quick responses and great customer service.
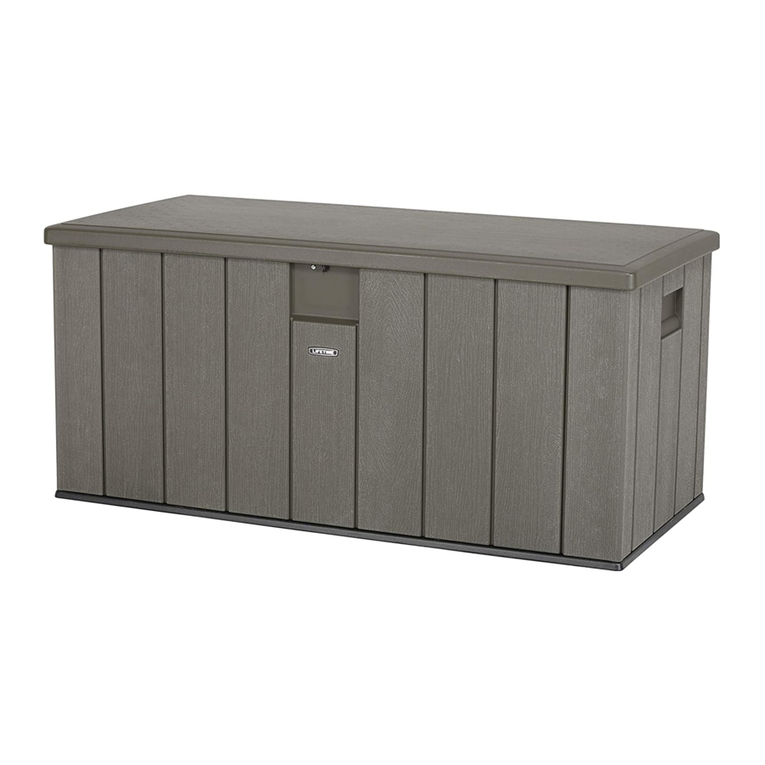
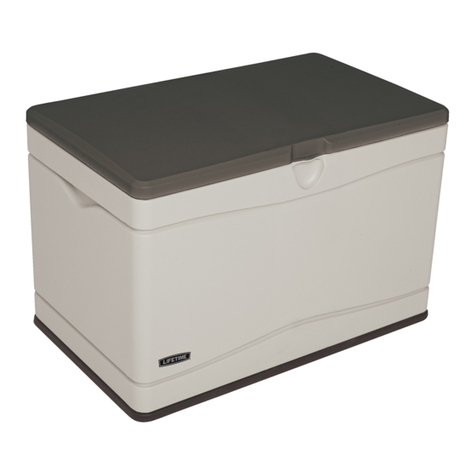
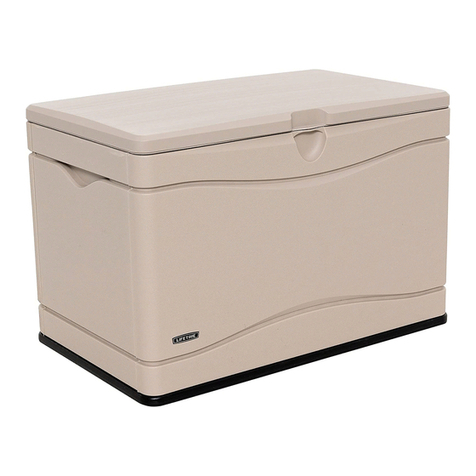
116-GALLON
DECK BOX
Call: 1-800-225-3865
7:00 am - 5:00 pm (Monday - Friday) MST
and 9:00 am - 1:00 pm Saturday MST
Web: www.lifetime.com/instructions
Live Chat: www.lifetime.com/instructions
NEED HELP? TALK TO US!
MODEL# AND PRODUCT ID (you will need both when contacting us)
Model Number: Product ID:
Lifetime storage boxes are designed to be strong
and durable. We strive to make assembly as easy as
possible without compromising quality. If you
get stuck, we have tools to help:
• Assemble on a Flat Surface
• Recruit a Friend or Family Member
Assembly should take 2 people about 1
hour to complete.
TOOLS REQUIRED TABLE OF CONTENTS
60089
Para español, vea la página 2.
Pour français, voyez la page 3.
7/16” (11 mm) (x2)
1/2” (13 mm) (x2)
Icon Legend...............................4
Warnings & Notices.....................5
Parts Identifier............................6
Box Assembly..............................7
Lid Assembly............................14
Cleaning & Care........................24
Registration.........................25
Warranty.............................26
3/8” (9,5 mm)
FOR DOMESTIC USE ONLY!
IMPORTANT: RETAIN FOR FUTURE REFERENCE. READ CAREFULLY.
ITM./ART. 619885
Importado por:
Importadora Primex S.A. de C.V.
Blvd. Magnocentro No. 4
San Fernando La Herradura
Huixquilucan, Estado de México
C.P. 52765
RFC: IPR-930907-S70
Ninguna garantía ofrecida por el fabricante es válida en México.
Copy
2
Los expertos de ensamblaje Lifetime©ofrecen respuestas rápidas y servicio valorado.
CAJA DE ALMACENAJE
DE 439 LITROS
Llame al 1.800.225.3865
0700 – 1700 lunes hasta viernes (HNR)
y 0900 – 1300 sábado (HNR)
Web: www.lifetime.com/instructions
Live Chat: www.lifetime.com/instructions
¿NECESITA AYUDA? ¡LLÁMENOS?
MODELO E ID DEL PRODUCTO (necesitará los dos al contactarnos)
Número de modelo: ID del producto:
Las cajas de almacenaje Lifetime©son diseñados
para ser sólidos y durables. Nos esforzamos
por hacer el ensamblaje lo más fácil posible sin
comprometer la calidad. Si se atasque, tenemos
las herramientas necesarias para ayudarle:
• Ensamble en una superficie plana
• Junte a un amigo o un miembro de la familia
El montaje debe llevar 2 adultos 1 hora para
completar.
INSTRUMENTAL REQUERIDO ÍNDICE
60089
INSTRUCCIONES
DE ENSAMBLAJE
For English, see page 1.
Pour français, voyez la page 3.
Leyenda de íconos.......................4
Advertencias y Noticias...............5
Identificador de piezas.................6
Ensamble de la caja...................7
Ensamble de la tapa..................14
Limpieza y Cuidado...................24
Registro.............................25
Garantía................................27
7/16” (11 mm) (x2)
1/2” (13 mm) (x2)
3/8” (9,5 mm)
¡SÓLO PARA EL USO DOMÉSTICO!
¡IMPORTANTE: GUARDE PARA FUTURA REFERENCIA. LEA CUIDADOSAMENTE.
ITM./ART. 619885
Importado por:
Importadora Primex S.A. de C.V.
Blvd. Magnocentro No. 4
San Fernando La Herradura
Huixquilucan, Estado de México
C.P. 52765
RFC: IPR-930907-S70
Ninguna garantía ofrecida por el fabricante es válida en México.
Copy
3
Nos Experts d’assemblage offrent des réponses rapides et de
service clientèle supérieure.
BOÎTE DE STOCKAGE
DE 439 LITRES
Légende des icônes.....................4
Avertissements & Notifications.....5
Identificateur de pièces................6
Assemblage de la boîte................7
Assemblage de la couverture......14
Nettoyage et Entretien...............24
Enregistrement....................25
Garantie................................28
Appelez au 1.800.225.3865
0700–1700 lundi à vendredi (HNR)
et 0900–1300 samedi (HNR)
web: www.lifetime.com/instructions
tchat: www.lifetime.com/instructions
NÉCESSITEZ-VOUS DE L’AIDE ? PARLEZ-NOUS !
MODÉLE ET ID DE PRODUIT (vous nécessiterez les deux lorsque vous nous contactez)
Número de modèle : ID du produit :
Les boîtes à stockage Lifetime©sont conçus pour
être solides et durables. Nous nous efforçons de
rendre l’assemblage aussi facile que possible sans
compromettre la qualité. Si vous êtes coincé, nous
avons les outils nécessaires pour vous aider :
• Assemblez sur un surface plate
• Rassemblez un ami ou un membre de la famille
L’assemblage devrait prendre 2 adultes à peut
près 1 heure pour achever.
OUTILS REQUIS SOMMAIRE
60089
INSTRUCTIONS
DE L’ASSEMBLAGE
For English, see page 1.
Para español, vea la página 2.
7/16” (11 mm) (x2)
1/2” (13 mm) (x2)
3/8” (9,5 mm)
POUR L’USAGE DOMESTIQUE SEULEMENT !
IMPORTANT, CONSERVEZ POUR RÉFÉRENCE : LISEZ AVEC PRUDENCE !
4





















ICON LEGEND / LEYENDA DE ÍCONOS / LÉGENDE DES ICÔNES
4
1152341 C 11/13/2013
5
English:
Failure to follow these warnings may result in serious injury or property damage and will void warranty.
• 








Most injuries are caused by misuse and/or not following instructions.
• Other warnings may be viewed towards the end of this manual.
español:
El incumplimiento de seguir estas advertencias puede resultar en lesiones graves o daño a la propiedad y anulará la garantía.
• Para asegurar la seguridad, no intente armar este producto sin seguir detenidamente las instrucciones.








La mayoría de las lesiones son causadas por el uso erróneo y/o el incumplimiento de seguir las instrucciones.
• Se pueden ver otras advertencias al fi nal de este manual.
français :
La non-respect de ces avertissements peut entraîner en conséquence des blessures sérieuses ou dommage à la propriété et annulera la
garantie.
• 









La plupart des blessures sont causées par l’abus et/ou par ne pas suivre les instructions.
• Vous pouvez lire atures avertissements sur la fi n de ce manuel.
WARNINGS & NOTICES / ADVERTENCIAS & NOTIFICACIONES / AVERTISSEMENTS & NOTIFICATIONS
5
6
AMZ (x1) ANB (x2)
AND (x1)
ANA (x1)
ANC (x1)
BKV (x1)
DRD (x1)
BEP (x2)
AKF (x2) AAO (x4)BET (x4)
DRE (x1)
DRG
PARTS IDENTIFIER / IDENTIFICADOR DE PIEZAS / IDENTIFICATEUR DE PIÈCES
METAL PARTS / PIEZAS DE METAL / PIÈCES EN MÉTAL
SMALL PARTS / PIEZAS PEQUEÑAS / PETITES PIÈCES
HARDWARE / ELEMENTOS DE FIJACIÓN / ACCESSOIRES
PLASTIC PARTS / PIEZAS DE PLÁSTICO / PIÈCES EN PLASTIQUE
7
1
ADW (x4) ADX (x6)DRC (x1) ADJ (x1)
DRD (x1)
AMZ (x1) ANB (x2)ANA (x1)
ANC (x1)
DRG
1BOX ASSEMBLY / ENSAMBLAJE DE LA CAJA / ASSEMBLAGE DE LA BOÎTE
7/16” (11 mm)
Hardware / Elementos de fijación / Accessoires
TOOLS REQUIRED / HERRAMIENTAS REQUERIDAS / OUTILS REQUIS
PARTS REQUIRED / PIEZAS REQUERIDAS / PIÈCES REQUISES
HARDWARE REQUIRED / ACCESORIOS REQUERIDOS / ACCESSOIRES REQUIS
Plastic Parts / Piezas de plástico / Pièces en plastique
Small Part / Pequeña pieza / Petite pièces

8
ANC
ANA
ANA
1.1
1.2
Rear Panel (ANA)
Floor Panel (ANC).
Panel trasero
(ANA)
Panel de piso (ANC).
Panneau
arrière (ANA)
Panneau de plancher (ANC).



uSECTION 1 (CONTINUED) / SECCIÓN 1 (SIGUE) / SECTION 1 (SUITE)

9
AMZ
1.3
1.4
Front Panel (AMZ)

Panel
delantero (AMZ)
delantero del Panel de piso.
Panneau
avant (AMZ)




uSECTION 1 (CONTINUED) / SECCIÓN 1 (SIGUE) / SECTION 1 (SUITE)

10
ANB
1
1
2
ANB
1.5 Side Panel (ANB)



Panel lateral (ANB)



dentro de las ranuras a lo largo del Panel de piso.
Panneau latéral (ANB)




Note: Repeat step 1.5 for the right side of the Deck Box.
Nota: Repita el paso 1.5 para el lado derecho de la Caja.
Note : Répétez l’étape 1.5 pour le côté droit de la Boîte.
!
uSECTION 1 (CONTINUED) / SECCIÓN 1 (SIGUE) / SECTION 1 (SUITE)

11
ADW (x4)
ADW
ADW
uSECTION 1 (CONTINUED) / SECCIÓN 1 (SIGUE) / SECTION 1 (SUITE)
1.6 Screw (ADW)
Tornillo (ADW) en cada esquina como se muestra.
Vis (ADW)
Note: Do not overtighten the Screws.
Nota: No apriete demasiado los Tornillos.
Note : Ne pas serrer excessivement les Vis.
!

12
DRD
DRC (x1)
DRC
ADJ (x1)
ADJ
7/16”
(11 mm)
DRD (x1)
uSECTION 1 (CONTINUED) / SECCIÓN 1 (SIGUE) / SECTION 1 (SUITE)
1.7 Box Latch (DRD)
Pestillo de la caja (DRD)
elementos ilustrados.
Loquet de la boîte (DRD)
des accessoires illustrés.

13
ADX (x6)
ADX
ADX
ADX
ADX
ADX
ADX
ADX
uSECTION 1 (CONTINUED) / SECCIÓN 1 (SIGUE) / SECTION 1 (SUITE)
1.8 Screw (ADX)
Tornillo (ADX)
Vis (ADX)
14
BEP (x2)
AKF (x2)
AAO (x4)
BES (x6)DRF (x4) AAB (x6)
BET (x4)
DQS (x4)
DRE (x1)
AND (x1)
BKV (x1)
3/8” (10 mm)
1
DRG
2LID ASSEMBLY / ENSAMBLAJE DE LA TAPA / ASSEMBLAGE DE LA COUVERCLE
7/16” (11 mm) 1/2” (13 mm)
Hardware / Elementos de fijación / Accessoires
TOOLS REQUIRED / HERRAMIENTAS REQUERIDAS / OUTILS REQUIS
PARTS REQUIRED / PIEZAS REQUERIDAS / PIÈCES REQUISES
HARDWARE REQUIRED / ACCESORIOS REQUERIDOS / ACCESSOIRES REQUIS
Metal Parts / Piezas de metal / Pièces en métal
Plastic Parts / Piezas de plástico / Pièces en plastique
Small Parts / Piezas pequeñas / Petites pièces

15
BKV
AND
uSECTION 2 (CONTINUED) / SECCIÓN 2 (SIGUE) / SECTION 2 (SUITE)
2.1
2.2
Lid Support (BKV)Lid (AND)

Soporte de la tapa (BKV)Tapa (AND). Entonces,

Support du couvercle (BKV)Couvercle
(AND)




16
DRE
DRE
DRE (x1)
AAB (x2)
BES (x2)
7/16” (x2)
(11 mm) (x2)
DRE
AAB
BES
2.3 Lid Latch (DRE)

Pestillo de la tapa (DRE)

Loquet du couvercle (DRE)

uSECTION 2 (CONTINUED) / SECCIÓN 2 (SIGUE) / SECTION 2 (SUITE)

17
DQS (x4)
DQS
DQS
DQS
DQS
3/8”
(10 mm)
DQS
DQS
2.4 


uSECTION 2 (CONTINUED) / SECCIÓN 2 (SIGUE) / SECTION 2 (SUITE)
Note: You can use a screwdriver, but we suggest using a drill.
Nota: Se puede usar un destornillador, mas recomendamos que use un
taladro eléctrico.
Note : Vous pouvez utiliser un tournevis, mais nous recommendos que
vous utilisiez une perceuse électrique.
!

18
AAO
AAO
AAO
BET
BET
BET
BEP
1/2” (x2)
(13 mm) (x2)
AAO (x2)
BET (x2)
2.5
2.6
Hinge (BEP)
Bisagra (BEP)
Charnière (BEP)



uSECTION 2 (CONTINUED) / SECCIÓN 2 (SIGUE) / SECTION 2 (SUITE)

19
DRF (x2)
DRF
DRF
3/8”
(10 mm)
uSECTION 2 (CONTINUED) / SECCIÓN 2 (SIGUE) / SECTION 2 (SUITE)
2.7 Screws (DRF).
Tornillos (DRF).

deux Vis (DRF).
Note: Do not overtighten the Screws.
Nota: No apriete demasiado los Tornillos.
Note : Ne pas serrer excessivement les Vis.
!
Note: You can use a screwdriver, but we suggest using a drill.
Nota: Se puede usar un destornillador, mas recomendamos que use un
taladro eléctrico.
Note : Vous pouvez utiliser un tournevis, mais nous recommendos que
vous utilisiez une perceuse électrique.
!

20
DRF (x2)
DRF
DRF
AAO
AAO
AAO
BET
BET
BET
BEP
3/8”
(10 mm)
1/2” (x2)
(13 mm) (x2)
AAO (x2)
BET (x2)
uSECTION 2 (CONTINUED) / SECCIÓN 2 (SIGUE) / SECTION 2 (SUITE)
2.8
2.9
Hinge (BEP)
Bisagra (BEP)
Charnière (BEP)




Note: Do not overtighten the Screws.
Nota: No apriete demasiado los Tornillos.
Note : Ne pas serrer excessivement les Vis.
!
Note: You can use a screwdriver, but we suggest using a drill.
Nota: Se puede usar un destornillador, mas recomendamos que use un
taladro eléctrico.
Note : Vous pouvez utiliser un tournevis, mais nous recommendos que
vous utilisiez une perceuse électrique.
!

This manual suits for next models

1

Other Lifetime Storage manuals

Lifetime 60372 User manual

Lifetime

Lifetime 60372 User manual

Lifetime 60012 User manual

Lifetime

Lifetime 60012 User manual

Lifetime 60215 User manual

Lifetime

Lifetime 60215 User manual

Lifetime 60059 User manual

Lifetime

Lifetime 60059 User manual

Lifetime 60103 User manual

Lifetime

Lifetime 60103 User manual

Lifetime 6433 User manual

Lifetime

Lifetime 6433 User manual

Lifetime 60331 User manual

Lifetime

Lifetime 60331 User manual

Lifetime 60012 User manual

Lifetime

Lifetime 60012 User manual

Lifetime 60059 User manual

Lifetime

Lifetime 60059 User manual

Lifetime 0113 User manual

Lifetime

Lifetime 0113 User manual

Lifetime 136-GALLON User manual

Lifetime

Lifetime 136-GALLON User manual

Lifetime 60170 User manual

Lifetime

Lifetime 60170 User manual

Lifetime 60350 User manual

Lifetime

Lifetime 60350 User manual

Lifetime 60059 User manual

Lifetime

Lifetime 60059 User manual

Lifetime 60103 User manual

Lifetime

Lifetime 60103 User manual

Lifetime 60336 User manual

Lifetime

Lifetime 60336 User manual

Lifetime Sentinel 6414 Datasheet

Lifetime

Lifetime Sentinel 6414 Datasheet

Lifetime 60298 User manual

Lifetime

Lifetime 60298 User manual

Lifetime 60209 User manual

Lifetime

Lifetime 60209 User manual

Lifetime 60209 User manual

Lifetime

Lifetime 60209 User manual

Lifetime 60215 User manual

Lifetime

Lifetime 60215 User manual

Lifetime 60353 User manual

Lifetime

Lifetime 60353 User manual

Lifetime 60298 User manual

Lifetime

Lifetime 60298 User manual

Lifetime 60103 User manual

Lifetime

Lifetime 60103 User manual

Popular Storage manuals by other brands

Spectra T50e user guide

Spectra

Spectra T50e user guide

Overland Tandberg NEOxl 40 instructions

Overland Tandberg

Overland Tandberg NEOxl 40 instructions

PNY Executive Attache P-EF256B3-RF user guide

PNY

PNY Executive Attache P-EF256B3-RF user guide

Buffalo LinkStation 500 user manual

Buffalo

Buffalo LinkStation 500 user manual

iStorage diskg user manual

iStorage

iStorage diskg user manual

IBM Deskstar Deskstar 3 Quick installation guide

IBM

IBM Deskstar Deskstar 3 Quick installation guide

Seagate ST905003BPA1E1-RK - Maxtor BlackArmor 500 GB External Hard... Specifications

Seagate

Seagate ST905003BPA1E1-RK - Maxtor BlackArmor 500 GB External Hard... Specifications

Fujitsu ETERNUS DX8100 S4 Site planning guide

Fujitsu

Fujitsu ETERNUS DX8100 S4 Site planning guide

INTILION scalebloc energy operating manual

INTILION

INTILION scalebloc energy operating manual

Philips HEART BEAT FM01SW40 Specifications

Philips

Philips HEART BEAT FM01SW40 Specifications

Philips CD740RW Specifications

Philips

Philips CD740RW Specifications

Maxtor Computer Drive product manual

Maxtor

Maxtor Computer Drive product manual

YitaHome FTPLDB-2005 Assembly instructions

YitaHome

YitaHome FTPLDB-2005 Assembly instructions

Knick ZU1080-P Series installation guide

Knick

Knick ZU1080-P Series installation guide

Procuro Pimm Tag quick guide

Procuro

Procuro Pimm Tag quick guide

Hitachi Travelstar 2.5 inch SATA HTS722020K9A300 Quick installation guide

Hitachi

Hitachi Travelstar 2.5 inch SATA HTS722020K9A300 Quick installation guide

LaCie LaCie Ethernet Disk White paper

LaCie

LaCie LaCie Ethernet Disk White paper

Quantum DXi V-Series Guide

Quantum

Quantum DXi V-Series Guide

manuals.online logo
manuals.online logoBrands
  • About & Mission
  • Contact us
  • Privacy Policy
  • Terms and Conditions

Copyright 2025 Manuals.Online. All Rights Reserved.