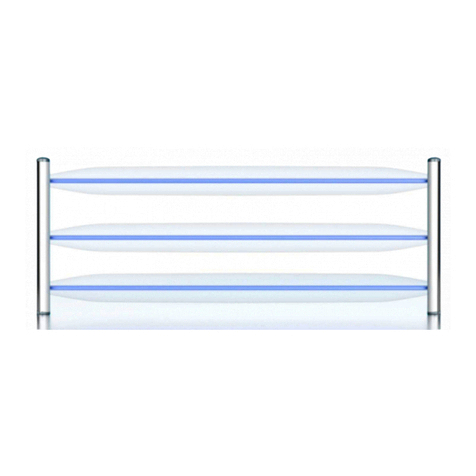
Liftsafe Fall Protection RoofGuard Classic HGC-KIT-09 User manual

Page 1
!
User Instruction
Guide for
RoofGuard Classic
Freestanding Guardrail
System
Liftsafe Fall Protection Inc.
RoofGuard Classic User Manual
RGC-UM-3.0

Page 2
!
!
!
!
Table of Contents
Section Page Number
1.0 Application 4
2.0 System Requirements 4
3.0 Components 5
4.0 System Layout 7
5.0 Installation 8
6.0 Detailed Inspection and Maintenance Log 12
7.0 Warranty 13
8.0 Notes 14

Page 3
Warnings and Conditions
This system is part of a personal fall protection system. The user must read and follow all
guidelines in this manual. These instructions must be provided to the user of this system.
The user must read and understand these instructions or have them explained to them
prior to using the system.
Alterations or misuses of this system or failure to follow instructions may result in serious
injury or death. If you have any questions on the use or care of this system peoples
contact Liftsafe Fall Protection Inc. at
1-800-977-2005.
!

Page 4
1.0 APPLICATION
1.1 The RoofGuard Classic system is designed to be installed on flat rooftops anywhere
workers may be at risk of fall from an elevated surface while working; rooftops, mezzanines, or
around openings, when workers should be protected by a physical barrier from the hazard.
!
2.0 System Requirements
2.1 The RoofGuard Classic system is designed to be used on flat roofs (up to 5% grade)
where the baseplate can sit flat on the roof surface. Depending on the roof surface, a rubber
pad or ultra-light paving stone may be used under the base plates to facilitate safe/stable
contact with the roof surface. As freestanding systems rely on friction between the
baseplates and the roofing materials, baseplates MUST NOT be set on ice or snow or other
substances which may permit excessive sliding. Users MUST clear the area prior to placing
the RoofGuard baseplates. If no parapet or curb is present at the roof edge, contact LFP for
a review of the application.
2.2 The RoofGuard Classic railing system is designed to protect workers on rooftop areas
near an opening into which they may fall. It is not intended to protect members of the public
or large gatherings of people from a rooftop edge.
!

Page 5
3.0 Components
3.1 Baseplates are cast in steel and hot dip galvanized for long-term outdoor use. Cone
point stainless steel set screws secure the guardrail into the base plates.
3.2 Vertical posts are supplied with fittings and caps for a variety of configurations: by
placing the fittings on a vertical post, the 5 common “post” assemblies are created.
RGC-POST-END: Used where the horizontal pipes end at a vertical post, at the
ends of the system and ends of the tie-backs.
RGC-POST-90D: Used where the horizontal pipe make a 90-degree corner
RGC-POST-INT: Used where the pipe continues straight out on either side of the
vertical post.
RGC-POST-TB: Used where the pipe continues straight out on either side of the
vertical post, but there is a tie-back for stability.
RGC-POST-VAR: Used when the horizontal pipes meet at a vertical post at an
angle between 90 and 180 degrees.!!
!
Figure 1 Figure 2 Figure 3 Figure 4 Figure 5
RGC-POST-END RGC-POST-90D RGC-POST-INT RGC-POST-TB RGC-POST-VAR

Page 6
3.3 Horizontal rails are available in two standard sizes, 6-foot & 9-foot. For other sizes, the
aluminum pipe is suitable for cut-to-fit on-site. The 6 foot sections of rail are used for the
tie-backs to provide the counter weight for the system. This may also be used along the
leading edge where a 9-foot section is too long. The 9-foot sections of rail use a stiffener
to connect the top/mid rail. This element may be omitted for some temporary construction
projects, where the loading requirements are lower. For more permanent applications, the
stiffener should be used.
Figure 6: Baseplate with set
screws and assembly tool
Figure 7: RoofGuard
system during assembly
Figure 8: RoofGuard
system during assembly
Figure 9: RoofGuard
system during assembly

Page 7
4.0 System Layout
4.1 Install bases and rails on a flat, clean and dry surface. Clean the area where base
plates will be installed, if necessary, to ensure good contact with the roof surface.
4.2 If curb or parapet is 4” or more above the top of the base-plate, then bases can be
positioned against the parapet. If curb or parapet is lower, contact LFP for a review of
the application.
4.3 The vertical posts of the RoofGuard System are supported by one baseplate, with
the expectation of the RGC-End posts, which are used for counterweight, and are
supported by 3 RoofGuard Baseplates stacked up on each other to provide the
necessary weight to resist overturning and sliding. If the system was custom designed,
please refer to the layout drawing provided with the system, as more weight may be
required for custom applications.
4.4 Each end of the system shall have a TIE-Back perpendicular to the hazard (roof
edge) extending 6-feet with 3 baseplates at the RGC-End Post. The tie-back shall NOT
be along a leading edge itself; IE: the RGC-End Post shall not be within 6-feet of the roof
edge unless part of a custom designed system – please refer to the custom layout
drawing for guidance.
4.5 Intermediate tie-backs shall be placed at points no greater than 27-feet apart. At
this point, the RGC-TB post will be used at the hazard edge. The tie backs are at this
point connected to the two horizontal rails, the RGC-End post and 3 baseplates.
4.6 In case where the tie-backs must be shorter, the weights can be increased to
accommodate the resistance required. You must consult LFP and obtain an
engineered layout drawing to indicate the weight plate distribution for
irregular installations.
4.7 Where required, use of the toe-board adapter will allow the use of 2x4” lumber toe-
boards to be placed between the base plates. This will help prevent tools or materials
from falling to a lower level.
!

Page 8
!
!
!
5.0 Installation
5.1 When working near the roof edge, workers should be tied-off to an alternate fall
protection system. Ideally workers should use a fall-restraint system utilizing a lifeline that will
allow them to reach the edge, but not be long enough to be able to fall.
5.2 If toe-boards will be required, place the toe-board adapter on the top of the baseplate
before placing the vertical posts into the desired holes. The lip of the toe board adapter shall
be on the `outside` edge of the rail towards the hazard.
5.3 The RoofGuard Baseplate has 3 holes, and for RoofGuard Classic, any of the 3 holes is
acceptable. Use of the center hole is typical, but for tight areas, or for convenience, an
outside hole may be useful.
5.4 Once the bases are positioned as desired, insert the vertical rails. Secure the vertical rail
to the Baseplate with the cone-point stainless steel set-screw.
Figure 10 & 11
Installation of Baseplates
NOTE: Only one set screw is used per rail leg. The two outside holes of the Baseplate have 2
possible set screw positions, both may be used but only one is required, perpendicular to the
rail it is holding
!
Page 8

Page 9
!
!
!
5.5 Use a 3/16” hex drive bit (provided) or wrench, and torque baseplate screws to 25ft-
lbs. All set screws for stacked plates must be secured against the wall of the vertical posts.
5.6 Once torqued the set screw can be ‘marked’ with the blue crayon (provided) to provide
a visual indicator that the screw has been secured and warn of tampering. (If the blue wax
is removed, it may indicate a tool was re-inserted in the set-screw.)
5.7 If toe-boards are to be used, the lumber can be cut and placed under the toe-board
adapter (from 5.2). The toe-board adapter can be lifted (sliding up the rails) to place the
lumber, and then lowered back onto the top of the lumber. Using the three holes provided,
secure the toe-board to the toe-board adapter with three #10 or #12 screws 1.5” or
longer. Longer screws should not protrude from the lumber where they may introduce a
hazard to workers.
5.8 Once all vertical posts are set, the horizontal rails can be placed into the fittings and
secured with the hex drive bit (provided). To provide a visual indicator that the screw has
been secured and warn of tampering mark set screw with crayon. (If the blue wax is
removed, it may indicate a tool was re-inserted in the set-screw.)
5.9 Working form one end to the other, complete the assembly of the rails as per the layout
drawing. Once complete, the system should be reviewed to ensure the design is as per the
layout drawing and each set screw has been torqued and marked. At this point the system
is safe and ready for use.
Page 9

Page 10
!
!
!
!
!
!
!
!
!
!
!
!
!
!
!Figure 13
!
!
!
!
!
!
!
!
!
!
!
!
Figure 14
Image of Complete a Complete Classic RoofGuard System
!

Page 11
!
Warning – Do NOT lean on, or climb on guardrails.
Guardrails MUST NOT be used as an anchor for fall restraint or
fall arrest, and shall not be used for hoisting or tie-off.
Attachment of banners / signs / equipment is not permitted.
Excess force applied to the top rail could cause tipping,
resulting in injury or death.
OSHA Reference 29 CFR 1910.23 Guarding of floor and wall openings and holes
(a)(2) Every ladder-way floor opening or platform shall be guarded by a
standard railing with standard toe-board on all exposed sides (except
at entrance to opening), with passage through the railing either
provided with a swing gate or offset so that a person cannot walk
directly into the opening.

Page 12
6.0 Detailed Inspection and Maintenance Log
Inspection Date
Inspection Items
Noted
Corrective Action
Taken
Maintenance
Performed
Approved By
!
!
!
!
!
!
!
!
!
!
!
!
!
!
!
!
!
!
!
!
!
!
!
!
!
!
!
!
!
!
!
!
!
!
!
!
!
!
!
!
!
!
!
!
!
!
!
!
!
!
!
!
!
!
!
!
!
!
!
!
!
!
!
!
!
!
!
!
!
!
!
!
!
!
!
!
!
!
!
!
!
!
!
!
!
!
!
!
!
!
!
!
!
!
!
!
!
!
!
!
!
!
!
!
!
!
!
!
!
!
!
!
!
!
!
!
!

Page 13
7.0 Liftsafe Fall Protection Warranty
Equipment offered by Liftsafe Fall Protection (LFP) is warranted against factory defects in
workmanship and materials for a period of one year from date of installation or use by the
owner, provided that this period shall not exceed 18 months from date of shipment. Upon
notice in writing, LFP will promptly repair or replace all defective items. LFP reserves the right to
elect to have any defective item returned to its plant for inspection before making a repair or
replacement. This warranty does not cover equipment damages resulting from abuse, damage
in transit, or other damage beyond the control of LFP. This warranty applies only to the original
purchaser, and is the only one applicable to our products, and is in lieu of all other warranties,
expressed or implied.

Page 14
8.0 Notes

Page 15
Liftsafe Fall Protection
409 Harmony Road
Ayr, Ontario N0B 1E0
TF.: 1(800) 977-2005
T.: (519) 896-2430
F.: (519) 896-2085
E.: info@liftsafeinspections.com
W.: www.fallsafetysolutions.com
!
!
This manual suits for next models
2
Table of contents