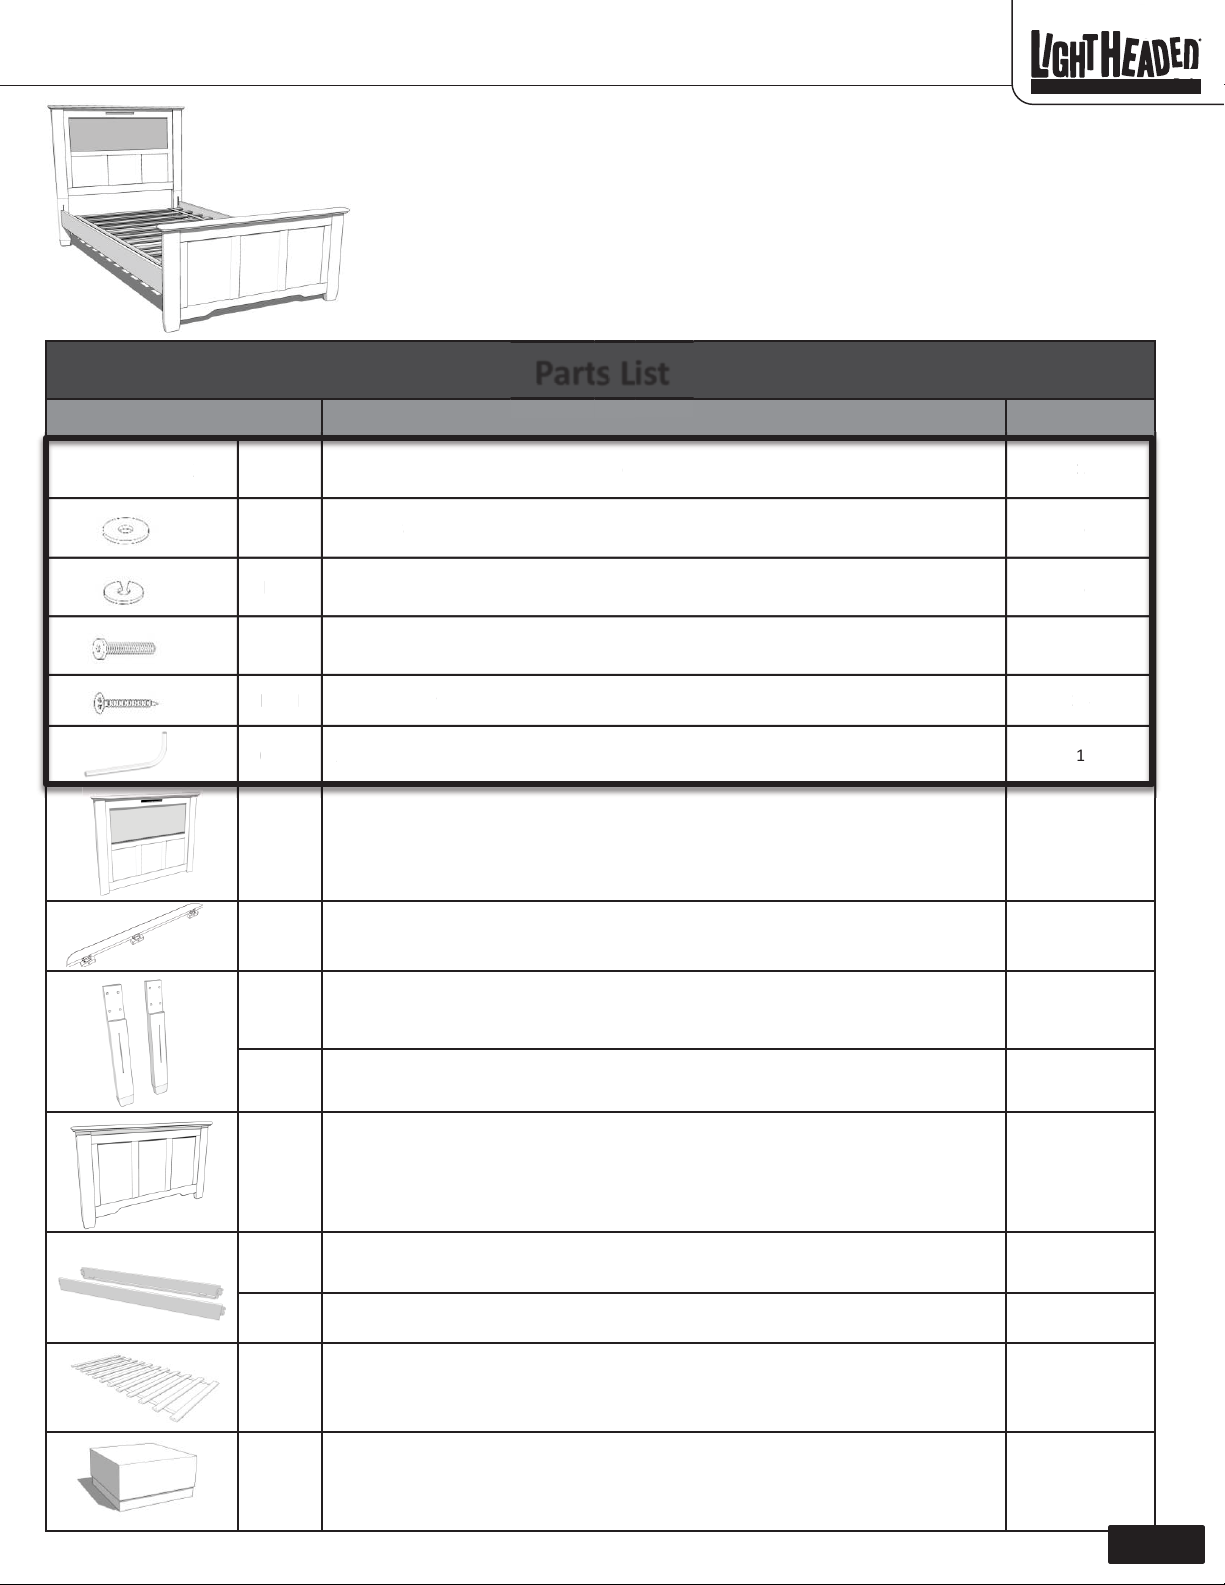
“Shaker” LightHeaded™ Bed
Assembly Instructions
www.LightHeadedBeds.com
Model #20157Twin size, Chocolate
Model #20261Twin size, Black
Model #20153 Twin size, White
9/17/2015
1168352 B Page 5
How to Obtain Warranty Service
We suggest you complete and return the product registration card that was included with your bed. This
will help us to promptly facilitate verification of the date of your original purchase. If you have any
questions regarding this warranty or would like to obtain warranty service, please call (800) 225-3865
and a friendly Customer Service Representative will assist you.
One Year Limited Warranty
LightHeaded™ Beds warrants that for a period of one year from the date of purchase, this product will be
free from defects in material and workmanship. LightHeaded™ Beds, at its option, will repair or replace the
product or any component of the product found to be defective during the warranty period. Replacement
will be made with a new or remanufactured product or component. If the product is no longer available,
replacement may be made with a similar product of equal or greater value. This is your exclusive warranty.
This warranty is valid for the original retail purchaser from the date of initial retail purchase and is not
transferable. Keep the original sales receipt. Proof of purchase is required for warranty service.
LightHeaded™ Beds dealers, service centers, or retail stores selling LightHeaded™ Beds products do not have
the right to alter, modify, or in any way change the terms and conditions of this warranty.
This warranty does not cover normal wear and tear of parts or damage resulting from any of the following:
negligent use or misuse of the product, use on improper voltage or current, use contrary to the operating
instructions, electronics disassembly, repair or alteration by anyone other than LightHeaded™ Beds
authorized service representatives.
What Are the Limits on LightHeaded™ Beds Liability?
LightHeaded™ Beds shall not be liable for any incidental or consequential damages caused by the breach of
any express, implied, or statutory warranty or condition. Except to the extent prohibited by applicable law,
any implied warranty or condition of merchantability or fitness for a particular purpose is limited in duration
to the duration of the above warranty. LightHeaded™ Beds disclaims all other warranties, conditions or
representations, express, implied, statutory or otherwise. LightHeaded™ Beds shall not be liable for any
damages of any kind resulting from the purchase, use or misuse of, or inability to use the product including
incidental, special, consequential or similar damages or loss of profits, or for any breach of contract,
fundamental or otherwise, or for any claim brought against purchaser by any other party.
Congratulations! Your LightHeaded™ bed is assembled and you are
ready for the real fun.
•Hop online and surf our website LightHeadedBeds.com where you can
apply your $20 gift coupon toward your first LightHeaded™ Image and
personalize your bed.
•Create your own custom images or select from our massive gallery of
amazing images and super characters.
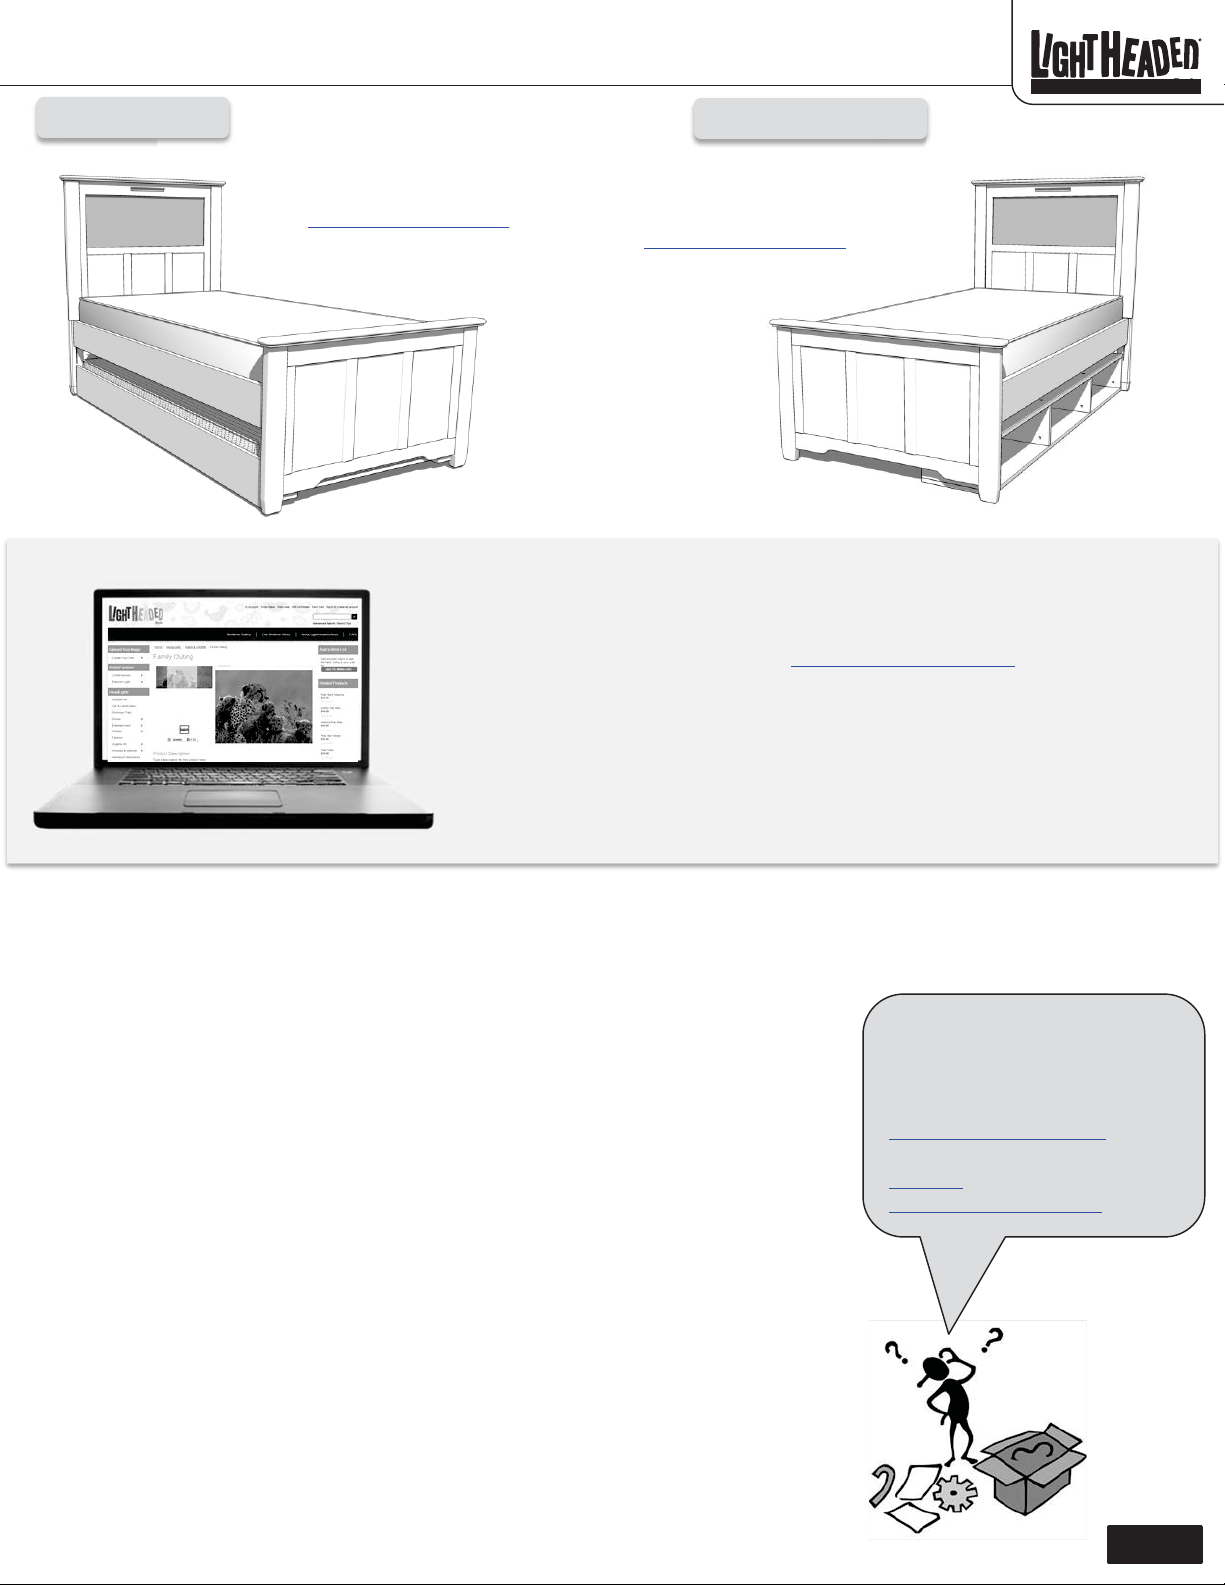
Trundle Underbed storage
An optional Twin Trundle bed is
available for purchase at
LightHeadedBeds.com An optional Underbed Storage Unit
is available for purchase at
LightHeadedBeds.com. Use 1 or
2 for additional storage as needed.
Got questions?
Our friendly LightHeaded™
Customer Service Rep can help you
at 800-225-3865 or e-mail us at
info@LightHeadedBeds.com.
Assembly videos are available on
You-Tube. Thanks from the folks at
www.LightHeadedBeds.com