Lincoln Redco Lettuce King I User manual

operator manual
This document includes:
• Safety Notices
• Specifications
• Installation Instructions
• Operating Instructions
• Cleaning Instructions
• Warranty Statement
P/N: 2802381
Revision: C
Lincoln Foodservice Products, LLC
1111 North Hadley Road
Fort Wayne, Indiana 46804
United States of America
Technical Support Hotline: (800) 678-9511
Telephone: (260) 459-8200
www.lincolnsmallwares.com
Lettuce King I and Lettuce King IV
Lettuce King I Lettuce King IV

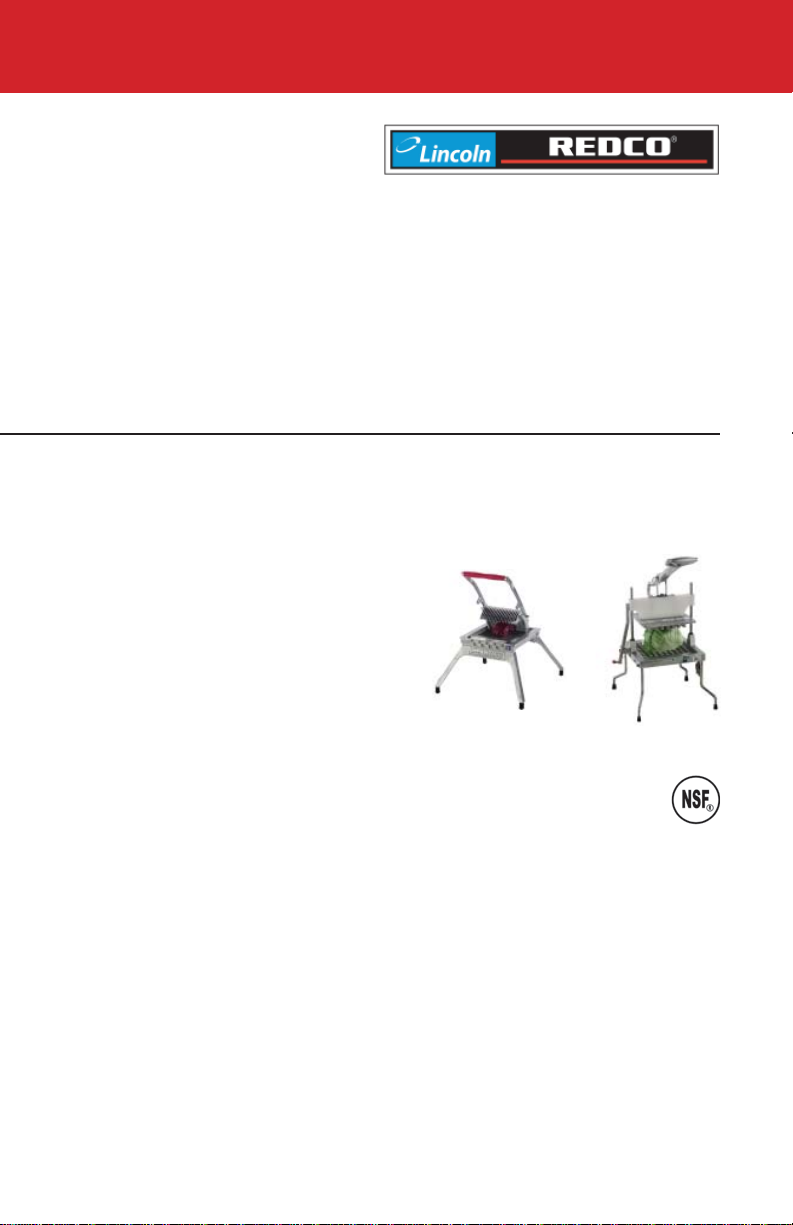
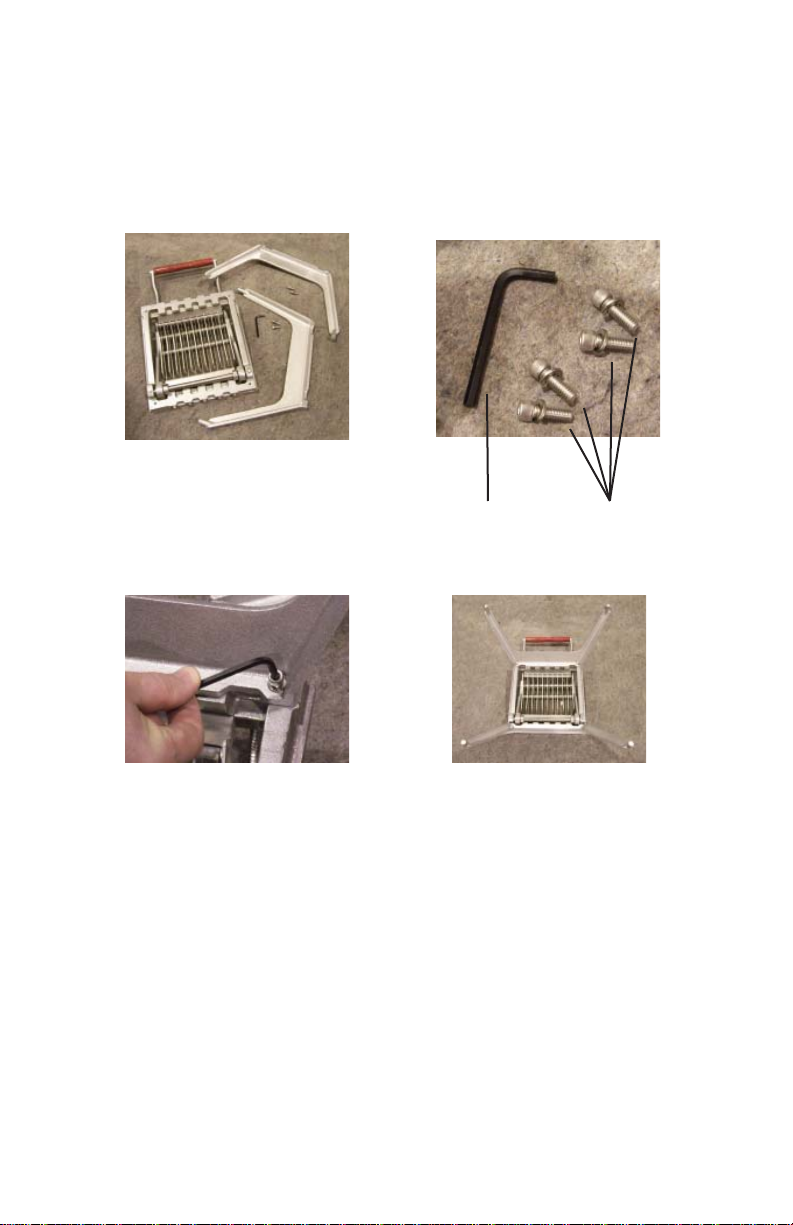
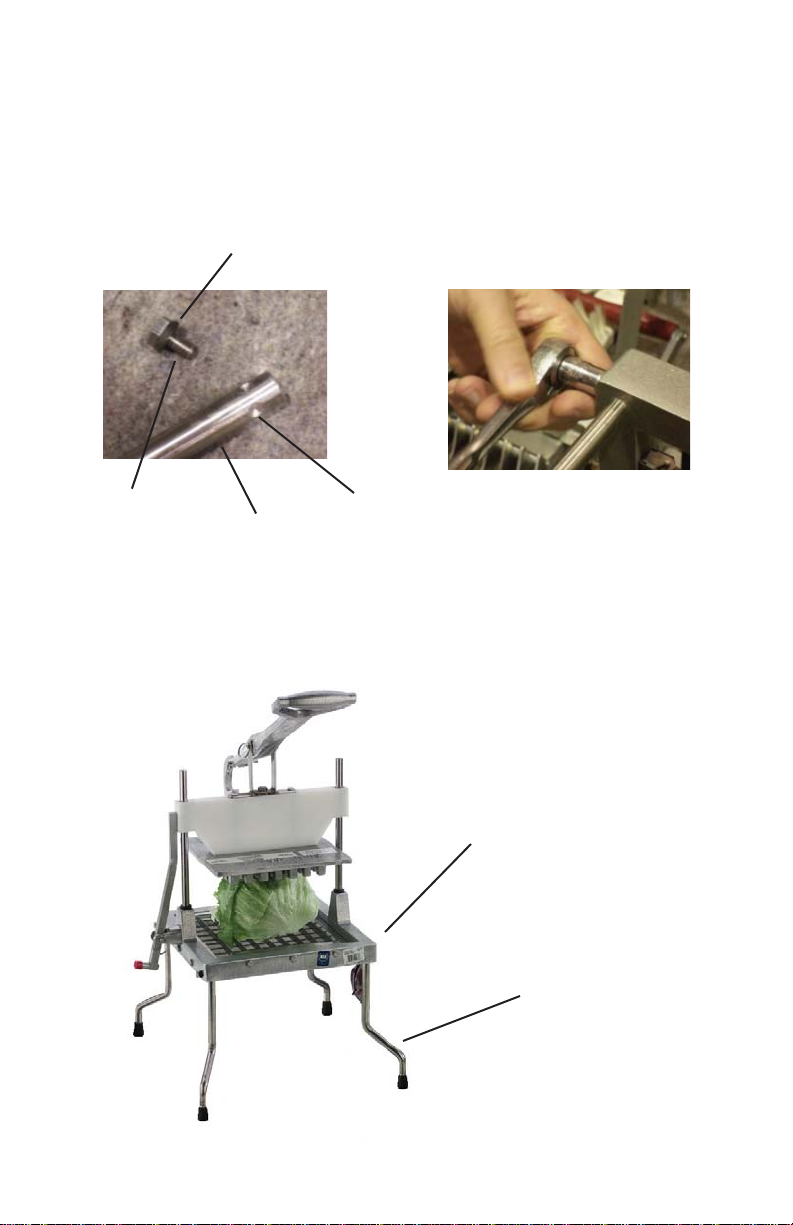
WARNING AND SAFETY INFORMATION
WARNING: This machine contains sharp blades and can cause serious injury or death if not handled
properly. All operators of this equipment should read this operator manual before operating
equipment.
CAUTION: In order to avoid damage to people and the appliance, read and follow the manufacturer’s
instructions for the cleaning of this equipment.
LIMITED TWO (2) YEAR WARRANTY
Lincoln Foodservice Products, LLC (“Lincoln”) warrants, to the original purchaser for use in the United States of America,
that each new item of Redco food preparation utensils (other than blades) manufactured by it (“Warranted Product”) is
free of defects in material and workmanship under normal use and conditions.
The exclusive remedy available under this Limited Warranty is that Lincoln will, free of charge, but at its option, subject to,
and in accordance with the terms and conditions of this Limited Warranty, repair or replace, for the original purchaser for
use in the United States of America, any Warranted Products or part thereof that proves to be defective with the same or a
similar item or part, it is returned to Lincoln in accordance with the procedure set out on the warranty card.
This Limited Warranty applies only to original parts of Warranted Products sold for use in the United States of America
and does not apply to any Warranted Products located outside the United States ofAmerica, regardless of where sold,
or to any item or part thereof that has been subjected to accident, casualty, alteration, misuse, or abuse or if the date of
manufacture is altered or removed.
THIS LIMITED WARRANTY DOES NOTAPPLY TO BLADES WHICHARE SOLD COMPLETELY WITHOUT WARRANTY
OR GUARANTEE OF ANY KIND, EXPRESSED OR IMPLIED. THE OBLIGATION OF LINCOLN IS LIMITED TO THE
ABOVE AND, EXCEPTAS EXPRESSLY STATED HEREIN, LINCOLN MAKES NO GUARANTEES OR WARRANTIES,
EXPRESSED OR IMPLIED, INCLUDING WITHOUT LIMITATION, WARRANTIES OF FITNESS OR MERCHANTABILITY,
WITH RESPECT TO WARRANTED PRODUCTS. LINCOLN SHALL NOT BE LIABLE FOR SPECIAL, INCIDENTAL, OR
CONSEQUENTIAL DAMAGES OFANY KIND. NO ONE IS AUTHORIZED TO MAKEANY GUARANTEES OR WAR-
RANTIES, EXPRESSED OR IMPLIED, ON BEHALF OF LINCOLN.
SOME STATES DO NOTALLOW LIMITATIONS OF IMPLIED WARRANTIES, OR THE EXCLUSION OR LIMITATION
OF INCIDENTAL OR CONSEQUENTLY DAMAGES IN CONNECTION WITH THE SALE OF CONSUMER PRODUCTS,
CONSEQUENTLY, IF YOUAREACONSUMER,AS THAT TERM IS LEGALLY DEFINED, THE ABOVE LIMITATION OR
EXCLUSION MAY NOT APPLY TO YOU.
2

BASE INSTALLATION - LETTUCE KING I
Tools required for proper installation:
One (1) 3/16” Allen Wrench (included)• Four (4) Fil. Hd. Screws, 1/4-20 x 3/8”• Four (4) Lock Washers• Two (2) Leg Castings•
Allen Wrench Fil. Hd. Screws &
Lock Washers
Attach Leg Castings by inserting screw
with washer from the underside of unit.
Hand tighten screws.
Once all four screws with washers have
been hand tightened, installation is
complete. Carefully invert unit so as to
place all four legs solidly on surface.
3

BASE INSTALLATION - LETTUCE KING IV
Tools required for proper installation:
One (1) 7/16” Socket Wrench (not provided)• Four (4) Hex Hd. Screws, 1/4-20 x 1/2”• Four (4) Rubber Seals• Two (2) Legs•
Rubber Seal
Hex Hd. Screw
1/4-20 x 1/2” Leg
Leg “Dimple” Insert Leg into Main Frame being sure to
align the Leg “Dimple” with the screw open-
ing in Main Frame. Insert screw with rubber
seal into Main Frame opening and attach
with socket wrench until tight. Complete
this procedure for all four legs. Installation
is now complete. NOTE: When attaching
legs to Main Frame, be sure that the leg
“bends” out away from Main Frame. See
photo below.
Main Frame
With legs installed properly,
note how the legs “bend” away
from the Main Frame of the unit.
4

OPERATING INSTRUCTIONS - LETTUCE KING I
Before each use, always check blade tightness. If blades are loose, review blade replacement instructions for1. tightness procedure.
Prepare lettuce in the usual manner by knocking out the core and peeling away the outer bruised and brown2. leaves. Cut head into halves or quarters to fit within frame casting.
Raise the pusher head handle to its full upright position.3.
Place the lettuce on the rear of the cutting blades and against the pusher head fingers.4.
With your free hand, grasp a front leg of the machine.5.
Move the pusher head handle downward in a firm motion, pushing the lettuce through the blade assembly.6.
Repeat this process until you have prepared enough lettuce for your daily needs.7.
Clean and lubricate your machine immediately.8.
CAUTION: Prior to first use, it is important to clean the unit. Wash new blades with warm soapy water
and rinse thoroughly to remove the thin protective oil film.
Blades are sharp and can cause injury. Check machine before using to insure machine is clean. Check for broken,
nicked or dull blades and if found, replace blade assembly. Check to insure that the pusher head sits down completely
on the rubber bumpers. The suction cups on each rear leg will hold the unit securely to smooth surfaces. If neces-
sary, lubricate guide rods using a light coating of mineral oil, Petro Gel, or food grade lubricant. DO NOT USE COOK-
ING OILAS IT WILL BECOME STICKYAND MAY PERMANENTLY DAMAGE THE UNIT.
CAUTION:
OPERATING INSTRUCTIONS - LETTUCE KING IV
Before each use, always check blade tightness. If blades are loose, review blade replacement instructions for1. tightness procedure.
Prepare lettuce in the usual manner by knocking out the core and peeling away the outer bruised and brown2. leaves.
Raise the head operating arm to its full upright position.3.
Place the lettuce, core side down, on the blade assembly.4.
With your left hand, grasp the safety lock and move it into operational position.5.
Move the head operating arm downward in a firm motion, pushing the lettuce through the blade assembly.6.
Repeat this process until you have prepared enough lettuce for your daily needs.7.
Clean and lubricate your machine immediately.8.
CAUTION: Blades are sharp and can cause serious injury. Never use machine unless all four rubber
feet are in place.
CAUTION: Blades are sharp and can cause serious injury. Never use machine unless all four rubber
feet are in place.
5

CLEANING INSTRUCTIONS
Place pusher head assembly (Lettuce King I), head assembly (Lettuce King IV) in its most “open” position by lifting1. the handle.
Clean excess lettuce from head assembly and blades with the special brush provided. Then rinse or spray off2. machine thoroughly with HOT water.
DO NOT SCRUB BLADES OR USE SCRUB PADS ON THIS MACHINE.3. Do not put this machine in a dishwasher or dish machine with soaps, detergents, or other chemicals.4. Let machine air dry.5. Lubricate sliding parts with mineral oil or Petro Gel. DO NOT USE COOKING OILAS IT WILL BECOME STICKY6. AND MAY PERMANENTLY DAMAGE THE UNIT.
CAUTION: Food acids will make blades dull and corrode the metal. Always clean this food preparation
machine immediately after every use!
BLADE REPLACEMENT
WARNING: HANDLE WITH EXTREME CARE AS BLADES ARE SHARPAND CAN CAUSE INJURY
OR DEATH.
WARNING: This machine contains sharp blades and can cause serious injury or death if not handled
properly. All operators of this equipment should read this operator manual before operating
equipment.
Broken, bent, nicked, or dull blades must be replaced immediately. Change the complete assembly. Never mix old and
new blades in the same assembly as this may lead to excessive blade breakage.
Allow yourself ample room to work on a flat, dry surface. Open the Lettuce King I or Lettuce King IV by raising the1. pusher head until it stops. To allow more room, the pull pin on the Lettuce King IV may be removed from the frame
casting and the entire pusher head may be removed. Lettuce King I pusher may also be removed. Loosen set
screws in locking collars and pull out pivot rod.
To remove blade assemblies, use a 7/16” wrench to remove all blade block screws. NOTE: The Lettuce King IV2. has two blade block assemblies in each machine.
DISPOSE OF USED BLADE ASSEMBLIES PROPERLY!
Examine the pusher head fingers (Lettuce King I), or head (Lettuce King IV). If they are nicked or burred, smooth3. the rough edges with a small flat file. The spaces between the fingers must be uniform. Straighten any bent
fingers.
LETTUCE KING I
The following instructions pertain to the Lettuce King I.4. A. Be sure that blade block shields are installed (see exploded view drawing letter “R”).
B. Place the blade assembly into the frame casting with the sharp side of the blade facing up.
C. Fasten the rear side of the blade assembly with 1/4-20 x 2” hex head screws. Using a 7/16” wrench, tighten
screw until screw head is in solid contact with the frame, then turn screw 1/2 turn more. Do not exceed 1/2 turn
(40 inch pounds).
D. Place screws in place on the front side. Install a rubber seal on each screw, between the frame casting and
the blade block shield. Using a 7/16” wrench, tighten screw until screw head is in solid contact with the frame,
then turn screw 1/2 turn more. Do not exceed 1/2 turn (40 inch pounds).
E. Check to insure that pusher head fingers do not touch cutting blades when operated. To adjust, loosen lock-
ing collar set screws and position pusher head fingers in center of blades.
CAUTION: Prior to using your new equipment, it is important to clean the unit. Wash new blades with
warm soapy water and rinse thoroughly to remove the thin protective oil film.
6

BLADE REPLACEMENT (CONT’D)
LETTUCE KING IV
5. The following instructions pertain to the Lettuce King IV.
A. When replacing both blade assemblies, you will find it easier to install the bottom blade assembly first.
B. Be sure that blade block shields are installed (see exploded view drawing letter “F”).
C. Place bottom blade assembly into the frame casting with the sharp side of the blade facing up.
D. Fasten the right side of the blade assembly with three 1/4-20 x 1 3/8” hex head screws. Using a 7/16” wrench,
tighten screw until screw head is in solid contact with frame then turn screw 1/2 turn more. Do not exceed 1/2
turn (40 inch pounds).
E. Place three screws in place on the left side. Install a rubber seal on each screw between the frame casting
and the blade block shield. Using a 7/16” wrench, tighten screw until screw head is in solid contact with the
frame, then turn screw 1/2 turn more. Do not exceed 1/2 turn (40 inch pounds).
F. Repeat above procedure for the top blade assembly, fastening the rear side first. The rubber seals are to be
placed on the front side between the frame casting and the blade block shield.
G. Place pusher head in place and lower head gently while checking to be sure that the metal head does not
make contact with the cutting blades. Since there is no normal adjustment procedure, call the Lincoln Technical
Support Hotline for assistance, if needed (see front cover for contact information).
7

This manual suits for next models
1
Table of contents
Popular Commercial Food Equipment manuals by other brands

Structural Concepts
Structural Concepts K Series Installation & operating manual

OEM
OEM FX201-M Operating and service manual

Alico
Alico Heat On Demand 2 Plus Installation, operation & service manual

Skope
Skope SERENE SC112G Service manual

Diamond
Diamond RVE/3C-SBC manual

AS ONE
AS ONE Drymax DMX-400 instruction manual