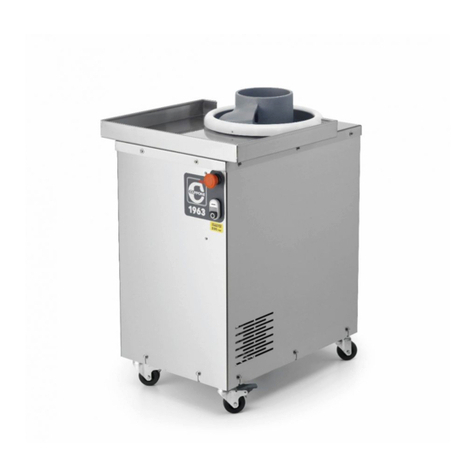
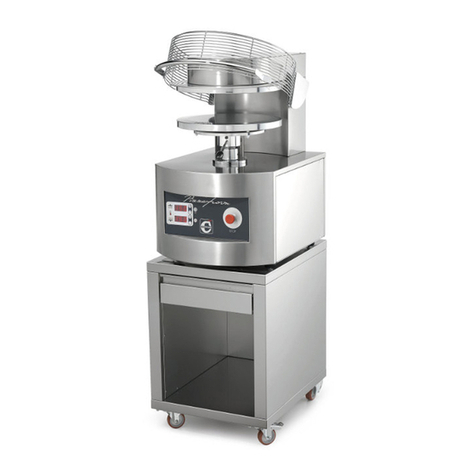
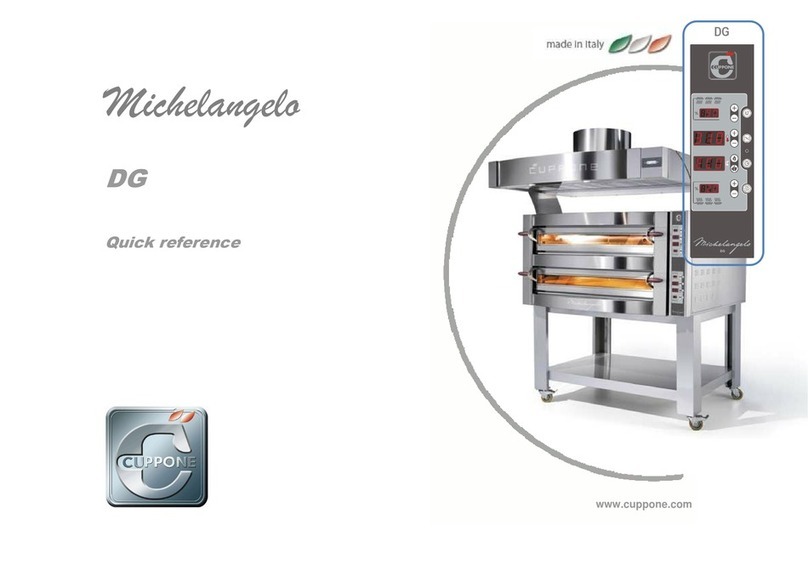
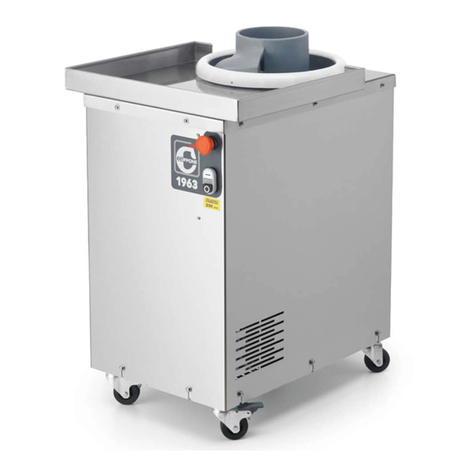
Cuppone Pizzaform User manual

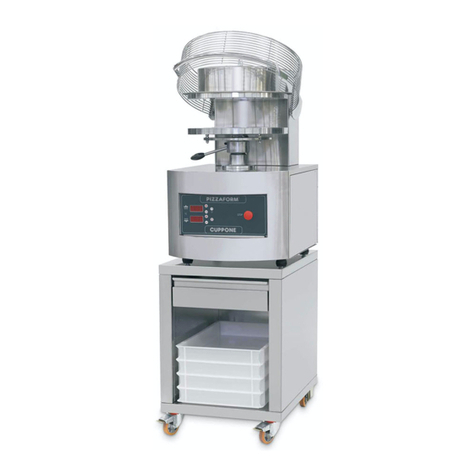
Pizzaform
User manual

2

3
Ed. 0719 - 70702572 REV00 Pizzaform - Use and maintenance
Contents
We congratulate you for choosing a product designed and
manufactured with cutting-edge technology.
In thismanualyouwillfind allthe informationon thePIZZAFORM
series of electronically controlled pizza hot-formers.
Before delivery to the customer, the product is checked and
tested in the Manufacturer's plants.
The “production process check sheet” enclosed with it
guarantees that each step in the production process, from
assembly to packaging, was carefully checked from both the
operating and safety standpoints.
Before the installation, read the content of this manual
carefully: it contains important information regarding product
assembly and safety regulations.
The foundation
Our company was founded in 1963 by the Lorenzo, Luigi and
Paolo Cuppone brothers. It immediately specialized in the
production of ovens and equipment for preparing and cooking
pizza.
The constant research and experimentation of new equipment
that are even now the strength of our company, have led us
to design and patent the machinery and ovens that have
revolutionized the way pizza is made.
Technical service
The Manufacturer can solve any technical problem regarding
use and maintenance.
Do not hesitate to contact him in case of doubt.
CUPPONE 1963
Cuppone F.lli S.r.l.
Via Sile, 36
31057 Silea (TV) - ITALY
T +39 0422 361143
F +39 0422 360993
info@cuppone.com - www.cuppone.com
Introduction
Introduction................................................................. 3
The foundation............................................................................................3
Technical service.........................................................................................3
Safety instructions ...................................................... 4
Risk analysis....................................................................................................5
Symbols used in the manual ..............................................................5
Symbols applied to the machine.....................................................6
Basic notions................................................................ 7
Knowing the product..............................................................................7
Preparing to use the product.............................................................7
Some piece of advice..............................................................................8
Use ................................................................................ 9
Knowing the control panel..................................................................9
Switching on ................................................................................................10
Plate temperature setting.....................................................................10
Setting the plate contact time ..........................................................10
Adjusting the distance between the plates..............................11
Processing.......................................................................................................11
Switching off ................................................................................................12
How to solve some processing problems..................................13
Automatic switching on of the appliance..................................14
Special functions: strike counter ......................................................14
Maintenance and cleaning ......................................... 15
Warnings..........................................................................................................15
Cleaning the product..............................................................................15
Maintenance and cleaning ......................................... 16
Disposal at end of life..............................................................................16
Downtime for prolonged periods ...................................................16
Disposing of ashes and food residues ..........................................16
Warranty....................................................................... 17
Warranty conditions.................................................................................17
Limits and exclusions...............................................................................17
Claims under warranty ...........................................................................17
Something is not working........................................... 18
What to do in case of any malfunction........................................18
Diagnostics.....................................................................................................19

4
• Read this guide carefully before using and main-
taining the appliance, and keep it with care in an
accessible place for any future consultation by
the various operators.
• Moreover, the manual must always accompany
the product through its life, even in case of trans-
fer.
• Before performing any maintenance, disconnect
the electricity supply.
• Unauthorised actions, tampering or modifica-
tions that do not follow the information provid-
ed in this manual can cause damages, injuries or
fatal accidents and null and void the warranty.
• Use or maintenance that fail to comply with the
instructions in this manual may cause damage,
injury or fatal accidents.
• The rating plate provides important technical
information that is vital in case of a request for
maintenance or repair of the appliance: please
do not remove, damage or modify it.
• Some parts of the appliance may reach high
temperatures. We recommend you avoid touch-
ing surfaces and do not get materials either flam-
mable or sensitive to heat near the appliance.
• Do not rest objects on the product, above all if
built in material sensitive to heat.
• These appliances are intended for use in com-
mercial applications, for example in kitchens,
restaurants, canteens, hospitals and commercial
companies such as bakeries, butcher shops, etc.,
but not for the continuous or mass production
of food.
Any use other than that indicated is con-
sidered improper, potentially dangerous for peo-
ple and animals and might irreparably damage
the equipment. Improper use of the equipment
voids the warranty.
• The device can be used by children aged 8 and
under and by persons with reduced physical,
sensory or mental abilities, or lacking in expe-
rience or the necessary knowledge, provided
they are under surveillance or after they have re-
ceived instructions relating to the safe use of the
appliance and understand the dangers inherent
in it. Children must not play with the appliance.
Cleaning and maintenance designed to be car-
ried out by the user must not be carried out by
unsupervised children.
• The staff using the appliance must be profes-
sionally prepared and periodically trained on its
use, as well as the safety and accident preven-
tion regulations.
• Children must be supervised to make sure they
do not play with the appliance or parts of it.
• FIRE HAZARD: leave the area around the equip-
ment free and clean of fuels. Do not keep flam-
mable materials near this appliance.
• WARNING: EXPLOSION HAZARD! It is forbidden
to use the product in potentially explosive envi-
ronments.
• WARNING: always switch off the main switch
when you finish using the appliance, above all
during cleaning or in cases of prolonged down-
time.
• If you notice any anomaly (e.g. damaged power
cable, etc.), malfunction or fault, do not use the
appliance and contact a Service Centre author-
Safety instructions
ized by the Manufacturer. Ask for original spare
parts or the Warranty will be forfeited.
• To avoid risks, if the power cable is damaged, it
must be replaced by the manufacturer, its ser-
vice agent or qualified personnel.
• Place the emergency phone numbers in a visible
location.
• Monitor the appliance during its entire oper-
ation, do not leave dishes in the product unat-
tended!
• Failure to follow these regulations may cause
damage or even fatal injury, subsequently inval-
idating the guarantee and relieving the Manu-
facturer of all liability.
• We recommend you have the appliance checked
by an Authorized Service Centre at least once a
year.
5
Ed. 0719 - 70702572 REV00 Pizzaform - Use and maintenance
Safety instructions
Symbols used in the manual
Important warning, if disregarded it can lead to seri-
ous damages to the appliance and injuries to people.
Reference to another chapter where the subject is
dealt with in more detail.
Manufacturer’s advice
The company cannot be held liable for any print or transcription
errors, reserving the right to make changes where deemed
suitable without prior notice.
Partial reproduction prohibited without the Manufacturer’s
consent. The measurements provided are indicative and not
binding.The original language is Italian: the Manufacturer is not
responsible for any translation/interpretation or print errors.
Risk analysis
• The machine was designed in compliance with
Machinery Directive 2006/42/EC and Legislative
Decree 27 January 2010, No.17.
• Following these rules, an assessment was made
of the possible extent of the damage as a conse-
quence of the risk to the health and safety of the
operators of the machine in question, deriving
from the occurrence of a hazard.
• According to these analyses, there are residual
risks linked to the use of the machine which can-
not be eliminated without a loss of functionality
and greater financial burden.
• These residual risks are:
• The operator's head could be
crushed by the plates during the
opening movement. The residual
risk is indicated by this pictogram on
the machine.
• Risk of breakdown and ejection of objects due
to the insertion of blades in the protections dur-
ing closure. Do not place your hands or oth-
er objects in the protection grille while the
machine is running, not even to unlock the
plates.
ATTENTION
• If the machine is blocked, switch it off and on
again.
• Risk of crushing fingers at the base
of the plate piston. The base of the
piston is flared to allow the finger to
slide and avoid entrapment; a mini-
mal residual risk of the finger being crushed re-
mains if it is forced into position. Do not attempt
to intervene at the base of the piston with the
machine in motion. The residual risk is indicated
by this pictogram on the machine.
• Risk of burns when touching the
plates: during use, the surfaces of
the plates become hot, special cau-
tion is recommended. The residual
risk is indicated by this pictogram.

6
ATTENZIONE
Prima di utilizzare l'apparecchiatura leggere
attentamente il manuale allegato.
ATTENTION
Before using the appliance, carefully read the
enclosed booklet.
ATTENZIONE
In caso di arresto del piatto spegnere e riaccendere
la macchina. Non forzare.
ATTENTION
In case of arrest of the plate, switch off and turn on
the machine. Do not force it.
Safety instructions
Symbols applied to the machine
Equipotential
Risk of crushing fingers.
Risk of electrocution
Risk due to scalding surface
Pay attention to gears
• ATTENTION: Read the
attached manual care-
fully before using the
equipment.
• ATTENTION: When the plate stops,
switch the machine off and on again.
Do not force it.

7
2
1
8
5
7
6
4
3
Fig.1.
Fig.2.
Ed. 0719 - 70702572 REV00 Pizzaform - Use and maintenance
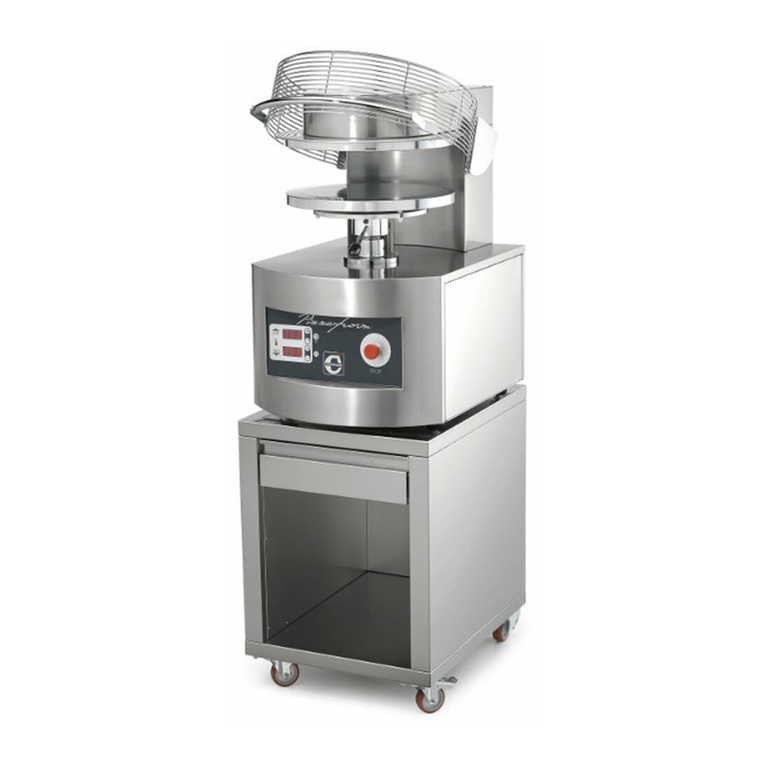
Knowing the product
Fig.1.
The equipment is intended to be used for commercial appli-
cations, for example in restaurant kitchens, canteens, hospitals
and commercial companies such as bakeries, butcher shops,
etc., but not for the continuous and mass production of food.
Its main parts are:
1 20mm thick iron bearing frame.
2 Stainless steel bodywork.
3 Self-braking motor (DC brake) with built-in thermal protec-
tion.
4 Thick chromium-plated plates with perimeter flaring.
5 Electronic control of the temperature and contact time of
the plates.
6 Safety devices in compliance with CE/UL standards.
7 Lever to adjust the distance between the plates.
8 Protection grid.
Preparing to use the product
Clean the oven and any accessories accurately, both external-
ly and internally, following the instructions in the dedicated
chapter rigorously.
Maintenance and cleaning - page 15.
Start the appliance following the instructions in the “Use and
Maintenance” manual annexed: monitor it during the whole
test and check that all the electrical components work properly.
The rst time you use the product, we recommend you set
the temperature at 150°C for at least 1 hour, without pro-
cessing any food.
To switch the product on and set its parameters, refer to:
Use - page 9
During the first cycle of operation, coat the hot plates with a
thin layer of olive oil, spreading it with some paper and then
Basic notions
Some parts of the appliance may reach high
temperatures. We recommend you avoid touch-
ing surfaces and do not get materials either flam-
mable or sensitive to heat near the appliance.
Do not place any solid or liquid objects on the
product, above all if alcoholic or made of
heat-sensitive materials.
Always switch off the master switch when you
finish using the appliance, above all during
cleaning or in cases of prolonged downtime.
cleaning it off with absorbent paper, then take a small ball of
dough, flatten it and reform the ball repeatedly until the dough
no longer sticks to the plates. This operation serves to create
a protective layer on the plates that makes the sliding of the
dough during flattening easier, and must be repeated every
time a thorough cleaning of the plates is carried out.
In this first phase, because of the humidity evaporating
from the insulating materials, the product will give out
unpleasant smells and fumes that will gradually disap-
pear during the following operating cycles.

8
Some piece of advice...
• Set the temperature of the plates at 150/160°C and contact
time equal to 0.8 seconds. These values satisfy the process-
ing of most doughs but may vary depending on the type
of dough used by the operator, its leavening degree and its
temperature.
• During the first operating cycle it is advisable to grease the
slightly warm plates with a thin layer of olive oil, spreading it
with paper to create a protective layer that makes the sliding
of the dough during flattening easier. This operation must be
repeated after every thorough cleaning of the plates. Be care-
ful not to burn yourself during this operation.
• Use a well leavened and not cold dough (remove the dough
from the fridge at least two hours before starting work).
Caution!
• Raising the protection grille during the ascent of the
lower plate, the movement stops and is immediately
reversed.
• If the lower plate fails to complete the flattening action, due
to unleavened dough or some foreign body placed between
the plates, immediately lift the protection to allow the move-
ment to be reversed.
• When the plate stops, switch the machine off and on again.
Do not force it.
Basic notions

9
Fig.3.
Ed. 0719 - 70702572 REV00 Pizzaform - Use and maintenance
Knowing the control panel
Fig.3.
1 Display 1
Displays the actual temperature of the upper plate.
In the parameter setting phase it displays the temperature
set for the upper plate or the contact time between the
plates.
2 Led display 1
Shows the heating element of the upper plate is ON.
3 Display 2
Displays the actual temperature of the lower plate.
In the parameter setting phase it displays the temperature
set for the lower plate.
4 Led display 2
Shows the heating element of the lower plate is ON.
5 + key
Increases the temperature of the upper plate and the con-
tact time of the plates.
6 - key
Decreases the temperature of the upper plate and the con-
tact time of the plates.
7 + key
Increases the temperature of the lower plate.
8 - key
Decreases the temperature of the lower plate.
9 Timer led
Shows the setting status of the contact time.
10 Timer key
Allows setting the plate contact time in seconds displayed
on display 1.
11 ON/OFF key
Switches the machine ON and OFF; activates the “count-
down” function.
12 Emergency STOP button
Switches the machine OFF and prevents the lower plate
from going up in an emergency.
13 Adjustment lever
Varies the distance between the two plates and therefore
the thickness of the dough disk; by moving the lever in a
counter-clockwise direction the thickness decreases, mov-
ing it in a clockwise direction increases the thickness.
Use
Contents
Knowing the control panel..................................................................9
Switching on.................................................................................................10
Plate temperature setting.....................................................................10
Setting the plate contact time...........................................................10
Adjusting the distance between the plates..............................11
Processing ......................................................................................................11
Switching off.................................................................................................12
How to solve some processing problems..................................13
Special functions: automatic switching on of the appliance
.................14
Special functions: strike counter.......................................................14
14 Protection grille
Prevents the insertion of foreign bodies between the plates;
if the protection is released during flattening, the move-
ment of the lower plate is immediately interrupted and re-
versed.
Act on the control panel using only your dry and clean
fingers
13
14
10 9
11
12
4
5 126
3 8 7

10
12
1
3 11
3 8 7
1 5 6 1 5 6 10
Fig.4.
Fig.5. Fig.7.
3 8 7
1 5 6
Fig.6.
Switching on
Fig.4.
Switch the machine ON pressing the ON/OFF key (11).
After a few seconds, the displays will show the current
temperatures of the plates (display (1) shows the temperature
of the upper plate, display (3) that of the lower plate).
It is then necessary to set 3 parameters:
• the temperatures of the upper and lower plates;
• how long the plates must remain in contact;
• the distance between the plates (therefore the thickness of
the disk).
If the machine does not switch on, check whether the
STOP button (12) is locked; if so, unlock it by turning it
in a clockwise direction.
Plate temperature setting
Fig.5.
To set the temperature of the upper plate press either the “+”
(5) or “-” (6) key; the display (1) starts flashing; press the “+”
(5) or “-” (6) key repeatedly until the desired temperature is
reached.
Fig.6.
To set the temperature of the lower plate press the “+” (7) or
“-” (8) key; the display (3) starts flashing; press the “+” (7) or
“-”(8) key repeatedly until the desired temperature is reached.
The temperature set when the machine is switched
o will be memorized and re-proposed at the next
power up.
Setting the plate contact time
Fig.7.
It is possible to set the plate contact time between 0 and 3
seconds. For this setting, press the “timer”(10) key; the
display (1) starts flashing and shows the set time; press either
the “+” (5) or “-” (6) key until the desired time is reached.
Use

11
1 5
3
13
+
2
3
4
5
6
1
14
Fig.10.
Fig.8.
Fig.9.
Ed. 0719 - 70702572 REV00 Pizzaform - Use and maintenance
Adjusting the distance between the
plates
Fig.8.
Turn lever (13) until the desired distance between the plates
is reached: the closer the plates, the thinner the dough disk.
By moving the lever in a counter-clockwise direction the
thickness decreases, moving it clockwise increases the
thickness.
Processing
Fig.9.
Wait for the plates to reach the set temperature, checking the
values on displays (1) and (3); if it is necessary to know the
temperature to be reached, press the “+” (5) key.
During the first operating cycle it is advisable to grease
the slightly warm plates with a thin layer of olive oil,
spreading it with paper to create a protective layer that
makes the sliding of the dough during flattening easier. This
operation must be repeated after every thorough cleaning of
the plates. Be careful not to burn yourself during this operation.
Fig.10.
1Place a small ball of dough, slightly dusted with flour,
exactly in the centre of the lower plate, without flattening
while handling it. It is vital to use a well leavened and not
cold dough (remove the dough from the fridge at least
two hours before starting work).
2Make sure there are no foreign objects on the lower plate
and lower the protection grille (14).
3The lower plate will automatically get near the upper
plate to flatten the dough ball.
Use

12
Fig.11.
2
3
4
5
6
1
14
2
3
4
5
6
1
14
Use
Fig.11.
4After the set contact time, the lower plate will go back to
its starting position.
5Lift the protection grille (14) and remove the dough
disk, being careful not to burn yourself on the warm
plates (use personal protection equipment such as heat
insulating gloves).
The protection grid must be raised only when the lower
plate has finished flattening and has returned to the
starting position; however, if you want to anticipate the
descent to reduce the diameter of the dough disk, lift the grille
before the end of the cycle.
Check if the result is satisfactory: if not, try modifying the
previously set parameters (temperature, contact time and
distance between the plates) by resetting them as described in
the previous paragraphs or refer to the table on page13 for
some practical tips.
Switching o
Fig.4.
To switch the appliance off, press the ON/OFF (11) key.
The emergency STOP button
When pressed, the red STOP button (12) switches the machine off and prevents the lower plate from raising in an emergency
(for instance if some foreign object remains stuck between the plates).
It must therefore be used only when really necessary and not as an ON/OFF switch to be used at the end of the work day.
Once pressed, to unblock it, turn it in a clockwise direction.

13
Ed. 0719 - 70702572 REV00 Pizzaform - Use and maintenance
Use
Problem Causes Solution
The dough disk sticks to the plates
and is difficult to remove
• The temperature of the plates is too low
• The dough ball was not floured before placing
it on the lower plate to flatten it
• The plates had not been greased with oil
• Check the set temperature (in case raise it up to 150°/160°C)
• Lightly flour the small ball of dough before placing it on the lower plate
• During the first operating cycle it is advisable to grease the slightly warm plates with a thin layer
of olive oil, spreading it with paper to create a protective layer that makes the sliding of the dough
during flattening easier. This operation must be repeated after every thorough cleaning of the plates.
Be careful not to burn yourself during this operation.
The shape of the dough disk is not
perfectly circular
• The ball was not positioned exactly in the cen-
tre of the plate
• The shape of the ball before flattening was not
perfectly spherical
• The temperature of the plates is too low.
• Position the ball exactly at the centre of the lower plate
• Do not alter the spherical shape of the ball while handling it
• Check the set temperature (in case raise it up to 150°/160°C)
• During the first operating cycle it is advisable to grease the slightly warm plates with a thin layer
of olive oil, spreading it with paper to create a protective layer that makes the sliding of the dough
during flattening easier. This operation must be repeated after every thorough cleaning of the plates.
Be careful not to burn yourself during this operation.
The dough disk shrinks after flattening • The dough has not leavened enough
• The temperature of the dough ball is too low
• Let the dough leaven longer placing it in a warm place.
• Use some not cold dough (remove the dough from the fridge at least two hours before starting
work)
The dough disk is not the desired size
• The contact time setting is incorrect
• The adjustment of the distance between the
plates is incorrect
• Increase or decrease the contact time between the plates (see page 10)
• Increase or decrease the distance between the plates (see page 11)
Bubbles appear on the surface of the
pizza during cooking • The dough ball has not leavened enough. • Let the dough leaven longer placing it in a warm place
• Pierce the dough disk with a pastry cutter before filling
How to solve some processing problems

14
1 5 6
9
11
10
1
3
5 12
Fig.12.
Fig.13.
Special functions: automatic
switching on of the appliance
The board is equipped with a special function for the automatic
switching on of the appliance (countdown) after a certain
number of hours set by the user.
Fig.12.
With the appliance display OFF (plug in, emergency STOP
button unlocked, ON/OFF key not ON) press the “ON/OFF”
(11) key for a few seconds to activate the function.
Display (1) shows the time to automatic switch-on (in the
example 12 = means the machine will automatically switch on
in 12 hours).
To modify this value, use the “+” (5) or “-” (6) key until the
desired time is displayed (with a maximum limit of 99.5, that is
99 hours and 50 minutes).
During these operations the LED Timer (9) is flashing.
A countdown starts straight away, at the end of which the
appliance will turn on automatically, with the parameters
(temperature, contact time and distance between the plates)
set at the time it was switched off.
If you wish to deactivate the function and switch the
appliance on straight away without waiting for the set time,
press the “timer” (10) key again or the ON/OFF (11) key.
If during the countdown the power supply is interrupted
(for example due to a blackout) the value reached is
saved to resume when the power supply is restored: for
example, if there were 4 hours before the oven was turned on
and the voltage is been suspended for 30 minutes, when the
power returns, there will still be 4 hours left to switch on.
Special functions: strike counter
With the appliance display switched off (plug in, emergency
STOP button unlocked, ON/OFF key not ON), pressing the
“+” (5) key displays for five seconds the number of strikes
performed (that is the number of processed dough balls).
The contactor is updated every five strikes.
Display (1) shows the thousands while display (3) shows the
hundreds, tens or the units.
Examples:
display (1): 1 (thousands)
display (3): 4 (units)
1.004 pizzas have been flattened
display (1): 1 (thousands)
display (3): 40 (tens)
1.040 pizzas have been flattened
display (1): 1 (thousands)
display (3): 400 (hundreds)
1,400 pizzas have been flattened
display (1): 0 (thousands)
display (3): 400 (hundreds)
400 pizzas have been flattened
Use

15
H2O
Fig.14.
Ed. 0719 - 70702572 REV00 Pizzaform - Use and maintenance
Warnings
Before carrying out any cleaning operation, it is neces-
sary to disconnect the power supply of the appliance
(acting on the system switch), wear adequate personal
protection equipment (e.g. gloves, etc.) and wait for the appli-
ance to cool. The user must only carry out routine maintenance
operations, for any extraordinary maintenance contact a Ser-
vice Centre requesting the intervention of an authorized tech-
nician. Any damages deriving from lack of maintenance or in-
correct cleaning (e.g. use of unsuitable detergents) are not
covered by the Manufacturer’s warranty.
Any cleaning must be carried out with the product
completely cold and wearing adequate personal
protection devices (e.g. gloves, etc.).
When cleaning any part or accessory do NOT use:
• abrasive or powder detergents;
• aggressive or corrosive detergents (e.g. hydrochlo-
ric/muriatic or sulfuric acid, chlorine, caustic soda, etc ...).
Warning! Do not use these substances even to clean the
sub-structure/floor under the appliance or base;
• abrasive or sharp tools (e.g. abrasive sponges, scrapers, steel
brushes, etc.);
• steamed or pressurised water jets.
It is best to have an authorized service centre perform
maintenance and inspection on the appliance at least
once a year to ensure top working and safety conditions.
Cleaning the product
Cleaning the external steel parts
Fig.14.
Make sure that the power supply has been disconnect-
ed and that the plates are not too hot and can cause
burns to the operator or damage the tools used for
cleaning. Use a cloth soaked in warm soapy water and finish
with a thorough rinsing and drying, taking care to remove all
traces of detergent, especially from the plates as they come
into contact with food.
Be careful not to scratch the plates if you need to clean any
residual dough.
Cleaning the machine interior
It is advisable to have qualified and authorized personnel clean
the machine interior at least once a year to safeguard the cor-
rect operation of its internal components
Cleaning the display
Clean the display with a soft cloth and a little detergent for del-
icate surfaces. Avoid using large quantities of product as any
infiltrations might cause serious damage to the display.
Avoid also using very aggressive detergents that may damage
the material the display is made of (polycarbonate).
Maintenance and cleaning

16
Disposal at end of life
To avoid any unauthorised use and associated risks, be-
fore discarding the machine make sure it cannot be
used; for this purpose, cut and remove the power cord
(once the equipment is unplugged).
Make sure no child can accidentally remain trapped inside the
cooking chamber, locking the door (for example, with adhesive
tape or locks).
Equipment disposal
Pursuant to art. 13 of Legislative Decree No. 49 of 2014
“Implementation of WEEE Directive 2012/19/EU on
electrical and electronic waste”, the crossed-out
wheelie bin specifies that the product entered the
market after 13 August 2005 and that at the end of its useful life
it must not be assimilated to other waste but must be disposed
of separately. All the equipment is made of recyclable metal
materials (stainless steel, iron, aluminium, galvanized sheet,
copper, etc.) in a percentage higher than 90% by weight. It is
necessary to pay attention to the management of this product
in its end of life reducing the negative impacts on the
environment and improving the effectiveness of the use of
resources, applying the "polluter-pays”, prevention, preparation
for re-use, recycling and recovery principles. Please note that
unauthorized or incorrect disposal of the product leads to the
application of the penalties provided for by the current
legislation.
Information on disposal in Italy
WEEE equipment in Italy must be delivered to:
• to Collection Centres (also named eco-islands or eco-plat-
forms)
• the dealer where new equipment is purchased who must
withdraw it free of charge ("one to one" withdrawal).
Information on disposal in European Union countries
The EU Directives on WEEE equipment has been adopted
in different ways by different countries, therefore in order to
dispose of this equipment correctly we suggest that you
contact your local authority or your dealer in order to ask the
correct method of disposal.
Downtime for prolonged periods
When the product is not in operation, disconnect it from the
mains. Protect the steel outside surfaces passing over them
with a soft cloth slightly damp with Vaseline oil.
Before resuming operations:
• accurately clean the equipment and accessories;
• reconnect the equipment to the power;
• inspect the equipment before using it.
Disposing of ashes and food residues
The ash and food residues removed when cleaning
must be disposed of according to the regulations in
force in the country where the product is used.
If in doubt, we suggest contacting the local authorities to ask
for the correct method of disposal.
Maintenance and cleaning

17
Ed. 0719 - 70702572 REV00 Pizzaform - Use and maintenance
Warranty conditions
“Cuppone F.lli s.r.l.”guarantees this product for 1 year from date
of purchase with regard to manufacturing and material faults.
“Cuppone F.lli s.r.l.” guarantees that all its products are
manufactured with the best quality materials and with
processing techniques that ensure total efficiency.
If, during normal use, faulty or malfunctioning items should be
discovered, said items will be replaced free of charge.
As to products sold abroad, replacements will be again free of
charge unless special conditions have been agreed with the
distributor.
Cuppone F.lli s.r.l.’s liability is limited to the supply of the
appliance which must be installed professionally by qualified
personnel, following the instructions contained in the booklets
supplied with the product purchased and in compliance with
the regulations in force.
“Cuppone F.lli s.r.l.” will not be liable if the installation, use and
maintenance instructions printed in the manual annexed to
each product are not complied with.
Systems in public places are subject to special regulations.
Limits and exclusions
The warranty applies on condition that:
• the appliance is installed by a qualified technician or capable
person that considers as suitable all the technical character-
istics of the system the appliance will be connected to, that
must anyway comply with the requirements in the booklets
supplied with all the products;
• the installer confirms that he/she has successfully carry out
the final test of the product, after installing it.
• the appliance is used as stated in the instruction manual sup-
plied for all the products.
The warranty is not valid for damages caused by:
• chemical and atmospheric agents, fires, faults in the room
electrical system, product misuse, lack of maintenance, prod-
uct modifications or tampering, ineffective and/or inade-
quate flue and/or other causes not depending on the prod-
uct.
• any damage caused by transport (for which the haulier is lia-
ble), therefore we recommend you check the goods carefully
on receipt, informing the retailer about any damage, stating
the problem on the transport document and on the copy
staying with the haulier.
All items subject to normal wear and tear, among which
gaskets, bulbs and belts, are excluded from the warranty.
The warranty does not cover any product calibrations or
adjustments, according to the type of installation.
This warranty applies only to the purchaser and cannot be
transferred.
In case of replacements, the warranty is not extended.
No compensation is given for the period during which the
product was not working.
This is the only valid warranty and nobody is authorized to
provide any other in the name or on behalf of “Cuppone F.lli
s.r.l.”.
Claims under warranty
If, during the warranty period, faults are discovered or
breakages occur, the user must contact the reseller with his/
her proof of purchase within 2 months from the date when he/
she discovered the fault.
If the complaint is justified, the warranty provides for the repair
of the appliance as provided for by the legislation in force.
The tribunal competent for any dispute is Treviso.
Warranty

18
Fig.15.
What to do in case of any malfunction
• Try and check the table on page13 If none of the proposed
solutions solves the problem, continue reading the following
procedure.
• Check if there are any error messages on the display (tables
on page 19.)
Message ................................................................................................................
• Note the product data (rating plate) and the date and num-
ber of the appliance purchase invoice.
Serial number.....................................................................................................
Model......................................................................................................................
Invoice date.........................................................................................................
Invoice number ................................................................................................
• Read the chapter on warranty carefully.
Warranty - page 17.
• Call an authorized Service Centre or contact the Dealer/Man-
ufacturer directly, stating the product data. While waiting for
technical assistance, disconnect the product from the power
supply.
CUPPONE 1963
Cuppone F.lli S.r.l.
Via Sile, 36
31057 Silea (TV) - ITALY
T +39 0422 361143
F +39 0422 360993
info@cuppone.com - www.cuppone.com
Something is not working....
Model
Electrical parameters
Absorption
Year of production
Serial number

19
Fig.16.
Ed. 0719 - 70702572 REV00 Pizzaform - Use and maintenance
Something is not working....
Diagnostics
In the event of faults or malfunctions, the board displays can
show the following error messages:
• 1. “Err” on display (1): upper heating element thermocouple
faulty.
• 2. “Err” on display (3): lower heating element thermocouple
faulty.
• 3.“Err” on display (1) and “rot” on display (3): error of the
motor that has not completed the cycle in the time set in the
“tUP” parameter.
NOTE:
“Err”the machine switches off.
To restore the functions, switch the machine on and off again. If
the problem persists, contact the service centre.
11
3
21
3
31
3

CUPPONE 1963
Cuppone F.lli S.r.l.
Via Sile, 36
31057 Silea (TV) - ITALY
T +39 0422 361143
F +39 0422 360993
Other manuals for Pizzaform
2
Table of contents
Other Cuppone Commercial Food Equipment manuals

Cuppone
Cuppone Michelangelo DG User manual

Cuppone
Cuppone PZF/30 User manual

Cuppone
Cuppone Pizzaform User manual

Cuppone
Cuppone Pizzaform Series Parts list manual

Cuppone
Cuppone RND280 User manual

Cuppone
Cuppone Dough Rounder User manual

Cuppone
Cuppone LLKBR280 User manual

Cuppone
Cuppone RND280 User manual

Cuppone
Cuppone PZF/30 User manual

Cuppone
Cuppone LLKBR800 User manual