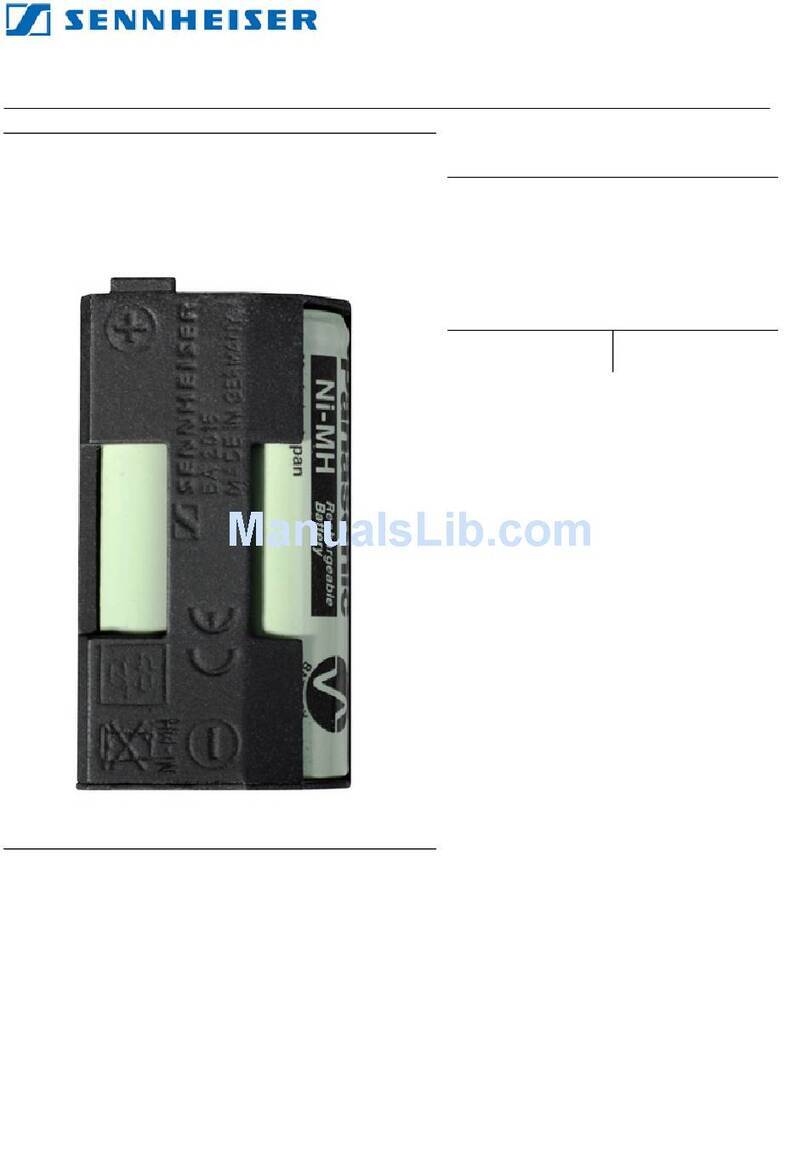
Lind Electronics PowerCenter 500 User manual

Page 1
The Lind
PowerCenter 500
Operation Manual
Model LPC - 500
for Apple Macintosh PowerBook™ 500 Series
© 1995 Lind Electronics, Inc.
Rev 4
™

Page 2
Thank you for purchasing the Lind PowerCenter 500 battery service
system. PowerBook Intelligent Batteries represent a technical break-
through in portable power management. Products that support this
battery system require a similarly high level of technical effort.
In the development of the PowerCenter and it's companion software,
we created the most full featured battery service product on the market.
Functions include error analysis and correction as well as charging,
conditioning and calibration. In the course of this development, we
found it necessary to analyze in detail all Intelligent Battery operations.
Most of the results of our battery analysis are contained in the
PowerCenter manual. We did not intend to write such an extensive
manual but a good understanding of the Intelligent Battery is essential
to understanding the operation of the PowerCenter and the Intelligent
Battery Utilities System (IBUS™) software.
We welcome your comments about our products. Please take time to
write or call us with your suggestions. Your satisfaction is our goal.
LeRoy Lind
The PowerCenter has been tested and verified to comply with FCC Part 15
Class B requirements.
PowerCenter is a trademark of Lind Electronics, Inc. Apple and Macintosh
PowerBook are registered trademarks. All other product names and trademarks
are properties of their respective owners.
Phone (612)927-6303
Fax (612)927-7740
URL: www.lindelectronics.com
E-Mail [email protected]

Page 3
CONTENTS
LPC-500 OVERVIEW ........................................................................................4
Fast Start Operating Instructions ................................................................5
USER INFORMATION.......................................................................................6
Specifications..............................................................................................6
Power Sources............................................................................................6
Indicators and Controls ...............................................................................7
Inputs and Outputs......................................................................................8
BATTERY CHARGING......................................................................................9
AUXILIARY POWER SOURCE.......................................................................10
CONDITIONING AND CALIBRATION ............................................................11
Relationship of Conditioning and Calibration ............................................11
Battery Conditioning In the PowerBook ....................................................11
Battery Calibration In the PowerBook .......................................................12
Calibration and Conditioning in the PowerCenter .....................................12
CONDITION AND CALIBRATION PROCEDURE ..........................................13
Set Up .......................................................................................................13
Calibration Procedure ...............................................................................14
Diagnostic Tests .......................................................................................16
Test Chart .................................................................................................16
ERROR CODES ..............................................................................................17
OVER DISCHARGED BATTERY RECOVERY...............................................18
Description Of Recovery ...........................................................................18
OD Recovery Operation............................................................................18
Shorted Cell Tests ....................................................................................19
LIMITED WARRANTY.....................................................................................20
APPENDIX I
HOW THE INTELLIGENT BATTERY WORKS.........................................21
Charging and Discharging .................................................................22
APPENDIX II
BATTERY CALIBRATION ........................................................................23
What is calibration? ...........................................................................23
How is the battery Calibrated?...........................................................23
Why is calibration needed?................................................................23
How do I know calibration is necessary?...........................................23
APPENDIX III
MEMORY EFFECT and CONDITIONING ................................................24
APPENDIX IV
BATTERY STORAGE and USE ...............................................................25

Page 4
LPC-500 OVERVIEW
The Lind PowerCenter™ 500 is a multi-function battery service unit
designed to:
• Charge Batteries.
• Condition and Calibrate Batteries.
• Serve as an Auxiliary Power Source.
• Perform Intelligent Battery Management Tasks.
Specific capabilities are:
• Charges one or two 500 series Intelligent Batteries outside the
PowerBook.
• Conditions and calibrates Intelligent Batteries outside the
PowerBook.
• Turns one or two external batteries into an Auxiliary Power Source.
• Recharges and restores communication with over discharged
batteries.
• Displays the charge remaining in each of two external batteries.
• Performs diagnostic tests and corrects battery problems.
The PowerCenter is designed to get maximum performance from the
Intelligent Batteries used in the PowerBook 500 series of laptop
computers.
General Operation
Up to two 500 series Intelligent Batteries snap firmly into the
PowerCenter. The locking mechanism of the batteries holds them in
place for charging and transport. Batteries may be carried in the
PowerCenter with negligible loss of battery power. Batteries may be
stored in the PowerCenter with power applied for charge maintenance.
The LCD displays in the PowerCenter show the charge remaining in
the batteries. The displays show additional information when the
system is doing diagnostic tests or calibrating the battery. The
PowerCenter has LED indicators for each battery slot to show when
the battery is being charged or discharged.
Power for charging batteries in the PowerCenter is obtained from an
Apple AC or Lind DC power adapter. A power cable is supplied to
connect the PowerCenter to the PowerBook. See Appendix I and II for
a description of Intelligent Battery operation.

Page 5
Fast Start Instructions
Battery Charging
1. Apply power to the PowerCenter.
2. Insert one or two Intelligent Batteries.
If the battery passes automatic diagnostic tests, the 'Charge LED'
comes ON and the PowerCenter begins charging. At full charge,
the LCD display will read 100%. The Charge Cycle repeats to
charge the second battery.
Auxiliary Power Operation
1. Connect the cable from the PowerCenter to the PowerBook.
2. Insert one or two Intelligent Batteries into the PowerCenter.
3. Press 'Mode Switch' on the PowerCenter until a 'RUN' LED comes
ON. The PowerBook now operates from PowerCenter Batteries.
The PowerCenter switches to the second battery after the first
battery is depleted. The computer switches to internal batteries
when external power is depleted.
Condition and Calibration
1. Apply power to the PowerCenter.
2. Connect the cable from the PowerCenter to the PowerBook.
3. Turn the PowerBook ON and lock it into 'Better Performance'
mode (see control panel page 12).
4. Insert one or two Intelligent Batteries into the PowerCenter.
5. Momentarily press the 'Mode Switch'.
The PowerCenter displays 'C1','C2' and 'C3' as it cycles through
the three charge and discharge cycles for each battery. It then
displays 'Cb' to show the battery is properly calibrated.
Over Discharged Recovery
1. Apply power to the PowerCenter.
2. Insert an Intelligent Battery.
If the PowerCenter determines Recovery is necessary, it displays
'Od' and begins the recovery sequence. The 'Charge' LED blinks
while Recovery is attempted. If Recovery and Diagnostic tests are
successful, the PowerCenter begins charging. If Recovery fails,
the PowerCenter displays 'E1' (see page 17).

Page 6
USER INFORMATION
Specifications
PowerCenter Size 9.4" x 4.5" x 1.125"
PowerCenter Weight
Empty 7.5 ounces
With 2 Batteries 32 ounces
PBook to PCenter Cable Length 4 feet
Power Input Apple AC Adptr or Lind DC Adptr
Charge Time
1 Battery 1.5 hrs
2 Batteries 3 hrs
Calibration and Conditioning Time
1 Battery Less than 5 hrs *
2 Batteries Less than 7 hrs *
* The maximum time depends upon the charge of the battery at the
start of the operation and the model PowerBook used as the load
during discharge.
Lind Battery Utilities™ 500
The Lind Battery Utilities 500 software program, is designed to analyze
stored battery parameters and allow the user to correct data that is out
of the normal range. Batteries that do not perform properly in the
PowerBook or the PowerCenter should be examined with this program
to determine if stored data corrections are necessary.
Power Sources
Power to operate the PowerCenter is obtained from an Apple AC
adapter or Lind DC Adapter™ 500 (12 volt Automobile Power Adapter
Model PB-5). A power cable, supplied with the PowerCenter, is used
to connect the PowerCenter to the PowerBook when:
- The PowerBook and PowerCenter are using power from the same
adapter.
- The PowerCenter is used as an Auxiliary Power Source.
- The PowerBook is used as a load for calibrating and conditioning
batteries.
Note: AC and DC adapters that do not have the capability to operate
and charge the PowerBook at the same time will not operate properly
with the PowerCenter 500.

Page 7
a. Charge LED - Full ON when battery is charging
- Flashes when:
PowerBook batteries are being charged
Charge Power is not connected
Over Discharge Recovery mode is active
Battery temperature is out of range
Terminal error codes are displayed
b. Run LED - - Full ON when PowerCenter batteries are discharging in
Auxiliary power or calibration modes.
- Flashes when:
Over Discharge Recovery mode is active
Terminal error codes are displayed
c. Display - - Displays the charge remaining in the battery in Charge and
Run modes.
- Displays test mode codes
- Displays battery failure error codes
d. Mode Switch - The Mode Switch is used to initiate calibration and enter
Auxiliary Power Pack mode.
Indicators and Controls
TM
Mode
Switch
abc
d

Page 8
Apple AC
Adapter
Lind PB-5
12V Adapter
500 Series
PowerBook
PowerCenter Connection
or
Battery
#2
Battery
#1
TM
Output Input
Inputs and Outputs
Mode
Switch
Power Cable supplied
with the PowerCenter

Page 9
BATTERY CHARGING
One or two PowerBook 500 series Intelligent Batteries can be charged
in the PowerCenter. The batteries are charged in sequence with the
first battery inserted being charged first. Diagnostic tests are per-
formed on batteries when inserted into the PowerCenter to assure all
battery and microprocessor functions are correct for proper charging
or use of the battery. Power for charging batteries is obtained from
the Apple AC adapter (supplied with the PowerBook) or a Lind DC
Adapter 500.
Battery Charge Procedure
• Apply power to the PowerCenter from one of the recommended
power sources.
• Insert one or two Intelligent Batteries into the PowerCenter.
-Diagnostic tests are run on each battery when it is inserted.
-Tests on a normal battery are completed in less than ten seconds.
- The LCD display indicates the percent of charge in the battery.
- The PowerCenter will not charge a battery with over 98% charge
remaining.
• The PowerCenter begins charging the first battery inserted.
• The ‘Charge’ LED comes ON to indicate the battery is charging.
- The battery charges at the same rate as in the PowerBook.
- A fully discharged battery charges in 1.5 to 2 hours.
- The charge in the battery indicated on the LCD display will
increase as charging progresses.
• At full charge, the ‘Charge ‘ LED turns OFF and the LCD display will
read 100% (see Note 1).
• The PowerCenter automatically begins charging the second battery
inserted.
• The charge cycle proceeds as described above to complete second
battery charging.
• Pulse maintenance charging maintains both batteries at full charge.
Note 1 - If the LCD display jumps to100% at the end of charge or
remains at 100% for a long period before charging is completed, this is
an indication that the battery needs calibration. The battery displays the
amount of charge it believes it contains but the display resets to 100%
when it has reached full charge. This display reset should not be
confused with calibration.
Note 2 - When the PowerCenter is connected to a PowerBook, battery
charging in the PowerCenter is delayed until the PowerBook's internal
batteries are fully charged or removed. The PowerCenter's 'Charge
LED' will blink while charging is delayed.

Page 10
AUXILIARY POWER SOURCE
One or two Intelligent Batteries inserted into the PowerCenter may be
used as an external Auxiliary Power Source for the PowerBook. These
batteries supply power to the PowerBook sequentially until they are
depleted. The PowerBook then continues to operate from internal
batteries. Using the PowerCenter as an auxiliary power source has the
following advantages:
• No need to interrupt PowerBook operation to swap batteries.
• Two or three times the operating time obtained with 1 or 2 internal
batteries.
• Frees the second battery slot for accessory modules without
sacrificing run-time.
• The charge remaining in the external batteries is conveniently and
continuously shown on the LCD displays of the PowerCenter.
Batteries recharged in the PowerCenter may be removed and inserted
into the PowerBook for maximum operating time.
Auxiliary Power Operation
• Connect the power cable from the PowerCenter output to the
PowerBook.
• Insert one or two Intelligent Batteries into the PowerCenter.
- A single battery may be placed in either side of the PowerCenter.
• Press the ‘Mode Switch’ on the PowerCenter until a ‘RUN’ LED
comes ON.
- The PowerCenter will now supply power to the PowerBook.
• The charge remaining in each battery is displayed continuously on
the LCD screens of the PowerCenter.
• The PowerCenter automatically switches to the second battery
when the first battery is depleted.
- The ‘Run’ LED of the second battery will come ON.
- A battery may be removed from the PowerCenter during
Auxiliary Power use without interrupting operation of the
PowerCenter or the PowerBook.
- The PowerCenter automatically shuts down when the second
battery is fully depleted. The computer then switches to internal
batteries.
Note- If the computer goes to sleep or is turned OFF, the PowerCenter
will automatically turn OFF in 3 minutes. The PowerCenter ‘Mode
Switch’ must be pressed to re-establish Auxiliary Power operation.
Note - It is recommended that the PowerBook have an internal battery
in place when any external power source is in use. This practice will
avoid loss of data if the external power cable is inadvertently discon-
nected.

Page 11
CONDITIONING AND CALIBRATION
Relationship of Conditioning and Calibration
Battery conditioning and calibration are two separate operations that
are necessary for different reasons. Both require the battery to be
charged, then discharged to a level below the PowerBook's normal
shut off point. When a battery is calibrated it is also automatically
conditioned. If the user calibrates a battery as often as it should be
conditioned, a separate conditioning sequence is unnecessary. In our
opinion batteries should be calibrated and conditioned once or twice a
month.
Battery Conditioning In the PowerBook
In battery mode, the PowerBook may operate from one or two batter-
ies. If the PowerBook uses a single battery, it runs until the battery is
discharged to 8.5 volts. At this point the PowerBook shuts itself OFF.
This method of conditioning may reduce the chances of acquiring a
serious loss of capacity if it is performed several times a month. The
8.5 volt level, however, is 0.5 volts higher than the recommended
conditioning voltage. In some cases, the memory effect loss may not
be fully corrected by discharging to this level.
If two batteries are installed and certain conditions are met (see Battery
Calibration In the PowerBook - next page), the battery in the right side
may be calibrated. When a battery is calibrated it is also discharged to
7.8 volts. This level of discharge provides better memory effect correc-
tion, and prevention, than the 8.5 volt level used in a one battery
system.
Note - See Appendix II and III for additional information on Conditioning
and Calibration.

Page 12
Battery Calibration In the PowerBook
The PowerBook performs battery calibration under a specific set of
circumstances. Calibration of a battery will occur if:
• Two batteries are installed in the PowerBook.
• One or both batteries are allowed to completely charge
• The PowerBook runs until it turns itself OFF due to complete battery
depletion.
• The batteries are depleted within eight hours of being fully charged.
If these conditions are met, the battery in the Right slot (only) will be
calibrated. Several other environmental and operational events or
conditions may prevent completion of the calibration sequence. The
PowerBook does not notify the user when calibration has, or has not
been accomplished.
Calibration and Conditioning in the PowerCenter
A battery is subjected to a 7.8 volt conditioning discharge level each
time it is calibrated in the PowerCenter. Batteries should be calibrated
and conditioned at about the same intervals. Therefore, the
PowerCenter combines the two procedures and does not have a
separate sequence for conditioning.
The PowerCenter can be set up to calibrate and condition two batteries
overnight. Proper completion of the calibration sequence is noted on
the LCD displays of the PowerCenter.

Page 13
Proper settings for Calibration and Conditioning in the PowerCenter
- If the PowerBook will not be used, the screen brightness should
be reduced during calibration to reduce screen stress.
Set Up
This procedure may require up to 5 hours if a battery is completely
discharged at the start of the operation. Two batteries are completed in
less than 7 hours.
• Connect a proper power adapter to the PowerCenter.
• Connect the power cable from the PowerCenter to the PowerBook.
- The PowerBook may be used during this operation. Note that
the PowerBook should have an internal battery installed to assure
continuous power if a cable is inadvertently disconnected.
• Turn the PowerBook ON and lock it into a mode that does not allow
it to go to sleep.
- See the illustration below. This control panel may be found within
the Control Panels Folder in the System Folder of the PowerBook.
CONDITION AND CALIBRATION PROCEDURE

Page 14
Calibration Procedure
• Insert one or two Intelligent Batteries into the PowerCenter.
- The normal diagnostic tests are run and the LCD displays the
percent of charge in the battery.
• Momentarily press the “Mode Switch” to put the PowerCenter into
the battery calibration mode.
- The ‘Charge’ LED is ON to indicate the battery is charging.
-The LCD alternately displays ‘C 1’ and the percent of charge in the
battery.
-The ‘C1’ display indicates the system is operating in the first of 3
phases of the calibration procedure.
- The battery charges to maximum capacity.
• The PowerCenter automatically switches to discharge mode for the
second leg of the calibration operation.
- The ‘RUN’ LED comes ON to indicate the battery is discharging.
-The LCD alternately displays ‘C2’ and the percent of charge in the
battery.
-The ‘C2’ display indicates the system is operating in the second
of 3 phases of the calibration procedure.
-The battery is discharged to a known zero capacity level of 7.8 volts.
-At this level, the battery has also been conditioned to correct or
prevent loss of capacity due to ‘Memory Effect’.
•The battery automatically begins charging to maximum capacity.
- The ‘Charge’ LED comes ON.
- The LCD screen alternately displays ‘C3’ and the percent of
charge in the battery.
- The ‘C3’ display indicates the system is operating in the third of 3
phases of the calibration procedure.
- The battery is fully charged and the indicated charge data stored
in the battery is updated to 100%.
-The LCD alternately displays ‘Cb’ and the percent of charge in the
battery.
-The code ‘Cb’ indicates calibration has been properly completed
on the first battery.

Page 15
NOTE 1 - The PowerCenter charges one battery while it discharges the
other to reduce the calibration time of two batteries.
NOTE 2 - An interruption in input power will cancel the calibration
sequence for batteries that have not already completed the sequence.
The PowerCenter will default into charging mode and the batteries will
be charged when power is restored.
NOTE 3 - An internal battery must be installed in the PowerBook when
batteries are being calibrated in the PowerCenter. This battery is only
needed to keep the PowerBook ON when the discharge transfers
between batteries are made by the PowerCenter.

Page 16
DIAGNOSTIC TESTS and ERROR MESSAGES
A number of communication and battery data examination tests are run
when an Intelligent Battery is inserted into the PowerBook computer.
Similar tests are run by the PowerCenter to assure the battery is in
proper condition to proceed with a charge or use cycle. The tests can
require as little as 3 seconds for a good battery and as long as 15
minutes for a battery that has over discharge and /or shorted cell
problems.
Some users may use the PowerCenter to test batteries to assure they
are communicating and to accurately determine their charge status in
percent of the normal maximum.
The Lind Battery Utilities 500 program runs an expanded set of diag-
nostic tests that examine data stored in the battery and gives the user
options for correcting data or control parameters that are not in the
normal range. See the BU-500 manual for further details.
NOTES
1- Proceed with charging or use.
2- If no communication, proceed with reset or recovery tests.
3- If successful, communication is established and tests continue.
4- Normal charging will proceed.
5- A high battery temperature will prevent or stop charging.
6- Charging will be terminated with this test failure.
7. A PowerBook must be connected to the PowerCenter to allow calibration
discharge cycles to begin.
8. ‘Ex’ error codes are canceled only by removing the battery from the PowerCenter.
TEST OR CONDITION WHEN TIME DISPLAY CODE NOTES
Start-Up Tests At insertion 3 - 6 sec. --- none 1
With No Communication 2
Batt. Micro Reset At insertion 10 sec. Od none 2,3
O.D. Battery Recovery At insertion 3 min. Od E1 3,8
Shorted Cell Test At insertion 12 min Sc E2 3,8
With Communication restored 4
Batt. Temp. out of range --- --- °F 5
Charge time long During charge --- % of Charge E3 5, 8
Maximum voltage During charge --- % of Charge E4 6, 8
Batt. over Temp. During charge --- % of Charge E5 6, 8
Waiting for Load During disch. --- % of Charge Ld 7
Test Chart

Page 17
ERROR CODES
Fatal Error Codes
Error codes E1 or E2 indicate a battery has serious problems. Prob-
lems could include:
-Cells have been damaged by severe or prolonged over discharge.
-One or more cells are shorted
- Internal Battery protective devices have been activated
- Intelligent Battery circuit failures have occurred.
It is likely that the PowerBook will not be able to communicate with a
battery with an 'E1' code. The battery is essentially dead. The E2 code
indicates communication is OK but one or more cells are shorted, and
the battery will not operate the PowerBook.
Non Fatal Error Codes
Error codes E3, E4 and E5 occur during the charging process. They
indicate a serious charging condition that required the unit to stop
charging. The error is sensed by the battery's circuitry and is reported
by the charger.
E3 - Charge time too long - Batteries should charge within a fixed
amount of time. This error code is displayed if the maximum charge
time is exceeded.
E4 - Maximum Voltage - During normal charging, battery voltage
should not exceed a maximum level. This error code is displayed when
the voltage is exceeded.
E5 - Battery Over Temp - During normal charging, temperature should
not exceed a certain level. If the temperature is exceeded, this error
code is displayed. Allow the battery to cool for at least ten minutes
outside the PowerCenter before attempting to recharge it.
Additional Actions Suggested
A. Test the battery using Lind Battery Utilities 500 software.
B. Re-install into PowerCenter for retest and recharging.
C. If the error persists, call 1 (800) S O S - A P P L.

Page 18
OVER DISCHARGED BATTERY RECOVERY
Description Of Recovery
If an Intelligent Battery has discharged to a very low level, the internal
microprocessor of the battery will not operate and there will be no
communication with the PowerBook or the PowerCenter. If communi-
cation is not established when a battery is inserted, the PowerCenter
first attempts to reset the battery microprocessor. If the reset attempt
fails, the PowerCenter applies charge current for a controlled period to
safely increase the battery voltage to a level that will establish commu-
nication. This sequence of operations is automatic and safely applies
more current in less time than the recovery process based on swap-
ping batteries in the PowerBook as suggested by Apple.
This ‘Recovery’ operation requires up to three minutes to complete. If
the recovery sequence is successful, communication with the battery is
established and the normal diagnostics tests are run. If communication
is not established, an E1 error code is displayed.
Od Recovery Operation
• Apply power to the PowerCenter from one of the recommended
power sources.
• Insert an Intelligent Battery into the PowerCenter.
• If there is no communication between the battery and the
PowerCenter and no communication occurs after application of a
processor reset signal.
- The Over Discharge test and recovery sequence begins.
- The LCD displays ‘Od’ to show that the Over Discharge
recovery procedure is in progress.
- The charge and run LEDs blink to alert the user to the activity in
progress.
- The Od recovery activity continues for up to three minutes.
- The PowerCenter attempts to communicate with the battery.
- If no communication is obtained, the LCD displays error code E1.
- The user should remove the battery from the PowerCenter and
label it as failed. Return defective batteries to Apple, your dealer
or other authorized collection points for recycling or disposal.
• If the Over Discharge recovery sequence raises the battery voltage
to over five volts, the battery will communicate with the
PowerCenter and the normal diagnostic tests will then be run.
Caution -Repetition of the recovery sequence may cause overheating
of the battery. A second attempt can be made after the battery is
allowed to cool for 10 or more minutes outside of the PowerCenter.

Page 19
SHORTED CELL TESTS
Description Of Tests
The diagnostic test sequence includes a shorted cell test that may run
as long as 12 minutes. During this test, charging power is applied in a
series of pulses with voltage stabilization and test periods between
pulse applications.
The LCD display will indicate error code E2 if the battery fails this test.
The remaining diagnostic tests are performed if the battery passes this
test.
Sc Test Operation
• Apply power to the PowerCenter from one of the recommended
power sources.
• Insert an Intelligent Battery into the PowerCenter.
• Communication is established with the battery.
• If a low battery voltage is detected:
- The LCD display shows “Sc” to indicate the test is in progress.
- Charge current is applied to the battery.
- The battery voltage is allowed to stabilize.
- Battery voltage is measured and compared to the minimum for a
battery with no shorted cells.
- These tests may continue for as long as 12 minutes.
- If the battery voltage increases and stays above the minimum
level, the shorted cell test is passed and the remaining
diagnostic tests are run.
- If the voltage does not increase to the required level, it is
concluded that one or more cells in the battery are shorted and
the error code 'E2' is displayed.
- The user should remove the battery from the PowerCenter and
label it as failed. Return defective batteries to Apple, your dealer
or other authorized collection points for recycling or diposal.

Page 20
LIMITED WARRANTY
Lind Electronic Design Co., Inc. (LIND) warrants the circuit assembly
portion of products manufactured by it to be free of defects in material
and workmanship for a period of 1 year from the date of purchase
under normal use. During this warranty period, LIND will, at its option,
repair or replace the product at no charge for parts or labor when the
product is returned postage paid as a complete unit to LIND. Proof of
purchase and a letter explaining the problem must accompany the
returned unit.
This warranty does not apply if the product has been altered or sub-
jected to abuse, accident or misuse. This warranty excludes incidental
or consequential damage resulting from the product or the use of the
product. This warranty is in lieu of all other warranties expressed or
implied and no person is authorized to assume for LIND any other
liability in conjunction with this product. The warranty gives you, the
purchaser, specific legal rights and you may have other rights which
may vary from state to state.
Warranty Registration
We urge you to fill in and send us the warranty card for the
PowerCenter 500. This will provide us with your address so we can
notify you of upgrades in hardware or the software that may be used in
conjunction with the PowerCenter.
Table of contents
