manuals.online logo
Brands
  1. Home
  2. •
  3. Brands
  4. •
  5. Linksys
  6. •
  7. Network Router
  8. •
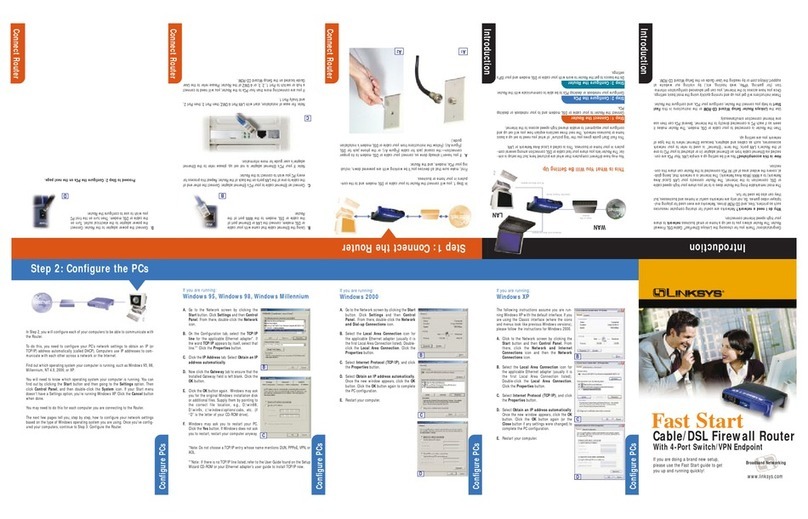
  9. Linksys NR041 Original operating instructions

Linksys NR041 Original operating instructions

NR041
Minimum Requirements
• PC with CD-ROM Drive
• Network Adapter with Ethernet (UTP CAT 5)
Cabling and TCP/IPProtocol Installed per PC
• Internet Explorer 4.0 (or Higher) or Netscape
Navigator 4.7 (or Higher) for Web-based
Configuration
• Cable or DSL Modem with Ethernet
Connection and Internet Access
Cable/DSL 4-Port Router
Package Contents
(1) Cable/DSL 4-Port Router
(2) Power Adapter
(3) Setup Wizard CD-ROM with User Guide
Not Shown: Registration Card and this Quick
Installation
The following steps will walk you through connecting the Router, configur-
ing your networked PCs to accept the IP addresses the Router assigns them,
and configuring the Router with setting(s) provided by your Internet Service
Provider (ISP).
The installation technician from your ISP should have left the setup infor-
mation for your modem with you after installing your broadband connection.
If not, you can call your ISP to request the data.
Once you have the setup information you need for your specific type of
Internet connection, you can begin installation and setup of the Router.
Connect the Cable/DSL 4-Port
Router to Your Network
Important: Network Everywhere strongly recommends that you use the
Setup Wizard CD-ROM by inserting the Setup Wizard CD-ROM into your
PC’s CD-ROM drive. The Setup Wizard will start automatically. Then follow
the Setup Wizard’s instructions to install the Router.
However, if you prefer to manually install the Router, then proceed to stepA
of this Quick Installation. Follow these instructions to install the Router.
For more detailed instructions, please refer to the Cable/DSL 4-Port Router’s
User Guide on the Setup Wizard CD-ROM.
A. Make sure that all the devices you’ll be working with are powered down,
including your PCs, your cable or DSL modem, and the Router.
B. Connect an Ethernet network
cable to one of your PCs’
Ethernet ports. This will be the
port that connects to the
Router.
C. Connect the other end of the
Ethernet network cable to one
of the LAN ports on the back
of the Cable/DSL Router.
Repeat steps A and B for all
the PCs you wish to connect to
the Router.
D. Port 1 can act as the Router’s uplink port. If you are connecting Port 1 of
the Router to a hub or switch, press the Uplink pushbutton. If you are con-
necting Port 1 of the Router to a PC, make sure the Uplink pushbutton has
not been pressed.
E. Connect the network cable
from your cable or DSL
modem to the Router’s
Internet port, and connect your
cable or DSL modem to its
proper connection. Then
power up your modem.
F. Plug one end of the power
adapter into the Power port
located on the back of the
Router.
G.Plug the other end of the power adapter into an appropriate power socket.
H.Turn on the cable or DSL modem. Then turn on the PC.
Before setting up the Router, you will have to configure your PCs to accept
the IP addresses provided by the Router. To do this, you will need to config-
ure TCP/IP. These instructions apply only to Windows 95, 98, and
Millennium machines. For TCP/IP setup under Windows NT, 2000, and XP,
please refer to your Windows manual.
F
Continue to Step 2 now!
C
B
E
This Quick Installation is meant to help you install the Router quickly and easily.For detailed instructions on installation and
configuration and further setup options, please consult the User Guide.
1
2
Configure Your PCs to Connect to
the Cable/DSL 4-Port Router
Note: Always use the power adapter that came with the Router. Using any
other power adapter could result in product damage.
Now that the Router is connected to your network, and you’ve set up TCP/IP
on your PCs, you can begin configuring the Router.
A. Open your web browser and type
http://192.168.1.1 into the
browser’s Address field. Press the
Enter key.
B. An Enter Network Password screen
will appear. Leave the User Name
field blank, and enter admin (the
default password) in the Password
field. Then click the OK button.
C. The Router’s Setup tab will
appear. Based on the setup
instructions from your ISP, you
may need to provide the Host
Name and Domain Name.
These fields allow you to supply
a host and domain name for the
Router and are usually left blank.
If requested by your ISP (usually
cable ISPs), complete these two
fields.
A. Go to the Network
Configuration screen by click-
ing the Windows Start button,
selecting Settings, and selecting
the Control Panel. Then double-
click the Network icon.
B. In the Configuration window,
select the TCP/IP protocol line
that has been associated with
your network card/adapter. If
there is no TCP/IP line listed,
refer to the User Guide to install
the TCP/IP Protocol now.
C. Click the Properties button,
and choose the IP Address tab.
Select Obtain an IP address
automatically. Click the OK
button. You have completed the
client settings.
D. Click the OK button. Windows
may ask for original Windows
installation or additional files.
Supply them as needed (e.g.,
D:\win98, D:\win95, c:\win-
dows\options\cabs, etc.).
E. Windows will ask you to restart
the PC. Click the Yes button. If
Windows does not ask you to
restart, restart your PC at this
time.
The values for the Router’s LAN IP Address and Subnet Mask are shown
on the Setup screen. Unless you have specific internal needs, there should
be no reason to change these values. For the internal LAN, the default val-
ues are as follows.
• Device IP Address: 192.168.1.1
• Subnet Mask: 255.255.255.0
D. The Router supports three WAN ConnectionTypes: DHCP (obtain an IP
automatically), Static IP Address, and PPPoE.
DHCP If your ISP supports DHCP, select this default option.
Static (Fixed) IP Address If your ISP assigns you a static IP Address, fill
in the WAN IP Address, Subnet Mask, Default Gateway Address, and
DNS fields.
PPPoE Enter your user name and password, if applicable.
When you have properly configured the Setup tab, click the Apply but-
ton, and then click the Continue button.
E. Click the Password tab, and set a password for the Router. You can use up
to 64 alphanumeric characters. The default password is admin. If you
don’t change the password, all users on your network will be able to access
the Router using the default password. When finished making your
changes, click the Apply button, and then click the Continue button.
F. If you want to use the Router as a DHCP server, choose the DHCP tab,
and configure the DHCP settings for your network.
G.Unless you already have a DHCP server on your internal network, choose
Enable. By choosing Enable, you will configure the Router to automati-
cally assign IP addresses to each of your PCs. You may enter the number
of PCs you plan on networking to the Router in the Number of DHCP
Users field.
H.Click the Apply button, and then click the Continue button.
I. Reset the power on the cable or DSL modem, and then restart the com-
puter so the computer can obtain the Router’s new settings.
www.networkeverywhere.com
QI-NR041-062402A JL
3
Configure the Cable/DSL 4-Port
Router
B
C
A
B
C
E
F
Note: The Setup screen and its available features may vary depending on the
WAN ConnectionType you select.
The installation of the Cable/DSL 4-Port Router is complete.
If you wish to further customize its configuration or want additional
details, refer to the User Guide on the Setup CD-ROM.
Important: Network Everywhere strongly recommends that you use the Setup
Wizard CD-ROM to install the Router.
Other Linksys Network Router manuals

Linksys SRW2008 User manual

Linksys

Linksys SRW2008 User manual

Linksys BEFN2PS4 - EtherFast Cable/DSL And Voice... User manual

Linksys

Linksys BEFN2PS4 - EtherFast Cable/DSL And Voice... User manual

Linksys BEFSR41 - EtherFast Cable/DSL Router Guide

Linksys

Linksys BEFSR41 - EtherFast Cable/DSL Router Guide

Linksys HomeLink HPPO200 User manual

Linksys

Linksys HomeLink HPPO200 User manual

Linksys BEFSX41 - Instant Broadband EtherFast Cable/DSL Firewall... Original operating instructions

Linksys

Linksys BEFSX41 - Instant Broadband EtherFast Cable/DSL Firewall... Original operating instructions

Linksys VELOP LN1100 Series User manual

Linksys

Linksys VELOP LN1100 Series User manual

Linksys MR2000 Series User manual

Linksys

Linksys MR2000 Series User manual

Linksys RVL200 Operation manual

Linksys

Linksys RVL200 Operation manual

Linksys FGW5500 User manual

Linksys

Linksys FGW5500 User manual

Linksys BEFSR41 - EtherFast Cable/DSL Router User manual

Linksys

Linksys BEFSR41 - EtherFast Cable/DSL Router User manual

Linksys RVS4000 Instructions for use

Linksys

Linksys RVS4000 Instructions for use

Linksys BEFSR11 - EtherFast Cable/DSL Router User manual

Linksys

Linksys BEFSR11 - EtherFast Cable/DSL Router User manual

Linksys EtherFast EF4124 User manual

Linksys

Linksys EtherFast EF4124 User manual

Linksys Network Router Operating instructions

Linksys

Linksys Network Router Operating instructions

Linksys max-stream ac-1900 User manual

Linksys

Linksys max-stream ac-1900 User manual

Linksys Velop WHW01/VLP01 User manual

Linksys

Linksys Velop WHW01/VLP01 User manual

Linksys WRT54GL - Wireless-G Broadband Router... User manual

Linksys

Linksys WRT54GL - Wireless-G Broadband Router... User manual

Linksys Gigaclear SPNMX55 User manual

Linksys

Linksys Gigaclear SPNMX55 User manual

Linksys EA8500 User manual

Linksys

Linksys EA8500 User manual

Linksys WET54G V3 User manual

Linksys

Linksys WET54G V3 User manual

Linksys RVL200 Instructions for use

Linksys

Linksys RVL200 Instructions for use

Linksys Velop WHW03 User manual

Linksys

Linksys Velop WHW03 User manual

Linksys PC22604 - ProConnect II 2604 Switch User manual

Linksys

Linksys PC22604 - ProConnect II 2604 Switch User manual

Linksys BEFW11S4 ver.3 Guide

Linksys

Linksys BEFW11S4 ver.3 Guide

Popular Network Router manuals by other brands

D-Link DIR-516 user manual

D-Link

D-Link DIR-516 user manual

MaxComm M-150 manual

MaxComm

MaxComm M-150 manual

tilgin HG2501 installation guide

tilgin

tilgin HG2501 installation guide

Cisco 7301 Series quick start guide

Cisco

Cisco 7301 Series quick start guide

Netopia TP4-CU installation guide

Netopia

Netopia TP4-CU installation guide

Hawking Wireless-G Router user manual

Hawking

Hawking Wireless-G Router user manual

Cisco 1941W Configuration guide

Cisco

Cisco 1941W Configuration guide

TP-Link Archer C8 user guide

TP-Link

TP-Link Archer C8 user guide

gefran R-SW5 manual

gefran

gefran R-SW5 manual

Hamlet HRDSL512P4 quick start guide

Hamlet

Hamlet HRDSL512P4 quick start guide

Edimax 3G-6200nL V2 Declaration of conformity

Edimax

Edimax 3G-6200nL V2 Declaration of conformity

Atel AXIS V810A user guide

Atel

Atel AXIS V810A user guide

TP-Link Archer C900 user guide

TP-Link

TP-Link Archer C900 user guide

Nortel Contivity 1000 GT Important notice

Nortel

Nortel Contivity 1000 GT Important notice

Cisco Small Business SRP520-U quick start guide

Cisco

Cisco Small Business SRP520-U quick start guide

Robustel R2000 Ent Installation and configuration quick guide

Robustel

Robustel R2000 Ent Installation and configuration quick guide

Edimax AR-7064+ Specifications

Edimax

Edimax AR-7064+ Specifications

peplink ONE user manual

peplink

peplink ONE user manual

manuals.online logo
manuals.online logoBrands
  • About & Mission
  • Contact us
  • Privacy Policy
  • Terms and Conditions

Copyright 2025 Manuals.Online. All Rights Reserved.