EThe Internet phone will
reboot two to three times
(each reboot may take up
to one minute). The System
will automatically assign an
extension number to the
Internet phone. When the
Internet phone displays it
extension number, then it is
ready for use.
FRepeat steps C-E until you
have installed all of your
Internet phones.
Congratulations! Now you can
make calls from one Internet
phone to another by dialing an
extension number.
Continue to the next section.
Make sure you have an active
Internet connection. Then
configure the settings for your
Internet phone service.
ALaunch the web browser on
the administration
computer.
BEnter
<IP address of the
System>
/admin/voice/
advanced in the
Address
field (use the static IP
address you previously
assigned to the System).
Then press Enter.
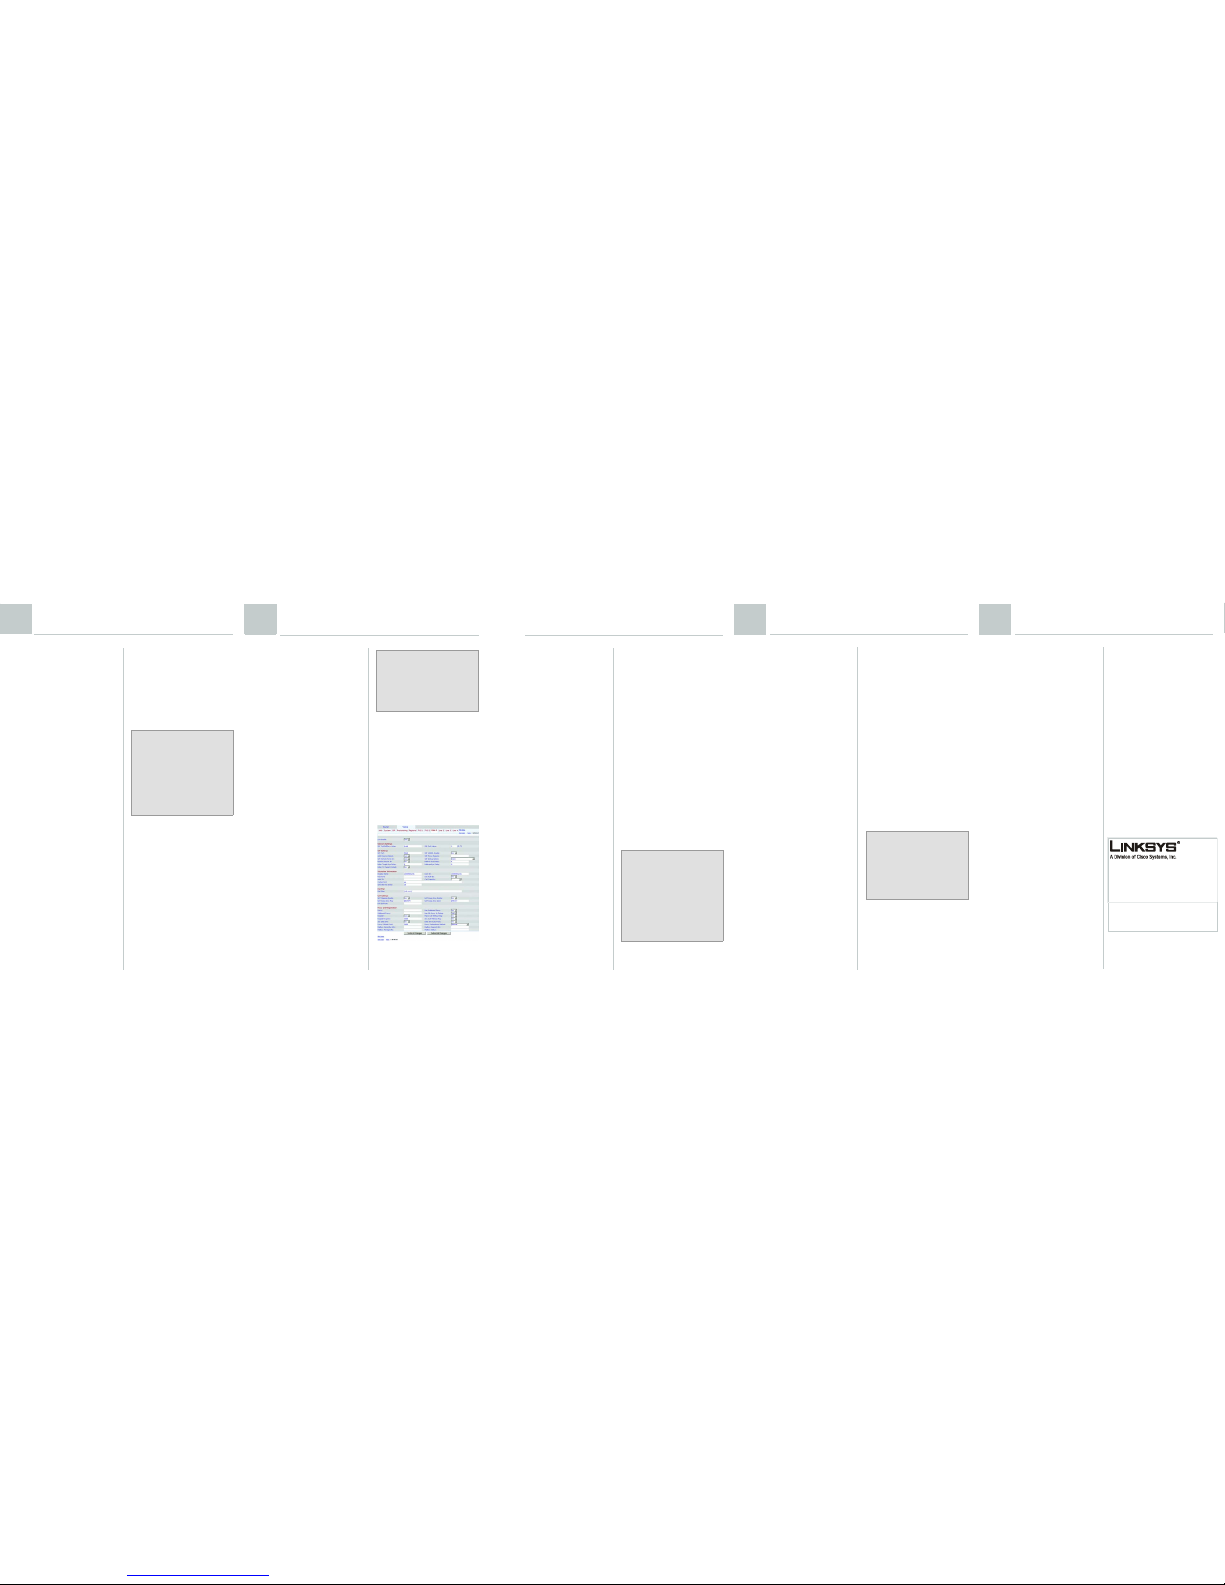
CThe
Voice - Info
screen
will appear. Click the
Line 1 tab.
DIn the Subscriber
Information section,
complete these fields:
User ID - Enter the user ID
(also called the account
number) supplied by your
ITSP. Do not use any
hyphens, spaces, or other
punctuation.
Password - Enter the
case-sensitive password
supplied by your ITSP.
EIn the Proxy and Registration
section, complete the
Proxy
field.
Proxy - Enter the proxy
address supplied by your
ITSP.
FIf you have additional
settings, enter those as well.
Refer to the instructions your
ITSP gave you.
GClick Submit All Changes.
HThe System will reboot itself.
Then the Internet phones will
reboot themselves.
IThe
Voice - Info
screen will
appear. In the Line 1 Status
section, make sure that the
Registration Status says,
“Registered.”
You can use any phone
connected to the System to make
external calls. However, you
cannot receive calls on any
analog telephone unless you
configure the appropriate
settings. Refer to the User Guide
for instructions about the FXS
settings. (You can download the
User Guide at
www.linksys.com
.)
Congratulations! Now you can
make external calls.
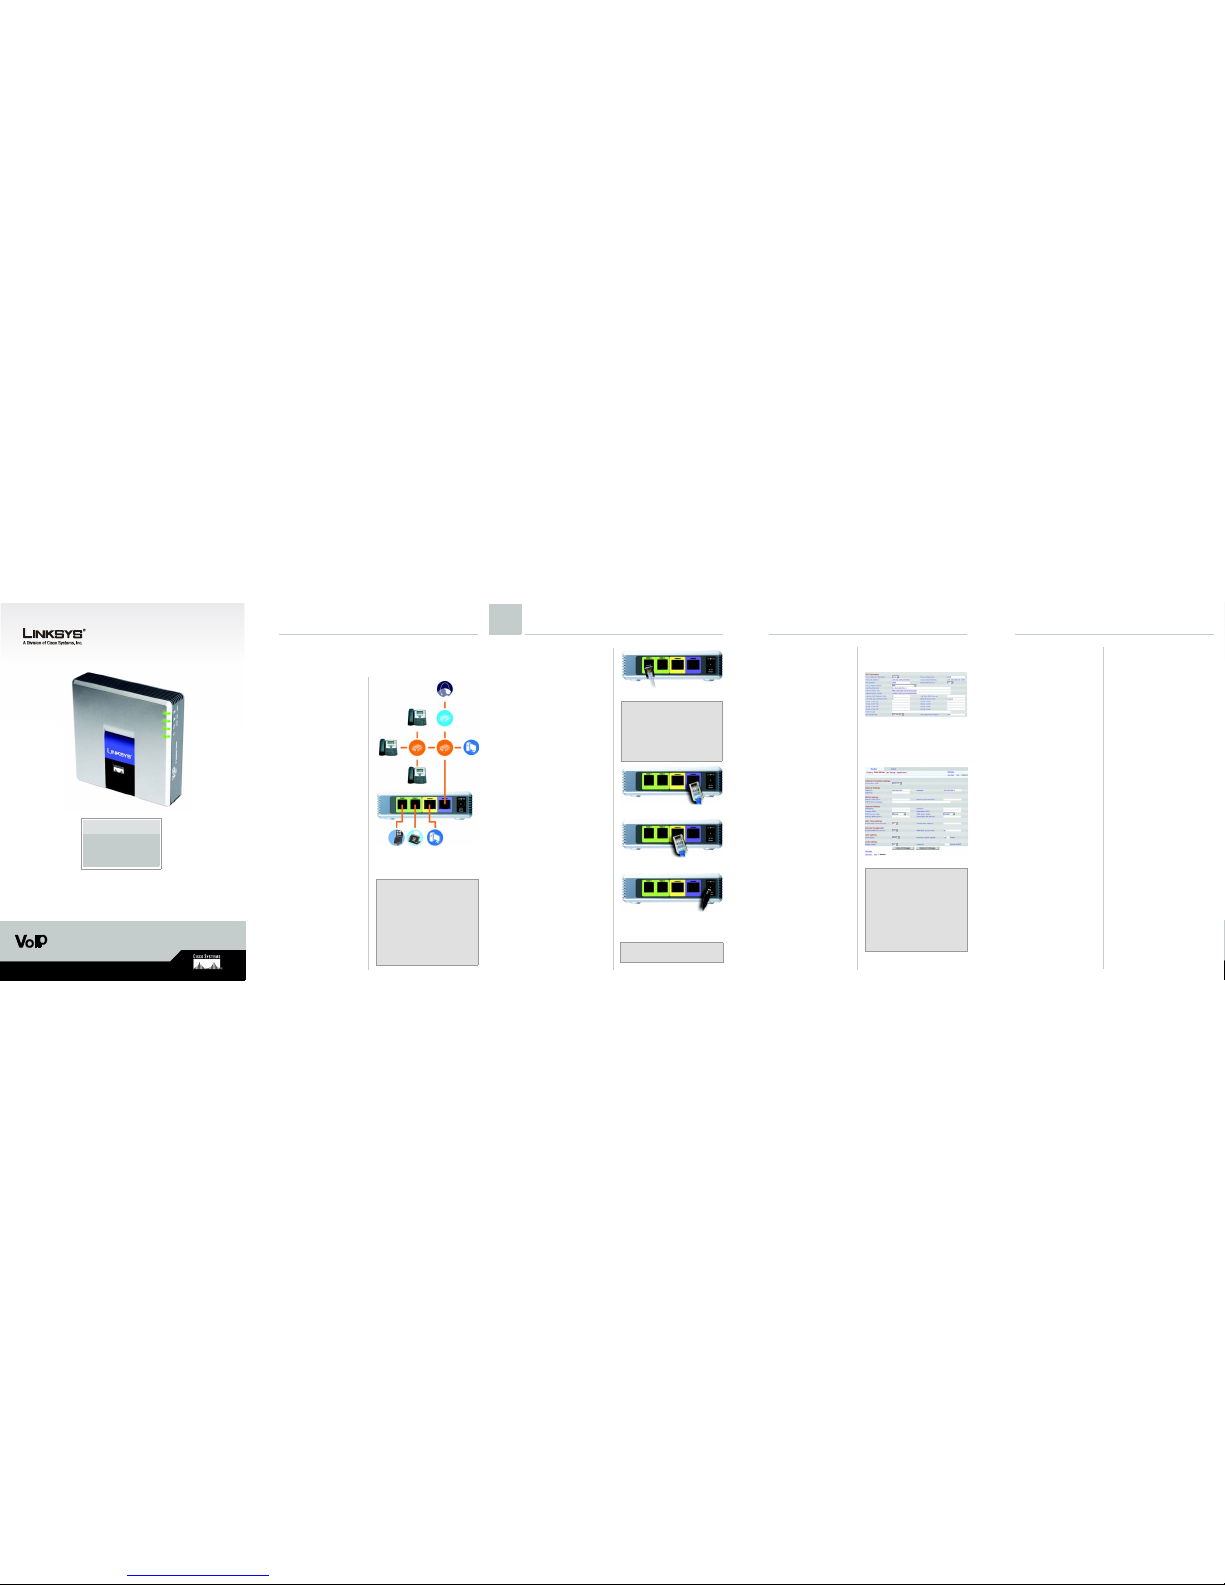
AConnect an Ethernet
network cable to one of the
Ethernet ports on your
router. Then connect the
other end of the cable to
an Ethernet port on a
network switch.
BConnect the switch’s power
adapter to its power port,
and then plug the power
adapter into an electrical
outlet.
CConnect an Ethernet
network cable to an Internet
phone. Then connect the
other end to one of the
Ethernet ports on the switch.
(If the Internet phone has
been used before, reset it to
its factory default settings
first. Refer to its
documentation for more
information.)
DConnect the Internet
phone’s power adapter to
its power port, and then
plug the power adapter into
an electrical outlet.
D
By default, the daytime auto-
attendant is enabled, so the first
message it plays (“If you know
your party’s extension, you may
enter it now”) is suitable for
business hours.
If you want a caller to hear a
different greeting during nighttime
(non-business) hours, then refer to
the Auto-Attendant Quick
Installation, which is available at
www.linksys.com
.
Receive External Calls
SPA9000-QI-60613B DF
2Connect the Internet Phones
NOTE: The System automatically
registers Linksys SPA-family Internet
phones (including model number
SPA941). If you connect a different
SIP-compatible phone, then
registration will be manual. Refer to
your phone’s documentation.
NOTE: The default SIP port of the
System is 6060.
3Set Up External Calling
To receive external phone calls,
you need to know the Direct
Inward Dialing (DID) number
assigned to you by your ITSP.
Usually this is the same as your
user ID, but it can be a different
number. Check with your ITSP to
find out what your DID number is.
Then decide which Internet
phones will ring when an outside
caller calls your DID number. The
default is aa, which stands for
auto-attendant, an automated
system that picks up external calls
and plays pre-recorded voice
messages. If you want only the
auto-attendant to receive a call,
keep the default setting. When the
auto-attendant receives a call, it
will prompt the caller to dial the
appropriate extension.
If you want specific Internet
phones to ring when your DID
number is called, then refer to the
User Guide for instructions about
the Contact List setting. (You can
download the User Guide at
www.linksys.com
.)
NOTE: Dial 9first when you make
an external call with the default US
dial plan.
If you cannot make calls with the
default US dial plan, visit
www.linksys.com/kb for additional
dial plans, or refer to the User Guide
to write your own script. (You can
download the User Guide at
www.linksys.com.)
NOTE: If your Internet Telephony
Service Provider (ITSP) supplied the
System, then it may be
pre-configured for you, and you do
not need to change any settings.
Refer to the instructions supplied by
your ITSP for more information.
NOTE: If you decide to keep
traditional phone service, which is
also known as Plain Old Telephone
Service (POTS), then you will use the
Linksys Analog Telephone Adapter
(model number: SPA3000). For
details, refer to the Analog Telephone
Adapter’s documentation.
Use the Auto-Attendant
4 5