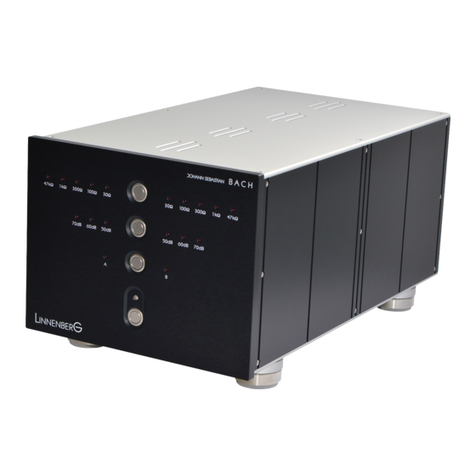
Linnenberg JOHANN SEBASTIAN BACH User manual

JOHANN SEBASTIAN BACH
PHONO STAGE

2
Owner’s Manual

3
For many music lovers, the playback of vinyl
records is the most important medium in their
music collection. This is supported by the
unmistakable character of the analogue sound,
as well as the fact that the playback quality has
improved considerably in recent times.
The BACH phono stage achieves the perfect
analog sound through the use of a fully
symmetrical circuit that suppresses noise and
leaves the sensitive signal of a phono cartridge
in the symmetrical mode.

4
Basic operation
Room temperatures over 30 degrees
Celsius (86 degrees Fahrenheit) and / or
extreme humidity should be avoided.
!
Place the unit on a solid, flat level surface
such as a shelf where it is convenient to
operate. Choose a location where the
connecting cable to the tonearm is short
(less than 1.5m). Furthermore, make sure
that no other devices with powerful mains
supplies (power amplifier) are in the
immediate vicinity, as the risk of picking up
hum is likely.
!
As it is common practice, disconnect BACH from
the mains during a thunderstorm or when going
on vacation.
Once the power cord is connected, the blue
indicator LED should light up and blink when the
front panel push button is operated. Turn off the
unit by pushing the front button again and do the
signal connections. If everything is connected,
turn on again and have fun!

5
Connections
Connecting the Analog Output
Connect the left and right interconnect cables
from the BACH's outputs to your preamplifier left
and right inputs. To maintain best sound quality, it
is strongly recommended that balanced audio
connections to be used. This is not only for the
reason of the best possible performance; it is also
important for getting the desired overall gain. The
indicated gain values refer to symmetric in ->
symmetric out operation. Unbalanced operation
will result in a 6dB gain loss.

6
Connecting a Turntable
BACH has two independent inputs for use with
two separate tonearms / turntables. These inputs
are labelled input A and input B.
Turntable Connection Types
For start listening, you only need to connect a
turntable to the BACH as you would do to any
other phono preamplifier. Nevertheless, please
take note of the following: BACH can be
connected to many different types of turntables.
To fully realize the sonic potential, use balanced
cable connections with XLR terminations
whenever possible. Balanced XLR cables
minimize interference from magnetic, hum, and
RF sources.
Wiring #1

7
A phono cartridge is actually a true balanced
source, a balanced input is provided. Connect
the output cables from your turntable to the left
and right channel XLR input. Do not short pin 1
(chassis/ground) to either pin 2 or 3 of the XLR
connector at any point in the cable, turntable
chassis, or tonearm. This will cause hum in the
system. Pins 2 and 3 must only be connected
directly to the cartridge pins. If your turntable does
not have XLR connections, use the Cinch (RCA)
input instead.
Wiring #2
The Cinch (RCA) is mainly there for convenience
reasons. It will work very fine for Moving Coil
cartridges as the source impedance of such
transducers is very low. Please note that in this
case you swap the cable shield with the function
of the second signal conductor. Due to the high
common mode rejection of the balanced inputs,
hum pick up will not occur, as long as the cable
shields of the left and right channels are not
connected to each other, or to the chassis
ground.

8
In order to further increase flexibility, the BACH
inputs (channel A, left and right and channel B, left
and right) can be switched from symmetrical to
asymmetrical mode. This comes effective from
September 2021. Four toggle switches positioned
on the rear panel are used for the task.
Changing the mode has no effect on the
outputs! The XLR output still delivers a
symmetric signal, even when the switches
are in the unbalanced position.
!
In general, when using a balanced phono cable
(wiring #1), the switches should remain in the
balanced position. When using the RCA input
jacks (wired to #2 or similar) the switches can help
to eliminate a hum problem, especially when
using an MM cartridge. In either case, please try
“balanced” operation first.
Since there are numerous tonearm
configurations on the market – mainly intended
for unbalanced standard phono amplifiers –
LINNENBERG AUDIO cannot guarantee that a
configuration will automatically work properly.
Sometimes experimenting with different ground
schemes is inevitable. Your dealer will help you if
a problem arises.

9
Channel A / B selection
BACH has two independent inputs. You can
switch over from one to the other on the fly by
pressing the push button located near the A/B
indicators.
Gain Selection Adjustment
Each input has 3 gain settings. 50dB, 60dB or
70dB. The 50dB setting is intended for MM-
cartridges or step-up transformers, whereas the
60dB/70dB gain is used for MC-cartridges. Again,
you can switch over from one to another on the
fly. When changing from A to B or vice versa, the
chosen setting will be stored. If the gain setting is
too high (e.g. 70dB for a high output MC) you may
experience clipping. As a warning, the
corresponding gain LED lights up during
playback. There is now 6dB of headroom left, but
reducing the gain is highly recommended.
Cartridge Loading Adjustment
Set the resistive load to 30Ω, 100Ω, 300Ω, 1kΩor
47kΩdepending on the cartridge manufacturer’s
recommendations or by listening. The 47kΩ
setting is for MM only and only works with the
50dB gain setting. It is disabled for the 60dB / 70dB
gain setting. Once chosen, you can not increase
gain from 50dB to 60/70dB. First, reduce the
impedance to at least 1kΩ. For step up
transformer operation it may be valuable to try to
use the 50dB / 1kΩsetting.

10
BACH fuse replacement
Replacing the fuse
The fuse holder is located on the back of the unit;
the fuse must be replaced by a 3.15AT type
(5x20mm). Normally the fuse should never blow –
if it has, it is a sign of a serious fault condition.
Further investigation is needed.

11
Specifications
Gain:
(sym. input -> sym. output)
50 – 60 – 70dB
Signal to noise ratio:
Gain = 50dB, @ Uin =
5mV: 96dB(A)
Gain = 60dB, @ Uin =
500μV: 78dB(A)
Gain = 70dB, @ Uin =
500μV: 77dB(A)
Equivalent Input Noise:
64nV = -144dBV
Input impedance:
30 – 100 – 300 – 1k –
47kΩ
Frequency response:
RIAA equalization curve (75 μs /318
μs / 3180 μs )
+/- 0.2dB max.
Low cut filter:
5Hz, 12dB / octave
Distortion and Noise:
< 0.004% @ 0dBV
(Gain = 50dB)
< 0.015% @ 0dBV
(Gain = 70dB)
Max. output level:
19V rms balanced
Output impedance:
10 Ωper phase
General:
Dimensions (H x W x D) :
210 x 256 x 442 mm
Weight:
15kg
Measurements taken in accordance to
“stereophile” magazine, John Atkinson

12
CE declaration of conformity
Product Type: Phono preamplifier
Model: J. S. BACH
Linnenberg-Elektronik declares that this product
complies with the Low Voltage Directive
2014/35/EU and the Electromagnetic
Compatibility Directive 2014/30/EU as well as the
Ecodesign Directive 2009/125/EC.
The unit meets all currently valid regulations only
in its original condition. The original, unaltered
factory serial number must be present on the
outside of the unit and must be clearly legible!
The serial number is an essential part of our
conformity declaration and therefore of the
approval for operation of the BACH. The serial
numbers on the unit and in manual, must not be
removed or modified, and must correspond.
Furthermore, the unit has been found to comply
with the limits for a Class B digital device, pursuant
to Part 15, subpart B (unintentional radiators) of the
FCC rules.
LINNENBERG – ELEKTRONIK
Germany
Phone: +49/178/7672984
Mail: info @ linnenberg-audio.de
© Linnenberg Elektronik 2023
Other manuals for JOHANN SEBASTIAN BACH
1
Other Linnenberg Amplifier manuals
