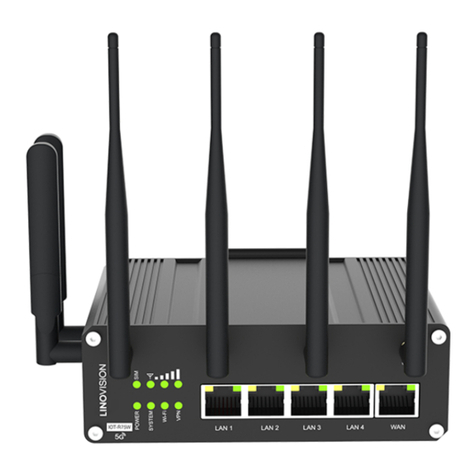
LINOVISION IOT-R32W User manual

IOT-R32W
User Manual
Updated on September 05,2023

Contents
Benutzerhandbuch .................................................................................15-28
Manuel de l'Utilisateur ...........................................................................29-42
User Manual ............................................................................................. 1-14
Manual de usuario ..................................................................................57-70
Gebruikers Handleiding .........................................................................71-84
Manuale d'us ............................................................................................43-56
1
2
3
4
5
6

www.linovision.com
;IPGSQI
Thank you for choosing linovision IOT-R32W industrial cellular router.
This guide describes how to install the IOT-R32W and how to log in the Web GUI to
configure the device. Once you complete the installation, refer to the linovision IOT-R32W
User Guide for instructions on how to perform configurations on the device.
6IPEXIH(SGYQIRXW
This Start Guide only explains the installation of linovision IOT-R32W router. For more functionality
and advanced settings, please refer to the relevant documents as below.
(SGYQIRX
(IWGVMTXMSR
IOT-R32W Datasheet Datasheet for IOT-R32W industrial cellular router.
IOT-R32W User Guide
Users could refer to the guide for instruction on how to log in the
web GUI, and how to configure all the settings.
The related documents are available on linovision website: https://www.linovision.com
(IGPEVEXMSRSJ'SRJSVQMX]
IOT-R32W are in conformity with the essential requirements and other relevant provisions of the CE,
FCC, and RoHS.
kPMRSZMWMSR-S8'S0XH
%PPVMKLXWVIWIVZIH
All information in this guide is protected by copyright law. Whereby, no organization or individual shall
copy or reproduce the whole or part of this user guide by any means without written authorization from
Xiamen linovision IoT Co., Ltd.
For assistance, please contact linovision
technical support: Email:
Tel: 86-571-8678175
6IZMWMSR ,MWXSV]
(EXI
(SG :IVWMSR
(IWGVMTXMSR
Apr. 26, 2019
V 1.0
Initial version
May 11, 2020
V 1.1
Web interfaces upgrade
Nov. 25, 2020
V 2.0
Layout Replace
1
en

www.linovision.com
1. Packing List
Before you begin to install the IOT-R32W router, please check the package contents to verify that
you have received the items below.
1 × IOT-R32W
1 × Ethernet Cable
1 × Power Adapter
2 × Magnetic Cellular
Antennas
1 × Quick Start Guide
1 × Stubby Wi-Fi
Antenna
(Wi-Fi Version Only)
1 × GPS Antenna
(GPS Version Only)
2 × Stubby Cellular
Antennas (Optional)
If any of the above items is missing or damaged, please contact your sales representative.
1 × 6-Pin Pluggable
Terminal
1 × DIN Rail Kit
4 × Setscrews
2
en

www.linovision.com
2. Hardware Introduction
2.1 Overview
2.2 Dimensions (mm)
1Main Cellular Antenna Connector
2GPS/WIFI Antenna Connector
3AUX Cellular Antenna
4LED Indicator Area
POWER: Power Indicator
SYSTEM: Status Indicator
SIM : Status Indicator
: Signal Strength Indicator
5Serial Port & I/O
6Ethernet LAN1/WAN Port
7Ethernet LAN2 Port
8Power Connector
9SIM and Reset Button Holder
3
en

www.linovision.com
2.3 Connectors
*: Only for -485 model.
2.4 LED Indicators
LED
Indication
Status
Description
POWER
Power Status
Off
The power is switched off
On
The power is switched on
SYSTEM
System Status
Green Light
Static: Start-up
Blinking slowly: the system is running properly
Red Light
The system goes wrong
SIM
SIM Card Status
Off
SIM1 or SIM2 is registering or fails to register (or there
are no SIM cards inserted)
Green Light
Blinking slowly: SIM1 has been registered and is ready
for dial-up
Blinking rapidly: SIM1 has been registered and is
dialing up now
Static: SIM1 has been registered and dialed up
successfully
Orange
Light
Blinking slowly: SIM2 has been registered and is ready
for dial-up
Blinking rapidly: SIM2 has been registered and is
dialing up now
Static: SIM2 has been registered and dialed up
successfully
Signal
Strength
Signal 1/2/3
Off
No signal
Green Light
Static/Off/Off: weak signals with 1-10 ASU (please
check if the antenna is installed correctly, or move the
antenna to a suitable location to get better signal)
PIN
RS232
RS485*
DI
DO
Description
1
---
---
---
OUT
Digital Output
2
---
---
IN
---
Digital Input
3
GND
---
---
---
Ground
4
---
---
COM
COM
Common Ground
5
RXD
B
---
---
Receive Data
6
TXD
A
---
---
Transmit Data
PIN
Description
7
Positive
8
Negative
7 8
4
en

www.linovision.com
Static/Static/Off: normal signals with 11-20 ASU
(average signal strength)
Static/Static/Static: strong signals with 21-31 ASU
(signal is good)
2.5 Reset Button
Reset button is under the SIM slots.
Function
Description
SYSTEM LED
Action
Reset
Blinking
Press and hold the reset button for more than 5 seconds.
Static Green →
Rapidly Blinking
Release the button and wait.
Off →Blinking
The router is now reset to factory defaults.
2.6 Ethernet Port Indicator
Indicator
Status
Description
Link Indicator (Orange)
On
Connected
Blinking
Transmitting data
Off
Disconnected
5
en

www.linovision.com
3. Hardware Installation
Environmental Requirements
- Power Input: 9-48 VDC
- Power Consumption: Typical 1.9W (Max 2.4 W)
- Operating Temperature: -40°C to 70°C (-40°F -158°F)
- Relative Humidity: 0% to 95% (non-condensing) at 25°C/77°F
3.1 SIM Card/Micro SD Card Installation
A. Unscrew the cover of the SIM card then B. Put SIM card/Micro SD into the slot and
screw it up. take it off.
3.2 Antenna Installation
Rotate the antenna into the antenna connector accordingly.
The external antenna should be installed vertically always on a site with a good signal.
3.4 Router Installation
The router can be placed on a desktop or mounted to a wall or a DIN rail.
3.4.1 Wall Mounting (Measured in mm)
Use 4 pcs of M3 × 6 flat head Phillips screws to fix the router on the wall.
Recommended torque for mounting is 1.0 N·m, and the maximum allowed is 1.2 N·m.
6
en

www.linovision.com
3.4.2 DIN Rail Mounting (Measured in mm)
Use 2 pcs of M3 × 6 flat head Phillips screws to fix the DIN rail to the router, and then hang the DIN rail
on the mounting bracket. It is necessary to choose a standard bracket.
Recommended torque for mounting is 1.0 N·m, and the maximum allowed is 1.2 N·m.
7
en

www.linovision.com
4. Log in the Web GUI of Router
4.1 PC Configuration
Please connect PC to LAN port of IOT-R32W router. PC can obtain an IP address, or you can
configure a static IP address manually. The following steps are based on Windows 10 operating
system for your reference.
(Note: As remote access is disabled by default, you can't access to the router's Web GUI if you connect
PC to WAN port of the router. But it will function properly if you enable it on Web GUI.
③Click “Ethernet” (May have different names). ④Click “Properties”.
①Click “Search Box” to search “Control Panel” on the
Windows 10 taskbar.
②Click “Control Panel” to open it, and then click
“View network status and tasks”.
8
en

www.linovision.com
(Note: Remember to click “OK” to finish configuration.)
4.2 Log in the Router
If this is the first time you configure the router, please use the default settings below:
IP Address: 192.168.1.1
Username: admin
Password: password
A. Start a Web browser on your PC (Chrome is recommended), type in the IP address, and press Enter
on your keyboard.
B. Enter the username and password, click “Login”.
⑤Double Click “Internet
Protocol Version 4 (TCP/IPv4)”
to configure IP address and
DNS server.
⑥Method 1: click “Obtain an IP
address automatically”;
Method 2: click “Use the
following IP address” to assign
a static IP manually within the
same subnet of the router.
9
en

www.linovision.com
If you enter the username or password incorrectly more than 5 times, the login page will be
locked for 10 minutes.
C. When you log in with the default username and password, you will be asked to modify the password.
It’s suggested that you change the password for the sake of security. Click “Cancel” button if you want
to modify it later.
D. After you log in the Web GUI, you can view system information and perform configuration on the
router.
10
en

www.linovision.com
5. Network Configuration
This chapter explains how to connect IOT-R32W to network via WAN connection or cellular.
5.1 Ethernet WAN Configuration
A. Go to “Network > Interface > Port” to change LAN1 to WAN port.
B. Go to “Network > Interface > WAN” to configure WAN parameters. Take static IP configuration as an
example. DHCP client and PPPoE type are optional according to your requirements.
Click “Save & Apply” button to make the changes take effect.
C. Connect WAN port to another router or modem.
D. Log in IOT-R32W web GUI via WAN port IP address and go to “Status > Network” to check if status
is “up”.
11
en

www.linovision.com
E. Go to “Network > Interface > Link Failover” to rise the WAN priority to 1.
F. Open your preferred browser on PC, then type any available web address into address bar and see if it
is able to visit Internet via IOT-R32W router.
5.2 Cellular Connection Configuration
Take inserting SIM card into SIM1 slot as an example; please refer to the following detailed operations.
A. Click “Network > Interface > Cellular > Cellular Setting” to configure the cellular info, like APN and
network type.
B. Click “Save” and “Apply” for configuration to take effect.
If you select “Auto”, the router will obtain ISP information from SIM card to set APN, Username, and
Password automatically. This option will only be taken effect when the SIM card is issued from a
well-known ISP.
C. Go to “Network > Interface > Link Failover” to enable SIM1 and rise link priority of SIM1.
12
en

www.linovision.com
D. Click to configure ICMP ping detection information.
E. Click “Status > Cellular” to view the status of the cellular connection. If it shows “Connected”, it
means SIM1 has dialed up successfully.
On the other hand, you can check the status of SIM indicator. If it keeps on green light statically, it
means SIM1 has dialed up successfully.
13
en

www.linovision.com
F. Open your preferred browser on PC, then type any available web address into address bar and see if it
is able to visit Internet via IOT-R32W router.
[END]
14
en

Datum
26. Apr. 2019
11. Mai 2020
25. Nov. 2020
Dokument Version
V1.0
V1.1
V2.0
Beschreibung
Erste Fassung
Upgrade der Webschnittstellen
Layout Ersetzen
Wenn Sie Hilfe benötigen, wenden
Sie sich bitte an den technischen
Support von Linovision:
E-Mail: [email protected]
Telefon: 86-571-8678175
© 2007-2023 Linovision IoT Co.
Alle Rechte vorbehalten.
Alle Informationen in diesem Handbuch sind durch das Urheberrecht geschützt. Weder Organisationen noch
Einzelpersonen dürfen dieses Benutzerhandbuch ganz oder teilweise ohne schriftliche Genehmigung von
Xiamen Linovision IoT Co.
Geschichte der Revision
Willkommen
Vielen Dank, dass Sie sich für den Linovision IOT-R32W Industrie-Mobilfunk-Router entschieden haben.
Diese Anleitung beschreibt die Installation des IOT-R32W und die Anmeldung an der Web-GUI zur
Konfiguration des Geräts. Sobald Sie die Installation abgeschlossen haben, lesen Sie das Linovision IOT-
R32W Benutzerhandbuch für Anweisungen zur Durchführung von Konfigurationen auf dem Gerät.
Verwandte Dokumente
Diese Startanleitung erklärt nur die Installation des Linovision IOT-R32W Routers. Für weitere Funktionen
und erweiterte Einstellungen lesen Sie bitte die entsprechenden Dokumente wie unten.
Die entsprechenden Dokumente sind auf der Linovision-Website verfügbar: https://www.linovision.com
Konformitätserklärung
IOT-R32W sind konform mit den grundlegenden Anforderungen und anderen relevanten Bestimmungen
der CE, FCC und RoHS.
Dokument
IOT-R32W Datenblatt
IOT-R32W Benutzerhandbuch
Beschreibung
Datenblatt für den industriellen Mobilfunkrouter IOT-R32W.
Die Benutzer können in der Anleitung nachlesen, wie sie sich bei der
Web-GUI anmelden und alle Einstellungen konfigurieren können.
www.linovision.com
15
de

1 × IOT-R32W
www.linovision.com
1 × 6-polige
Steckbare Klemme
1 × Wi-Fi-Stummelantenne
(Nur Wi-Fi-Version)
1 × DIN-Schienen-Kit
1 × GPS-Antenne
(Nur GPS-Version)
1 × Ethernet-Kabel
2 × Stubby-
Mobilfunkantennen
(Optional)
4 × Stellschrauben
1 × Netzadapter
Sollte einer der oben genannten Artikel fehlen oder beschädigt sein, wenden Sie sich bitte an
Ihren Vertriebsmitarbeiter.
1 × Schnellstart-Anleitung
2 × Magnetische
Mobilfunkantennen
1. Packliste
Bevor Sie mit der Installation des IOT-R32W Routers beginnen, überprüfen Sie bitte den Inhalt
des Pakets, um sicherzustellen, dass Sie die unten aufgeführten Artikel erhalten haben.
16
de

www.linovision.com
Anschluss für die Haupt-Mobilfunkantenne
GPS/WIFI-Antennenanschluss
AUX-Mobilfunkantenne
LED-Anzeigebereich
POWER: Betriebsanzeige
SYSTEM: Status-Anzeige
SIM: Status-Anzeige
: : Signalstärke-Anzeige
Serieller Anschluss & E/A
Ethernet LAN1/WAN-Anschluss
Ethernet LAN2-Anschluss
Stromanschluss
SIM- und Reset-Tastenhalterung
2. Hardware-Einführung
2.1 Überblick
2.2 Abmessungen (mm)
1
2
3
4
5
6
7
8
9
17
de

SIM
LED
POWER
Signalstärke
SYSTEM
www.linovision.com
7
Signal 1/2/3
8
Anzeige
Status der
Stromversorgung
Systemstatus
Status der
SIM-Karte
Orangefarbenes
Licht
Status
Aus
Ein
Grünes Licht
Rotes Licht
Aus
Grünes Licht
Aus
Grünes
Licht
PIN
1
2
3
4
5
6
PIN
7
8
RS232
---
---
GND
---
RXD
TXD
RS485*
---
---
---
---
B
A
DI
---
EIN
---
COM
---
---
Beschreibung
Positiv
Negativ
DO
AUS
---
---
COM
---
---
Beschreibung
Der Strom ist ausgeschaltet
Der Strom ist eingeschaltet
Statisch: Einschalten
Langsam blinkend: Das System läuft ordnungsgemäß
Das System ist defekt
SIM1 oder SIM2 wird registriert oder kann nicht registriert
werden (oder es sind keine SIM-Karten eingelegt)
Blinkt langsam: SIM1 wurde registriert und ist für die
Einwahl bereit
Blinkt schnell: SIM1 ist registriert und wählt sich gerade
ein
Statisch: SIM1 wurde registriert und erfolgreich
angewählt
Blinkt langsam: SIM2 wurde registriert und ist für die
Einwahl bereit
Blinkt schnell: SIM2 ist registriert und wählt sich gerade
ein
Statisch: SIM2 wurde registriert und erfolgreich
eingewählt
Kein Signal
Static/Off/Off: schwache Signale mit 1-10 ASU (bitte
überprüfen Sie, ob die Antenne richtig installiert ist, oder
bringen Sie die Antenne an einen geeigneten Ort, um ein
besseres Signal zu erhalten)
Beschreibung
Digitaler Ausgang
Digitaler Eingang
Masse
Gemeinsame Masse
Empfangsdaten
Senden von Daten
2.3 Steckverbinder
2.4 LED-Anzeigen
*: Nur für das Modell -485.
18
de
Other manuals for IOT-R32W
1
Table of contents
Languages:
Other LINOVISION Network Router manuals
