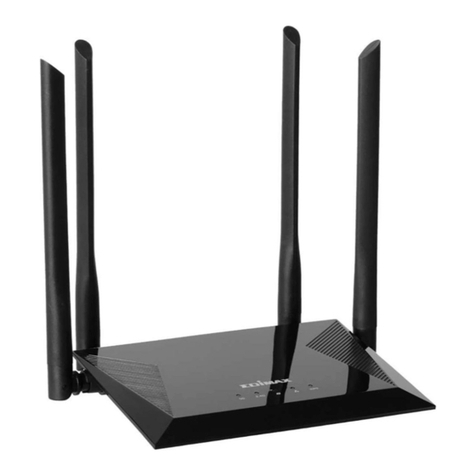
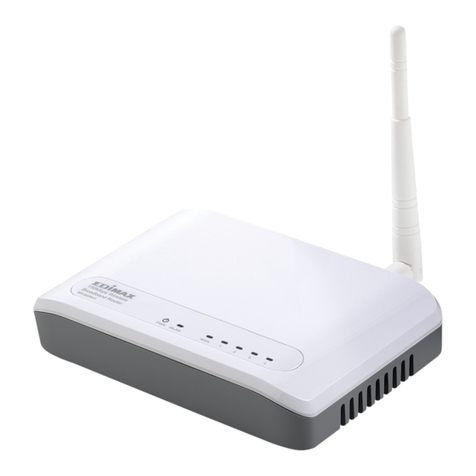
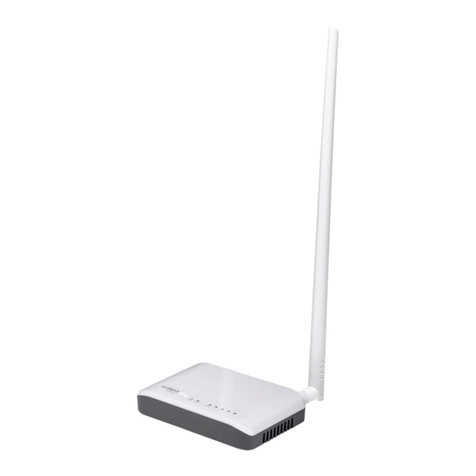
Edimax BR-6479Gn User manual

BR-6479Gn
Quick Installation Guide
03-2013 / v1.0

Copyrightby Edimax Technology Co, LTD. all rights reserved. No part of this publication may be
reproduced, transmitted, transcribed, stored in a retrieval system, or translated into any language
or computer language, in any form or by any means, electronic, mechanical, magnetic, optical,
chemical, manual or otherwise, without the prior written permission of this company.
This company makes no representations or warranties, either expressed or implied, with respect
to the contents hereof and specifically disclaims any warranties, merchantability or fitness for any
particular purpose.Any software described in this manual is sold or licensed "as is". Should the
programs prove defective following their purchase, the buyer (and not this company, its distributor,
or its dealer) assumes the entire cost of all necessary servicing, repair, and any incidental or
consequential damages resulting from any defect in the software. Further, this company reserves
the right to revise this publication and to make changes from time to time in the contents hereof
without obligation to notify any person of such revision or changes.
The product you have purchased and the setup screen may appear slightly different from those
shown in this QIG. For more detailed information about this product, please refer to the User's
Manual on the CD-ROM. The software and specifications are subject to change without notice.
Please visit our web site www.edimax.com for the update.All right reserved including all brand
and product names mentioned in this manual are trademarks and/or registered trademarks of
their respective holders.
Linux Open Source Code
Certain Edimax products include software codes developed by third parties, which are subject
to the GNU General Public License (GPL) or GNU Lesser General Public License (LGPL). Please
see the GNU (www.gnu.org) website for the terms and conditions of each license.
The GNU GPLand GNU LGPL software codes used in Edimax products are distributed
without any warranty and are subject to the copyrights of their respective authors. The firmware
files for this product can be found under the “Download” page at the Edimax website
(www.edimax.com).
Local Support
• Taiwan Customer Service: 0800-200-115, Email: service@edimax.com.tw
• China Customer Service: 4006-765-988, Email: service@edimax.com.cn
• Other http://www.edimax.com

Federal Communication Commission Interference Statement
This equipment has been tested and found to comply with the limits for a Class B digital device,
pursuant to Part 15 of FCC Rules. These limits are designed to provide reasonable protection
against harmful interference in a residential installation. This equipment generates, uses, and
can radiate radio frequency energy and, if not installed and used in accordance with the
instructions, may cause harmful interference to radio communications.
However, there is no guarantee that interference will not occur in a particular installation. If this
equipment does cause harmful interference to radio or television reception, which can be
determined by turning the equipment off and on, the user is encouraged to try to correct the
interference by one or more of the following measures:
1. Reorient or relocate the receiving antenna.
2. Increase the separation between the equipment and receiver.
3. Connect the equipment into an outlet on a circuit different from that to which the
receiver is connected.
4. Consult the dealer or an experienced radio technician for help.
• FCC Caution
This device and its antenna must not be co-located or operating in conjunction with any other
antenna or transmitter.
This device complies with Part 15 of the FCC Rules. Operation is subject to the following two
conditions: (1) this device may not cause harmful interference, and (2) this device must accept
any interference received, including interference that may cause undesired operation.
Any changes or modifications not expressly approved by the party responsible for compliance
could void the authority to operate equipment.
• Federal Communications Commission (FCC) Radiation Exposure Statement
This equipment must be installed and operated in accordance with provided instructions and a
minimum 20 cm spacing must be provided between computer mounted antenna and person’s
body (excluding extremities of hands, wrist and feet) during wireless modes of operation.
The equipment version marketed in US is restricted to usage of the channels 1-11 only.
• R&TTE Compliance Statement
This equipment complies with all the requirements of DIRECTIVE 1999/5/EC OF THE
EUROPEAN PARLIAMENTAND THE COUNCIL of March 9, 1999 on radio equipment and
telecommunication terminal Equipment and the mutual recognition of their conformity (R&TTE)
The R&TTE Directive repeals and replaces in the directive 98/13/EEC (Telecommunications
Terminal Equipment and Satellite Earth Station Equipment)As of April 8, 2000.
• Safety
This equipment is designed with the utmost care for the safety of those who install and use it.
However, special attention must be paid to the dangers of electric shock and static electricity
when working with electrical equipment.All guidelines of this and of the computer manufacture
must therefore be allowed at all times to ensure the safe use of the equipment.
• EU Countries Intended for Use
The ETSI version of this device is intended for home and office use in Austria, Belgium,
Denmark, Finland, France, Germany, Greece, Ireland, Italy, Luxembourg, Bulgaria, Cyprus,
Czech Republic, Estonia, Hungary, Latvia, Lithuania, Malta, Poland, Romania, Slovakia,
Slovenia, the Netherlands, Portugal, Spain, Sweden, and the United Kingdom.
The ETSI version of this device is also authorized for use in EFTA member states: Iceland,
Liechtenstein, Norway, and Switzerland.
• EU Countries not intended for use
None
A declaration of conformity is available on www.edimax.com
1
Table of Content
Chapter 1: Product Information.......................................................................................3
1-1 Safety Information.............................................................................................................................3
1-2 Package Contents.............................................................................................................................3
1-3 Interface and Function......................................................................................................................4
1-4 Features..............................................................................................................................................5
Chapter 2: Hardware Installation and the Network Settings for Client Computer...6
2-1 Hardware Installation........................................................................................................................6
2-2 The Network Settings for Client Computer....................................................................................6
2-2-1 Obtain IP addresses automatically: Windows XP.....................................................................6
2-2-2 Obtain IP addresses automatically: Windows 7..................................................................9
Chapter 3: Setting Up .....................................................................................................14
3-1 iQ Setup............................................................................................................................................14
3-1-1 iQ Setup with Computer .............................................................................................................14
3-1-2 iQ Setup with iPhone...................................................................................................................18
3-1-3 iQ Setup with Android Phone.....................................................................................................22
3-2 Manual set-up via web browser....................................................................................................27
3-2-1Login Web UI the setting page...................................................................................................27
Chapter 4: Quick Setup ........................................................................................................28
4-1 System Time Zone..........................................................................................................................28
4-2 WAN Settings...................................................................................................................................28
Chapter 5: Admin ............................................................................................................29
5-1 Firmware Upgrade..........................................................................................................................29
5-2 Language..........................................................................................................................................29
5-3 Time Zone........................................................................................................................................29
5-4 Config................................................................................................................................................30
5-5 Password..........................................................................................................................................30
5-6 WOL..................................................................................................................................................31
5-7 Remote Mgt......................................................................................................................................31
5-8 iQSetup.............................................................................................................................................32
5-9 Restart...............................................................................................................................................32
Chapter 6: WAN...............................................................................................................33
6-1 WAN..................................................................................................................................................33
6-1-1 Dynamic IP ...................................................................................................................................33
6-1-2 Static IP.........................................................................................................................................34
6-1-3 PPPoE...........................................................................................................................................35
6-1-4 PPTP / L2TP.................................................................................................................................36
6-2 DNS...................................................................................................................................................37
6-3 WISP.................................................................................................................................................37

2
6-4 DDNS................................................................................................................................................38
Chapter 7: LAN ................................................................................................................39
Chapter 8: Wireless.........................................................................................................41
8-1 Basic Settings..................................................................................................................................41
8-1-1 Disable “Broadcast ESSID”— the easiest security setting....................................................43
8-1-2 Show List of Wireless Clients ....................................................................................................43
8-2 Encryption.........................................................................................................................................44
8-2-1 WEP...............................................................................................................................................44
8-2-2 WPA pre-shared key...................................................................................................................45
8-2-3 WPS RADIUS...............................................................................................................................46
8-3 Advanced Settings..........................................................................................................................46
8-4 WPS..................................................................................................................................................48
8-5 Access Control.................................................................................................................................49
8-6 Wireless Schedule..........................................................................................................................49
Chapter 9: NAT ................................................................................................................50
9-1 Port Forwarding...............................................................................................................................50
9-2 Virtual Server...................................................................................................................................51
9-3 UPnP.................................................................................................................................................51
9-4 ALG ...................................................................................................................................................52
Chapter 10: Firewall........................................................................................................53
10-1 DMZ ................................................................................................................................................53
10-2 Access Control..............................................................................................................................54
10-3 URL Blocking.................................................................................................................................54
10-4 DoS (Denial of Service) ...............................................................................................................55
Chapter 11: QoS & iQoS.................................................................................................57
11-1 QoS...........................................................................................................................57
11-2 iQoS................................................................................................................................................58
Chapter 12: Status...........................................................................................................60
Appendix ..........................................................................................................................61
Troubleshooting......................................................................................................................................61
Glossary ..................................................................................................................................................63

3
Chapter 1: Product Information
Thank you for purchasing the Edimax BR-6479Gn Wireless Gigabit Router. BR-6479Gn
Supports IEEE 802.11b/g/n the standard 2.4 GHz bands. In addition, BR-6479Gn features with
iQ Setup- Smart and automated router setup that needs no more CD installation and helps to get
you online in minutes.
1-1 Safety Information
Please follow the following safety instructions to ensure your safety:
• This router is designed for indoor use only. DO NOT place this router outdoors.
• DO NOT put this router in or near hot or humid places like the kitchen, bathroom, or a car
parked in the sun.
• Disconnect any connected cables from the router before pulling the router with force.
• If you want to hang this router on the wall or place it somewhere high, please make sure it is
firmly secured. Edimax’s warranty does not cover damages caused by misuse.
• Please keep this router and its accessories out of the reach of children.
• DO NOT put this router on paper, cloth, or other flammable materials.
• DO NOT disassemble this router. Disassembling this router will invalidate the warranty.
Please contact your dealer if you experience any problems.
• If this router gets wet or falls into water when it is powered, DO NOT touch it with your bare
hands. Disconnect the power plug from the wall socket immediately, or contact an
experienced technician for help.
• Should your router or power supply overheat and burn out, switch the electrical power off or
disconnect the power plug from the wall socket immediately, and call your dealer for help.
1-2 Package Contents
※Before you start to use this router, please check if there is any item listed as below missing in
the package, and contact your dealer to claim the missing item(s):
• BR-6479Gn broadband router x 1
• 3dBi detachable antenna x 3
• Quick Installation Guide x 1
• CD x 1
• Power Adapter x 1
• Holding Base x 1
• Ethernet Cable x 1

4
1-3 Interface and Function
• Front Panel
LED Light
Status
Description
Power
On Router is switched on and correctly powered.
Off Router is not switched on or correctly powered.
2.4GHz
On
2.4GHz Wireless connectivity activated.
Off
2.4GHz Wireless connectivity not activated.
Flashing 2.4GHz Wireless LAN activity (transferring data).
LAN
On LAN port connected
Off LAN port not connected
Flashing LAN activity (transferring data)
WAN
On
WAN port connected
Off
WAN port not connected
Flashing WAN activity (transferring data)
• Back Panel
Item Name Description
Antenna Connector Connects to the supplied 3dBi detachable
antennas
Wireless Signal ON/OFF
Switch Switches the wireless signal on and off

5
WPS/Reset
Button
Resets the router to factory default settings or
starts WPS function (Reset: press this button and
hold for 20 seconds to clear all settings. WPS:
Press this button for10~15 seconds to activate
WPS function)
Gigabit LAN Ports
(Yellow Ports 1-4) Connects to computer or other web devices
Gigabit WAN Port
(Blue Port) Connects to Cable/xDSL modems
5V Power Connector Connects to the supplied power adapter
1-4 Features
•Support IEEE 802.11b/g/n the standard 2.4 GHz and less bands.
•Wireless data transmission rate up to 300Mbps (2.4GHz).
•A good option for demands of streaming High-Definition (HD) videos, music and other media.
•4 LAN ports design, data transmission rate up to 1000Mbps.
•Comply with IEEE 802.3/ 802.3u/ 802.3ab standards.
•Smart and automated router setup with exclusive feature – iQ Setup.
•Features iQoS for quick and easy bandwidth management.
•Build-in hardware button to enable/disable wireless signal.
•Feature with Wireless Signal On/Off Scheduling function to manage the schedule for wireless
connection.
•Support DHCP/ Static IP/ PPPoE/ WISP connection modes.
•Support WMM, WEP, WPA, WPA2, DDNS, QoS, IP/MAC filter, DMZ and virtual server.

6
Chapter 2: Hardware Installation and the Network Settings for
Client Computer
2-1 Hardware Installation
Please follow the following instructions to build a network connection between your new
broadband router, computers, and other network devices:
2-2 The Network Settings for Client Computer
2-2-1 Obtain IP addresses automatically: Windows XP
(A). Click the “Start” button, then click “Control Panel”.

7
(B). 請Double‐click the “Network” icon, and the “Network” window will appear.
(C). Right click “Local Area Connection” on the mouse.When the “Local Area Connection
Properties” window appears, click “Properties”.
(D) Select “TCP/IP”, and then click “Properties

8
(E) Select “Obtain an IP address automatically” and “Obtain DNS server address automatically”,
then click “OK”.

9
2-2-2 Obtain IP addresses automatically: Windows 7
(A)Click the “Windows” button, then click “Control Panel”.

10
(B)Double‐click the “Network and Internet” icon, and the “Network” window will appear.
(C)Double-click『Network and Sharing Center』

11
(D)Double-click『Change adapter settings』
(E) Right click “Local Area Connection” on the mouse. When the “Local Area Connection
Properties” window appears, click “Properties”.

12
(F) Click “Properties”
(G) Choose『Internet Protocol Version 4(TCP/IPv4)』and then click “Properties”
(H) Select “Obtain an IP address automatically” and “Obtain DNS server address automatically”,

13
then click “OK”.

14
Chapter 3: Setting Up
This section introduces network set-up methods of BR-6479Gn:1) iQ Setup and 2) Manual
set-up via web browser.
3-1 iQ Setup
iQ Setup is a simple and intelligent WAN detection tool. When BR-6479Gn is in the factory
default settings, as long as your internet connections are DHCP, Static IP or PPPoE, iQ Setup
can quickly detect the WAN types and help you to easily set up BR-6479Gn. Here we are going
to show you how to connect to internet in minutes through iQ Setup with your computer, iPhone
and Android phone.
3-1-1 iQ Setup with Computer
When you have correctly installed your hardware and connected to the network, make sure that
your network adapter has been set to obtain IP automatically, enable your web browser, then you
will see the iQ Setup and just follow the instructions to complete the set-up. You will be able to
enjoy surfing internet in mimutes.
1) Please select language first, then click on the next “>>”
Note: You can switch to manually setup via web browser by clicking on ”□”
2) Automatic network detection is proceeding.

15
3) If your network connection is DHCP, you will see the following message: (if your network
connection is PPPoE, please skip to Step 4)
When you see the above successful DHCP connection message, please click the next ">>"
proceed to Step 5)
4) If your network connection is PPPoE, you will see the following message:
Please enter the user name and password provided by your ISP (user name and password are
case- sensitive). Click the next ">>", you will see the following connection success message:
When you see the above successful PPPoE connection message, please click the next ">>"
proceed to Step 5)
Note: You can switch to manually setup via web browser by clicking on ”□”

16
5) IF you are not sure about the DNS, please do not check the “User configure manually” and
click “>>” to continue the next step. If you prefer to set up DNS manually, please check the
box first, and then enter DNS1 and DNS2 info.
6) You have to set up the ESSID (factory default is the EDIMAX) for your BR-6479Gn on this
page. If you want to set up the wireless security encryption, please click the check box of
"enabled WPA2 security encryption" first. Then enter the password (at least 8 characters) you
wish to have. If you do not want to set the encryption now or hope to apply other encryption
methods, you can uncheck the box of “enabled WPA2 security encryption”, and click the next
">>", to complete iQ Setup first. Later, you can login the Web based management interface to
continue further configurations. For more encryption setting instructions, please refer to 8-3
Encryption Setting.
After you click the “>>”, you will see the page shown with message that the system is
restarting. It may take a few minutes to proceed, please be patient to wait.

17
7) When you see the following web page shown on your screen, that means you had been
successfully connected to the internet. Please restart your browser and enjoy surfing the
Internet.
8) If you need to execute iQ Setup again, please find “iQ Setup” function at System
Management.
Table of contents
Other Edimax Network Router manuals

Edimax
Edimax GS-5210PLG User manual

Edimax
Edimax BR-6104K User manual

Edimax
Edimax BR-6104K User manual

Edimax
Edimax CV-7438nDM User manual

Edimax
Edimax BR-6428nS V3 User manual

Edimax
Edimax BR-6208ACD User manual

Edimax
Edimax AR-7084gA/B User manual

Edimax
Edimax 3G-6218n User manual

Edimax
Edimax GP-103IT User manual

Edimax
Edimax HP-8501 User manual

Edimax
Edimax BR-6478AC User manual

Edimax
Edimax ES-3305P Reference guide

Edimax
Edimax EW-7811Un V2 User manual

Edimax
Edimax BR-6473AX User manual

Edimax
Edimax AR-7084A User manual

Edimax
Edimax BR-6475nD User manual

Edimax
Edimax BR-6424n User manual

Edimax
Edimax EW-7303APn v2 User manual

Edimax
Edimax AR-7188WnA User manual

Edimax
Edimax BR-6428n User manual