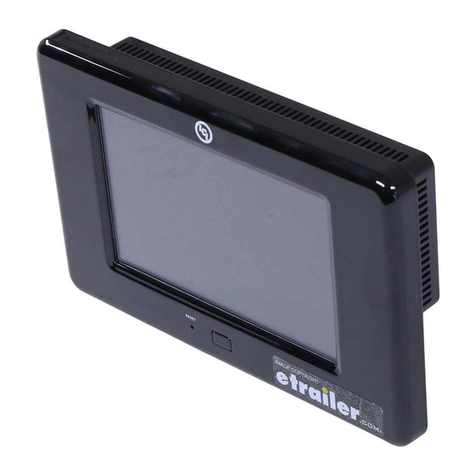
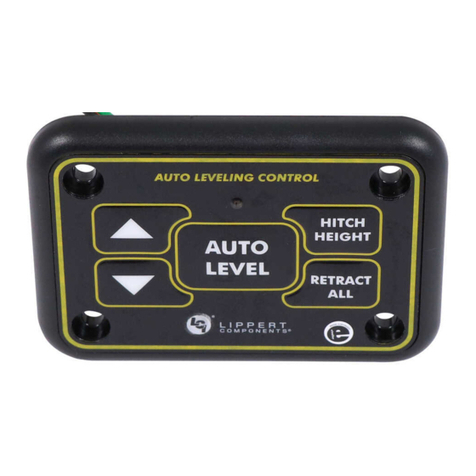
Lippert Components Ground Control TT Leveling OneControl User manual

Rev: 11.29.2018 Page 1
Ground Control®
TT Leveling with
LCD Touch Pad
OEM INSTALLATION MANUAL

Rev: 11.29.18 Page 2 CCD-0001755
TABLE OF CONTENTS
Safety Information 3
Resources Required 3
Measuring Departure and Approach Angle 4
Installation 5
2K and 3K C-Jack 5
5K Jacks 6
Power Tongue Jack 6
Determining the Mounting Position and Installing Leveling Sensors 8
Mounting Position of Leveling Sensors 8
Installing Leveling Sensors 9
Installing the Controller 11
Controller Options 11
LCI Electronic Leveling Touch Pad 12
Prior to Operation 13
Touch Pad Diagram 13
Basic Jack Operation 14
System Settings 14
Homing Jacks 14
Zero Point Calibration 15
Operation 15
Unhitching From Tow Vehicle 15
Auto Level 16
Reconnecting To Tow Vehicle 17
Troubleshooting 18
Touch Pad Error Codes 18
Special Jack Error Codes 19
Troubleshooting 20
Manual Override 20
Preventive Maintenance 21
Wiring Diagram - 2K/3K Gray Controller 22
Wiring Diagram - 3K/3K Salmon Controller 23
Wiring Diagram - 2K/5K Brown Controller 24
Wiring Diagram - 3K/5K Yellow Controller 25

Rev: 11.29.18 Page 3 CCD-0001755
Safety Information
NOTE: Lippert Components, Inc. (LCI) recommends that the following installation procedures should only
be performed by qualified and trained personnel. Please read all Safety Information and instructions
prior to starting this procedure. Lippert Components also recommends the use of appropriate
Personal Protective Equipment (PPE) while performing any portion of this installation.
NOTE: The Ground Control ® TT Leveling OneControl™ Touch Panel is specific to travel trailer applications only.
NOTE: The images in this manual are designed to illustrate the installation procedure only and may not
represent the exact trailer being worked on. The appearance of some components may vary from
trailer to trailer.
Resources Required
• Cordless or Electric Drill or Screw Gun
• Appropriate Drive Bits
• ⁄" Drill Bit
• ½" Ratchet
• Deep Well Socket
• ⁄" Open Face Wrench
• String
• Silver or White Paint or Permanent Marker
• 2 Clamps
Failure to act in accordance with the following may result in death, serious injury, trailer damage or
voiding of the component warranty.
Moving parts can pinch, crush or cut. Keep clear and use caution.

Rev: 11.29.18 Page 4 CCD-0001755
Measuring Departure and Approach Angle
Departure and approach angles are measured by running a string line from the meeting point of the tire and
ground up at an angle to the lowest point on the front or rear of the trailer. These string lines are shown as
dotted lines (Fig.1 and Fig. 2).
NOTE: C-Jacks shown for reference only to mark proper locations.
Ground Draw Bar Approach Angle
String Line
Departure Angle
String Line
Axle Hanger
Fig. 1
Departure Angle
String Line
Approach Angle
String LineGround
Fig. 2
Minimum Ground Clearance is 7"
Ground Clearance is 10.5" to 15"

Rev: 11.29.18 Page 5 CCD-0001755
Installation
Fig. 3
A
B
C
NOTE: Before checking ground clearance, make sure the trailer is parallel to the plain of the ground and
level front to back.
For the 2K and 3K C-jack Leveling System, follow steps 1-4 for the front and the rear jacks. If installing 5K
Jacks in the rear follow the 5K Jacks section.
NOTE: The height specifications for the C-jack Leveling System is a minimum of 10.5" and maximum 15"
(measured from the bottom of the foot pad to the ground).
2K and 3K C-Jack
NOTE: Figure 3 depicts C-jacks installed onto an OEM cross-member.
1. Align the jack assembly mounting holes with the holes on the mounting bracket assembly across the
chassis road-side to curb-side.
2. Insert six ⁄" - 16 x 1 ½" bolts (Fig. 3A) through each set of aligned mounting holes.
3. Secure the bolts with a ⁄" - 16 nut (Fig 3B).
NOTE: Figure 4 illustrates the ⁄" - 16 x 1 ½" bolt (Fig. 4A) within the C-channel of the mounting bracket
assembly.
4. Connect the wire harnesses to the C-jack motor wires (Fig. 3C).
Run the harnesses to the compartment where the controller will be
mounted.
NOTE: LCI recommends zip tying the wire harnesses tight against the front
C-Jack motors to prevent damage to the wire harnesses.
Fig. 4
A
The trailer MUST be supported per manufacturer's specifications before working underneath. Failure to
do so may result in death of serious injury

Rev: 11.29.18 Page 6 CCD-0001755
5K Jacks
1. Align the rear jack mounting plate holes
with the holes in the rear jack mounting
brackets (Fig. 5B) on the main frame rail
(Fig. 5A). Set the rear jacks (Fig. 5D) at the
proper height to ensure the rear jack foot
panel is within the departure angle of the
trailer.
2. Bolt the rear jacks (Fig. 5D) to the rear jack
mounting brackets (Fig. 5B) using four
⁄" - 16 x 1 ½" bolts (Fig. 5E) and four
⁄" - 16 nuts (Fig. 5C) per jack. Tighten the
bolts to 90 ft-lb of torque.
3. Connect the wire harnesses to the rear jack
motor wires and run the harnesses to the
compartment where the controller
will be mounted.
4. Repeat steps 1-3 for the other side.
NOTE: LCI recommends zip-tying the harnesses
tight against the rear jack motors to
prevent damage to the wire harnesses.
A
B
C
D
Power Tongue Jack
1. Remove the foot pad from the Power Tongue Jack, if necessary.
A. Remove the hairpin cotter pin (Fig. 6D) and clevis pin (Fig. 6B) holding the foot pad (Fig. 6C) to the
jack leg (Fig. 6A). Set the pins and the foot pad aside.
2. Support the trailer according to manufacturer's instructions. Remove fasteners from the Power Tongue Jack.
3. Carefully slide the jack leg (Fig. 7A) through the hole in the coupler (Fig. 7B) on the trailer A-frame
(Fig. 7C).
A
B
C
D
A
B
C
E
Fig. 5
Fig. 6 Fig. 7
The trailer MUST be supported per manufacturer's specifications before working underneath. Failure to
do so may result in death of serious injury

Rev: 11.29.18 Page 7 CCD-0001755
Fig. 8 Fig. 9
A
4. Align the 3 holes in the Power Tongue Jack mounting plate (Fig. 8A) with the 3 holes in the coupler
(Fig. 8B).
5. Secure the Power Tongue Jack to the coupler plate with three ⁄" - 16 x 1" serrated flange Grade 5 Zinc
coated bolts (Fig. 9A).
6. Connect the two Deutsch Connectors from the jack to the Tongue Jack Harness.
7. Connect the power wire from the Power Tongue Jack to a 30 amp fuse, then to a grounded 12V power
supply on the trailer.
NOTE: The Power Tongue Jack has an option to replace the foot pad or attach the Drop Leg foot pad.
8. Reattach the foot pad to the jack leg by sliding the foot pad back over the bottom of the jack leg.
Secure it with the clevis pin and cotter pin which were previously removed (Fig. 6).
NOTE: The Power Tongue Jack has an option to replace the foot pad with the Drop Leg foot pad.
9. If using the Drop Leg foot pad, attach the foot pad (Fig. 10C) to the jack leg (Fig. 10A). Secure it with
the snapper pin (Fig. 10B).
Fig. 10
C
A
B
A
B

Rev: 11.29.18 Page 8 CCD-0001755
Determining the Mounting Position and Installing Leveling Sensors
Mounting Position of Leveling Sensors
The leveling sensors have a limited
mounting area for proper performance. The
front sensor must be within 36” from the
front of the frame as signified by Section
A in (Fig.11). Ensure that the front sensor
is mounted in front of the front leveling
jacks. The rear sensor must be in line with or
behind the rear leveling jacks, as signified
by Section B in (Fig.11 and Fig. 12). Both the
front sensor and the rear sensor must also be
mounted in line with the center of the frame,
as signified by the dotted blue centerline in
(Fig.11 and Fig. 12).
Fig. 11
Rear of Trailer
Front of Trailer
Section A
Section B
Front Left
C-Jack
Rear Left
C-Jack
Front Right
C-Jack
Rear Right
C-Jack
Centerline
Fig. 12
Rear of Trailer
Section B
Rear Left
5K Jack
Rear Right
5K Jack
Centerline

Rev: 11.29.18 Page 9 CCD-0001755
Installing Leveling Sensors
The Leveling Sensors (Fig. 13) must be installed on cross-members in line with or behind the rear jacks, and
in line with, or in front of, the front jacks, centered curbside to roadside on the trailer with the arrows on
the top of the sensor pointing the correct direction (Fig. 14). See (Fig. 11), Sections A and B and Figure 12,
Section B for location clarification.
Fig. 13
NOTE: The following process will be repeated for both sensor installations.
NOTE: Leveling sensor mounting plate might be pre-installed by LCI, if so perform step 2 and step 4.
1. Dry fit the mounting plate (Fig. 15C) and the leveling sensor (Fig. 15B) to the cross-member (Fig. 15A).
The pre-drilled holes in the plate are for mounting the sensor to the plate. Mark on the plate where the
sensor will set.
Fig. 14
Fig. 15
A
B
C
NOTE: Leave space between the sensor (Fig. 15B) and cross-member (Fig. 15A) so the wire harness will not
be pinched.
NOTE: The wire harness must be oriented towards the front of the trailer (Fig. 11 and Fig. 12). Proper
orientation of the wire harness is imperative for correct operation of the leveling system.

Rev: 11.29.18 Page 10 CCD-0001755
A
Fig. 18
Fig. 17
x
x
A
B
C
Fig. 16
A
B
C
2. Attach the sensor (Fig. 16A) to the mounting plate (Fig. 16B) using two #12 - 14 x 1" hex head self-
drilling screws (Fig. 16C).
NOTE: To avoid cracking the mounting sensor housing, do not over-tighten the screws.
3. Attach the mounting plate and sensor assembly (Fig. 17B) to the cross-member (Fig. 17A) using two
#12 - 14 x 1" hex head self-drilling screws (Fig. 17C). Ensure that the plate is centered side to side on the
frame and that the sensor is oriented properly. See (Fig. 11 and Fig. 12) Sections A and B for location
clarification.
4. Connect the sensor harness to the 3-Pin connector on the sensor (Fig. 18A) and run the harness
through the frame and up to the compartment where the controller will be mounted.

Rev: 11.29.18 Page 11 CCD-0001755
Fig. 19
A
B
Installing the Controller
NOTE: Prior to starting this portion of the installation, double check that all of the harnesses are properly
and securely connected to the leveling jacks, Power Tongue Jack, and leveling sensors.
NOTE: The compartment where the controller will be installed must be protected from the elements and
the controller MUST be installed in compliance with Recreational Vehicle Industry Association
(RVIA) Gas Codes, since the controller connections are not spark-proof.
Controller Options
There are four different options for the controller depending on the installed leveling jack configuration.
A. Install Gray Controller (P/N 694815) for a two 2K C-Jack and two 3K C-Jack configuration (Fig. 1)
using the LCI Electronic Leveling Touch Pad.
B. Install Salmon Controller (P/N 672953) for a four 3K C-Jack configuration (Fig. 1) using the LCI
Electronic Leveling Touch Pad.
C. Install Brown Controller (P/N 694816) for a two 2K C-Jack and two 5K Jack configuration (Fig. 2)
using the LCI Electronic Leveling Touch Pad.
D. Install Yellow Controller (P/N 421483) for a two 3K C-Jack and two 5K Jack configuration (Fig. 2)
using the LCI Electronic Leveling Touch Pad.
1. Using four #8 x 1” wood screws (Fig. 19B), attach the controller (Fig. 19A) to the compartment wall or
ceiling.
2. Attach the power and ground electrical cables to the corresponding posts on the controller, then
connect them to the correct posts on the trailer battery.
3. Connect all jack wire harnesses to the appropriate connectors on the controller. See appropriate
Wiring Diagram section.

Rev: 11.29.18 Page 12 CCD-0001755
LCI Electronic Leveling Touch Pad
1. Determine where to mount the touch pad. The touch pad should be mounted in a compartment on
the side of the trailer so the operator will have a view of the coupler while using the touch pad.
2. Remove the faceplate of the touch pad (Fig. 20B) from the mounting bezel (Fig. 20A).
3. Cut a hole in the wall of the compartment 3 ⁄” wide by 2 ¾” high (Fig. 21) so the top and bottom
horizontal cuts are parallel to the floor of the compartment.
4. Feed the touch pad harness through this hole and run it to the compartment where the controller is
mounted. Plug the harness into the appropriate connector on the controller.
5. Insert the touch pad bezel (Fig. 22A) into the cutout and attach it with four #8 x 1" wood screws
(Fig. 22B) with sufficient length to thread into the compartment wall.
6. Plug the touch pad harness into the connector on the back of the touch pad faceplate and snap the
faceplate into the bezel (Fig. 23).
Fig. 21
Fig. 23
Fig. 20
A
B
2 ¾"
3 ⁄"
Fig. 22
A
B

Rev: 11.29.18 Page 13 CCD-0001755
Fig. 24
A
B
C D E
F
G
H
J
K
I
Prior to Operation
The leveling system should only be operated under the following conditions:
1. The trailer is parked on a reasonably level surface.
2. Be sure all persons, pets, and property are clear of the trailer while the leveling system is in operation.
3. Make sure battery(ies) are fully charged and test at 12+VDC under load.
Touch Pad Diagram
Callout Description
A Up Arrow - Scrolls up through the menu on LCD.
B Down Arrow - Scrolls down through the menu on LCD.
C Enter - Activates modes and procedures indicated on LCD.
D LCD Display - Displays procedures and results.
E Retract - Places leveling system into retract mode.
F Auto Level - Places leveling system into auto level mode.
G Power Button - Turns leveling system on and off.
HFront Jack Button - Activates front jacks in manual mode.
Front Jack Button - Activates tongue jack in standard mode.
I Left Jack Button - Activates left jacks in manual mode.
J Right Jack Button - Activates right jacks in manual mode.
K Rear Jack Button - Activates rear jacks in manual mode.

Rev: 11.29.18 Page 14 CCD-0001755
Basic Jack Operation
NOTE: The "On" and "Off" switch (Fig. 28A) controls the Power Tongue Jack's light only. If left on for an
extended period of time, the light will drain the trailer's battery.
NOTE: The Power Tongue Jack is designed for vertical movement of the trailer only.
The Power Tongue Jack can be operated at any time using the buttons on the front of the tongue jack
motor enclosure or by using the LCI Electronic Leveling Touch Pad "FRONT" button while in standard mode.
The leveling jacks can only be extended when the touch pad is in the manual mode. Once in manual mode,
pressing the “FRONT” button (Fig. 24H) will extend both front jacks at the same time. By pushing the button
combination of the "FRONT" and “LEFT” (Fig. 24I), or "FRONT" and “RIGHT” (Fig. 24J) buttons, the individual
front jacks can be extended. Pressing the “REAR” button (Fig. 24K) will extend both rear jacks at the same
time. To extend individual rear jacks, press the button combination of “REAR” and “LEFT” (Fig. 24I), or “REAR”
and “RIGHT” (Fig. 24J) buttons, depending on which jack needs to be operated.
If the touch pad is put in the retract mode, which is indicated by the orange illuminated LED next to the
“RETRACT” button (Fig. 24E), both front jacks can be retracted together by pushing the “FRONT” button (Fig.
24H). Front jacks can be retracted individually by pushing the combination of the "FRONT" and “LEFT” (Fig.
24I), or "FRONT" and “RIGHT” (Fig. 24J) buttons. Similarly, the rear jacks can be retracted together by pushing
the “REAR” button (Fig. 24K), or individually by pushing the combination of the “REAR” and “LEFT” (Fig. 24I)
or “REAR” and “RIGHT” (Fig. 24J) buttons.
NOTE: If the leveling jacks will not operate individually using the method described above, but they
operate properly when Auto Level is performed, the Twist Prevention Protection System has locked
out the operation to prevent damage to the frame of the trailer.
System Settings
Homing Jacks
1. Run the system by pressing "FRONT" (Fig. 24H). A special jack error code should occur. If not, introduce
the special jack error code.
NOTE: To introduce an error, disconnect 1 of the hall effect sensor wires from the controller. After
attempting to operate the disconnected jack, the touch pad screen will display an error. Reconnect
the hall effect sensor wire.
NOTE: In order to clear the special jack error code the jacks need to be "homed." In order to "home" jacks,
each jack must be able to retract a minimum of 6".
Be sure to park the trailer on solid and level ground. Prior to operation, clear all jack landing locations
of debris and obstructions. The locations should also be free of surface depressions and moisture. When
parking the trailer on extremely soft surfaces, utilize load distribution pads under each jack.
People and pets should be clear of the trailer while the leveling system is operated. Never lift the trailer
completely off the ground. Lifting the trailer so the wheels are not touching the ground will create an
unstable and unsafe condition.

Rev: 11.29.18 Page 15 CCD-0001755
2. Extend all jacks to reach the 6" of minimum retract needed.
A. Press "FRONT" (Fig. 24H) to extend the front jacks (if required).
B. Press "REAR" (Fig. 24K) to extend the rear jacks (if required).
3. Press and hold the retract button until all of the jacks begin to retract. The jacks will retract until they
reach the hard current limit.
4. The jacks are now “homed” and the special jack error code will be cleared.
NOTE: If the jacks do not retract, an error should display on the touch pad screen. This is typically caused by
wiring interruption.
Zero Point Calibration
The “Zero Point” is the programmed point that the trailer will return to each time the Auto Level feature
is used. The “Zero Point” must be programmed prior to using the Auto Level feature to ensure the proper
operation of the system.
NOTE: Prior to starting this procedure, double check all connections on the controller, jacks, and touch pad.
1. In manual mode run the jacks to level the trailer. This is best achieved by placing a level in the center
of the trailer and leveling it both front to back and then side to side. (See “Basic Jack Operation” for
instructions on how to manually operate the system).
2. Once the trailer is level, turn off the touch pad.
3. With the touch pad off, press and release the “FRONT” button (Fig. 24H) 5 times and then press and
release the “REAR” button (Fig. 24K) 5 times.
4. The touch pad will flash and beep and the display will read “ZERO POINT CALIBRATION ENTER to set,
Power to Exit” (Fig. 25).
5. To set the current position as the zero point, press the “ENTER” button (Fig. 24C).
6. LCD display will read “Zero point stability check” (Fig. 26).
7. LCD display will read “Zero point set successfully” once process is complete (Fig. 27).
8. The system will set this point as its level state and the touch pad will turn off.
Fig. 25 Fig. 26 Fig. 27
B
Fig. 28
Operation
Unhitching From Tow Vehicle
1. Be sure the ground surface under the Power Tongue Jack is firm and
level.
2. Be sure the footpad of the Power Tongue Jack is pinned securely in
place with the clevis pin and hairpin cotter pin.
3. Chock all tires of the trailer.
4. Disconnect any wires, chains, or sway control that may be equipped
between the tow vehicle and the trailer. Unlatch the trailer coupler.
5. Press and hold the “EXT” button (Fig. 28B) on the Power Tongue Jack
or press the "FRONT" button (Fig 24H) on the touch pad in standard
mode to extend the Power Tongue Jack until the footpad touches
the ground and the coupler clears the hitch ball.
6. Once the coupler is clear of the hitch ball, move the tow vehicle a
safe distance away from the trailer.
A

Rev: 11.29.18 Page 16 CCD-0001755
Auto Level
1. Prior to auto leveling, make sure the trailer is unhitched from the tow vehicle and the tow vehicle is
parked a safe distance away from the trailer.
2. Press the “ON/OFF” button (Fig. 29A) and then press “AUTO LEVEL” (Fig. 29B).
NOTE: Once the automatic leveling cycle has been started, it is important that there is no movement in the
trailer until the trailer has completed the leveling process. Failure to remain still during the leveling
cycle could have an effect on the performance of the leveling system.
NOTE: Pressing any button during an Auto Level sequence will abort the auto leveling cycle.
NOTE: Auto Leveling sequence may vary slightly based on the height of the trailer coupler prior to leveling.
NOTE: Sequence may vary slightly based on the height of the trailer coupler prior to leveling.
3. When the Auto Level sequence begins:
A. The system checks that the rear jacks are retracted.
B. The Power Tongue Jack may adjust depending on the orientation of the trailer.
C. Front jacks will extend until movement of the trailer is sensed.
D. The Power Tongue Jack will then retract.
E. The front jacks will extend/retract near level.
F. Rear jacks will extend and ground.
G. Trailer will level front-to-rear and then side-to-side.
H. The Auto Level sequence will ground all jacks to ensure all foot pads are on the ground. Once this
has been completed the LCD screen will read "AUTO LEVEL SUCCESS."
4. The LED screen will then read "READY" followed by the current battery voltage. The green LED in the
center of the four leveling jack buttons will be illuminated (Fig. 30A).
NOTE: If the "AUTO LEVEL" sequence does not perform as described above, place the system in manual
mode and test that the jacks operate correctly by pushing their coordinating buttons on the touch
pad; i.e. "FRONT" button operates only the front jacks, etc. If the jack functions are incorrect, check
that the correct jack wiring harnesses are plugged into the correct ports on the controller.
Fig. 29
A
B
Fig. 30
A

Rev: 11.29.18 Page 17 CCD-0001755
Reconnecting To Tow Vehicle
1. Press the “ON/OFF” button to turn panel on (Fig. 31B).
2. Press the “UP ARROW” (Fig. 31A) button on the touch pad until “AUTO HITCH HGT, ENTER TO BEGIN” is
displayed on the LCD. Press the “ENTER” button (Fig. 31C).
3. The rear leveling jacks will retract, followed by the tongue jack extending to the ground, then followed
by the front leveling jacks retracting. The tongue jack will then adjust the height of the front of the
trailer coupler to the point at which the “AUTO LEVEL” button was most recently pressed.
4. Press the “ON/OFF” button to turn system off (Fig. 31B).
5. Back the tow vehicle into position to align the tow vehicle hitch and trailer coupler with each other.
6. Press and hold “RET” on the tongue jack to retract the tongue jack (Fig. 32A) until the coupler sets into
position on top of the tow vehicle hitch.
7. Latch the tow vehicle hitch and connect any wires, chains or sway control that may be equipped
between the tow vehicle and trailer.
8. Press the “RET” button (Fig. 32A) twice and then press and hold the “RET” button for 3-5 seconds to
engage the tongue jack’s auto retract feature.
NOTE: The “RET” button (Fig. 32A) can also be pressed and held until the jack is fully retracted.
Fig. 32Fig. 31
A
C
B
A

Rev: 11.29.18 Page 18 CCD-0001755
Troubleshooting
Touch Pad Error Codes
NOTE: To clear an error from the touch pad, repair or otherwise correct the issue, then press “ENTER.”
If the error is still present, the message will be displayed again.
Touch Pad Error Codes
LCD Error Codes What's Happening? What Should Be Done?
Excess Angle Excessive angle reached during auto
operation. Relocate the trailer.
Excessive Angle Excessive angle reached during manual
operation.
Stop manual operation and reset jacks
to a more level state. The code will self
clear, there is no need to hit "ENTER."
Feature Disabled
Hitch recognition requested but no
hitch height set.
Perform "AUTO LEVEL" sequence to
establish hitch height.
Zero point not set. Set zero point.
Low Voltage Battery voltage dropped below 9.5V.
Check wiring - repair or replace.
Test battery voltage under load - charge
or replace.
Out Of Stroke
Jack has reached maximum stroke
length and is unable to lift.
Check disposition of jacks. Relocate the
trailer.
Unexpected high amp current stall.
Check jacks in manual mode or perform
manual override procedure. Repair or
replace as needed.
Check for bent or damaged jacks. Repair
or replace as needed.
External Sensor Bad connection or wiring from the
controller to the leveling sensor.
Replace or repair connection to leveling
sensor.
Jack Timeout Time limit exceeded for the requested
auto operation. Check disposition of jacks.
Auto Level Fail
Unable to auto level due to uneven
ground.
Check disposition of jacks. Relocate the
trailer.
Unable to auto level due to zero point
being set incorrectly. Reset zero point.
Comm Error Communication between controller and
touch pad has been lost.
Check harness for proper connections or
damage. Replace if necessary.
Bad Calibration Sensor calibration values are out of
range. Replace controller.
Function Aborted The user pressed a button on the touch
pad during an automatic operation.
Restart automatic operation and then
refrain from pressing any buttons on the
touch pad.
Hall Power Short Short circuit detected in one of the hall
effect power wires. Test for short and repair or replace.

Rev: 11.29.18 Page 19 CCD-0001755
Special Jack Error Codes
To clear one of the error codes listed below:
1. Correct or otherwise repair the issue (see the table below).
NOTE: In order to clear the special jack error code the jacks need to be "homed." In order to "home" jacks,
each jack MUST be able to retract a minimum of 6".
2. Extend all jacks to reach the 6" of minimum retract needed.
A. Press "FRONT" (Fig. 24G) to extend the front jacks (if required).
B. Press "REAR" (Fig. 24J) to extend the rear jacks (if required).
3. Press and hold the retract button until all of the jacks begin to retract. The jacks will retract until they
reach the hard current limit.
4. The jacks are now “homed” and the special jack error code will be cleared.
NOTE: If the jacks do not retract, an error should display on the touch pad screen. This is typically caused by
wiring interruption.
Special Leveling Jack Error Codes
LCD Error Codes What's Happening? What Should Be Done?
LF Jack
RF Jack
LR Jack
RR Jack
Tongue Jack
Error at a specific jack (left front,
right front, left rear, right rear,
tongue jack).
• Hall signal issue (open,
short, malfunction or loss of
communication)
• Open or short circuit between
controller and motor.
Check harness connections
at controller and at jack.
Check harness for damage.
Check fuses at controller.
Repair or replace as necessary.

Rev: 11.29.18 Page 20 CCD-0001755
Fig. 34 Fig. 35
A
Fig. 33
A
B
A
Troubleshooting
Manual Override
NOTE: For ease of manual override it is recommended to unplug the power harness to the motor prior to
performing the manual override procedure.
NOTE: Use of a 12-18 volt cordless screw gun or pneumatic screw gun is acceptable to manually override
the jacks. Do not use an impact screw gun to perform any of the override procedures, as this may
damage the motor. If manual override is necessary there are two options for each style of jack.
NOTE: If the travel trailer is equipped with 4 C-Jacks the override procedure is the same for the front and rear.
2K or 3K C-Jack Motor Override:
Tools needed: ⁄” drive ratchet and extension (no socket)
1. Find the port on the top of the jack motor (Fig. 33A).
2. Remove the rubber plug (Fig. 34A).
3. Insert the ⁄” drive into the port.
4. Turn the override until the jack extends or retracts to desired position.
2K or 3K C-Jack Manual Override Nut:
Tools needed: ¾" socket and ratchet
1. Locate the manual override nut (Fig. 33B).
2. Place ¾" socket and ratchet over the manual override nut (Fig. 35A) and turn the override nut until the
jack extends or retracts to desired position.
Moving parts can pinch, crush or cut. Keep clear and use caution.
Table of contents
Other Lippert Components Touch Panel manuals
