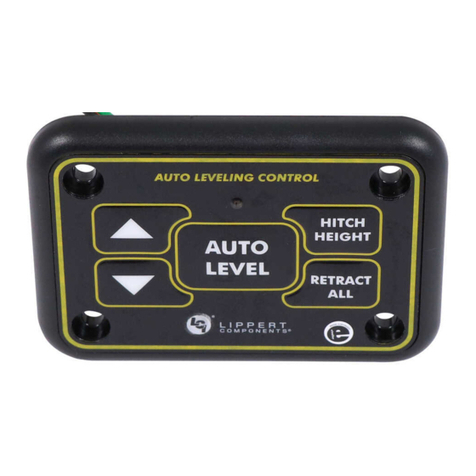
Lippert Components OCTP User manual

OneControl® Touch Panel
OWNER'S MANUAL

Rev: 12.21.18 Page 2 CCD-0001440
System Information
The OneControl® Touch Panel (OCTP) is a touchscreen device that provides system controls and monitoring
software for the recreational vehicle unit. The systems include slide-outs, leveling systems, awnings, lighting,
temperature, water tanks, tire pressure, battery levels and any other compatible systems installed on the
unit and programmed into the OneControl® system. Powering up the unit will also power the OneControl®
Touch Panel and the various controllers throughout the unit.
Operation
Power On/Off
1. The device can be powered on or off using the button on the front of the device.
NOTE: It will take a few moments to start up and load the system.
2. To enter or exit sleep mode, press and release the power button.
Control Panel
1. Locate OneControl® control panel (Fig. 1).
2. Press the power button (Fig. 1A) to turn on the OneControl® Touch Panel.
3. Press the icon of the system to be operated; i.e., awning, bed lifts, generator, etc. (Fig. 2).
NOTE: The control panel will show icons representing the devices connected to the OneControl® system.
Press the back button (Fig. 3A) at any time to return to the OneControl® home screen.
A
Fig. 1 Fig. 2
TABLE OF CONTENTS
System Information 2
Operation 2
Power On/O 2
Control Panel 2
System Operations 3
OneControl Resources 10
OneControl
®
Assembly 13
OneControl
®
Components 14-19

Rev: 12.21.18 Page 3 CCD-0001440
System Operations
Press back button (Fig. 3A) in the top-left corner to return to the home screen at any time.
1. Awning, if equipped:
A. Pressing the Awning icon (Fig. 2) will allow you to access the awning control screen (Fig. 3).
B. Select an awning to operate.
I. To extend the awning, press the EXTEND button (Fig. 3B).
II. To retract the awning, press the RETRACT button (Fig. 3C).
2. Bed Lifts, if equipped:
A. Pressing the Bed Lifts icon (Fig. 2) will allow you to access the bed lift control screen (Fig. 4).
B. Select a Bed Lift to operate.
I. To raise the bed lift, press the RAISE button (Fig. 4A).
II. To lower the bed lift, press the LOWER button (Fig. 4B).
A
Fig. 3
B
C
Fig. 4
A
B

Rev: 12.21.18 Page 4 CCD-0001440
3. Doors, if equipped:
A. Pressing the Doors icon (Fig. 2) will allow you to access the door lock control screen (Fig. 5).
B. Select a door to operate.
I. To lock the door, press the LOCK button (Fig. 5A).
II. To unlock the door, press the UNLOCK button (Fig. 5B).
4. Fan, if equipped:
A. Pressing the Fan icon (Fig. 2) will allow you to access the fan control screen (Fig. 6).
B. Press a fan to turn it ON (Fig. 6A) or OFF (Fig. 6B).
B
A
Fig. 6
Fig. 5
A
B

Rev: 12.21.18 Page 5 CCD-0001440
5. Generator, if equipped:
A. Pressing the Generator icon (Fig. 2) will allow you to access the generator control screen (Fig. 7).
B. Select a generator to operate.
I. To start the generator, press the START button (Fig. 7A).
II. To access the auto-start menu and set maintenance intervals, choose auto-start voltage, etc.,
press the SETTINGS button (Fig. 7B) on the left side of the screen.
6. HVAC, if equipped:
A. Pressing the HVAC icon (Fig. 2) will allow you to access the HVAC control screen (Fig. 8).
B. Select an HVAC zone to control (Fig. 8A).
C. Selecting a zone will bring you to the climate zone control screen.
I. Toggle the heating or cooling on or off by pressing the HVAC control button (Fig. 9A).
II. Adjust the fan strength by pressing the HVAC fan control button (Fig. 9B).
A
Fig. 8
A
B
Fig. 9
A
Fig. 7
B

Rev: 12.21.18 Page 6 CCD-0001440
7. Landing Gear, if equipped:
A. Pressing the Landing Gear icon (Fig. 2) will allow you to access the landing gear control screen (Fig. 10).
I. To extend the landing gear, press the EXTEND button (Fig. 10A).
II. To retract the landing gear, press the RETRACT button (Fig. 10B).
8. Levelers, if equipped:
A. Pressing the Levelers icon (Fig. 2) will allow you to access the leveling user interface (Fig. 11).
I. To level the unit, press the AUTO LEVEL button (Fig. 11A).
A
Fig. 11
Fig. 10
A
B

Rev: 12.21.18 Page 7 CCD-0001440
7. Landing Gear, if equipped:
A. Pressing the Landing Gear icon (Fig. 2) will allow you to access the landing gear control screen (Fig. 10).
I. To extend the landing gear, press the EXTEND button (Fig. 10A).
II. To retract the landing gear, press the RETRACT button (Fig. 10B).
9. Lighting, if equipped:
A. Pressing the Lighting icon (Fig. 2) will allow you to access the lighting control screen (Fig. 12).
I. Pressing the highlighted ALL ON or ALL OFF (Fig. 12A) will turn all lights on or off.
II. Pressing the highlighted ON or OFF (Fig. 12B) will turn individual lights on or off.
III. If the unit is equipped with colored lighting, pressing the settings icon (ellipsis) (Fig. 12C) will
allow the adjustment of the light name, mode, color, intensity and speed (Fig. 13).
NOTE: Status of individual lights is displayed by the light bulb to the left of the light name. The light icon
will display a lit bulb (Fig. 12D) if the light is on and a dim bulb (Fig. 12E) if the light is off.
10. Tank Monitor, if equipped:
A. Pressing the Monitor Panel icon (Fig. 2) will allow you to access the tank monitor control
screen (Fig. 14).
B. The monitor tank capacity levels (Fig. 14A) to the left will show current fill levels for a given tank.
C. Pressing the device buttons on the right (Fig. 14B) will activate the component. The icon to the
right will turn green when the corresponding device is in use (Fig. 14C).
AA
B
C
DE
Fig. 12 Fig. 13
C
B
Fig. 14
A

Rev: 12.21.18 Page 8 CCD-0001440
11. Slides, if equipped:
A. Pressing the Slides icon (Fig. 2) will allow you to access the slide-out control screen (Fig. 15).
B. Select a slide-out to operate.
I. Pressing OUT will extend the slide-out (Fig. 15A).
II. Pressing IN will retract the slide-out (Fig. 15B).
12. Stabilizers, if equipped:
A. Pressing the Rear Stabilizer icon (Fig. 2) will allow you to access the rear stabilizer control
screen (Fig. 16).
B. Select a stabilizer to operate.
I. To extend the rear stabilizer, press the EXTEND button (Fig. 16A).
II. To retract the rear stabilizer, press the RETRACT button (Fig. 16B).
A
Fig. 15
B
A
Fig. 16
B

Rev: 12.21.18 Page 9 CCD-0001440
13. TV Lifts, if equipped:
A. Pressing the TV Lift icon (Fig. 2) will allow you to access the TV lift control screen (Fig. 17).
B. Select a TV lift to operate.
I. To raise the TV lift, press the RAISE button (Fig. 17A).
II. To lower the TV lift, press the LOWER button (Fig. 17B).
14. Vent Covers, if equipped:
A. Pressing the Vent Covers icon (Fig. 2) will allow you to access the vent cover control screen (Fig. 18).
B. Select a vent cover to operate.
I. To open the vent cover, press the OPEN button (Fig. 18A).
II. To close the vent cover, press the CLOSE button (Fig. 18B).
Fig. 17
A
B
Fig. 18
B
A

Rev: 12.21.18 Page 10 CCD-0001440
OneControl Resources
Pressing the MyRV icon (Fig. 2) will allow you to access the MyRV OneControl resources.
NOTE: The following documents and resources on the OneControl® Touch Panel are pre-loaded on the
system at the time of manufacture. For the latest revisions, visit www.lci1.com.
There are various operation and information videos (Fig. 19A) including troubleshooting and maintenance
guides (Figs. 19B and 20).
NOTE: Troubleshooting videos may not be specific to any unit.
A
E
B
F
C
D
Fig. 19
Fig. 20

Rev: 12.21.18 Page 11 CCD-0001440
1. Owner's Manuals (Fig. 19C); product documentation containing operation and basic
troubleshooting (Fig. 22).
NOTE: Product documentation may not be specific to any unit.
2. Search Function (Fig. 19D); searches the OneControl® tablet for any files (documentation, videos,
images, etc.) containing the search term (Fig. 23).
NOTE: Enter search terms into search pop-up and press the search button (Fig. 23A) to view all related files.
Fig. 21
Fig. 22
A
Fig. 23

Rev: 12.21.18 Page 12 CCD-0001440
3. FAQs (Fig. 19E); frequently asked questions with drop down answers (Fig. 24).
NOTE: Press the question to reveal the answer and a link to more information.
4. Apps (Fig. 11F); manage the tablet and information settings (Fig. 25).
A. OneControl® Media Sync (Fig. 25A) allows the manufacturer to manage documentation supplied
on OneControl®.
B. Set Date & Time (Fig. 25B) manages the clock and calendar settings.
Fig. 24
A B
Fig. 25

ELECTRONICS
Rev: 12.21.18 Page 13 CCD-0001440
ONECONTROL®ASSEMBLY
Touch
Panel
Canbus Power
Connector
Front View
Rear View
Screen
Power button

ELECTRONICS
Rev: 12.21.18 Page 14 CCD-0001440
ONECONTROL®COMPONENTS
A
C
B
Callout Part # Description
A 318708 7" Tablet
B 318750 Wall Mount Docking Station
C 345081 Digital Switch, Touch Screen Wall Mount Switch

ELECTRONICS
Rev: 12.21.18 Page 15 CCD-0001440
ONECONTROL®COMPONENTS
D E
Callout Part # Description
D406345 5" OneControl® Touch Panel
406347 7" OneControl® Touch Panel
E 644577 OneControl® Touch Panel Mounting Bracket
F
341237 Tank Monitor (Original)
437442 Tank Monitor (V2)
431051 Tank Monitor (V2) (20A)
F
(Original) (V2)
(V2) (20A)

ELECTRONICS
Rev: 12.21.18 Page 16 CCD-0001440
ONECONTROL®COMPONENTS
L
K
H
G
IJ
Callout Part # Description
G 318709 Wi-Fi Hub
H 378610 Range Extender
I406343 Wi-Fi Gateway Hub
J 351138 Smart Switch
K
344920 5 Function Receiver with Selectable Fuses
344922 5 Function Receiver with Selectable Fuses and Hydraulic
344921 8 Function Receiver with Selectable Fuses
344923 8 Function Receiver with Selectable Fuses and Hydraulic
L 318751 Lighting Control Module

ELECTRONICS
Rev: 12.21.18 Page 17 CCD-0001440
ONECONTROL®COMPONENTS
N
O P
Callout Part # Description
M 436375 Multi-Output LED Lighting Control Module
N
331111 Canbus Data Harness - 2'
331113 Canbus Data Harness - 5'
331114 Canbus Data Harness - 10'
331116 Canbus Data Harness - 20'
331117 Canbus Data Harness - 30'
351071 Canbus Data Harness - 50'
O 329080 Canbus Power Connector
P 333041 Canbus Terminating Resistor
M

ELECTRONICS
Rev: 12.21.18 Page 18 CCD-0001440
ONECONTROL®COMPONENTS
Callout Part # Description
Q
406350 HVAC Controller (Original)
709167 HVAC 2.0 Controller (Single Zone)
709168 HVAC 2.0 Controller (Dual Zone)
709169 HVAC 2.0 Controller (Triple Zone)
R 406348 Generator Genie Controller
Q
R
(Original) (Single Zone)
(Dual Zone) (Triple Zone)

ELECTRONICS
Rev: 12.21.18 Page 19 CCD-0001440
ONECONTROL®COMPONENTS
S
V
U
T
Callout Part # Description
S 308958 2 Motor Velocity Sync In-Wall Slide Controller
T 709940 Auto Start Generator Genie Controller
U 425749 Leveling Controller
V 345083
W 694656 4 Point Ground Control 3.0 Controller
X 694654 6 Point Ground Control 3.0 Controller
WX

The contents of this manual are proprietary and copyright protected by Lippert Components, Inc. (“LCI”).
LCI prohibits the copying or dissemination of portions of this manual unless prior written consent from an
authorized LCI representative has been provided. Any unauthorized use shall void any applicable warranty.
The information contained in this manual is subject to change without notice and at the sole discretion of LCI.
Revised editions are available for free download from lci1.com.
Please recycle all obsolete materials.
For all concerns or questions, please contact
Lippert Components, Inc.
This manual suits for next models
1
Table of contents
Other Lippert Components Touch Panel manuals
