Litheli U1GT21112 User manual

Visit our website at: http://www.litheli.com
Read this material before using this product.
Failure to do so can result in serious injury.
SAVE THIS MANUAL.
Operator's Manual
Keep this manual for the safety warnings and precautions, assembly,
operating, inspection, maintenance and cleaning procedures. Write the product’s serial number in the
back of the manual near the assembly diagram (or month and year of purchase if product has no number).
Keep this manual and the receipt in a safe and dry place for future reference.
Save This Manual
40V BATTERY POWERED
GRASS TRIMMER 2 IN 1
When unpacking, make sure that the product is intact
and undamaged. If any parts are missing or broken,
please contact us: WWW.LITHELI.COM.
U1GT21112
Copyright 2019 Litheli. All rights reserved.
No portion of this manual or any artwork contained herein may be reproduced in
any shape or form without the express written consent of Litheli.
Diagrams within this manual may not be drawn proportionally. Due to continuing
improvements, actual product may differ slightly from the product described herein.
Tools required for assembly and service may not be included.
©

Watch what you are doing. Use
common sense. Do not operate appliance when
you are tired.
It will do the job
better and with less likelihood of injury at the
rate for which it was designed.
Use face or dust mask if
operation is dusty.
Do not wear loose
clothing or jewelry. They can be caught
in moving parts. Use of rubber gloves
and substantial footwear is recommended
when working outdoors. Wear protective
hair covering to contain long hair.
Page 2 WWW.LITHELI.COM Item U1GT21112
Table of Contents
Safety ......................................................... 2
Specifications
.............................................
5
Setup
..........................................................
6
Operation
.................................................
10
Maintenance .................................................. 15
Parts List and Diagram .............................. 17
Warranty
..........................................................
19
WARNING SYMBOLS AND DEFINITIONS
This is the safety alert symbol. It is used to alert you to potential
personal injury hazards. Obey all safety messages that
follow this symbol to avoid possible injury or death.
Indicates a hazardous situation which, if not avoided,
will result in death or serious injury.
Indicates a hazardous situation which, if not avoided,
could result in death or serious injury.
Indicates a hazardous situation which, if not avoided,
could result in minor or moderate injury.
Addresses practices not related to personal injury.
IMPORTANT SAFETY INSTRUCTIONS
When using electric gardening appliances, basic safety precautions should always be followed
to reduce the risk of fire, electric shock, and personal injury, including the following:
READ ALL INSTRUCTIONS
Gardening Appliance Safety
1. Avoid Dangerous Environment -
Do not use appliances in damp or wet locations.
2. Do Not Use In Rain.
3. Keep Children Away - All visitors should
be kept at a distance from work area..
4. Dress Properly -
5. Wear ANSI-approved safety goggles,
hard hat and heavy-duty rubber work
gloves.
.
6. Wear thick jeans and steel-toed
work boots to help prevent injury
caused by flying debris.
7. Use Right Appliance - Do not use appliance for
any job except that for which it is intended.
8. Avoid Unintentional Starting -
Do not carry appliance with finger on switch.
9. Don’t grasp the exposed cutting blades or cutting
edges when picking up or holding the appliance.
10. Do Not Force Appliance -
11. Do not Overreach -
Keep proper footing and balance at all times.
12. Stay Alert -
13. Store Idle Appliances Indoors - When not in use,
appliances should be stored indoors in dry, and
high or locked-up place - out of reach of children.

Before further use of the
appliance, a guard or other part that is damaged
should be carefully checked to determine that it
will operate properly and perform its intended
function. Check for alignment of moving parts,
binding of moving parts, breakage of parts,
mounting, and any other condition that may
affect its operation. A guard or other part that is
damaged should be properly repaired or replaced
by a qualified technician unless indicated
elsewhere in this manual.
Keep cutting
edge sharp and clean for best performance and
to reduce the risk of injury. Follow instructions
for lubricating and changing accessories. Keep
handles dry, clean, and free from oil and grease.
Page 3
14. Maintain Appliance With Care -
15 . Check Damaged Parts -
16. Keep guards in place and in working order..
17 . Keep hands and feet away from cutting area..
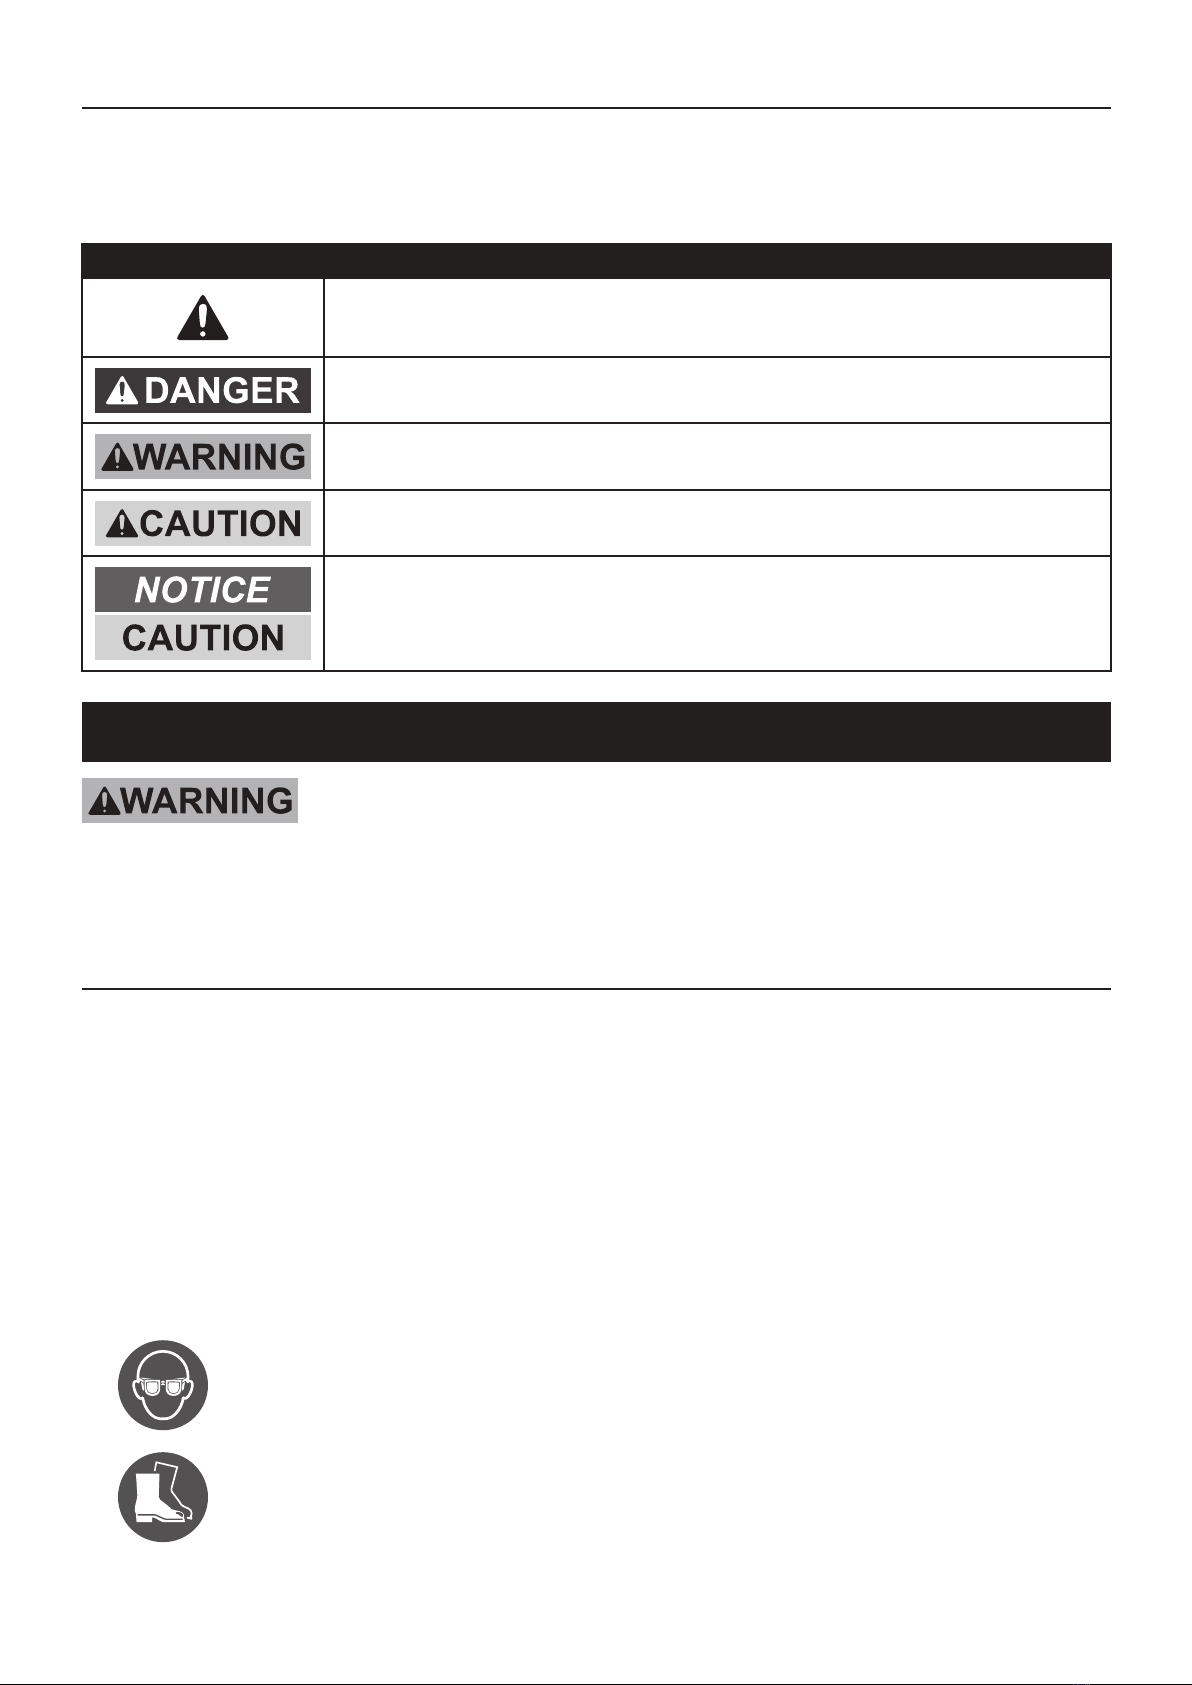
18 . Wear full eye protection and protective clothing..
19. If electrolyte contacts the skin, wash it off
immediately with water.
20. If electrolyte contacts the eyes, flush thoroughly and
immediately with water. Seek medical attention.
21 . Stop working when you feel tired or exhausted.
Make regular breaks to rest..
22. People with pacemakers should consult their
physician(s) before use. Electromagnetic fields
in close proximity to heart pacemaker could
cause pacemaker interference or pacemaker
failure.
23. When servicing use only identical replacement
parts.
24. Disconnect Appliance - Remove Battery Pack
when not in use, before servicing, when changing
accessories such as blades, and the like.
25. Carefully follow cutting procedures
explained in this manual. They are specifically
planned to reduce risk to the operator..
26. Only replace the line on this appliance with
the line material and diameter of line listed
on the Specifications table. Other materials,
such as wire, rope, or blades can damage the
appliance and be forcefully and dangerously
ejected from the appliance upon breaking.
Lithium Battery Safety Warnings
LITHIUM BATTERIES STORE
ALARGEAMOUNTOFENERGY AND
WILL VENT FIRE OR EXPLODE IF MISTREATED:
1 . Keep
Battery Pack dry.
2. DO NOT DO ANY OF THE FOLLOWING
TO THE BATTERYPACK:
a. Open,
b. Drop,
c. Short-circuit,
d. Puncture,
e. Incinerate,
f. Expose to temperatures greater than 104°F.
3. Charge Battery Pack only according
to its Charger’s instructions..
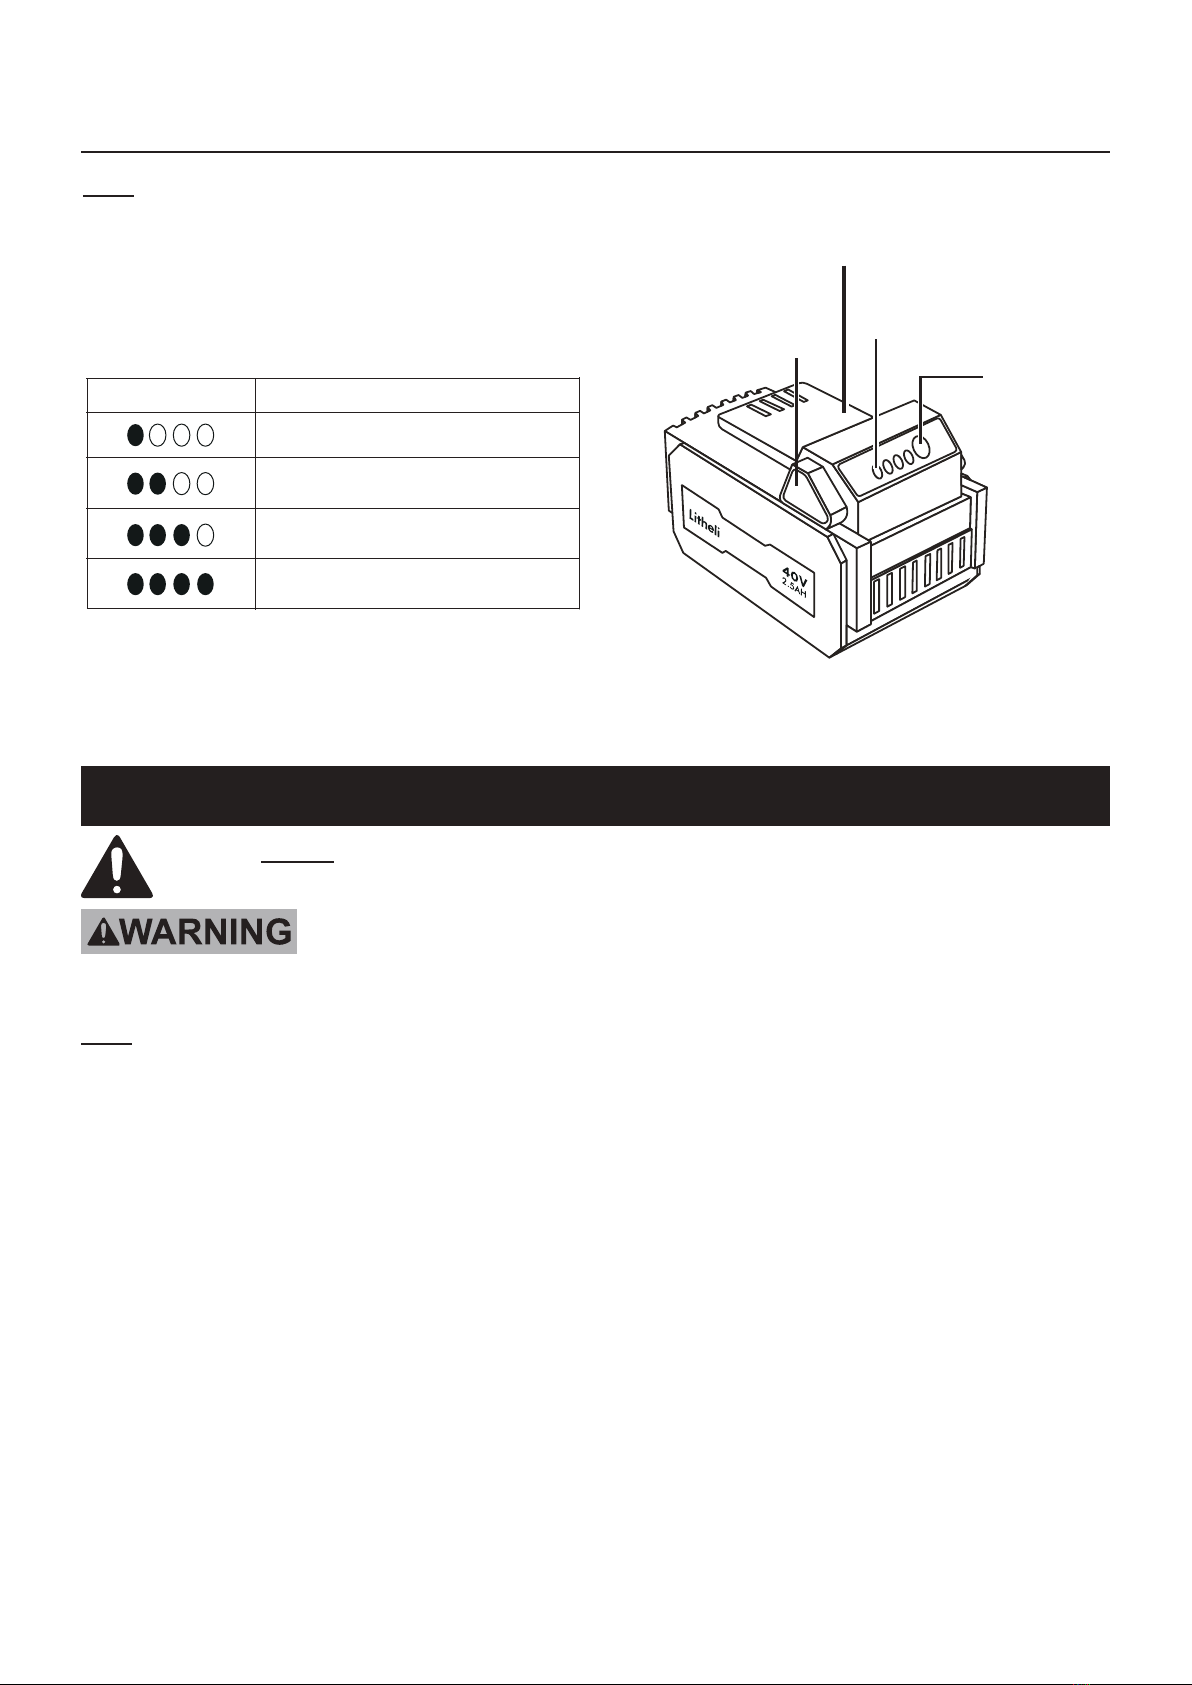
4. Inspect Battery Pack before every use;
do not use or charge if damaged..
Battery Charger Safety
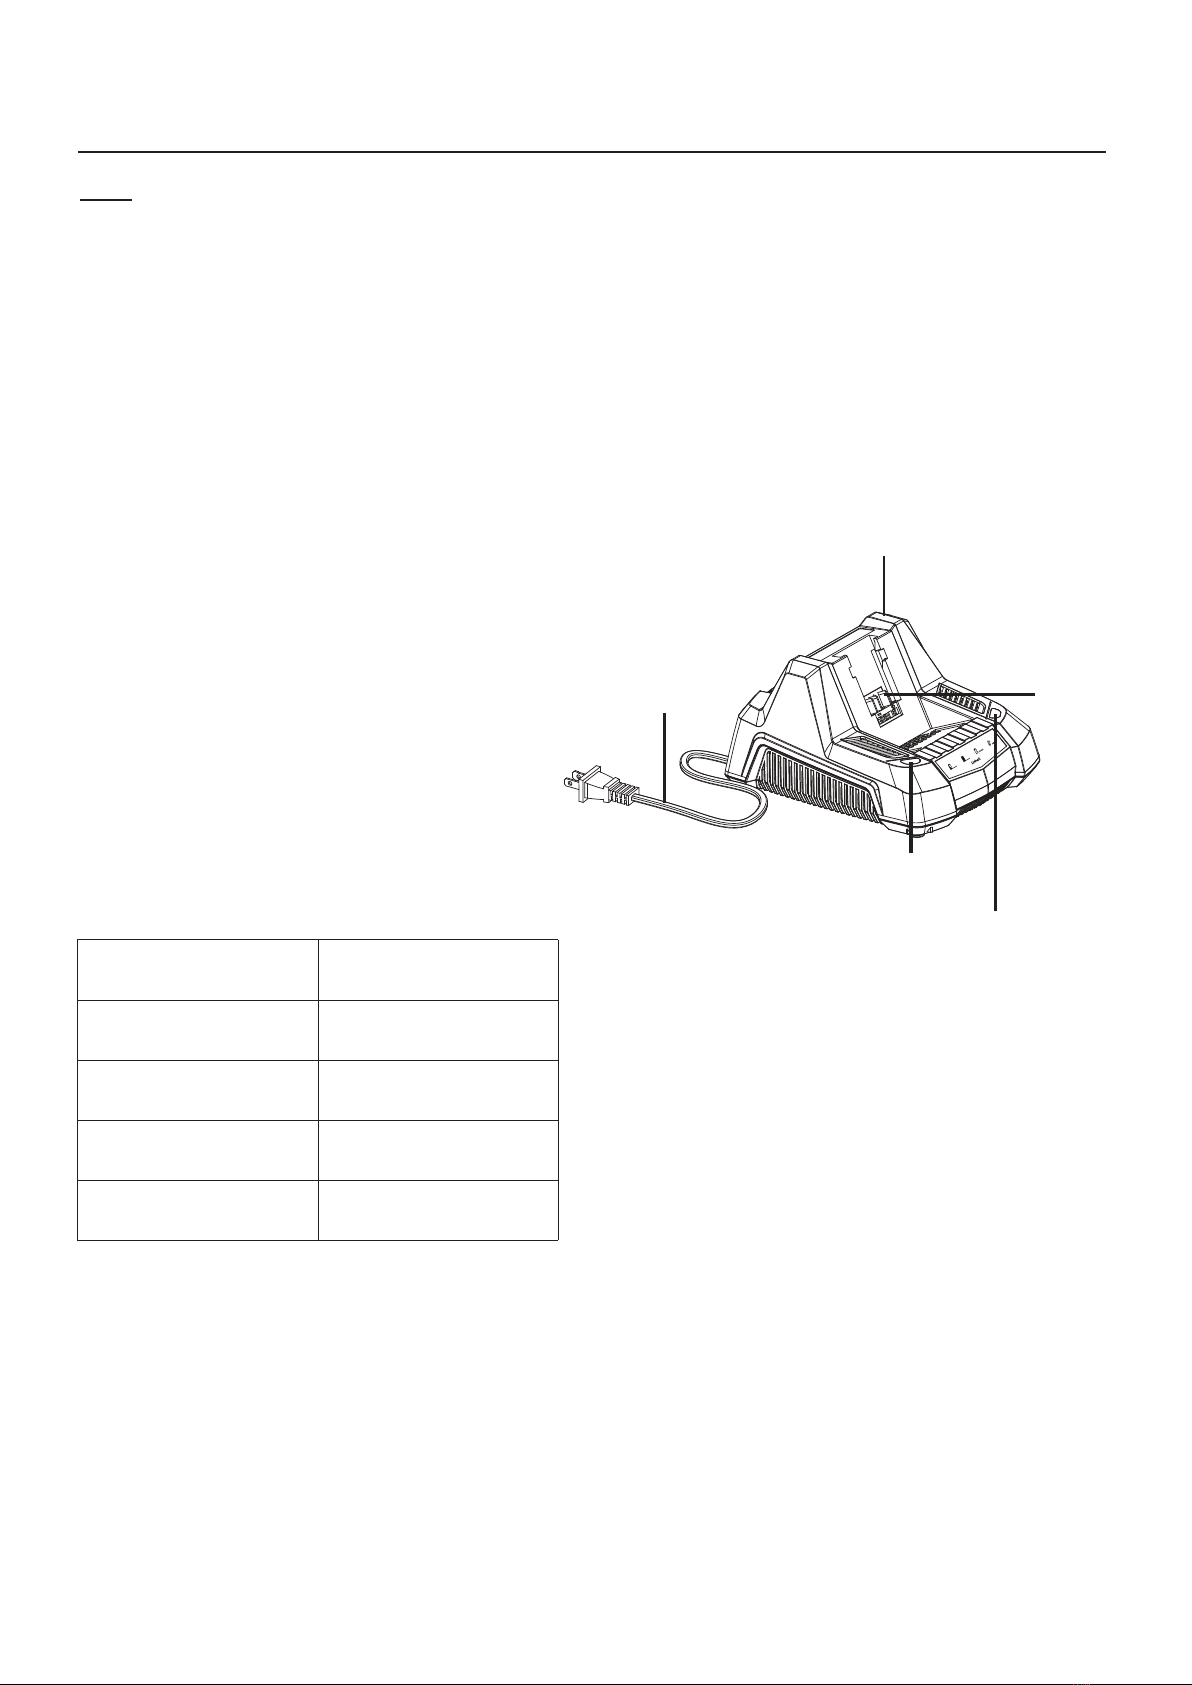
1 . SAVE THESE INSTRUCTIONS - This manual
contains important safety and operating
instruction for battery charger Model U1GT21112.
2. Before using battery charger, read all instructions
and cautionary markings on battery charger,
battery, and product using battery..
3. CAUTION - To reduce risk of injury, charge only li-ion
type rechargeable batteries. Other types of batteries
may burst causing personal injury and damage.
4. Do not charge or use appliance
in rain, or in wet locations.
5. Do not use battery-operated appliance in rain.
6. Remove or disconnect battery after use,
before servicing, cleaning or removing
material from the gardening appliance..
7. Do not dispose of battery in a fire. The
cell may explode. Check with local codes
for possible disposal instructions.
8. Do not open or mutilate the battery. Released
electrolyte is corrosive and may cause damage to
the eyes or skin. It may be toxic if swallowed.
9. Exercise care in handling batteries in order not
to short the battery with conducting materials
such as rings, bracelets, and keys.. The battery
or conductor may overheat and cause burns..
WWW.LITHELI.COM
Item U1GT21112

Page 4
Vibration Hazard
This appliance vibrates during use.
Repeated or long-term exposure to vibration may
cause temporary or permanent physical injury,
particularly to the hands, arms and shoulders.
To reduce the risk of vibration-related injury:
.
1 . Anyone using vibrating appliances regularly or for
an extended period should first be examined by
a doctor and then have regular medical checkups
to ensure medical problems are not being caused
or worsened from use. Pregnant women or people
who have impaired blood circulation to the hand,
past hand injuries, nervous system disorders,
diabetes, or Raynaud’s Disease should not use this
appliance. If you feel any symptoms related to
vibration (such as tingling, numbness, and white
or blue fingers), seek medical advice as soon as
possible.
2. Do not smoke during use.. Nicotine reduces
the blood supply to the hands and fingers,
increasing the risk of vibration-related injury..
3. Wear suitable gloves to reduce the
vibration effects on the user.
4. Use appliances with the lowest vibration when
there is a choice between different processes.
5. Include vibration-free periods each day of work.
6. Grip appliance as lightly as possible
(while still keeping safe control of it).
Let the appliance do the work.
7. To reduce vibration, maintain the appliance
as explained in this manual. If any abnormal
vibration occurs, stop use immediately.
General Safety
1. The spool will continue to rotate for a few
seconds after use. Allow it to stop completely
and remove Battery Pack before putting the
appliance down, making any adjustments, or
servicing the appliance.
2. Do not use in rain, snow, sprinklers, or wet grass..
Do not rinse off the Trimmer..
3. Use only during daylight hours..
4. Carefully inspect the spool housing and guard
before inserting Battery Pack in the Trimmer. Do
not use Trimmer if any part is cracked or damaged.
5. Do not use appliance for other than intended use.
6. Maintain labels and nameplates on the appliance.
These carry important safety information.
If unreadable or missing, contact Litheli for a
replacement.
7. The warnings, precautions, and instructions
discussed in this instruction manual cannot
cover all possible conditions and situations
that may occur. It must be understood by the
operator that common sense and caution are
factors which cannot be built into this product,
but must be supplied by the operator.
SAVE THESE INSTRUCTIONS.
WWW.LITHELI.COM Item U1GT21112

NOTE:
Page 5
Specifications
Charger Input Rating
Charger Output Rating
Battery Rating
Battery Type
Cutting Swath
Cutting Blade Diameter
Grounding
TO PREVENT ELECTRIC SHOCK AND DEATH FROM INCORRECTGROUNDING:
Check with a qualified electrician if you are in doubt as to whether the outlet is properly
grounded. Do not modify the power cord plug provided with the charger. Do not use the charger
if the power cord or plug is damaged. If damaged, have it repaired by a service facility before
use. If the plug will not fit the outlet, have a proper outlet installed by a qualified electrician.
WWW.LITHELI.COM
Item U1GT21112
120VAC / 60Hz
36VDC / 3.3A
40VDC / 2.5Ah / 90Wh
40V Litheli Li-Ion
350mm (13.7 in)
255mm (10 in)
ExtensionCords
Extension cords must not be used with this item’s Charger..
Symbology
Double Insulated
VVolts
~Alternating Current
AAmperes
n0 xxxx/min. No Load Revolutions per Minute (RPM)
WARNING marking concerning Risk
of Eye Injury. Wear ANSI-approved
safety goggles with side shields.
Read the manual before
set-up and/or use.
WARNING marking
concerning Risk of Fire.
Do not cover Charger
ventilation ducts.
Charge on fireproof surface only.
WARNING marking concerning
Risk of Electric Shock.
Properly connect Charger’s power
cord to appropriate outlet.
WARNING marking concerning
Risk of Explosion.
Do not puncture, short, or open
battery packs and do not charge
damaged battery packs.
Do not throw the batteries in the
household waste, fire or water.
Do not expose the battery to sunlight
for a long time and do not place it on
radiators (max. 45 ° C).
Dispose of the batteries at a collection point
for old batteries, from where they are taken
to environmentally friendly recycling.
Charge level indication.

Read the ENTIRE IMPORTANT SAFETY INFORMATION section at the beginning of this
manual including all text under subheadings therein before set up or this product.
Page 6
Setup - Before use:
Functions
WWW.LITHELI.COM Item U1GT21112
Trigger
Trigger
Safety Lock Auxiliary
Handle
Lower Aluminium
Pipe
Guard
Line
Cutter
Lock Shaft
Button
Speed Control
Button
Buckle

Page 7WWW.LITHELI.COMItem U1GT21112
Charging the Battery Pack
NOTE : The Battery Pack comes partly charged.
Charge the Battery Pack prior to first use, ideally at least 60 minutes.
Rapid Battery Charger
Power Cord
with Plug
Battery
Pack
Connector
Charging
Status
LED – Red
Charging
Status
LED – Green
Always pull out the Power Plug of the Charger
from the mains before removing or connecting the Battery Pack to the charger.
Never charge the Battery Pack when the ambient temperature is below 10 °C or above 40 °C.
Rest the Charger for at least 15 minutes between successive charging sessions.
If no Battery Pack is inserted into the Charger and the
charger is connected to mains, the Charging Status LED flashes green.
1 .
2.
3.
4.
Align the Battery Pack to the rails of the
Charger and slide it in. Ensure it clicks
noticeably in place.
Connect the Power Plug of the Charger with
the mains. The Charging Status LED lights
up red. The continuously lit green
Charging Status LED indicates
that the charging process is complete.
Disconnect the Power Plug of the
Charger from the mains and remove the
Battery Pack from the charger.
Attach the Battery Pack back to the
product (see “Installing and Removing
Battery Pack”).
Charging status LEDs
Green LED flashes
without battery pack Charger ready
Green LED lights up
with battery pack
Battery pack fully
charged
Red LED lights up with
battery pack Battery pack charging
Red and green LEDs
flashing Battery pack defect
Red and green LEDs
continuously lit
Battery pack too cold
or warm

Page 8 WWW.LITHELI.COM Item U1GT21112
NOTE :
Assembly Instructions
Read the ENTIRE IMPORTANT SAFETY INFORMATION section at the beginning of this
manual including all text under subheadings therein before set up or use of this product.
TO PREVENT SERIOUS INJURY FROM ACCIDENTAL OPERATION:
Release Trigger of the appliance before performing any procedure in this section.
For additional information regarding the parts listed in the following pages,
refer to the Assembly Diagram near the end of this manual.
Battery Pack
Release
Button
Battery Level
Indication Lights
Battery
Level Button
Checking the Battery Charging Level
Press the Battery Level Button
to check the charging level of the Battery Pack. The charging level
will be shown on the Battery Level Indication Lights.
Charge the Battery Pack before
operation when it is at 25% or low battery charging level.
NOTE :
Charging level
Charging level too low
Between 5% and 50%.
Between 50% and 80%.
More than 80%.
LED status

Unfolding the Handle
Page 9
WWW.LITHELI.COM
Item U1GT21112
1. Unfold the handle (A of Figure 1).
2. Install the connector knob to secure the handle (B of Figure 1).
NOTE: The nut that holds the handle connector knob in place is lightly secured in the
connector housing with a piece of tape. Remove the tape after you install the connector knob.
Figure1
Installing the Auxiliary Handle
Figure4
Place the “top cover of the auxiliary handle”
on the “lower cover of the auxiliary handle”,
press the screw into the screw port and
tighten the screw with the Allen Key (Figure 4).
Align the screw holes of the shield with the
nuts of the brushless motor assembly, insert
the inner hexalobular socket pan head
self-tapping screws and fix it with a screwdriver
(Figure 4).
The round hole of the rubber sleeve is aligned
with the cylinder of the auxiliary handle for
assembly (Figure 2).
Place the assembled rubber sleeve on the
upper aluminum tube and align the cylinder of
the auxiliary handle with the spacing hole of
the aluminum tube for assembly. (The long
side of the auxiliary handle faces the trimmer
head (left) (Figure 3).)
1.
2.
Figure2
Figure3
3.
4.
A
B

Remove the 4 Phillips head screws that are taped
to the guard and use them to install the guard
(Figure 5).
Installing the Guard
Figure5
Operating Instructions
Do not charge a cracked,
open, or leaking Battery Pack, or charge a
non-recommended type of Battery Pack.
While charging, Battery Pack and
Charger may become warm to the touch and the
Charger′s fan may come on. This is normal.
Read the ENTIRE IMPORTANT SAFETY INFORMATION section at the beginning of this
manual including all text under subheadings therein before set up or use of this product.
TO PREVENT SERIOUS INJURY:
Before operating the gardening appliance, put on ANSI-approved safety goggles, closed-toe work
boots, long pants, and other safety gear. Safety goggles and other safety gear need to be purchased
by yourself.
TO PREVENT SERIOUS INJURY AND PROPERTY DAMAGE:
Inspect the area before using the String Trimmer. Remove all hard objects from work area.
Use both hands when operating Trimmer.
TO PREVENT SERIOUS INJURY FROM ACCIDENTAL OPERATION:
Charging Battery Pack
1 . Place Battery Charger on a dry, flat,
fireproof surface indoors.
NOTE: Allow battery to cool completely before charging.
2. Examine Battery Pack.
3. Battery Pack is designed to fit this Charger
specifically. If Battery Pack does not fit
Charger properly, do not try to insert it. Do
not force Battery Pack into the Charger.
4. Plug Charger into a grounded, 120VAC, 60Hz
receptacle. Green LED will blink, showing
that power is supplied to the charger.
5.
NOTE: A fully discharged Battery Pack will
take about 1 hour to fully charge.
NOTE:
6. Green LED will light continuously when
Battery Pack is charged. Unplug Charger
and remove Battery Pack when finished.
7. Allow Battery Pack to cool completely before
use.
.
Make sure that the Power Switch/Trigger is in the off-position and
remove Battery Pack before setting up the appliance.
Slide Battery Pack onto Charger. Red LED
will light continuously while charging.
Page 10 WWW.LITHELI.COM Item U1GT21112

Item U1GT21112 WWW.LITHELI.COM Page 11
Appropriate Temperature Ranges
Charge the battery at 0°C (32°F) to 40°C (104°F)*
Use products at -15°C (5°F) to 60°C (140°F)
Store products at -15°C (5°F) to 60°C (140°F)
Unplug the charger if Below 0°C (32°F) or above
40°C (104°F)
Charging time will increase if you do not charge the
battery within this range.
Store the tool, battery pack, and battery charger in
an enclosed clean, dry area.
2. Align the cavity in the battery pack with the
tongue on the handle housing (Figure 7).
3. Push the battery pack into the handle until the
battery pack locks into the latch (Figure 7).
Figure7
4. To start the trimmer, press the lockout button,
then squeeze the variable-speed trigger
(Figure 8).
Figure8
Lockout button
Variable-speed trigger
Starting the Trimmer
1. Make sure that the vents on the trimmer are
clear of any dust and debris.
Figure6
Trimmer venting areas
Shutting Off the Trimmer
To shut off the trimmer, release the trigger.
Whenever you are not using the trimmer or are
transporting the trimmer to or from the work area,
remove the battery pack.
Removing the Battery Pack
from the Trimmer
Press the battery latch on the machine to release
the battery pack and slide the battery pack out of
the machine (Figure 9).
Figure9

Page 12 WWW.LITHELI.COM Item U1GT21112
Advancing the Line Using
the Bump Feed
1. Run the tool at full throttle.
2. Tap the bump button on the ground to
advance the line. The line advances each time
the bump button is tapped. Do not hold the
bump button on the ground.
Note: The line trimming cut-off blade on the
grass deflector cuts the line to the correct
length.
Note: If the line is worn too short, you may not
be able to advance the line by tapping it on the
ground. If so, release the trigger and refer to
Advancing the Line Manually (page 12).
Figure10
Bump button
Advancing the Line Manually
Remove the battery pack from the trimmer, then
push the bump button at the base of the spool
retainer while pulling on the trimmer line to
manually advance the line.
Trimming
Figure11

Page 13
WWW.LITHELI.COM
Item U1GT21112
Operating Tips
•Keep the trimmer tilted toward the area being
cut; this is the best cutting area.
•The string trimmer cuts when you move it from
left to right. This prevents the trimmer from
throwing debris at you.
•Use the tip of the string to do the cutting; do not
force the string head into uncut grass.
•Wire and picket fences can cause the string to
wear rapidly and even break. Stone and brick
walls, curbs, and wood can also cause the string
to wear rapidly.
•Avoid trees and shrubs. The string can easily
damage tree bark, wood moldings, siding, and
fence posts.
Figure12
Direction of rotation
String path
Replacing the Spool
Use only 2 mm (0.08 inch) diameter monofilament
string.
Important: Using a larger diameter string
causes the motor to overheat and fail.
1. Remove the battery.
2. Push in the tab on the side of the spool retainer
(Figure 13).
Figure13
Spool Retainer Tab
Spool
Line Cutoff Blade
Slot
3. Pull the spool retainer up to remove it and
remove the spool.
4. To install the new spool, make sure that the
string is captured in 1 of the retaining slots on
the new spool. Make sure the end of the string
extends approximately 150 mm (6 inches).
5. Install the new spool so that the string aligns
with the eyelet in the string head. Thread the
string into the eyelet.
6. Pull the string extending from the string head
so that the string releases from the slot in the
spool.
7. Install the spool retainer by pressing the tabs
into the slots and pushing down until the spool
retainer clicks into place.

Item U1GT21112
WWW.LITHELI.COM
Page 14
Replacing the String
1. Remove the battery.
2. Remove the spool; refer to Replacing the
Spool (page 13).
Figure14
Spool
Anchor Slot
Note: Remove any old string remaining on the
spool.
3. Each side of the spool accepts approximately
2.5 m (8 ft) of string. Use only 2 mm (0.08
inch) diameter monofilament string.
Note: Do not use any other gauge or type of
string, as this could damage the trimmer.
4. Insert the string into the anchor slot in the
upper part of the spool (Figure 14). Wind the
string onto the spool in the direction shown
by the arrows on the spool.
5. Place the string in the slot on the upper spool
flange, leaving about 150 mm (6 inches)
extended beyond the slot.
Note: Do not overfill. After winding the string,
there should be at least 6 mm (1/4 inch)
between the wound string and the outside
edge of the spool.
6. Replace the spool and the spool retainer; refer
to Replacing the Spool (page 13).
Replacing the Blade
1. Press the lock shaft button and turn the spool
counterclockwise until it is removed.
2. Take out the brush breaker blade from the
accessory package and remove the brush
breaker sheath.
3. Insert the blade into the brushless motor
assembly, cover the blade pressing plate and
cover the blade pressing cover.
4. Put the hexagon check nut and use a four-way
socket wrench to tighten it clockwise.
Figure15
Remove the
protective cover

Page 15
WWW.LITHELI.COM
Item U1GT21112
CAUTION
The line cutoff blade on the deflector is
sharp and can cut you.
Do not use your hands to clean the
deflector shield and blade.
Perform only the steps described in these instructions. All further inspection, maintenance, and repair
work must be performed by an authorized service center or a similarly qualified specialist if you cannot
solve the problem yourself.
Remove Battery Pack and wipe
external surfaces of the appliance with clean cloth.
inspect the
general condition of the appliance. Check for:
User-Maintenance and Storage
Procedures not specifically explained in this manual must
be performed only by a qualified technician.
TO PREVENT SERIOUS INJURY FROM ACCIDENTAL OPERATION OR ELECTRIC SHOCK:
Release the Trigger and remove the Battery Pack before performing
any inspection, maintenance, or cleaning procedures.
TO PREVENT SERIOUS INJURY FROM APPLIANCE FAILURE:
Do not use damaged equipment. If abnormal noise or vibration
occurs, have the problem corrected before further use.
Cleaning, Maintenance, and Lubrication
1 . BEFORE EACH USE,
• loose hardware,
• misalignment or binding of moving parts,
• cracked or broken parts,
• damaged electrical wiring,
• any other condition that may
affect its safe operation.
2. AFTER USE,
3. Li-Ion BATTERY MUST BE RECYCLED OR
DISPOSED OF PROPERLY.
Do not short, incinerate or open battery.
4. Store Battery Pack, Charger, and tool in dry, indoor
area out of reach of children and away from metal
objects (i.e., paperclips, coins) to prevent shorting.
5. All parts are permanently lubricated.
Do not use additional lubrication.
.
Troubleshooting
6. Wipe or scrape clean the cutting head area any
time there is an accumulation of debris.
7. Check and tighten all fasteners. If any part is
damaged or lost, repair or replace it.
8. Brush debris away from air intake vents and
exhaust on motor housing to prevent the motor
from overheating.

Item U1GT21112
WWW.LITHELI.COM
Page 16
Problem Possible Cause Corrective Action
1. The battery is not fully installed in the
tool.
1. Remove and then replace the battery
into the tool, making sure that it is fully
installed and latched.
2. The battery pack is not charged. 2. Remove the battery pack from the tool
and charge it.
3. The battery pack is damaged. 3. Replace the battery pack.
The tool does not start.
4. There is another electrical problem
with the tool.
4. Contact an Authorized Service Dealer.
1. The battery pack charge capacity is
too low.
1. Remove the battery pack from the tool
and fully charge the battery pack.
The tool does not reach full power.
2. The air vents are blocked. 2. Clean the air vents.
1. There is debris on the drum area on
the trimmer.
1. Clean any debris off of the drum area.
The tool is producing excessive vibration
or noise.
2. The spool is not properly wound. 2. Advance the line using the bump feed
and/or remove the line on the spool
and wind the spool again.
The battery pack loses charge quickly. 1. The battery pack is over or under the
appropriate temperature range.
1. Move the battery pack to a place
where it is dry and the temperature is
between 0°C (32°F) and 40°C (104°F).
1. The battery charger is over or under
the appropriate temperature range.
1. Unplug the battery charger and move
it to a place where it is dry and the
temperature is between 0°C (32°F)
and 40°C (104°F).
The battery charger is not working.
2. The outlet that the battery charger is
plugged into does not have power.
2. Contact your licensed electrician to
repair the outlet.
The battery pack shows only 3 LED
indicators after only a few seconds of
using a fully charged battery.
1. This is a normal occurrence. 1. Stop the tool and press the
battery-charge-indicator button or
the remove the battery from the tool to
display the actual battery charge.
All 4 LED indicators are blinking on
the battery pack after you press the
battery-charge-indicator button on the
battery pack and the current charge
displays (when the battery pack is not in
use).
1. The battery pack is over or under the
appropriate temperature range.
1. Move the battery pack to a place
where it is dry and the temperature is
between 0°C (32°F) and 40°C (104°F).
All 4 LED indicators are blinking on the
battery pack after releasing the trigger
(when the battery pack is in use).
1. The battery pack is over or under the
appropriate temperature range.
1. Move the battery pack to a place
where it is dry and the temperature is
between 0°C (32°F) and 40°C (104°F).
2 LED indicators are blinking on
the battery pack after you press the
battery-charge-indicator button on the
battery pack and the current charge
displays (when the battery pack is not in
use).
1. There is a difference in voltage
between cells in the battery pack.
1. Place the battery on the charger until
it is fully charged.
2 LED indicators are blinking on the
battery pack after releasing the trigger
(when the battery pack is in use).
1. There is a difference in voltage
between cells in the battery pack.
1. Place the battery on the charger until
it is fully charged.
1 LED indicator is blinking on the battery
pack.
1. The battery pack voltage is low. 1. Place the battery pack on the charger.
An audible tone sounds when advancing
the line using the bump feed.
1. This is a normal occurrence. 1. Stop the tool by releasing the trigger
and then start the tool.
It is difficult to remove the battery pack
from the tool.
1. The battery pack/tool is new or there
is corrosion in the battery terminals
and/or the terminals on the tool.
1. Clean the terminals on the battery pack
and the tool. Then apply dielectric
grease to the battery terminals; do not
use any other type of lubricant as it can
damage the terminals.

Item U1GT21112
Record Product’s Serial Number Here:
NOTE: If product has no serial number, record month and year of purchase instead..
NOTE: Some parts are listed and shown for illustration purposes only,
and are not available individually as replacement parts.
Part Description Qty
1 Trimmer Head Cover 1
2 Outlet Hole Block 2
3 Nylon Wire 1
4 Wire Spool 1
5 Percussion Head 1
6 Percussion Outlet Spring 1
7 Hex Lock Nut 2
8 Trimmer Head Seat 1
9Inner Plum Countersunk Head
Tapping Screw 4
10 Windshield Cover 1
11 Fan Blade 1
12 Internal Plum Pan Head Screw 3
13 Windshield 1
14 Lock Shaft Button 1
15 Lock Shaft Button Spring 1
16 E-Axial Snap Ring 1
17 Brushless Motor Assembly 1
18 Socket Roundhead Screw 2
19 Socket Roundhead Screw 3
20 Spring Washer 2
21 Shock Absorber Rubber Sleeve 1
22 Lower Aluminium Pipe 1
23 Heat Shrink Tube 3
24 Spring Wire 1
25 Heat Shrink Tube 3
26 Air Duct 1
27 Lower Connector Pipe 1
28 Hex Lock Nut 2
29 Connecting Shaft Sleeve 1
30 Upper Connector Pipe 1
31 Connector Pipe Knob 1
32 Rubber Sleeve 1
33 Wire Sleeve 1
34 Socket Roundhead Dental Screw 3
35 Socket Roundhead Dental Screw 1
36 Under The Auxiliary Handle 1
Part Description Qty
37 Hex Lock Nut 4
38 Above The Auxiliary Handle 1
39 Socket Roundhead Dental Screw 4
40 Upper Aluminum Tube 1
41 Bracelet 1
42 Buckle 1
43 Socket Cross Wrench 1
44 Buckle Seat 1
45 Left Aluminium Tube Bushing 1
46 Right Aluminium Tube Bushing 1
47 Cable Platen 1
48 Internal Conductor 1
49 Speed-Control Switch Push Button 1
50 Left Handle 1
51 Slide Switch 1
52 Inching Switch 1
53 Heat Shrink Tube 2
54 Battery Pack Left Casing 1
55 Brushless Controller Assembly 1
56 Inner Plum Pan Head Tapping
Screw 20
57 Battery Pack Right Casing 1
58 Male Insert 1
59 Insert Holder 1
60 Right Handle 1
61 Switch Platen Spring 1
62 Switch Platen 1
63 Switch Self-Lock Spring 1
64 Reverse Self-Lock Switch 1
65 Phillips head screws 4
66 Secant Block 1
67 Protective Cover 1
68 Cutting Blade 1
69 Cutter Blade Sheath 1
70 Blade Platen 1
71 Platen Cover 1
Parts List and Diagram
PLEASE READ THE FOLLOWING CAREFULLY
THE MANUFACTURER AND/OR DISTRIBUTOR HAS PROVIDED THE PARTS LIST AND ASSEMBLY DIAGRAM
IN THIS MANUAL AS A REFERENCE TOOL ONLY. NEITHER THE MANUFACTURER OR DISTRIBUTOR
MAKES ANY REPRESENTATION OR WARRANTY OF ANY KIND TO THE BUYER THAT HE OR SHE IS
QUALIFIED TO MAKE ANY REPAIRS TO THE PRODUCT, OR THAT HE OR SHE IS QUALIFIED TO REPLACE
ANY PARTS OF THE PRODUCT. IN FACT, THE MANUFACTURER AND/OR DISTRIBUTOR EXPRESSLY
STATES THAT ALL REPAIRS AND PARTS REPLACEMENTS SHOULD BE UNDERTAKEN BY CERTIFIED AND
LICENSED TECHNICIANS, AND NOT BY THE BUYER. THE BUYER ASSUMES ALL RISK AND LIABILITY
ARISING OUT OF HIS OR HER REPAIRS TO THE ORIGINAL PRODUCT OR REPLACEMENT PARTS
THERETO, OR ARISING OUT OF HIS OR HER INSTALLATION OF REPLACEMENT PARTS THERETO.
Parts List
WWW.LITHELI.COM Page 17
172 Battery and Charger

Item U1GT21112
Assembly Diagram
WWW.LITHELI.COM
Page 18

Warranty
90-Day Money Back
You May Return Your Product for A Full Refund Within The First 90 Days of Your Purchase.
3-Year Battery and Charger Warranty
Against Defects in Workmanship and Materials.
Battery and Charger Must Be Used and Maintained in Accordance with The Manual of The
Operator's Instructions and Regulations.
5-Year Tool Warranty
Against Defects in Materials, Parts or Workmanship.
Litheli at Its Own Discretion Will Repair or Replace Any and All Parts Found To Be Defective.
All Units Must Be Used and Maintained in Accordance with The Directions and Regulations in The
Operator's Manual.
Returning The Product
Contact Us at www.litheli.com for The Return Address, We Will Issue Replace/Refund Upon Receiving
Your Return.
Need An Extra Copy of The Operator's Manual? Visit www.litheli.com to Download it.
Table of contents
Other Litheli Trimmer manuals