Installaon Instrucon:
24V Stac Color - LED Tapelight
www.llialighng.com tel: 847-412-4880
REV0.0 07062022
page 3-5
Install the Hardwired Tapelight
Install the Gripper Connect
INSTALLATION NOTES:
• Review all the parts and quanes to conrm if all the
necessary parts are available.
•LED tapelight can only be cut at specic points. It is
essenal to dryt your enre assembly to the cut point
of your LED tapelight before roung/cung out the
mounng surface.
INSTALLATION NOTES:
• Review all the parts and quanes to conrm if all the
necessary parts are available.
•LED tapelight can only be cut at specic points. It is
essenal to dryt your enre assembly to the cut point
of your LED tapelight before roung/cung out the
mounng surface.
CAUTION: Use the proper safety equipment when
making any modicaon to LED tapelight
CAUTION: Use the proper safety equipment when
making any modicaon to LED tapelight
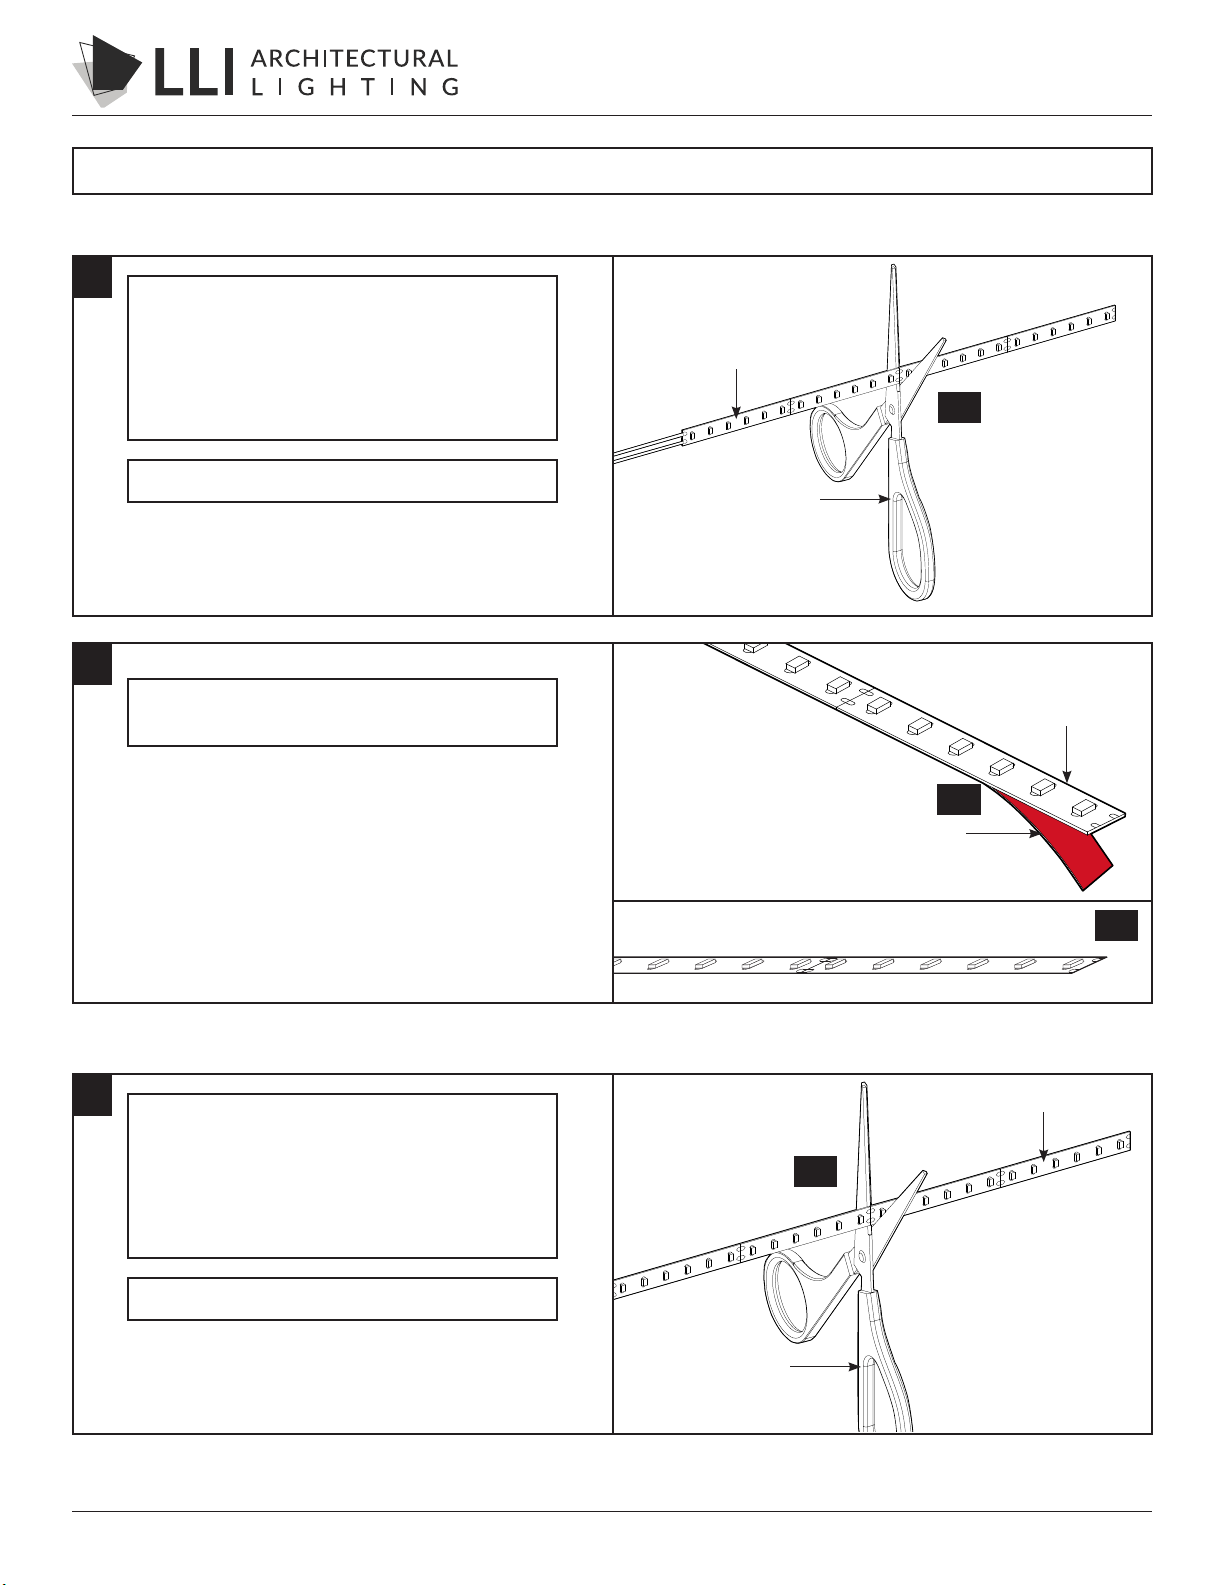
1
1
LED tapelight
adhesive backing
LED tapelight
LED tapelight
ulity shears
ulity shears
1.1 If shortening the LED tapelight, Cut along the cut marks that are
in between the solder pads using ulity shears.
1.1 Shorten the LED tapelight to the desired length. Cut along the
cut marks that are in between the solder pads using ulity
shears.
2
1.1
1.1
2.1 Remove the red adhesive backing from the LED tapelight.
2.2 Carefully press the LED tapelight to the mounng surface.
If installing to a specic extrusion reference that installaon for
more details.
2.3 Make the wiring connecons in accordance with local & naonal
electrical codes. For addional informaon reference the power
supply instrucon. General wiring diagram on page 5.
INSTALLATION NOTES:
• Make sure not to cut the side of the tapelight with
lead wires.
2.1
2.2
INSTALLATION NOTES:
• Reference either the Hardwire or the Gripper Connect steps to install the Tapelight properly.