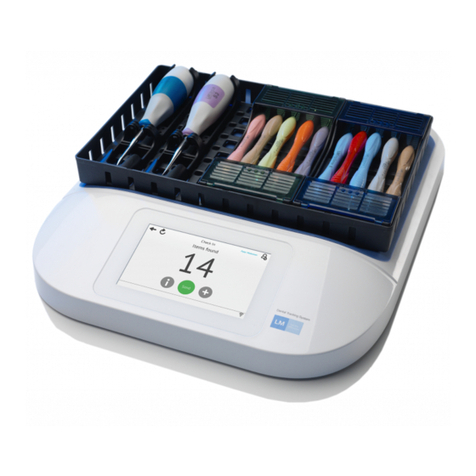
LM ProPower UltraLED User manual

LM-ProPower Technical manual
9770081-C

For technical support regarding the use of this manual,
Error Codes and Cause Codes as well as repair procedures,
For support regarding Return Material Authorizations and warranty returns,
This manual is valid for version C8.0 and higher of:
LM-ProPower UltraLED
LM-ProPower AirLED
LM-ProPower CombiLED
The version is indicated on the label on the backside of the device.
Manufacturer, marketing and sales
LM-Instruments Oy
PL 88 (Norrbyn rantatie 8)
FI-21601 Parainen, Finland
Phone: +358 2 4546 400
Fax: +358 2 4546 444
E-mail: [email protected]
Web: www.lm-dental.com
Copyright
Copyright 2014 LM-Instruments Oy. All rights reserved. The contents
of this manual may be changed without notice. No part of this manual
may be reproduced in any form or by any means without permission in
writing from LM-Instruments Oy.

3
Content
1 Troubleshooting 4
1.1 UltraLED with tap water connector 4
1.2 UltraLED with medicament/water bottle 7
1.3 AirLED with tap water connector 10
1.4 AirLED with medicament/water bottle 12
1.5 CombiLED with tap water connector 14
1.6 CombiLED with medicament/water bottle 17
2 Cause Diagnosis and Cause Codes 20
3 Repair instructions 29
3.1 Removing the cover casing 29
3.2 Replacing the scaler handpiece tubing 32
3.3 Measuring voltage from the control circuit board to the scaler electronics unit 33
3.4 Replacing the scaler electronic unit 34
3.5 Replacing the compressor 36
3.6 Cleaning a magnetic valve 37
3.7 Opening a stuck waterline in the scaler handpiece 38
3.8 Cleaning of clogged system in AirLED 39
4 Spare parts 40
4.1 CombiLED 40
4.2 UltraLED Scaler 43
4.3 AirLED Polisher 46
4.4 Recommended spare part stock 49
5 Technical data 50
5.1 CombiLED 50
5.2 UltraLED Scaler 51
5.3 AirLED Polisher 52
7. Warranty Terms 53
8. Return Shipment Policy 54
Customer Service Form 55

4
1. Troubleshooting
1.1 UltraLED with tap water connector
Type of problem
Description
A. Unit is not responding and no lights are lit on the control panel
Page 4
B. Lights are flashing on the control panel
Page 4
C. No tip vibration
Page 5
D. Weak tip vibration
Page 5
E. Insufficient or no water flow
Page 5
F. Tip does not fit smoothly onto the handpiece
Page 5
G. Difficulty to remove the ErgoGrip
Page 6
H. Handpiece is overheated
Page 6
I. Weak or no LED light
Page 6
A. Unit is not responding and no lights are lit on the control panel
1. Check that the power cord is connected properly and double check the voltage (120V/230V).
2. Check the fuse and replace if necessary. See Maintenance-section of the user guide.
3. Check that the wall outlet and the fuse panel of your clinic are OK.
4. If the problem still remains –contact your dealer for support and indicate Error Code E-X02
B. Lights are flashing on the control panel
Four blue lights on the control panel are
flashing simultaneously.
Check that the foot control cable is connected
at both ends and is not damaged.
The blue light next to the ON-key is
flashing alternately with three other blue
lights on the control panel.
Check that the scaler handpiece is properly
connected.
Three yellow lights are flashing in
sequence.
The Working Mode has not been selected.
Select the working mode by pressing one of
the keys next to the yellow lights.
The light next to the C-key is flashing.
The cleaning function has been activated.
Wait until the cleaning process has finished
and the light stops flashing.

5
C. No tip vibration
1. Check that the tip is firmly tightened. Preferably use a torque wrench and tighten clockwise
until the torque wrench slides. (The torque wrench prevents the tip from being overtightened.)
2. Check that the green light below the keys on the control panel is lit. If it is not lit, please see
Section A on page 4.
3. Check that the device has been turned on by pressing the ON-key and that the blue light next
to the ON-key is lit.
4. Check that the Working Mode has been selected by pressing one of the Working Mode keys
and that one of the yellow lights on the control panel is lit.
5. If you have an additional handpiece, try replacing the handpiece.
6. If you have an additional foot control cable, try replacing the foot control cable.
7. If you have an additional foot control, try replacing the foot control.
8. If the problem still remains –contact your dealer for support and indicate Error Code E-S01
D. Weak tip vibration
1. Check that the tip is firmly tightened. Preferably use a torque wrench and tighten clockwise
until the torque wrench slides. (The torque wrench prevents the tip from being overtightened.)
2. Check that the tip is not worn out. Use a tip check card to evaluate wearing or try an unused
tip. Use original LM-Instruments tips for reliable performance.
3. If you have an additional handpiece, try replacing the handpiece.
4. If the problem still remains –contact your dealer for support and indicate Error Code E-S02
E. Insufficient or no water flow when foot switch is activated
1. Check that the tap water hose is properly connected to the back of the device and that the tap
water system is OK (tap/valve is open and possible filter is OK).
2. Check that dry mode is not activated i.e. that the blue light next to the crossed-out water drop
is not lit. If it is lit, press the ON-key.
3. Adjust the water control ring on the handpiece to fully open (dots aligned).
4. Try with another tip.
5. Use the LM-ProPower Fixer to check that the water hose inside the handpiece has not stuck
in the autoclave. Insert the Fixer carefully into the handpiece from the hose connector side.
(To avoid the hose getting stuck, the water adjustment on the handpiece should be set to fully
open before sterilization in autoclave.)
6. If the problem still remains –contact your dealer for support and indicate Error Code E-S04
F. Tip does not fit smoothly onto the handpiece
1. Clean handpiece threads with compressed air and try with a new tip
2. If the problem still remains, the threads of the handpiece may be damaged and the handpiece
needs to be replaced. Contact your dealer and indicate Error Code E-S06.

6
G. Difficulty to remove the ErgoGrip from the handpiece
1. Grab the ErgoGrip gently near the lens and at the same time twist and slide it off the
handpiece
2. If the problem still remains, replace the ErgoGrip
H. Handpiece is overheated during use
1. Check that the fluid flow is sufficient (at least 20 ml/min)
2. If the problem still remains, replace the handpiece and contact your dealer
I. Weak or no LED light.
1. Note that there are two versions of the ErgoGrip with different lenses and light pattern and
intensity: “ErgoGrip LED” and “ErgoGrip FocusLED”.
2. Check that lens in the ErgoGrip is clear and clean. Clean or replace if necessary.
3. If you have an additional handpiece, try replacing the handpiece
4. If the problem still remains –contact your dealer for support and indicate Error Code E-S03

7
1.2 UltraLED with medicament/water bottle
Type of problem
Description
A. Unit is not responding and no lights are lit on the control panel
Page 7
B. Lights are flashing on the control panel
Page 7
C. No tip vibration
Page 8
D. Weak tip vibration
Page 8
E. Insufficient or no water flow
Page 8
F. Tip does not fit smoothly onto the handpiece
Page 8
G. Difficulty to remove the ErgoGrip
Page 9
H. Handpiece is overheated
Page 9
I. Weak or no LED light
Page 9
A. Unit is not responding and no lights are lit on the control panel
1. Check that the power cord is connected properly and double check the voltage (120V/230V).
2. Check the fuse and replace if necessary. See Maintenance-section of the user guide.
3. Check that the wall outlet and the fuse panel of your clinic are OK.
4. If the problem still remains –contact your dealer for support and indicate Error Code E-X02
B. Lights are flashing on the control panel
Four blue lights on the control panel are
flashing simultaneously.
Check that the foot control cable is connected
at both ends and is not damaged.
The blue light next to the ON-key is
flashing alternately with three other blue
lights on the control panel.
Check that the scaler handpiece is properly
connected.
Three yellow lights are flashing in
sequence.
The Working Mode has not been selected.
Select the working mode by pressing one of
the keys next to the yellow lights.
The light next to the C-key is flashing.
The cleaning function has been activated.
Wait until the cleaning process has finished
and the light stops flashing.

8
C. No tip vibration
1. Check that the tip is firmly tightened. Preferably use a torque wrench and tighten clockwise
until the torque wrench slides. (The torque wrench prevents the tip from being overtightened.)
2. Check that the green light below the keys on the control panel is lit. If it is not lit, please see
Section A on page 4.
3. Check that the device has been turned on by pressing the ON-key and that the blue light next
to the ON-key is lit.
4. Check that the Working Mode has been selected by pressing one of the Working Mode keys
and that one of the yellow lights on the control panel is lit.
5. If you have an additional handpiece, try replacing the handpiece.
6. If you have an additional foot control cable, try replacing the foot control cable.
7. If you have an additional foot control, try replacing the foot control.
8. If the problem still remains –contact your dealer for support and indicate Error Code E-S01
D. Weak tip vibration
5. Check that the tip is firmly tightened. Preferably use a torque wrench and tighten clockwise
until the torque wrench slides. (The torque wrench prevents the tip from being overtightened.)
6. Check that the tip is not worn out. Use a tip check card to evaluate wearing or try an unused
tip. Use original LM-Instruments tips for reliable performance.
7. If you have an additional handpiece, try replacing the handpiece.
8. If the problem still remains –contact your dealer for support and indicate Error Code E-S02
E. Insufficient or no water flow when foot switch is activated
1. Check that the medicament/water bottle is properly connected i.e. the cap is tightened and
pushed in all the way onto the connector. Check that the o-rings on cap and connector are in
good condition. Replace o-rings if worn. O-rings can be lubricated with a glycerine based
lubricant (or vaseline).
2. Check that dry mode is not activated i.e. that the blue light next to the crossed-out water drop
is not lit. If it is lit, press the ON-key.
3. Adjust the water control ring on the handpiece to fully open (dots aligned).
4. Try with another tip.
5. Use the LM-ProPower Fixer to check that the water hose inside the handpiece has not stuck
in the autoclave. Insert the Fixer carefully into the handpiece from the hose connector side.
(To avoid the hose getting stuck, the water adjustment on the handpiece should be set to fully
open before sterilization in autoclave.)
6. If the problem still remains –contact your dealer for support and indicate Error Code E-S04
F. Tip does not fit smoothly onto the handpiece
1. Clean handpiece threads with compressed air and try with a new tip
2. If the problem still remains, the threads of the handpiece may be damaged and the handpiece
needs to be replaced. Contact your dealer and indicate Error Code E-S06.

9
G. Difficulty to remove the ErgoGrip from the handpiece
1. Grab the ErgoGrip gently near the lens and at the same time twist and slide it off the
handpiece
2. If the problem still remains, replace the ErgoGrip
H. Handpiece is overheated during use
1. Check that the fluid flow is sufficient (at least 20 ml/min)
2. If the problem still remains, replace the handpiece and contact your dealer
I. Weak or no LED light
1. Note that there are two versions of the ErgoGrip with different lenses and light pattern and
intensity: “ErgoGrip LED” and “ErgoGrip FocusLED”.
2. Check that lens in the ErgoGrip is clear and clean. Clean or replace if necessary.
3. If you have an additional handpiece, try replacing the handpiece
4. If the problem still remains –contact your dealer for support and indicate Error Code E-S03

10
1.3 AirLED with tap water connector
Type of problem
Description
A. Unit is not responding and no lights are lit on the control panel
Page 10
B. Lights are flashing on the control panel
Page 10
C. Difficulty to remove the ErgoGrip
Page 10
D. Weak or no LED light
Page 11
E. Insufficient or no water flow
Page 11
F. Insufficient or no powder flow
Page 11
G. Water drips from the bottom of the device onto the table
Page 11
A. Unit is not responding and no lights are lit on the control panel
1. Check that the power cord is connected properly and double check the voltage (120V/230V).
2. Check the fuse and replace if necessary. See Maintenance-section of the user guide.
3. Check that the wall outlet and the fuse panel of your clinic are OK.
4. If the problem still remains –contact your dealer for support and indicate Error Code E-X02
B. Lights are flashing on the control panel
Four blue lights on the control panel are
flashing simultaneously
Check that the foot control cable is connected
at both ends and is not damaged.
The blue light next to the ON-key is
flashing alternately with three other blue
lights on the control panel.
Check that the polisher tubing is properly
connected onto the connectors. Make sure it
is pressed in all the way.
Two yellow lights are flashing
alternately.
The Working Mode has not been selected.
Select the working mode by pressing one of
the keys next to the yellow lights.
The light next to the AP-key blinks twice
and pauses.
The device reminds of the need to activate
the cleaning cycle by pressing the AP-key (Air
Purge). Please see user manual for details.
The light next to the C-key is flashing
continuously.
The cleaning function has been activated.
Wait until the cleaning process has finished
and the light stops flashing.
C. Difficulty to remove the ErgoGrip from the handpiece
1. Grab the ErgoGrip gently near the lens and at the same time twist and slide it off the
handpiece
2. If the problem still remains, replace the ErgoGrip

11
D. Weak or no LED light.
1. Note that there are two versions of the ErgoGrip with different lenses and light pattern and
intensity: “ErgoGrip LED” and “ErgoGrip FocusLED”.
2. Check that lens in the ErgoGrip is clear and clean. Clean or replace if necessary.
3. If you have an additional polisher tubing, try replacing the polisher tubing.
4. If the problem still remains –contact your dealer for support and indicate Error Code E-P03
E. Insufficient or no water flow
1. Check that the tap water hose is properly connected to the back of the device and that the tap
water system is OK (tap/valve is open and possible filter is OK).
2. Check that Air Blow mode is not activated i.e. that the blue light next to the crossed-out water
drop is not lit. If it is lit, press the ON-key.
3. Adjust water control on powder container cap to fully open.
4. Gently check that the nozzle is fully tightened
5. If you have an additional nozzle, replace the nozzle.
6. If the problem still remains –contact your dealer for support and indicate Error Code E-P04
F. Insufficient or no powder flow
1. Check that there is powder in the powder container and that the o-ring in the cap is in correct
position.
2. If you have an additional nozzle, replace the nozzle. A clogged nozzle may be cleaned in an
ultrasonic bath or in citric acid (or vinegar).
3. Unscrew and remove the powder container, nozzle and ErgoGrip and blow with compressed
air into the handpiece.
4. If the problem still remains –contact your dealer for support and indicate E-P01
G. Water drips from the bottom of the device onto the table
1. The ProPower device has a built-in water trap that removes humidity from the pressurized air
coming from the compressor in the compressor room of your clinic. The water trap condenses
the humidity in the pressurized air into water which is then released underneath the device.
Normally there is no water at all or a very small amount (a few drops). If the amount of water
is significant, the compressor of your clinic may need service. Please contact the
manufacturer or dealer of your compressor.

12
1.4 AirLED with medicament/water bottle
Type of problem
Description
A. Unit is not responding and no lights are lit on the control panel
Page 12
B. Lights are flashing on the control panel
Page 12
C. Difficulty to remove the ErgoGrip
Page 13
D. Weak or no LED light
Page 13
E. Insufficient or no water flow
Page 13
F. Insufficient or no powder flow
Page 13
G. Water drips from the bottom of the device onto the table
Page 13
A. Unit is not responding and no lights are lit on the control panel
1. Check that the power cord is connected properly and double check the voltage (120V/230V).
2. Check the fuse and replace if necessary. See Maintenance-section of the user guide.
3. Check that the wall outlet and the fuse panel of your clinic are OK.
4. If the problem still remains –contact your dealer for support and indicate Error Code E-X02
B. Lights are flashing on the control panel
Four blue lights on the control panel are
flashing simultaneously
Check that the foot control cable is connected
at both ends and is not damaged.
The blue light next to the ON-key is
flashing alternately with three other blue
lights on the control panel.
Check that the polisher tubing is properly
connected onto the connectors. Make sure it
is pressed in all the way.
Two yellow lights are flashing
alternately.
The Working Mode has not been selected.
Select the working mode by pressing one of
the keys next to the yellow lights.
The light next to the C-key blinks twice
and pauses.
The device reminds of the need to activate
the cleaning cycle by pressing the C-key.
Please see user manual for details.
The light next to the C-key is flashing
continuously.
The cleaning function has been activated.
Wait until the cleaning process has finished
and the light stops flashing.

13
C. Difficulty to remove the ErgoGrip from the handpiece
1. Grab the ErgoGrip gently near the lens and at the same time twist and slide it off the
handpiece
2. If the problem still remains, replace the ErgoGrip
D. Weak or no LED light
1. Note that there are two versions of the ErgoGrip with different lenses and light pattern and
intensity: “ErgoGrip LED” and “ErgoGrip FocusLED”.
2. Check that lens in the ErgoGrip is clear and clean. Clean or replace if necessary.
3. If you have an additional polisher tubing, try replacing the polisher tubing.
4. If the problem still remains –contact your dealer for support and indicate Error Code E-P03
E. Insufficient or no water flow
1. Check that Air Blow mode is not activated i.e. that the blue light next to the crossed-out water
drop is not lit. If it is lit, press the P-key.
2. Adjust water control on powder container cap to fully open.
3. Check that the medicament/water bottle is properly connected i.e. the cap is tightened and
pushed in all the way onto the connector. Check that the o-rings on cap and connector are in
good condition. Replace o-rings if worn. O-rings can be lubricated with a glycerine based
lubricant (or vaseline).
4. Gently check that the nozzle is fully tightened.
5. If you have an additional nozzle, replace the nozzle.
6. If the problem still remains –contact your dealer for support and indicate Error Code E-P04
F. Insufficient or no powder flow
1. Check that there is powder in the powder container and that the o-ring in the cap is in correct
position.
2. If you have an additional nozzle, replace the nozzle. A clogged nozzle may be cleaned in an
ultrasonic bath or in citric acid or (vinegar).
3. Unscrew and remove the powder container, nozzle and ErgoGrip and blow with compressed
air into the handpiece.
4. If the problem still remains –contact your dealer for support and indicate E-P01
G. Water drips from the bottom of the device onto the table
1. The ProPower device has a built-in water trap that removes humidity from the pressurized air
coming from the compressor in the compressor room of your clinic. The water trap condenses
the humidity in the pressurized air into water which is then released underneath the device.
Normally there is no water at all or a very small amount (a few drops). If the amount of water
is significant, the compressor of your clinic may need service. Please contact the
manufacturer or dealer of your compressor.

14
1.5 CombiLED with tap water connector
Type of problem
Scaler
Polisher
Description
A. Unit is not responding and no lights are lit on the control
panel
X
X
Page 14
B. Lights are flashing on the control panel
X
X
Page 14-15
C. Difficulty to remove the ErgoGrip
X
X
Page 15
D. Weak or no LED light
X
X
Page 15
E. No tip vibration
X
Page 15
F. Weak tip vibration
X
Page 15
G. Insufficient or no water flow
X
Page 16
H. Tip does not fit smoothly onto the handpiece
X
Page 16
I. Handpiece is overheated
X
Page 16
J. Insufficient or no water flow
X
Page 16
K. Insufficient or no powder flow
X
Page 16
L. Water drips from the bottom of the device onto the table
X
X
Page 16
A. Unit is not responding and no lights are lit on the control panel
1. Check that the power cord is connected properly and double check the voltage (120V/230V).
2. Check the fuse and replace if necessary. See Maintenance-section of the user guide.
3. Check that the wall outlet and the fuse panel of your clinic are OK.
4. If the problem still remains –contact your dealer for support and indicate Error Code E-X02
B. Lights are flashing on the control panel
Five blue lights on the control panel are
flashing simultaneously
Check that the foot control cable is connected
at both ends and is not damaged.
The blue lights next to the S- and P-
keys are flashing alternately when
pressing the foot control
The Scaler/Polisher has not been switched
on. Press the S-key to select the scaler or
press the P-key to select the polisher.
The blue light next to the S-key is
flashing alternately with three other blue
lights on the control panel.
Check that the scaler handpiece is properly
connected.
The blue light next to the P-key is
flashing alternately with three other blue
lights on the control panel.
Check that the polisher tubing is properly
connected onto the connectors. Make sure it
is pressed in all the way.

15
Two or three yellow lights are flashing in
sequence.
The Working Mode has not been selected.
Select the working mode by pressing one of
the keys next to the yellow lights.
The light next to the C-key flashes twice
and pauses.
The device reminds of the need to activate
the polisher cleaning cycle by pressing the C-
key. Please see user manual for details.
The light next to the C-key is flashing
continuously.
The cleaning function has been activated.
Wait until the cleaning process has finished
and the light stops flashing.
C. Difficulty to remove the ErgoGrip from the handpiece
1. Grab the ErgoGrip gently near the lens and at the same time twist and slide it off the
handpiece
2. If the problem still remains, replace the ErgoGrip
D. Weak or no LED light
1. Note that there are two versions of the ErgoGrip with different lenses and light pattern and
intensity: “ErgoGrip LED” and “ErgoGrip FocusLED”.
2. Check that lens in the ErgoGrip is clear and clean. Clean or replace if necessary.
3. If you have an additional scaler handpiece (or polisher tubing), try replacing the scaler
handpiece (or polisher tubing).
4. If the problem still remains –contact your dealer for support and indicate Error Code “E-S03
No light in scaler handpiece“ or “E-P03 No light in polisher handpiece”
E. No tip vibration
1. Check that the tip is firmly tightened. Preferably use a torque wrench and tighten clockwise
until the torque wrench slides. (The torque wrench prevents the tip from being overtightened.)
2. Check that the green light below the keys on the control panel is lit. If it is not lit, please see
Section A on page 4.
3. Check that the scaler has been turned on by pressing the S-key and that the blue light next to
the S-key is lit.
4. Check that the Working Mode has been selected by pressing one of the Working Mode keys
and that one of the yellow lights on the control panel is lit.
5. If you have an additional handpiece, try replacing the handpiece.
6. If you have an additional foot control cable, try replacing the foot control cable.
7. If you have an additional foot control, try replacing the foot control.
8. If the problem still remains –contact your dealer for support and indicate Error Code E-S01
F. Weak tip vibration
1. Check that the tip is firmly tightened. Preferably use a torque wrench and tighten clockwise
until the torque wrench slides. (The torque wrench prevents the tip from being overtightened.)
2. Check that the tip is not worn out. Use a tip check card to evaluate wearing or try an unused
tip. Use original LM-Instruments tips for reliable performance.
3. If you have an additional handpiece, try replacing the handpiece.
4. If the problem still remains –contact your dealer for support and indicate Error Code E-S02

16
G. Insufficient or no water flow when foot switch is activated (Scaler)
1. Check that the tap water hose is properly connected to the back of the device and that the tap
water system is OK (tap/valve is open and possible filter is OK).
2. Check that dry mode is not activated i.e. that the blue light next to the crossed-out water drop
is not lit. If it is lit, press the S-key.
3. Adjust the water control ring on the handpiece to fully open (dots aligned).
4. Try with another tip.
5. Use the LM-ProPower Fixer to check that the water hose inside the handpiece has not stuck
in the autoclave. Insert the Fixer carefully into the handpiece from the hose connector side.
(To avoid the hose getting stuck, the water adjustment on the handpiece should be set to fully
open before sterilization in autoclave.)
6. If the problem still remains –contact your dealer for support and indicate Error Code E-S04
H. Tip does not fit smoothly onto the handpiece
1. Clean handpiece threads with compressed air and try with a new tip
2. If the problem still remains, the threads of the handpiece may be damaged and the handpiece
needs to be replaced. Contact your dealer and indicate Error Code E-S06.
I. Handpiece is overheated during use
1. Check that the fluid flow is sufficient (at least 20 ml/min)
2. If the problem still remains, replace the handpiece and contact your dealer
J. Insufficient or no water flow (Polisher)
1. Check that the tap water hose is properly connected to the back of the device and that the tap
water system is OK (tap/valve is open and possible filter is OK).
2. Check that Air Blow mode is not activated i.e. that the blue light next to the crossed-out water
drop is not lit. If it is lit, press the P-key.
3. Adjust water control on powder container cap to fully open.
4. Gently check that the nozzle is fully tightened
5. If you have an additional nozzle, replace the nozzle.
6. If the problem still remains –contact your dealer for support and indicate Error Code E-P04
K. Insufficient or no powder flow
1. Check that there is powder in the powder container and that the o-ring in the cap is in correct
position.
2. If you have an additional nozzle, replace the nozzle. A clogged nozzle may be cleaned in an
ultrasonic bath or in citric acid (or vinegar).
3. Unscrew and remove the powder container, nozzle and ErgoGrip and blow with compressed
air into the handpiece.
4. If the problem still remains –contact your dealer for support and indicate Error Code E-P01.
L. Water drips from the bottom of the device onto the table
1. The ProPower device has a built-in water trap that removes humidity from the pressurized air
coming from the compressor in the compressor room of your clinic. The water trap condenses
the humidity in the pressurized air into water which is then released underneath the device.
Normally there is no water at all or a very small amount (a few drops). If the amount of water
is significant, the compressor of your clinic may need service. Please contact the
manufacturer or dealer of your compressor.

17
1.6 CombiLED with medicament/water bottle
Type of problem
Scaler
Polisher
Description
A. Unit is not responding and no lights are lit on the control panel
X
X
Page 17
B. Lights are flashing on the control panel
X
X
Page 17-18
C. Difficulty to remove the ErgoGrip
X
X
Page 18
D. Weak or no LED light
X
X
Page 18
E. No tip vibration
X
Page 18
F. Weak tip vibration
X
Page 18
G. Insufficient or no water flow
X
Page 19
H. Tip does not fit smoothly onto the handpiece
X
Page 19
I. Handpiece is overheated
X
Page 19
J. Insufficient or no water flow
X
Page 19
K. Insufficient or no powder flow
X
Page 19
L. Water drips from the bottom of the device onto the table
X
X
Page 19
A. Unit is not responding and no lights are lit on the control panel
1. Check that the power cord is connected properly and double check the voltage (120V/230V).
2. Check the fuse and replace if necessary. See Maintenance-section of the user guide.
3. Check that the wall outlet and the fuse panel of your clinic are OK.
4. If the problem still remains –contact your dealer for support and indicate Error Code E-X02
B. Lights are flashing on the control panel
Five blue lights on the control panel are
flashing simultaneously
Check that the foot control cable is connected
at both ends and is not damaged.
The blue lights next to the S- and P-
keys are flashing alternately when
pressing the foot control
The Scaler/Polisher has not been switched
on. Press the S-key to select the scaler or
press the P-key to select the polisher.
The blue light next to the S-key is
flashing alternately with three other blue
lights on the control panel.
Check that the scaler handpiece is properly
connected.
The blue light next to the P-key is
flashing alternately with three other blue
Check that the polisher tubing is properly
connected onto the connectors. Make sure it

18
lights on the control panel.
is pressed in all the way.
Two or three yellow lights are flashing in
sequence.
The Working Mode has not been selected.
Select the working mode by pressing one of
the keys next to the yellow lights.
The light next to the C-key flashes twice
and pauses.
The device reminds of the need to activate
the polisher cleaning cycle by pressing the C-
key. Please see user manual for details.
The light next to the C-key is flashing
continuously.
The cleaning function has been activated.
Wait until the cleaning process has finished
and the light stops flashing.
C. Difficulty to remove the ErgoGrip from the handpiece
1. Grab the ErgoGrip gently near the lens and at the same time twist and slide it off the
handpiece
2. If the problem still remains, replace the ErgoGrip
D. Weak or no LED light
1. Note that there are two versions of the ErgoGrip with different lenses and light pattern and
intensity: “ErgoGrip LED” and “ErgoGrip FocusLED”.
2. Check that lens in the ErgoGrip is clear and clean. Clean or replace if necessary.
3. If you have an additional scaler handpiece (or polisher tubing), try replacing the scaler
handpiece (or polisher tubing).
4. If the problem still remains –contact your dealer for support and indicate Error Code “E-S03
No light in scaler handpiece“ or “E-P03 No light in polisher handpiece”
E. No tip vibration
1. Check that the tip is firmly tightened. Preferably use a torque wrench and tighten clockwise
until the torque wrench slides. (The torque wrench prevents the tip from being overtightened.)
2. Check that the green light below the keys on the control panel is lit. If it is not lit, please see
Section A on page 4.
3. Check that the device has been turned on by pressing the S-key and that the blue light next to
the S-key is lit.
4. Check that the Working Mode has been selected by pressing one of the Working Mode keys
and that one of the yellow lights on the control panel is lit.
5. If you have an additional handpiece, try replacing the handpiece.
6. If you have an additional foot control cable, try replacing the foot control cable.
7. If you have an additional foot control, try replacing the foot control.
8. If the problem still remains –contact your dealer for support and indicate Error Code “E-S01
No vibration” or “E-S02 Low power / vibration”
F. Weak tip vibration
1. Check that the tip is firmly tightened. Preferably use a torque wrench and tighten clockwise
until the torque wrench slides. (The torque wrench prevents the tip from being overtightened.)
2. Check that the tip is not worn out. Use a tip check card to evaluate wearing or try an unused
tip. Use original LM-Instruments tips for reliable performance.
3. If you have an additional handpiece, try replacing the handpiece.
4. If the problem still remains –contact your dealer for support and indicate Error Code E-S02

19
G. Insufficient or no water flow (Scaler)
1. Check that dry mode is not activated i.e. that the blue light next to the crossed-out water drop
is not lit. If it is lit, press the S-key.
2. Adjust the water control ring on the handpiece to fully open (dots aligned).
3. Check that the medicament/water bottle is properly connected i.e. the cap is tightened and
pushed in all the way onto the connector. Check that the o-rings on cap and connector are in
good condition. Replace o-rings if worn. O-rings can be lubricated with a glycerine based
lubricant.
4. Try with another tip.
5. Use the LM-ProPower Fixer to check that the water hose inside the handpiece has not stuck
in the autoclave. Insert the Fixer carefully into the handpiece from the hose connector side.
(To avoid the hose getting stuck, the water adjustment on the handpiece should be set to fully
open before sterilization in autoclave.)
6. If the problem still remains –contact your dealer for support and indicate Error Code E-S04
H. Tip does not fit smoothly onto the handpiece
1. Clean handpiece threads with compressed air and try with a new tip
2. If the problem still remains, the threads of the handpiece may be damaged and the handpiece
needs to be replaced. Contact your dealer and indicate Error Code E-S06.
I. Handpiece is overheated during use
1. Check that the fluid flow is sufficient (at least 20 ml/min)
2. If the problem still remains, replace the handpiece and contact your dealer
J. Insufficient or no water flow (Polisher)
1. Check that Air Blow mode is not activated i.e. that the blue light next to the crossed-out water
drop is not lit. If it is lit, press the P-key.
2. Adjust water control on powder container cap to fully open.
3. Check that the medicament/water bottle is properly connected i.e. the cap is tightened and
pushed in all the way onto the connector. Check that the o-rings on cap and connector are in
good condition. Replace o-rings if worn. O-rings can be lubricated with a glycerine based
lubricant.
4. Gently check that the nozzle is fully tightened
5. If you have an additional nozzle, replace the nozzle.
6. If the problem still remains –contact your dealer for support and indicate Error Code E-P04
K. Insufficient or no powder flow
1. Check that there is powder in the powder container and that the o-ring in the cap is in correct
position.
2. If you have an additional nozzle, replace the nozzle. A clogged nozzle may be cleaned in an
ultrasonic bath or in citric acid (or vinegar).
3. Unscrew and remove the powder container, nozzle and ErgoGrip and blow with compressed
air into the handpiece.
4. If the problem still remains –contact your dealer for support and indicate Error Code E-P01.
L. Water drips from the bottom of the device onto the table
1. The ProPower device has a built-in water trap that removes humidity from the pressurized air
coming from the compressor in the compressor room of your clinic. The water trap condenses
the humidity in the pressurized air into water which is then released underneath the device.
Normally there is no water at all or a very small amount (a few drops). If the amount of water
is significant, the compressor of your clinic may need service. Please contact the
manufacturer or dealer of your compressor.

20
2. Cause Diagnosis and Cause Codes
Error Code
Scaler
Polisher
Diagnosis instructions
Cause code
Repair / Remedy instructions
E-S01 No vibration
X
1. Replace the handpiece with a working
handpiece. If the device works with the
working handpiece the handpiece is faulty.
C-001 Faulty Handpiece
Replace handpiece (spare part LM-10093).
Fill in Customer Service Form indicating cause code C-001
and submit to LM fax +358 2 454 6444. After obtaining an
RMA number from LM, return the faulty handpiece with the
RMA number to LM for replacement.
2. If there is no vibration with the working
handpiece, the tubing is probably damaged.
C-002 Faulty tubing
Level 1 Service Providers:
Fill in Customer Service Form indicating cause code C-002
and submit to LM fax +358 2 454 6444. After obtaining an
RMA number from LM, return the entire device with
accessories and the RMA number to LM for repair.
Level 2 Service Providers:
Replace tubing (spare part LM-15609061). See repair
instructions in Section 2.
Fill in Customer Service Form indicating cause code C-002
and submit to LM fax +358 2 454 6444. After obtaining an
RMA number from LM, return the faulty hose for replacement.
3. Measure the control voltages from the
control circuit board to scaler electronic unit.
See repair instructions Section 3.
C-003 Faulty electronic
unit
If the voltages from the control circuit board are OK, replace
the scaler electronic unit (spare part LM-15610221. See repair
instructions Section 3.
Fill in Customer Service Form indicating cause code C-003
and submit to LM fax +358 2 454 6444. After obtaining an
RMA number from LM, return the faulty electronic unit for
replacement.
4. If above actions do not solve the problem,
request authorization to return the device to
LM-Instruments for repair.
C-004 Unidentified Loss
of Vibration
Fill in Customer Service Form indicating cause code C-004
and submit to LM fax +358 2 454 6444. After obtaining an
RMA number from LM, return the entire device with
accessories and the RMA number to LM for repair.
This manual suits for next models
2
Table of contents
Other LM Dental Equipment manuals
Popular Dental Equipment manuals by other brands

Huntleigh
Huntleigh AKRON M6M user manual

DENTSPLY
DENTSPLY AutoMate III manual

Carestream DENTAL
Carestream DENTAL CS 1200 Safety & Regulatory Guide

Durr Dental
Durr Dental VistaScan Mini View 2.0 XPS07.2D Series Installation and operating instructions

Vatech
Vatech EzRay Air VEX-P300 user manual

Bego
Bego Fornax T operating instructions

Carestream DENTAL
Carestream DENTAL CS 7600 manual

NSK
NSK Endo-Mate TC2 Operation manual

Dentmate
Dentmate Ledex WL-090+ Instructions for use

Amanngirrbach
Amanngirrbach Straumann Argotherm user manual

orangedental
orangedental spot-on nxt Instructions for use

Renfert
Renfert Silent compactCAM Translation of the original instructions for use