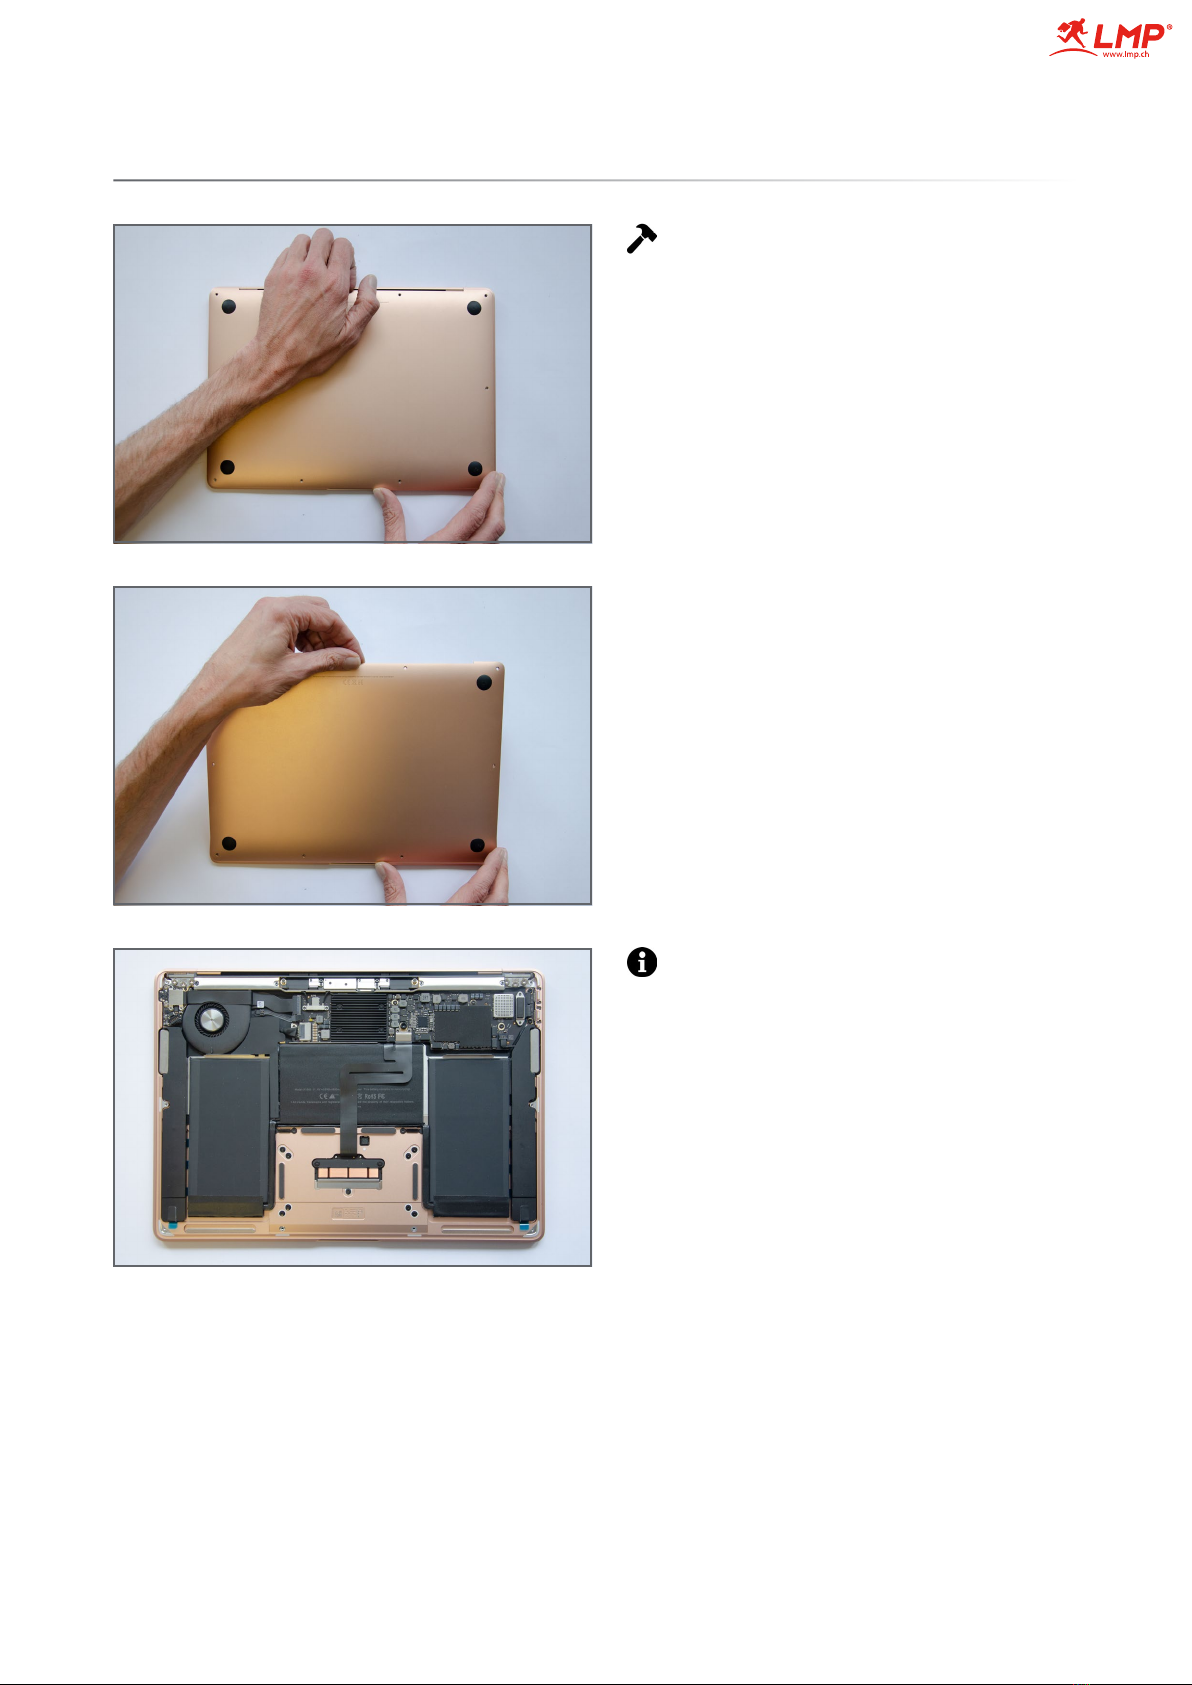
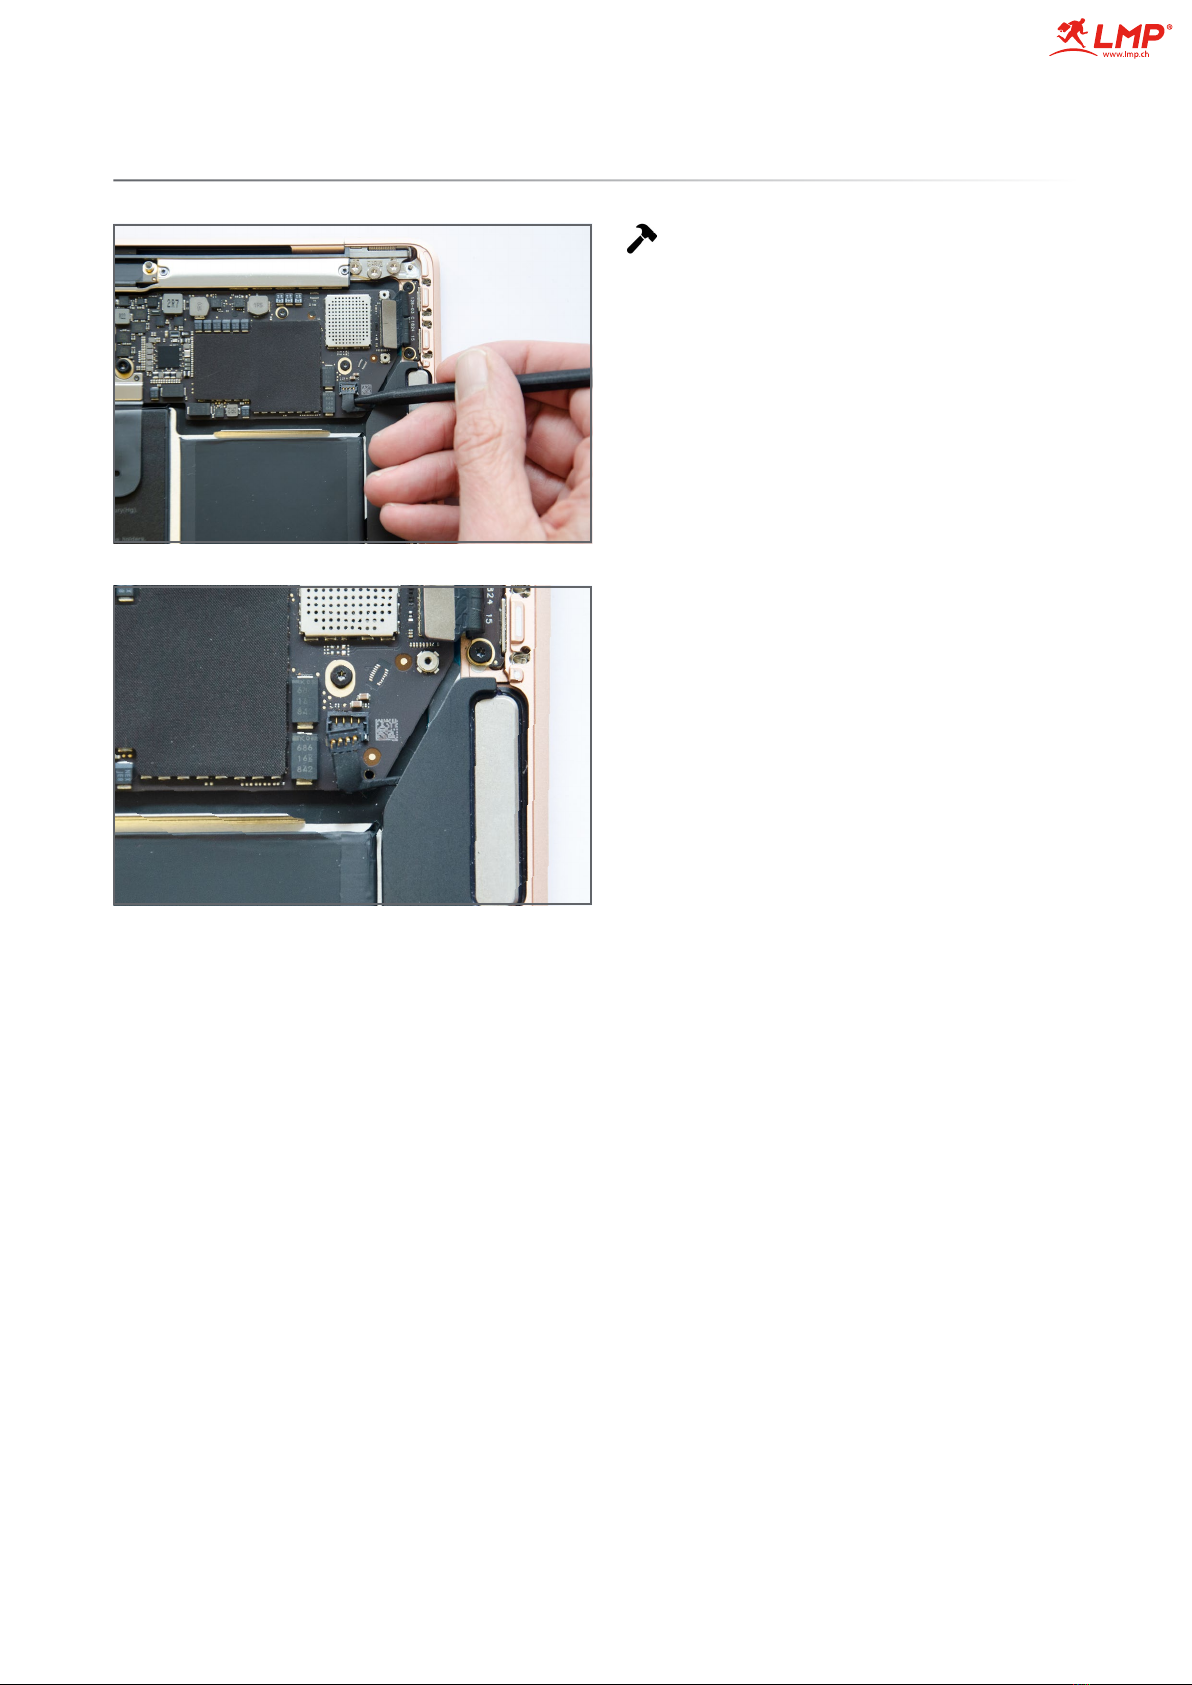
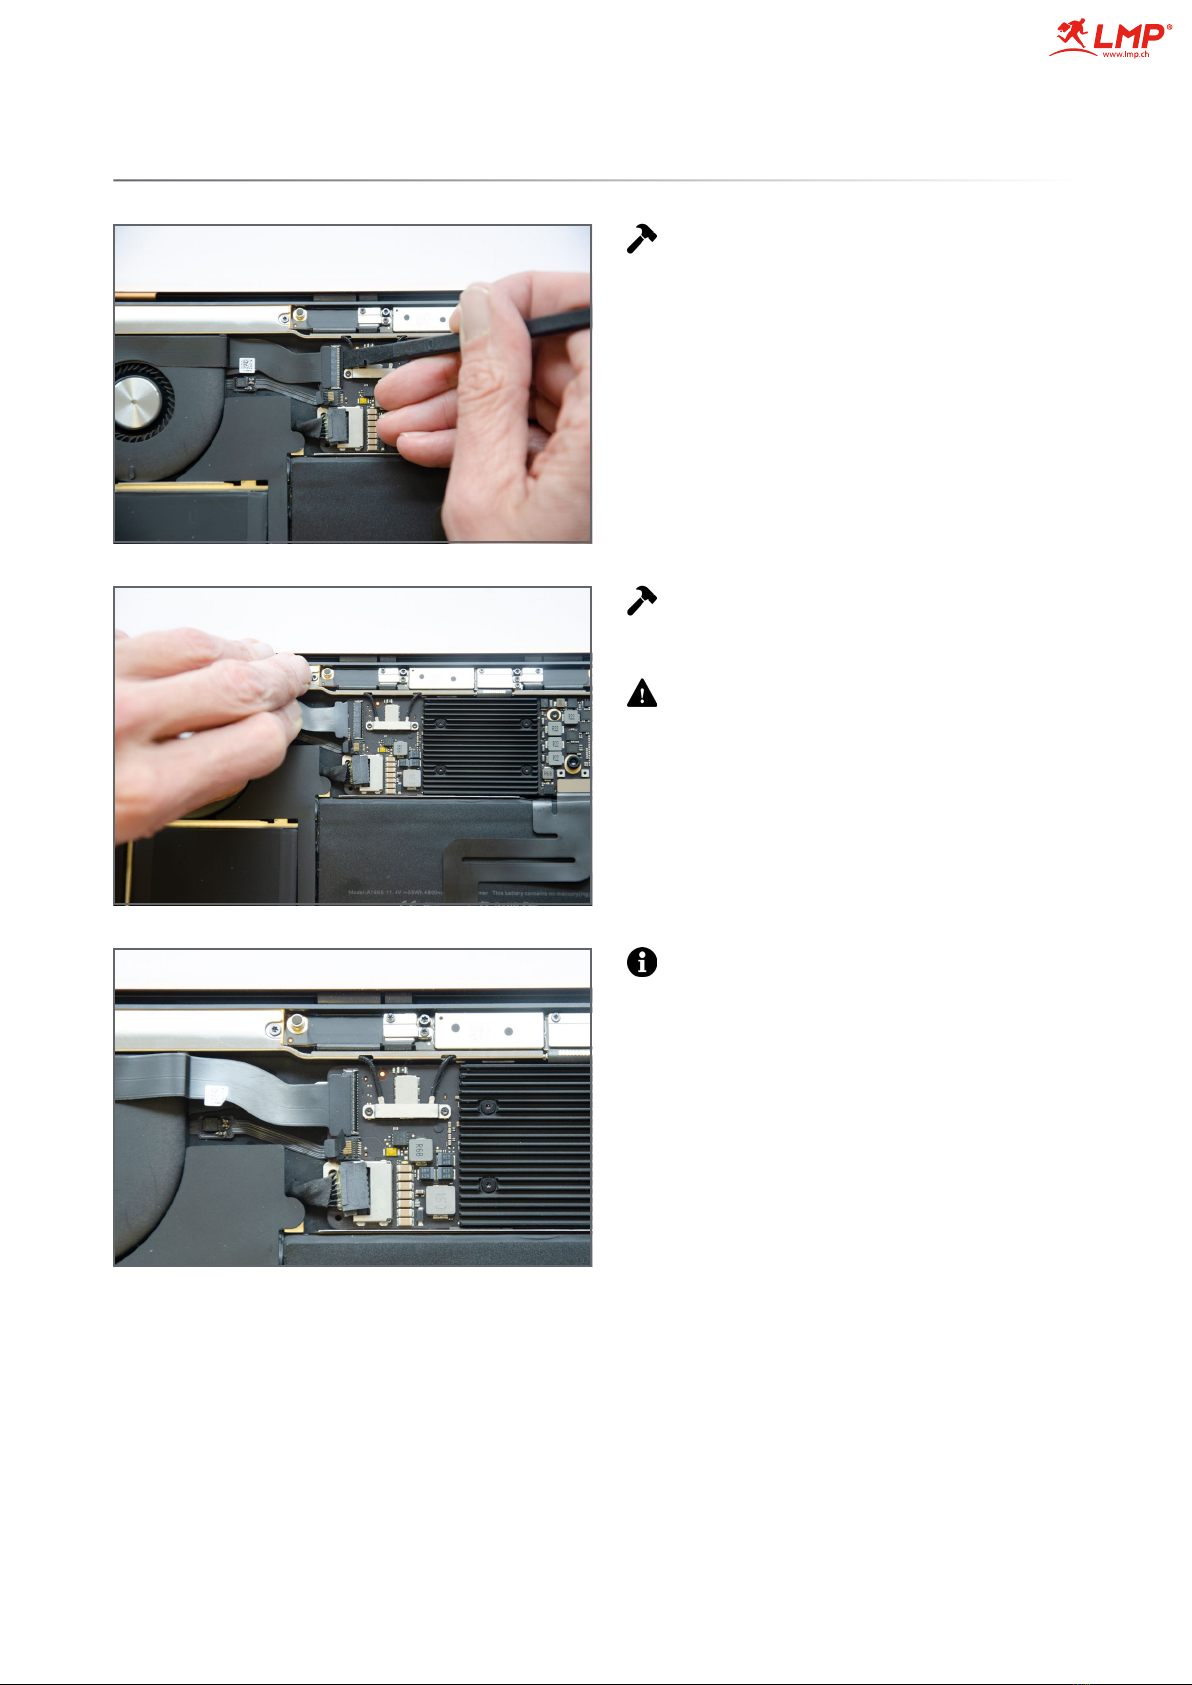
lmp y MacBook Air 13 User manual

Guide: Battery Replacement
Page 1
LMP Battery MacBook Air 13" Thunderbolt 3
10/18 - 3/20, built-in, Li-Ion Polymer, A1965, 11.4 V, 50 Wh
P/N 23195
SUPPORTED APPLE DEVICES:
MacBook Air (Retina, 13-inch, 2018)
MacBook Air (Retina, 13-inch, 2019)

Introduction
Before performing the procedure discharge the MacBooks battery to at least 20% or under if
possible. This will ensure that the battery does not contain enough energy to initiate a thermal
event.
Tools required for this procedure:
Pentalobe P5 screwdriver
Torx T5 and T3 screwdriver
Spudger with flat and pointed ends.
Tweezers
Page 2
All of the above tools are included in the LMP Toolkit (P/N 16262), available separately.
Additional equipment:
Isopropyl wipes
This procedure requires the removal of a large number of small screws and parts. It is vitally
important that you have a method of organizing these screws and parts to avoid loss and to
ensure the use of the correct screws when reassembling the MacBook - using an ice cube tray
or similar to store the screws and small parts is a good method of organization.
Be aware that while a lot of the screws appear to be the same they can vary slightly in length.
Therefore it’s important that the screws are returned to their original positions to avoid
damage during reassembly.
It is highly recommended that this procedure is carried out by an experienced technician.
LMP accepts no responsibility or liability in the event of any damage or injury caused while
performing this procedure.
It is the responsibility of the person performing the procedure to ensure that they have the
requisite technical skills to competently carry out the battery replacement.
If in doubt do not begin. Instead employ an experienced technician to perform the repair on
your behalf.

Step 1
Before you start ensure that the MacBook is completely turned o. Close the display and place
the MacBook upside down on a soft cloth or similar to protect the display housing.
Note the location of each screw as they will need to be returned to the same position
otherwise damage may occur.
Using a Pentalobe P5 screwdriver remove the 10 screws securing the the bottom case:
2 long screws with a long shoulder from positions 1 as depicted.
2 long screws with a short shoulder from positions 2 as depicted.
6 short screws from positions 3 as depicted.
Page 3MacBook Air (Retina, 13-inch, 2018 / 2019) Battery Replacement

MacBook Air (Retina, 13-inch, 2018 / 2019) Battery Replacement
Step 2 – Bottom Case
The bottom case is now removed.
Page 4
Lift the bottom case from the rear until
you hear and feel the securing clips
disengage.

MacBook Air (Retina, 13-inch, 2018 / 2019) Battery Replacement
Step 3 – Battery Connector
Page 5
Use the pointed end of a spudger to
press the logic board power button for
5 seconds.
Use the at end of a spudger to push
against the ridge in the battery cable
connector until it releases from the
socket.

Step 4 – Logic Board
Page 6
Using a Torx T3 screwdriver remove the
2 screws holding the USB-C board cable
securing bracket.
MacBook Air (Retina, 13-inch, 2018 / 2019) Battery Replacement
Remove the bracket
Using the flat end of a spudger from the
left side of the connector, lever the
connector directly up from the logic
board.

Step 5 – Speaker Cables Right
Page 7
Use the pointed end of a spudger to
carefully lever the speaker connector
upwards and out of the socket.
MacBook Air (Retina, 13-inch, 2018 / 2019) Battery Replacement

MacBook Air (Retina, 13-inch, 2018 / 2019) Battery Replacement
Step 6 – Trackpad Cable
Page 8
Do not attempt to lift the cable any
further as part of the cable is connected
to the keyboard underneath the logic
board.
Using a Torx T3 screwdriver remove the
two screws holding the trackpad cable
securing bracket.
Remove the bracket.
Using the flat end of a spudger carefully
lever the cable directly up from the logic
board.

Step 7 – Fan Cable
Only peel the tape back far enough to
release it from the connector.
Page 9
Carefully peel the black tape away from
the fan connector.
MacBook Air (Retina, 13-inch, 2018 / 2019) Battery Replacement
Use the pointed end of a spudger to
carefully lift the locking lever on the fan
cable connector.
Carefully slide the fan cable out of the
connector.
The cable slides parallel to logic board,
do not lift the cable.

Step 8 – Audio Board Cable
The cable slides parallel to logic board,
Do not lift the cable.
The cable is adhered to the fan. Leave
the cable in place for now.
Page 10
Use the at end of a spudger to carefully
lift the locking lever on the audio board
cable connector.
MacBook Air (Retina, 13-inch, 2018 / 2019) Battery Replacement
Carefully slide the cable out of the
connector.

Step 9 – Antenna Cables
Page 11MacBook Air (Retina, 13-inch, 2018 / 2019) Battery Replacement
Using a Torx T3 screwdriver remove the
2 screws holding the antenna cable
securing bracket.
Remove the bracket.

Step 10 – Antenna Cables
To reconnect the antenna cables while
reassembling position the connector
directly on the socket and carefully press
down. You should feel a slight pop as
the connector clicks into place.
Page 12MacBook Air (Retina, 13-inch, 2018 / 2019) Battery Replacement
Slide the pointed end of a spudger
underneath each antenna cable close to
the connector and carefully use a
levering motion to release each
connector.

Page 13MacBook Air (Retina, 13-inch, 2018 / 2019) Battery Replacement
Step 11 – Display Cable Connector
Using a Torx T3 screwdriver remove the
2 screws securing the display cable
connector bracket.
Remove the bracket.
Using the flat end of a spudger carefully
lever the display cable connector
directly up from the display board.

MacBook Air (Retina, 13-inch, 2018 / 2019) Battery Replacement
Step 12 – Logic board removal
Page 14
Using a Torx T5 screwdriver remove the
following screws:
3 medium screws
1 large screw with a rubber bumper
2 small screws
Tilt the logic board up from the front
and carefully slide it out of the housing
while checking for snagged cables.
Reinstalling the logic board is the reverse
of the previous procedure. However pay
attention to the cables and check that
none are trapped underneath the logic
board before replacing the screws.

Step 13 – Audio Board Cable
Page 15MacBook Air (Retina, 13-inch, 2018 / 2019) Battery Replacement
Using a Torx T3 screwdriver remove the 3
screws holding the audio board securing
bracket.
Remove the bracket.

Step 14 – Audio Board Cable
Page 16
Using the at end of a spudger carefully
lever the cable connector directly up
from the audio board.
If you nd this dicult then use a hair
dryer to apply heat to loosen the
adhesive.
MacBook Air (Retina, 13-inch, 2018 / 2019) Battery Replacement
The audio board cable is adhered to the
fan. Carefully peel the cable up from the
fan.

Step 15 – Touch ID cable
Be extremely careful. The touch ID cable
is very fragile and if damaged the
MacBook will require a replacement
touch ID board. This can only be done by
an Apple Authorized Service Provider.
Once the audio board cable has been
removed it will reveal the touch ID cable.
Page 17
Use the pointed end of a spudger to
carefully lever the cable connector directly
up from the audio board.
MacBook Air (Retina, 13-inch, 2018 / 2019) Battery Replacement
Use the pointed end of a spudger to
carefully lever the cable connector
directly up from the audio board.
The touch ID cable is adhered to the
audio board. Apply heat with a hair dryer
to loosen the adhesive and then carefully
work the cable free using the pointed
end of a spudger.

MacBook Air (Retina, 13-inch, 2018 / 2019) Battery Replacement
Step 16 – Left Speaker Cable
Page 18
Using the pointed end of a spudger
carefully lever speaker cable connector
up from the audio board.

MacBook Air (Retina, 13-inch, 2018 / 2019) Battery Replacement
Step 17 – Audio Board Removal
Page 19
Using a Torx T3 screwdriver remove the
small screw in position 1.
Using a Torx T5 screwdrive remove the 2
long screws.

Step 18 – Audio Board Removal
Page 20
Gently wiggle the board free.
MacBook Air (Retina, 13-inch, 2018 / 2019) Battery Replacement
Table of contents
Other lmp Computer Accessories manuals